A Rustic Basement Bar

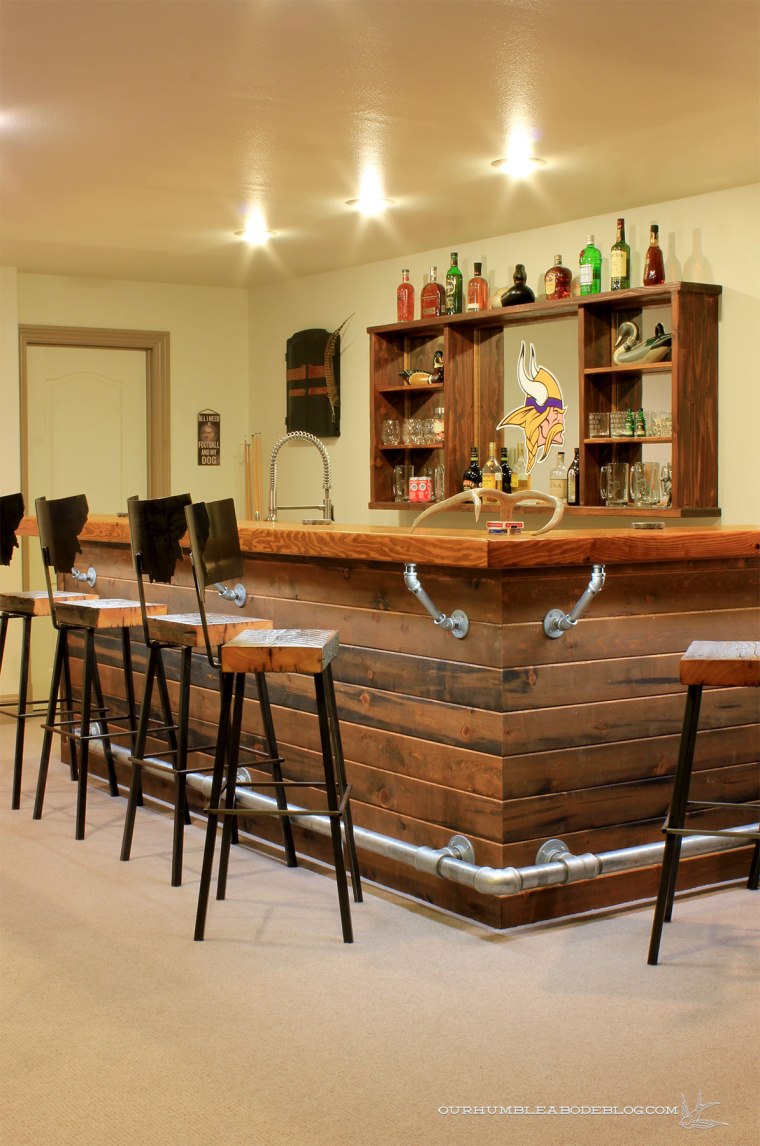
Between the nearly entire home remodel of one client, Ben and I squeezed in a basement man cave bar remodel.  Before, the bar had a traditional, but basic bead board clad bar.  It was fine and functional, but nothing our clients loved.

Rustic-Bar-Before

To create a true man cave, complete with adjacent pool/ping-pong table and theater space, we ditched the traditional and replaced it with rustic.

Rustic-Bar-with-Under-Bar-Lights-1

Rustic-Bar-Overall

On the drink making side, we pulled out the previous laminate counters, opting for a sleek and seamless stainless steel counter and sink.

Rustic-Bar-Stainless-Steel-Detail

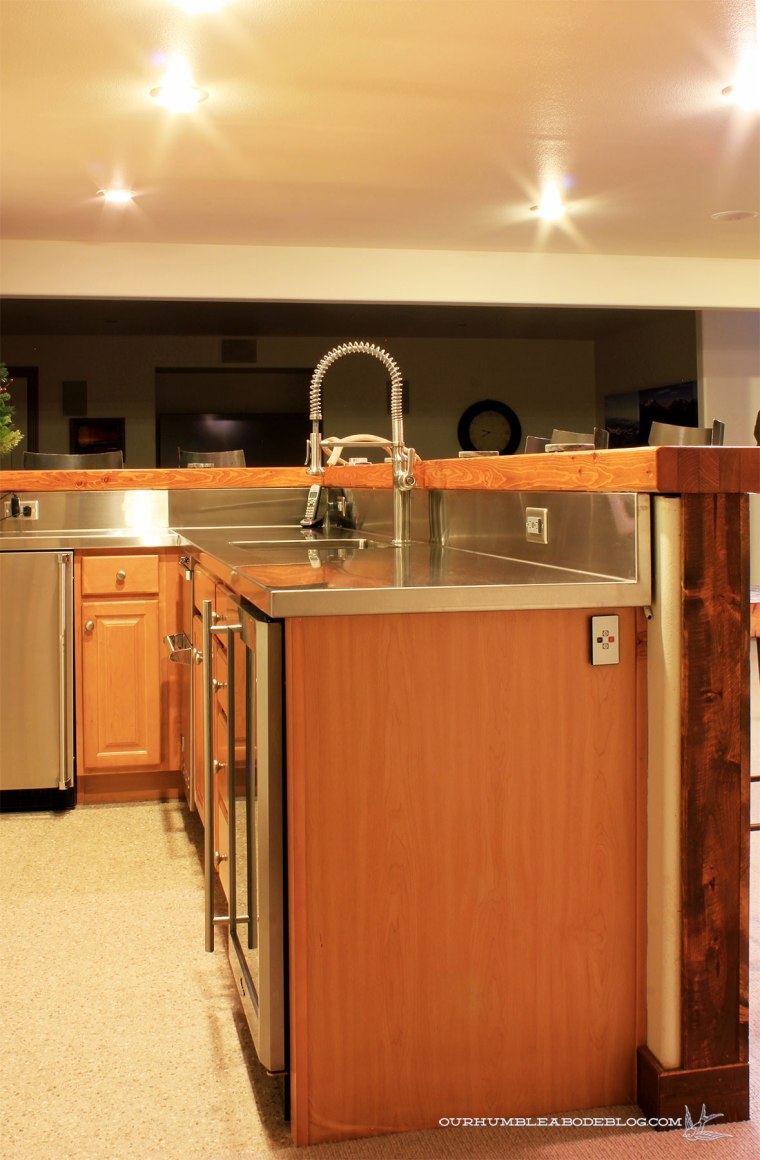
The bar top is made from a 4″ thick glulam beam, with a slight sanding to give rustic character.

Rustic-Bar-Countertop-Detail

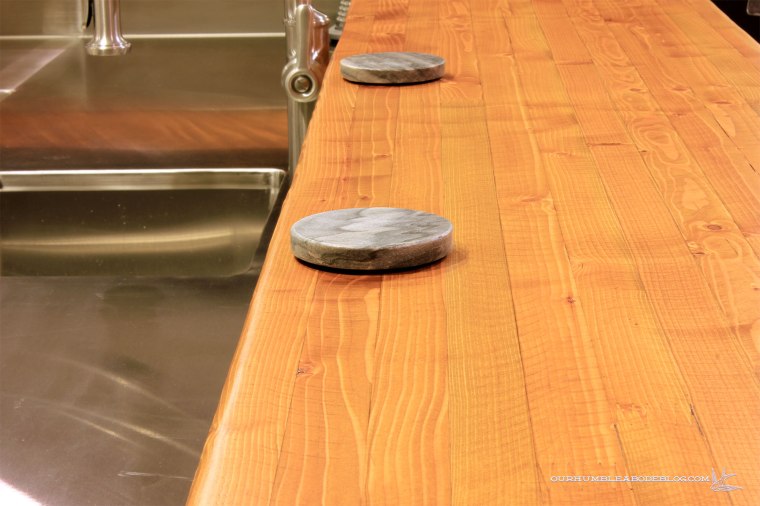
Stained a light pecan, the wood oozes character, but still feels in keeping with an old school bar set up.

Rustic-Bar-Pipe-Support-Brackets

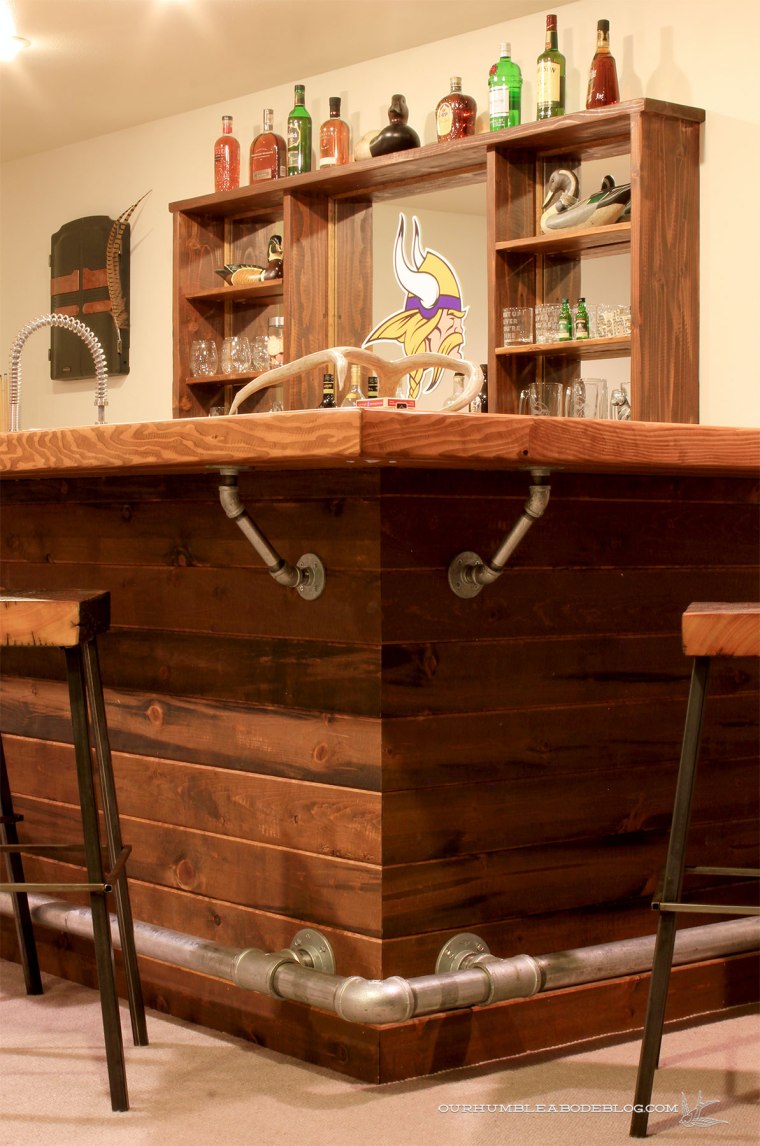
For a comfortable seating arrangement, we added a 2″ diameter galvanized pipe to serve as a foot rail.

Rustic-Bar-Corner-Detail

Tucked into the under side of the bar top is a strip of ribbon thin LED lights.  The strip is concealed by a channel, then tacked into place with electrical staples.

Rustic-Bar-Underside-Lights

A remote control turns the lights off or on, even from the adjoining rooms.

Rustic-Bar-Lights-On-Off

Even with the overhead lights off, the bar gives off enough light to softly slight the surroundings.

Rustic-Bar-with-Under-Bar-Lights

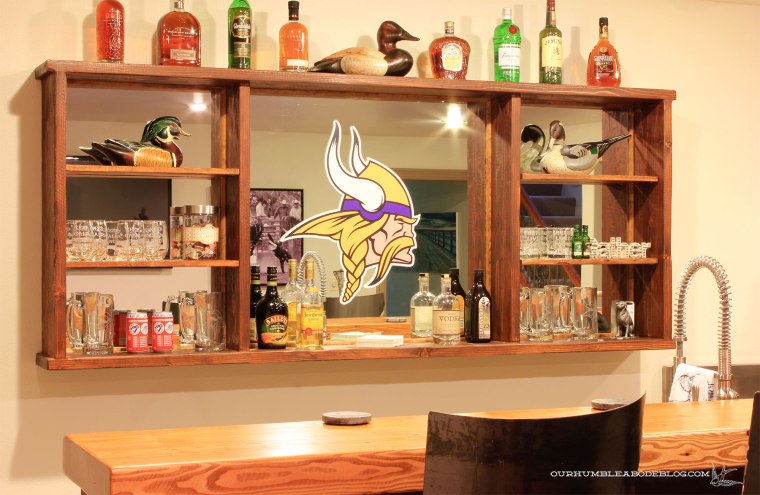
Behind the bar, Ben built a mirror backed display case to store bottles and glasses.

Rustic-Bar-Display-Shelf-Detail

The owners added a unique touch with custom-made Montana backed stools, completing the look.

Rustic-Bar-Detail

Now, this Vikings fan has a hang out space to watch the game, entertain, and enjoy a good drink.

Burned Leather Ornament DIY

Let’s play a quick game of ‘Two Truths and a Lie: Holiday Edition’ shall we?  One: I’ve never sent out a holiday card, like ever.  Two: I’ve never forgotten about/misplaced gifts, only to discover and wrap them Christmas Eve.  Three: I make personalized ornaments for family and friends.

Based on the title and content of this post, you should be able to surmise I do, in fact, make ornaments.  The other truth?  I’ve never sent out a holiday card, but I do love receiving them.

Last year, I put my newest toy, I mean tool, to use by making simple wood burned ornaments.

Wood-Burned-Family-Ornament

Following a similar process, I decided to put a spin on the burned ornament by substituting leather for wooden discs.  To get started, I dug through my stash of leather scraps, then tested the wood burner to be sure it would work well on a small corner.  The natural finish leather worked best, whereas a metallic gold finished leather didn’t burn at all.

Armed with the knowledge my plan would work, I created a template in Photoshop, customizing it with family names, printing a sheet full.

Burned-Leather-Ornament-Supplies

Just as I did with the wooden discs, I taped the template in place, with a small piece of carbon paper between the two.

Wood-Burned-Ornament-Tracing

Using a ball point pen, I traced the design, transferring the design to the leather.  It’s a faint line, but it’s enough to follow along with the burner.  Moving steadily along, I trace the design, leaving a darker, slightly depressed design behind.

Burned-Leather-Ornament-Start

Up close, it doesn’t look quite as smooth, but I also feel like that’s part of the charm of the ornament being hand-made.  If there are areas of a brand already on the leather, it takes the burning differently, kind of like a harder spot in a wooden piece.

Burned-Leather-Ornament-Finished-Detail

With a fully warmed burner and the right leather, an ornament takes less than five minutes to make.  Even with 12 days until Christmas, there’s still plenty of time to make ornaments for everyone on your list.  Give as a small ‘I’m thinking about you’ gift or use it as a gift tag for a more personal touch.

Burned-Leather-Ornament-Finished

Other quick gift ideas using this method would be personalizing a wallet or key chain.  Have travel plans for the holiday season, make a set of custom bag tags.

A Client Remodel: Living & Dining Rooms After

Last week I shared a kitchen remodel, now let’s take a look at their living and dining rooms.  Before, the living room was divided by a wall with two cut out arches.

Kitchen-and-Dining-from-Living-Before-Client

Using the same foot print, the dining room sits just off the kitchen.  A built-in bench with a walnut top runs below the window, offering extra seating.

Dining-Room-Overall

Though not the same angle, you can see the window and sliding door in this before:

Kitchen-info-Dining-Before-Client

And a better look at the bench, with a beautiful walnut table that can extend to seat 10.

Dining-from-Living

One more before, just to drive home the point of how incredibly different these spaces are.  Though the openings allowed people to mingle between rooms, it made the kitchen work space cramped.

Kitchen-into-Living-Room-Before-Client

The sofa now pulls double duty as seating and a movable room divider.  Shelves will eventually flank the fireplace, as well as curtains and art to add more of these lively home owners personality to the space.

Living-Room-from-Dining-Bench

The knotty alder trim and dark rock fireplace seemed to swallow up all of the natural light this space had.

Fireplace-Before-Client

Now, the white shiplap fireplace flanked by white cabinets brighten the entire room.  Walnut counters, hearth, and mantle balance the bright elements, warming it up.

Living-Room-Fireplace

Their chairs they already owned look stunning in the room, and contrast nicely against the cool blue sofa.

Living-Room-Built-Ins-Detail

Opposite from that cabinet is this gorgeous view:

Living-into-Kitchen-Detail

Before, the stairs were fine, but nothing great.

Living-Room-Toward-Stairs-Before-Client

In place of the old vertical spindles, a sleek black horizontal metal railing is not only functional, but beautiful.

Living-Room-Sofa-to-Kitchen

More to come soon, but are you enjoying seeing client projects in addition to our home?

A Client Remodel: Kitchen After

Raise your hand if you remember our client’s pine-clad space.  If you don’t, stop reading now and check out all of the before photos.


Kitchen-and-Dining-Before-Client

After demolishing nearly the entire main level, the remodel is drawing to a close and looking and functioning as a completely new space.  Hold on to your hats, because this is a striking difference:

Kitchen-and-Dining

Is that insane, or what?!  Okay, how about another, because I find before and after makeovers to be the best.  Before:

Kitchen-Before-Client

And after:

Kitchen-Island-from-Dining

I know, pick your jaw up off of your device.  That door that previously led to the garage was moved to the entry, allowing for a better kitchen flow and more cabinetry.  Removing the wall allows for easy flow between the living spaces, making entertaining a breeze.

A walnut clad vent hood adds much-needed warmth to the white cabinet perimeter, with brushed brass accents for a bit of bling.

Kitchen-Island-from-Edge-of-Living-Room

A 36 inch Bertazzoni range looks like a functional masterpiece.

Range-and-Vent-Detail

It’s hard to tell in the before shots, but the island was only 30 inches away from the perimeter, making opening the dishwasher barely possible.  Now, there’s enough room to have both the range and dishwasher open.

Kitchen-Range-and-Island

The dishwasher is tucked into the island, next to the beautiful enamel coated cast iron sink apron front sink.

Island-Detail-Toward-Dining

With all of the precise, hard lines, we chose a slightly varied subway tile to create a handmade look.

Kitchen-Backsplash-Detail

The back splash is grey with a crackle finish, wavy in texture, and full of charm.  Truly, the icing on the cake.

Backsplash-Detail

That’s all for now, stay tuned for more before and after goodness of the living and dining spaces.  Until then, what’s your favorite part of the remodel?  I love the open, functional layout, the walnut hood, and the tile back splash.

The Cost of an Indoor Pool

Now that the pool house is complete, the pool with water, we’re getting a lot of questions.  How much does it cost to fill and/or heat?  How do we keep the humidity in check?

We got the water bill for filling it using hoses and city water.  The bill for September, the month we filled it was $120, which is about $60 higher than average.  So that was far cheaper than getting a water pump truck to fill it, which runs around 500 dollars.  However, it took several days to fill with the hose, so there’s a give and take.

Pool-House-Dehumidifier-and-Cover

The pump room is the brain of the pool, housing the furnace, pump, cartridge filter, bromine applicator, and on demand water heater for the pool water.

In addition to the water bill, we have received the electric bill.  Again, our average bill runs around $60 per month, but was up to $120.  The electricity is mainly used for the pump and the hot tub.  Pool-House-Pump-Room

As for the cost to heat the water, the on demand heater is an unconventional choice.  Ben researched affordable, efficient water heating methods but hadn’t seen anything about a conventional on demand heater for a pool.  Over the course of the last year, he asked everyone he came in touch with that dealt with water or heaters for their opinion.  No one had a reason it wouldn’t work, so that’s what he installed.

Pool-House-Dehumidifier-and-Pool-Cover

We don’t constantly have the water heating, but try to keep it between 82 and 86 degrees.  At that temperature, the water helps keep the room heat up, so we haven’t been running the furnace much.  Our gas bill should come soon, so we’ll see how different the average versus pool heating is.

Despite being indoors, we have a clear bubble cover on the pool when not in use.  Not only does this help keep the water heat in, it also minimizes the air humidity.  It’s cut for a close fit, with slits to wrap around the ladder.

Pool-House-Pool-Cover

Though the cover helps tremendously, we did get a stand alone dehumidifier.  It comes in handy during and after swimming, when the cover is off for extended lengths of time.  When swimming, the humidity can get up to 90%, but the unit will bring it back down to 35% within a few hours.

Pool-House-Dehumidifier

It has a pump, so there’s no emptying the tank, it simply pumps right back into the pool.  Though I don’t love the look of having the dehumidifier on the floor, it does work wonders.  Perhaps down the road we’ll get one that hooks up to the furnace, but we’d like to see how it goes through the summer months as well.