

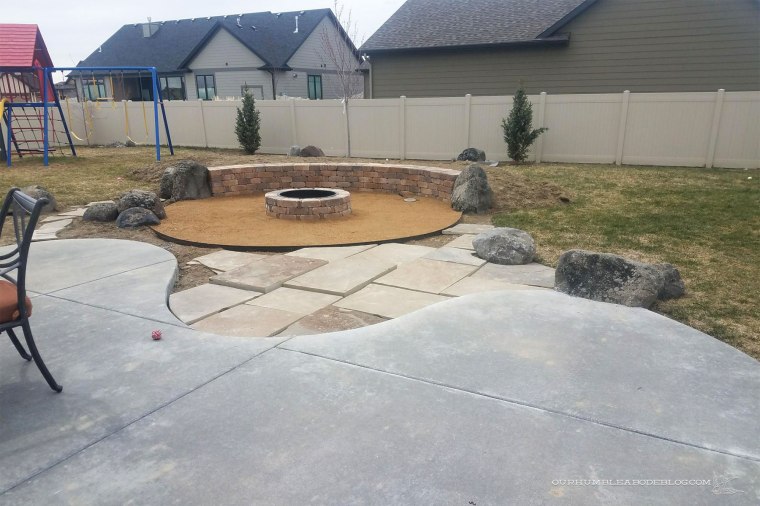
Back in March, we had clients ask us to build a pergola on their back patio. The pad had been poured in the fall, with landscape progress in various stages, but they wanted to create a great hang out space for their family.
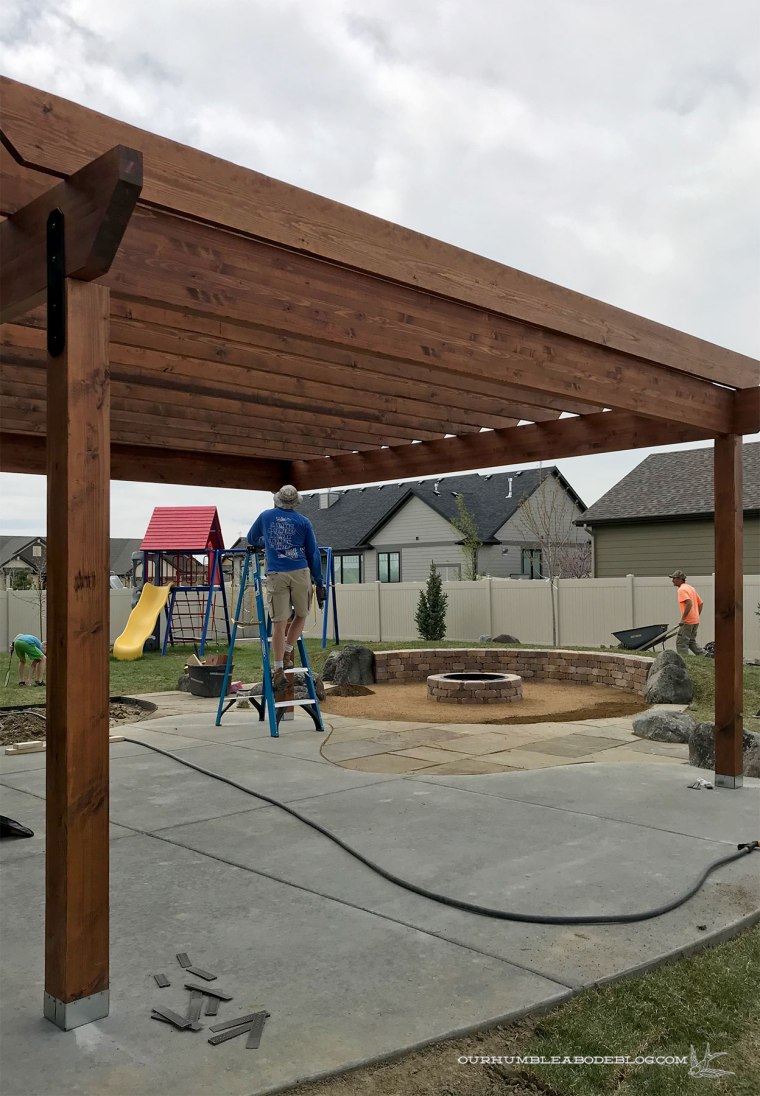
After measuring, planning, sketching, and pre-cutting and staining all of the pieces, we got to work assembling the structure. First, two posts connected to one beam, secured in to cleats.

Followed up with the other side, then the beams connecting the two pieces together.

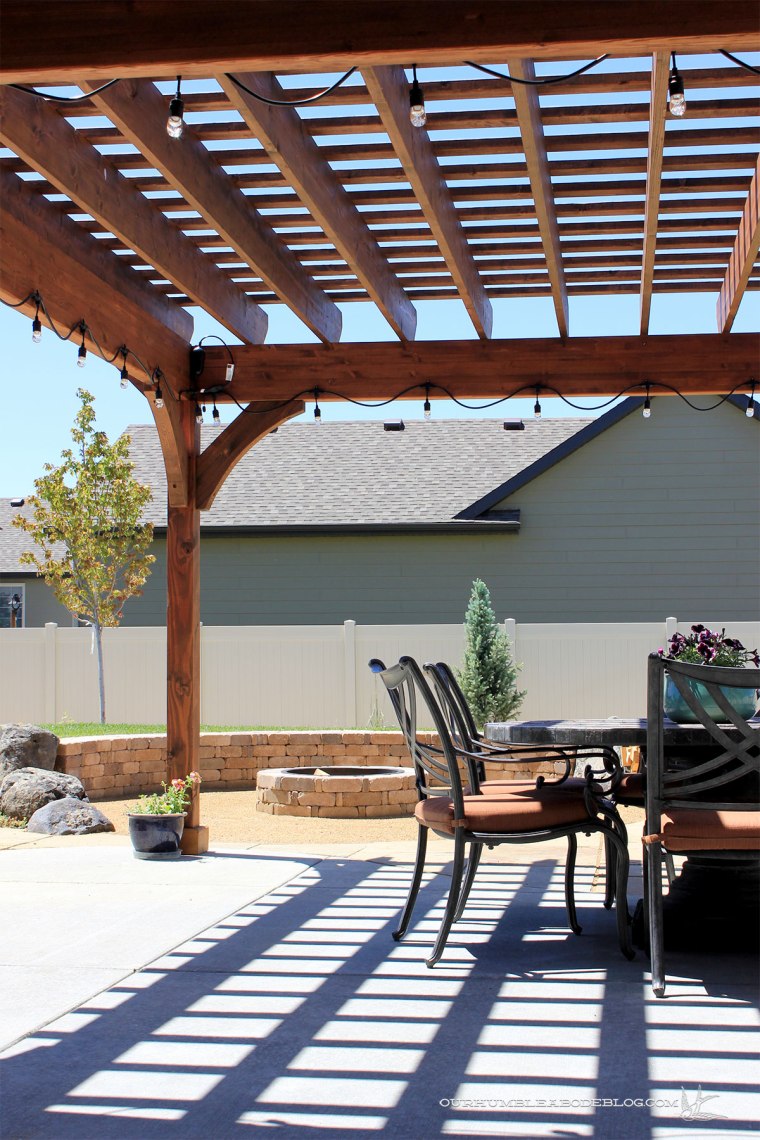
Joists spaced 16 inches apart make up the overhead structure.
Our clients didn’t know how dark they wanted the inside, so we spaced the top slats 12 inches on center apart.
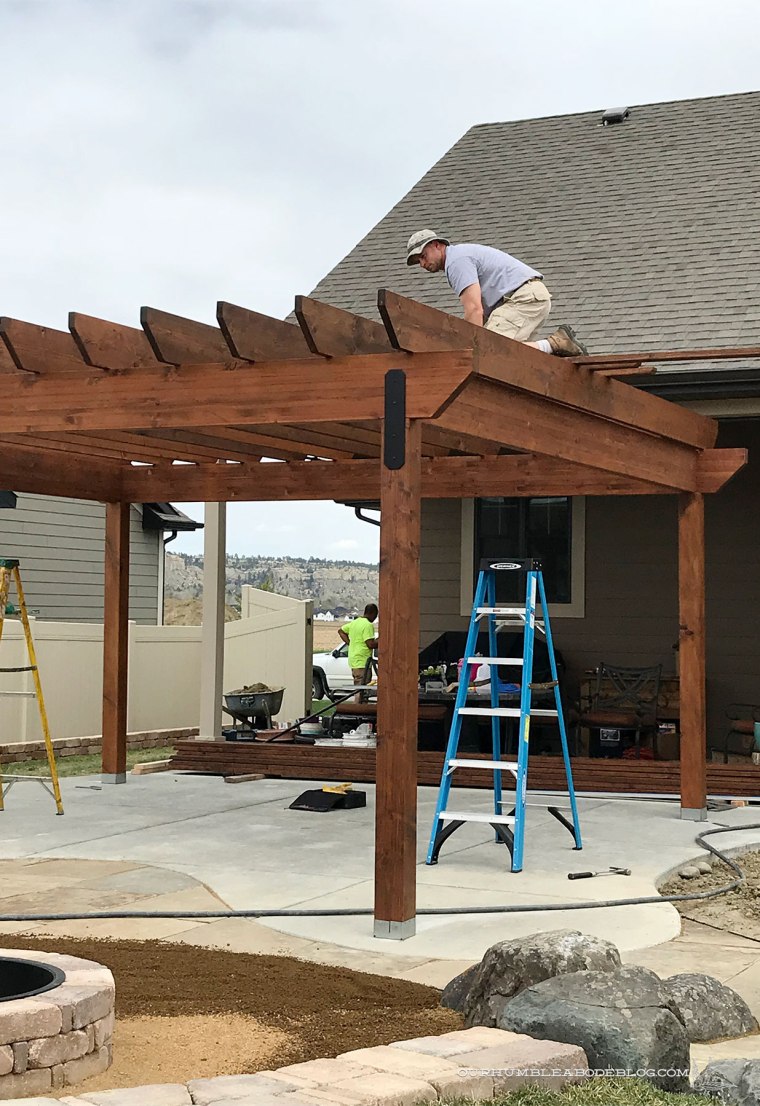
This allows for added slats down the road, if they decide they need more sun coverage.

Arched braces look great while firming up the overall frame.

Once complete, the 16 foot square structure adds a lot of character to their backyard.


The pergola connects the house to the fire pit, offering multiple zones to hang out and relax.
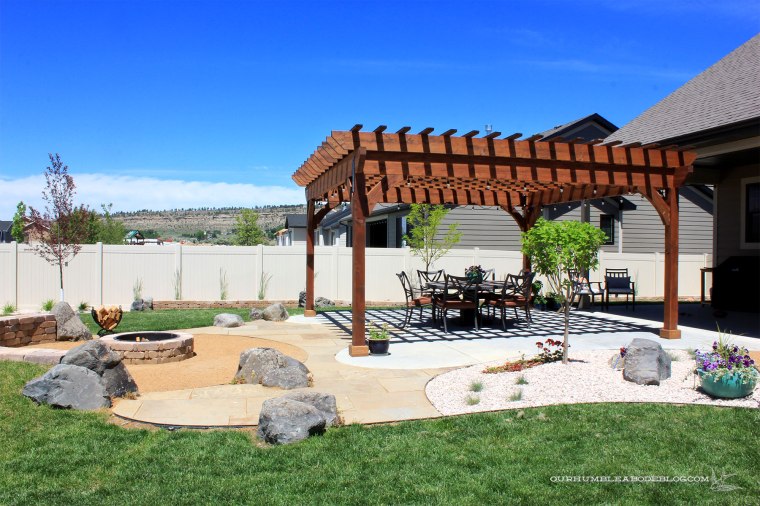

Under the pergola, the slats add a graphic grid of shade to the dining table.


Along with new landscaping, these clients now have a backyard oasis to relax and watch their kids play.
At the end of the long work day assembling the pieces, our clients were thrilled with the results. And we are/were so grateful for such wonderful people to work with and for.
