Hey everyone! Glad to see you here today. Did you have a good weekend? We’ve spent most of our last two (including Memorial Day) working on a back yard deck. If you’re thinking, “Wait, I thought you were going to have a concrete patio back there?” you’d be right.
That was the plan up until a few weeks ago, but our plans are kinda fluid. If our original plan won’t work, we find a better project, or a kick butt deal, we’re willing to switch things up. Heck, that’s how we ended up with wood countertops at our last house.
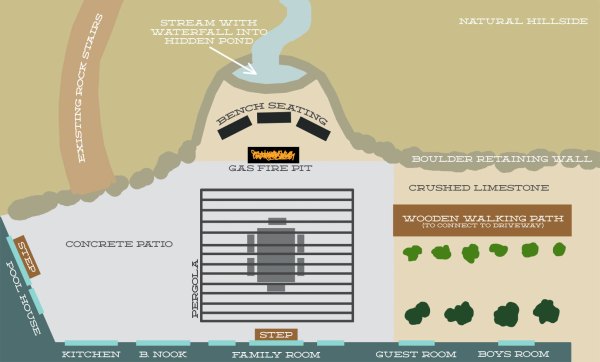
When Ben stumbled into the deal of the century, we couldn’t say no. You see, a commercial building in town was in the process of being demolished. Outside sat a giant stack of glulam beams, originally used to support the roof.
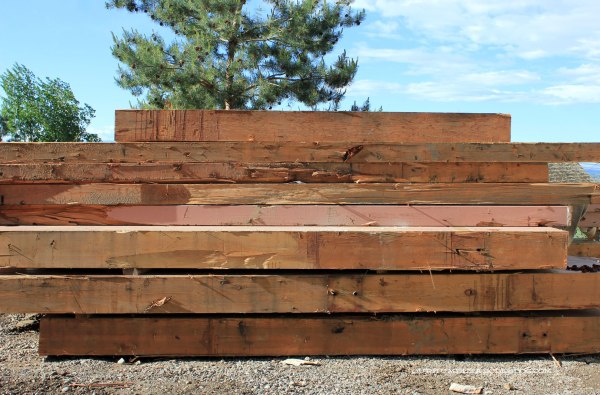
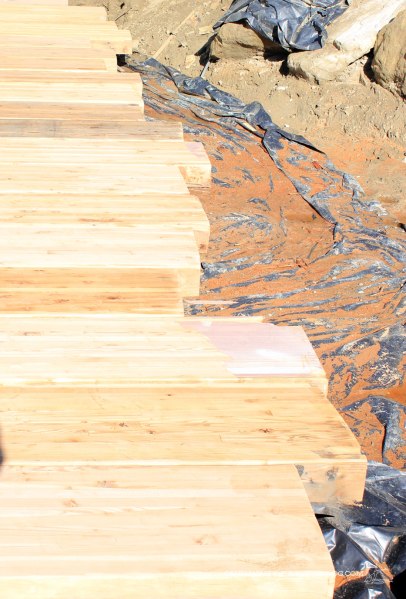
Ben called around until he found the guy responsible for these dudes and asked what the heck deal was. Well, they were destined for landfill. Landfill, not on our watch! Instead Ben cut these giants down, hauled ’em home, and we’re building a deck now. But they’re not deck ready in their original condition.
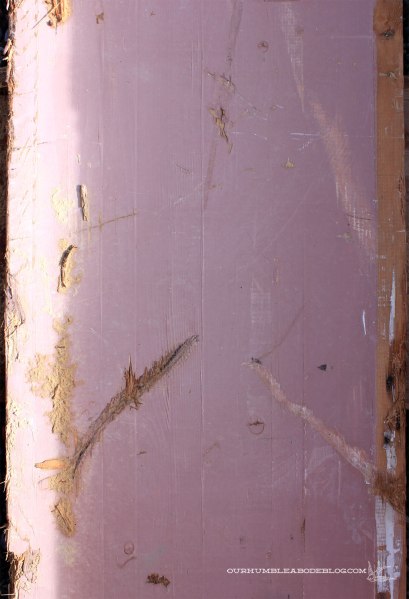
Purple paint, screw and nail holes, and gouges from the not super concerned excavator operator need some attention.
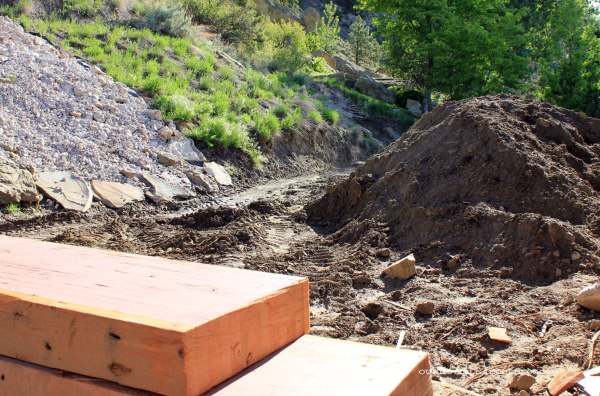
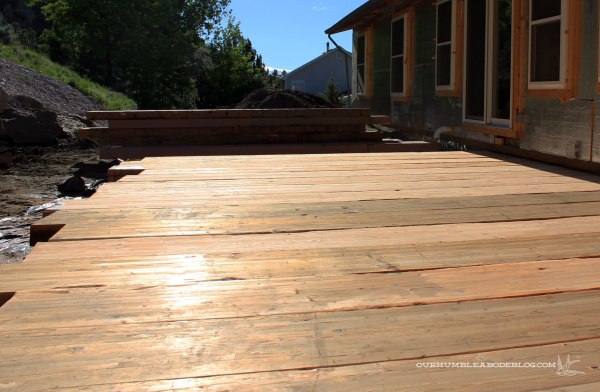
But, the mud pit we call a back yard is slowly becoming a user-friendly, dirt free space. Here’s where we are today:
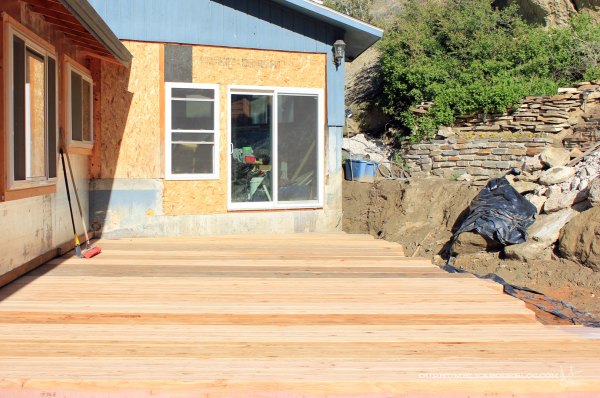
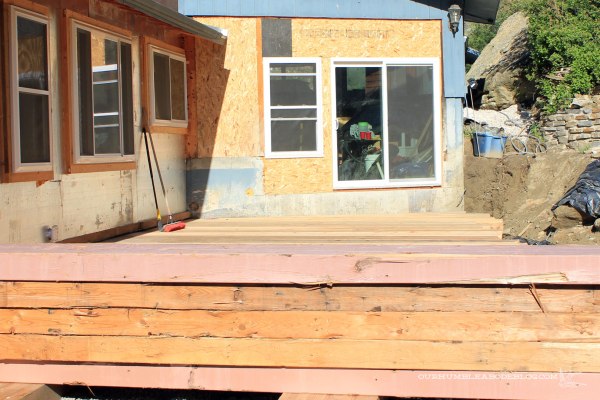
Nineteen beams in place, seven to go. Each beam is 5 1/4 inches thick, 19 1/4 inches wide, 15 or 16 feet long, and weighs about 300 pounds each. In a word, massive. Admittedly, I’m of little help moving these bad mamba jambas. It’s quite comical, actually. Ben summons his Hulk powers while I’m all Captain America, pre experimental serum. However, I can fetch tools, pull nails, and help decide which side of each beam looks better.
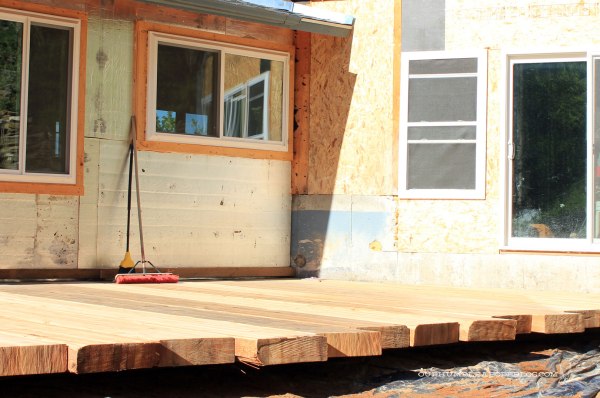
The deck sits about six inches off the ground with a slight cantilever off the ends.
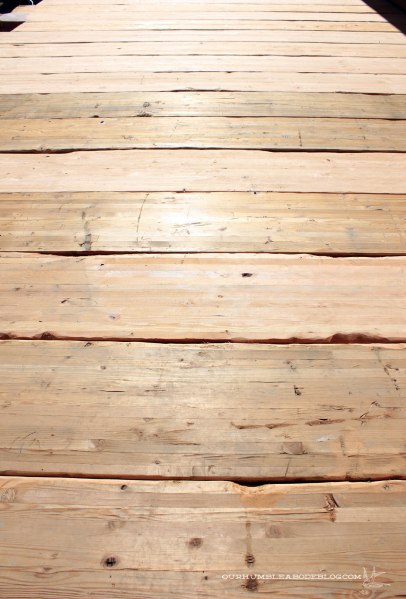
Before we can put each beam in place, we’ve got to pull out all nails and screws, sand off the paint, and smooth the grooves from the demo. Damage from the removal gives each beam some rustic character.

Even though the sides have a some pitting, the tops are super smooth. I’ve carefully and scientifically measured the tripping hazard of each side, not yet stubbed a toe or fallen.
Of course we’re still not done. Seven more beams until we’re at the desired width.
Then we’ll use a large sander (likely a rented one for hardwood floors) to go over the top, smoothing everything. Oh, we’ll have the fun task of cutting all the ends to make a clean, straight edge, too. Normal skill saws don’t even come close to cutting through.
We’ll seal the virgin wood with a mid-toned stain, for a little depth and color. And we’ll have to build stairs to this little rock landing. No more mudslides, thank you.

Despite not being done, we’re already enjoying using the deck. For waterfall sitting, of course.

Once we’ve finished the deck, we’ll cover the rest of the muddy areas with plastic, crushed limestone, and add some plants. Because we need greenery. I’m thinking a shady little hosta/bleeding heart/lily of the valley bed outside of the bedroom windows. And build a pergola. And add a gas fire pit. And cover the house in new siding. Yes, we’ve got big plans for this summer.
What do you think of the newest addition? We’re smitten with him so far. Anyone else building a deck? Or adding greenery to a yard?


