The Pool House Kitchen Progress

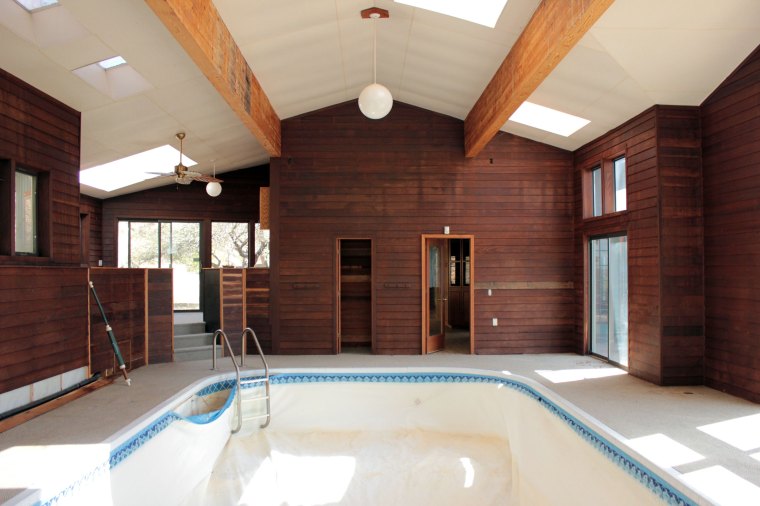
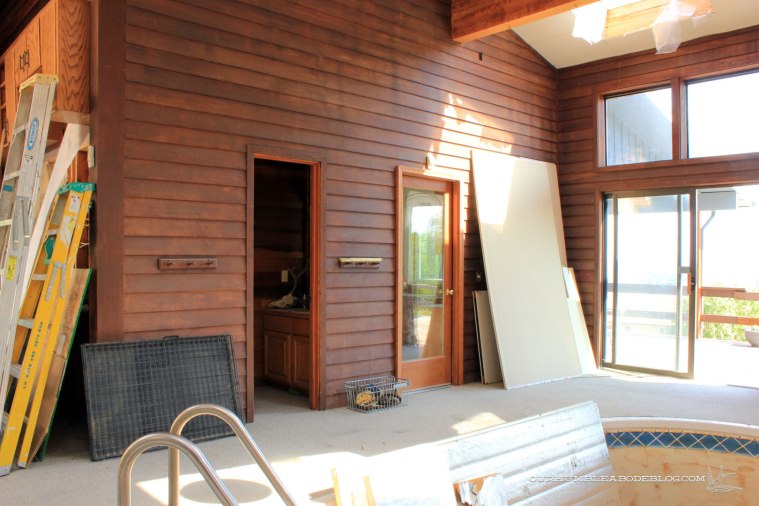
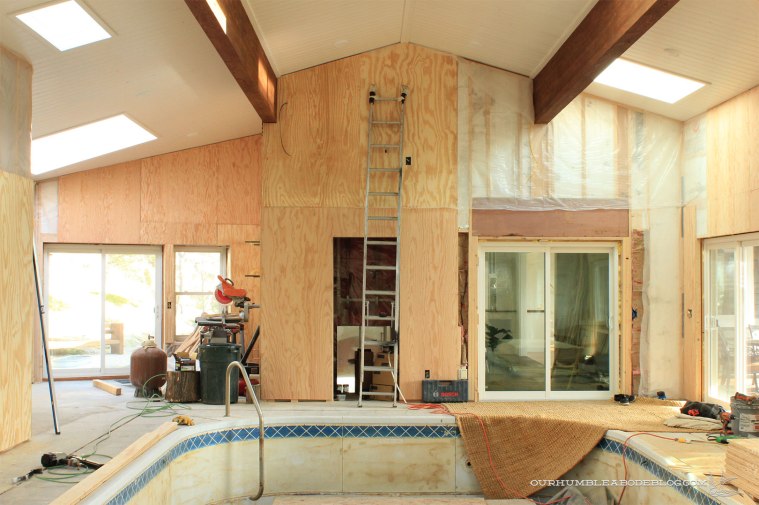
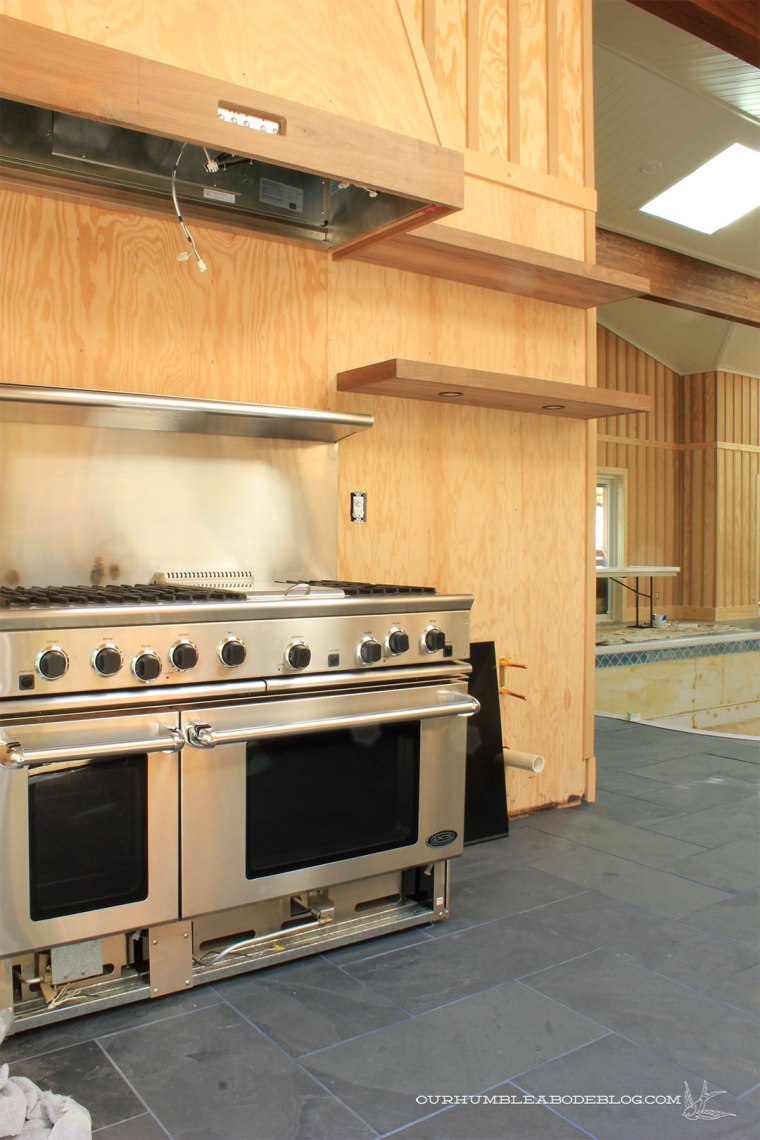
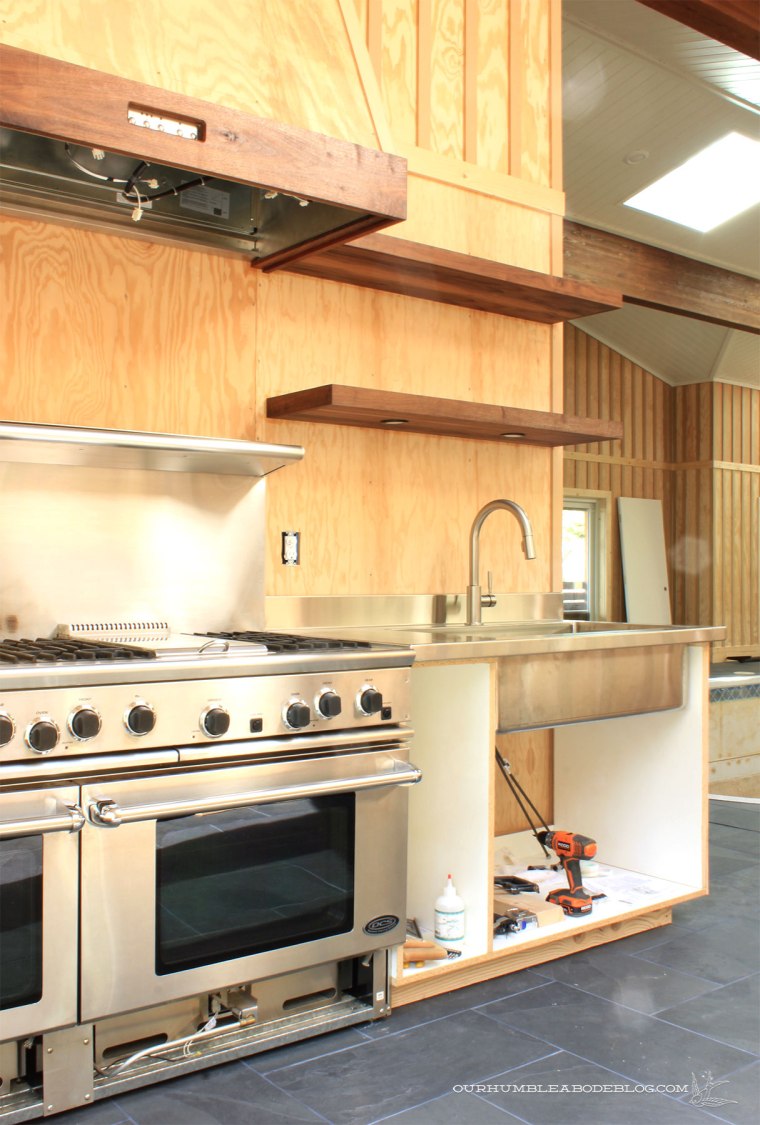
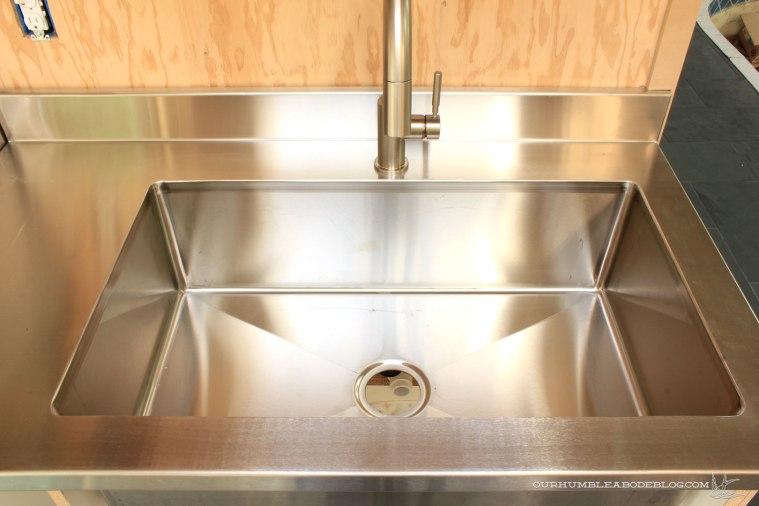
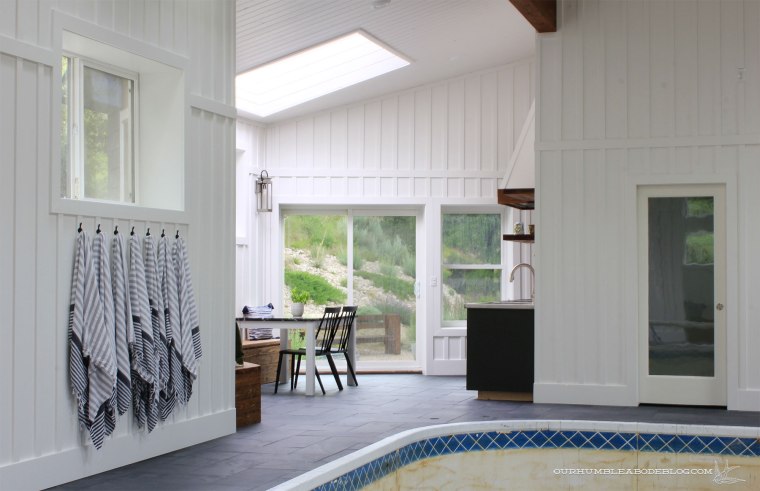
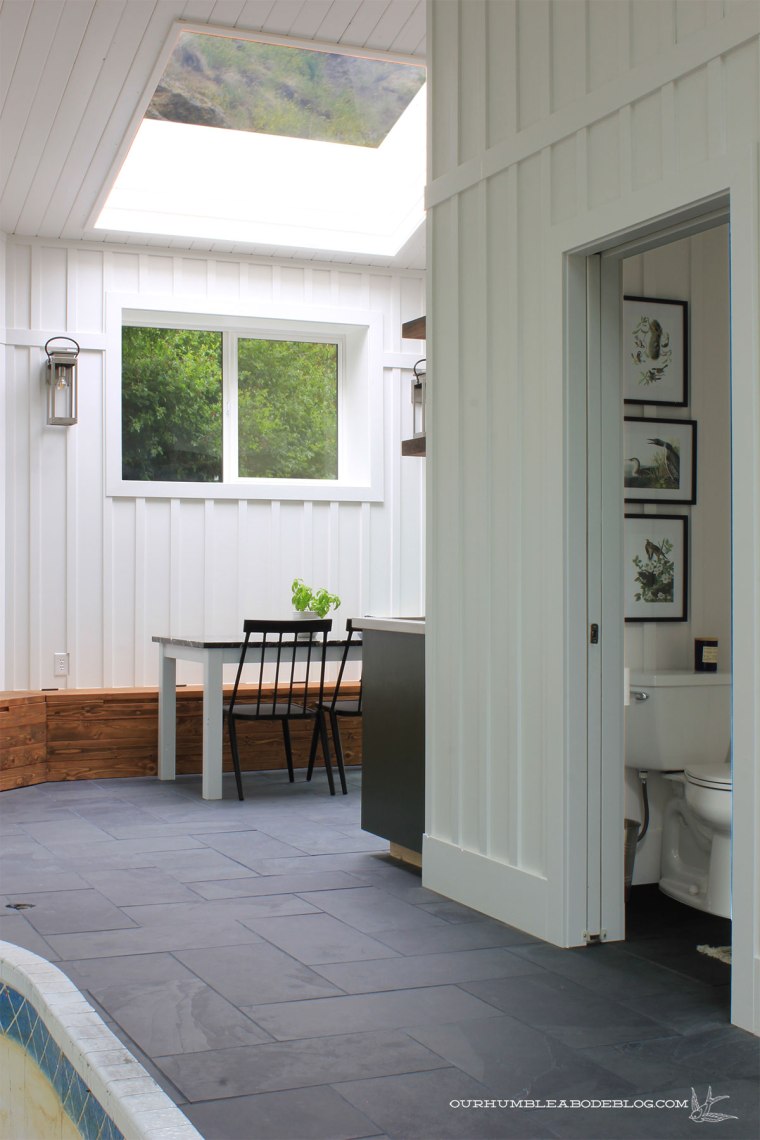
If you’re sick of pictures and posts about the pool house, I’m sorry to disappoint you today.  With the bathroom being the smallest room, it was quick to finish up.  The kitchen area, while not finished, it coming along nicely.  Starting off, the pool had a three step raised, um, wet bar?  Outside the sliding door, there was a small raised rock platform.  So three steps up to go three steps down.

New-House-Wet-Bar-April-13-2012

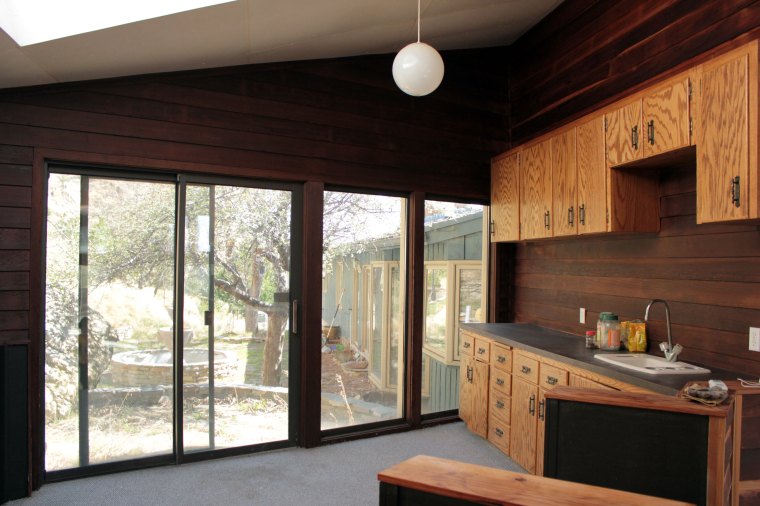
It also featured a winow behind the cabinets, making it look off when seen from outside.  We initially thought the platform perhaps hid plumbing, but a look below showed it was completely open.  With that knowledge, we made the decision to eliminate the raised platform for a free-flowing layout.

Half-Demoed-Pool-House-Wet-Bar

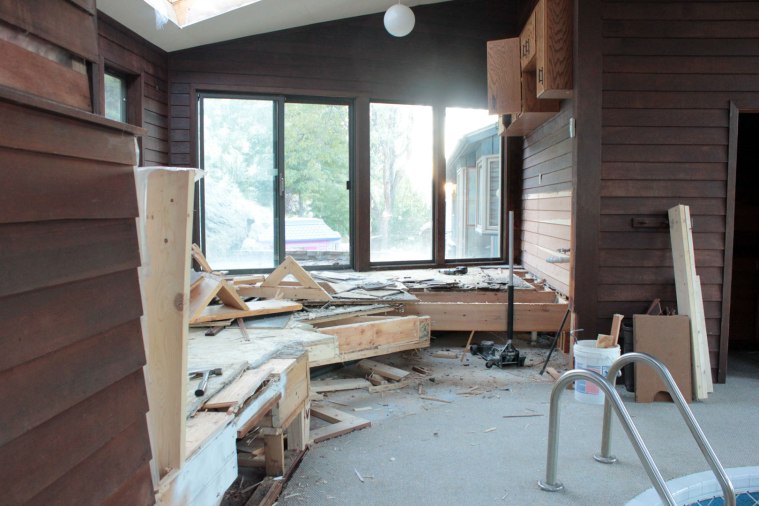
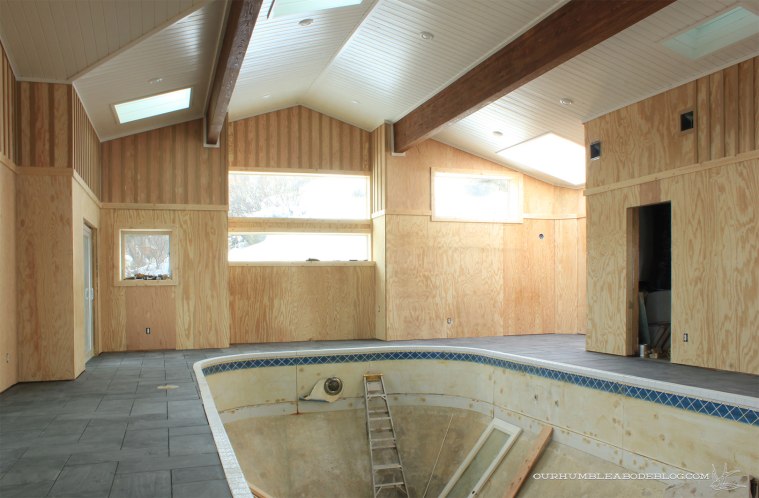
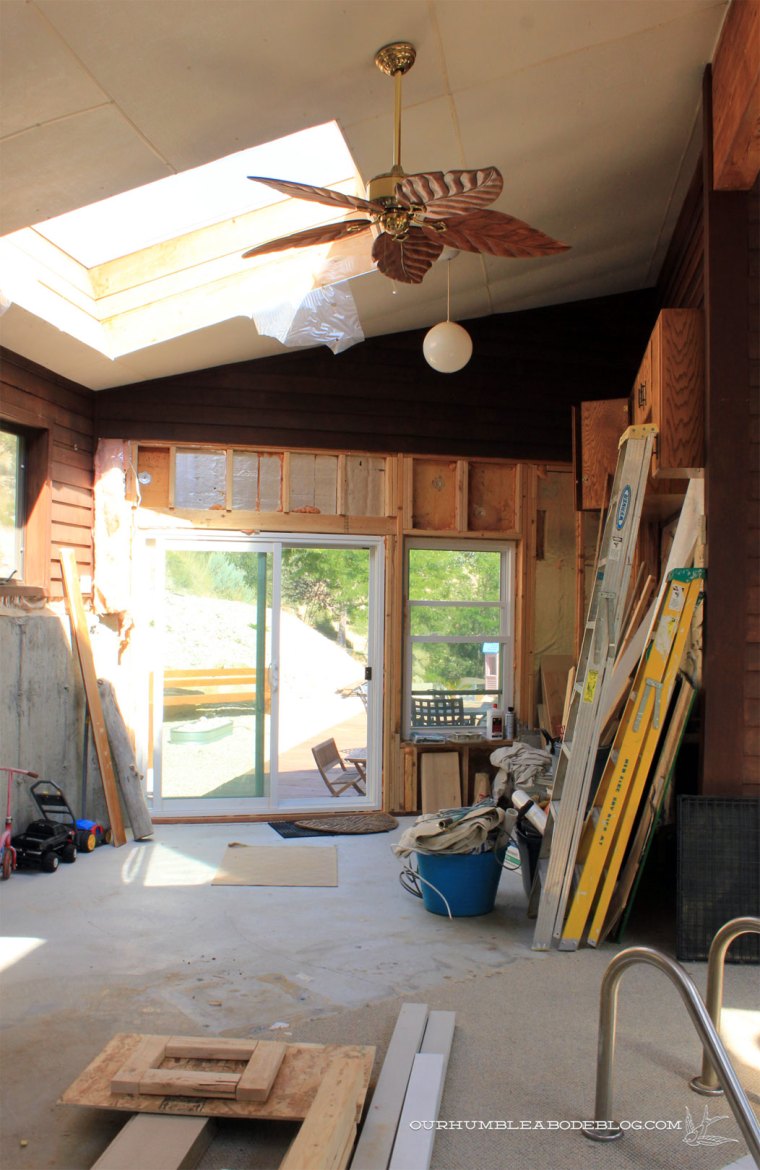
Once the platform (inside and out) were removed, we lowered the door and window to keep it even with the floor.

Pool-House-Back-Door-Aug-2014

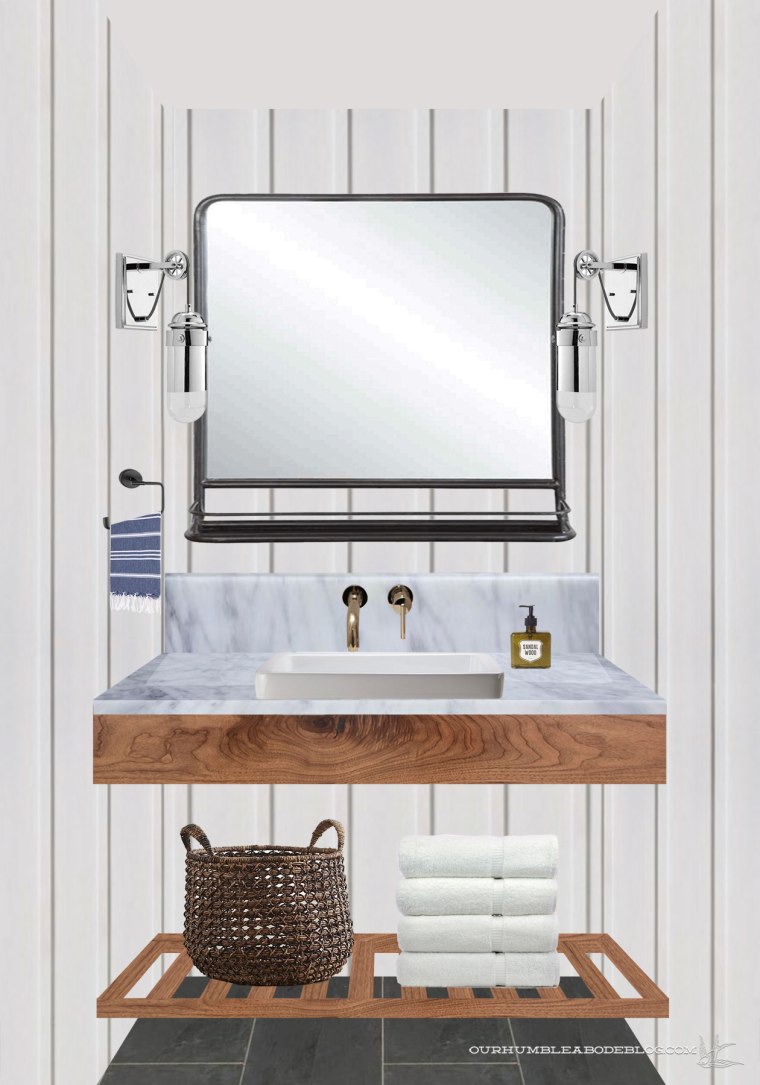
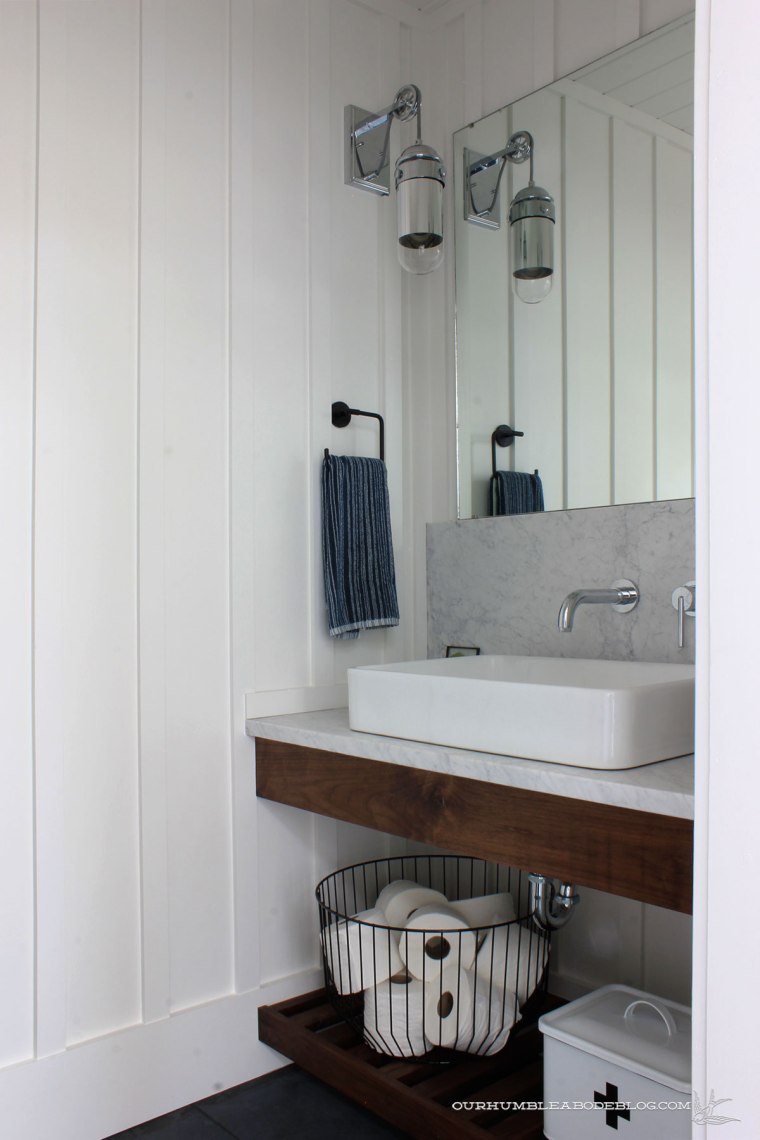
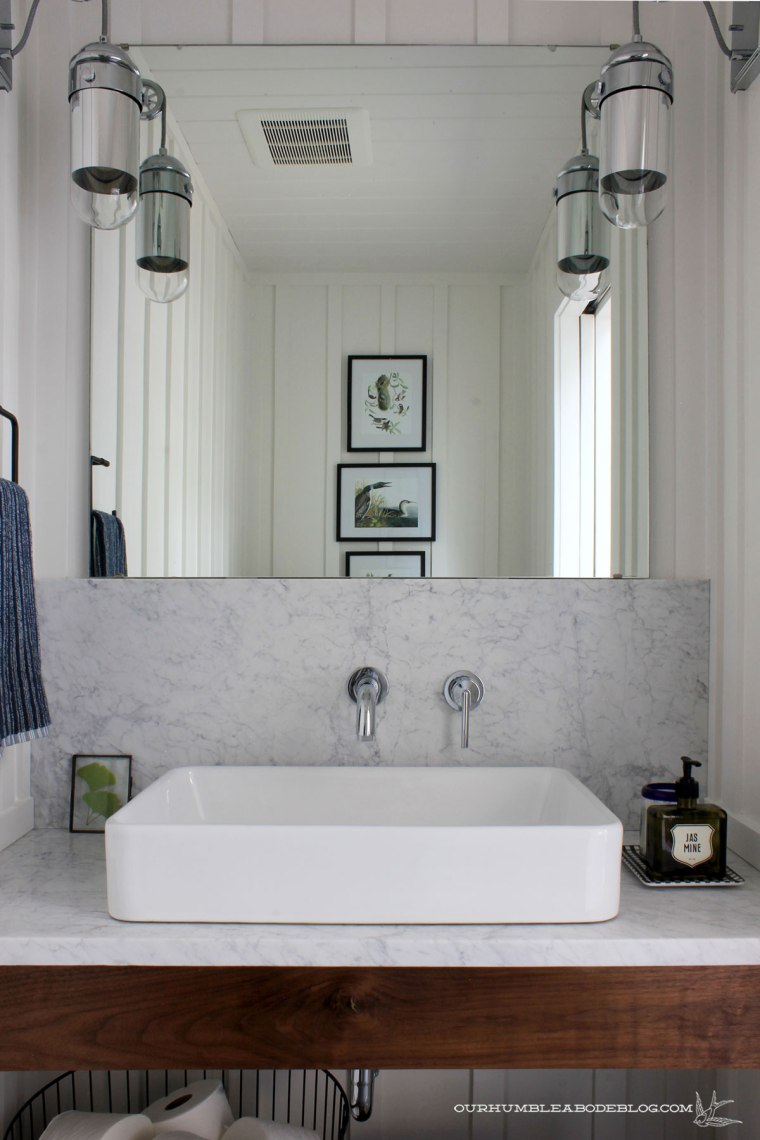
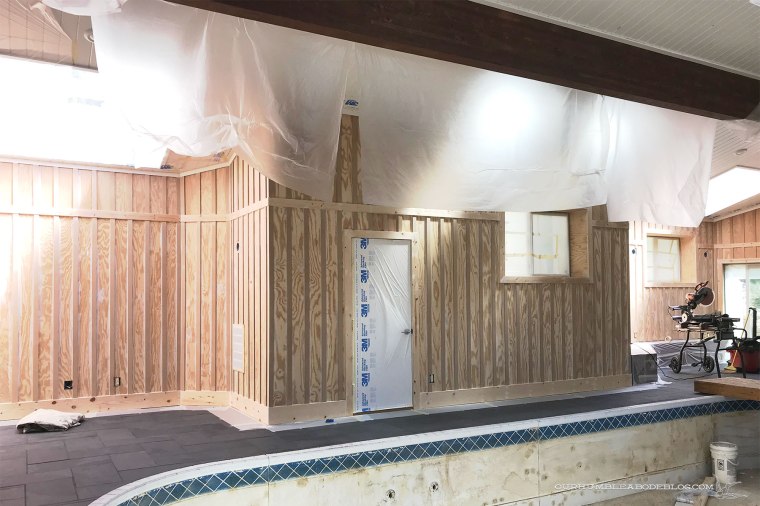
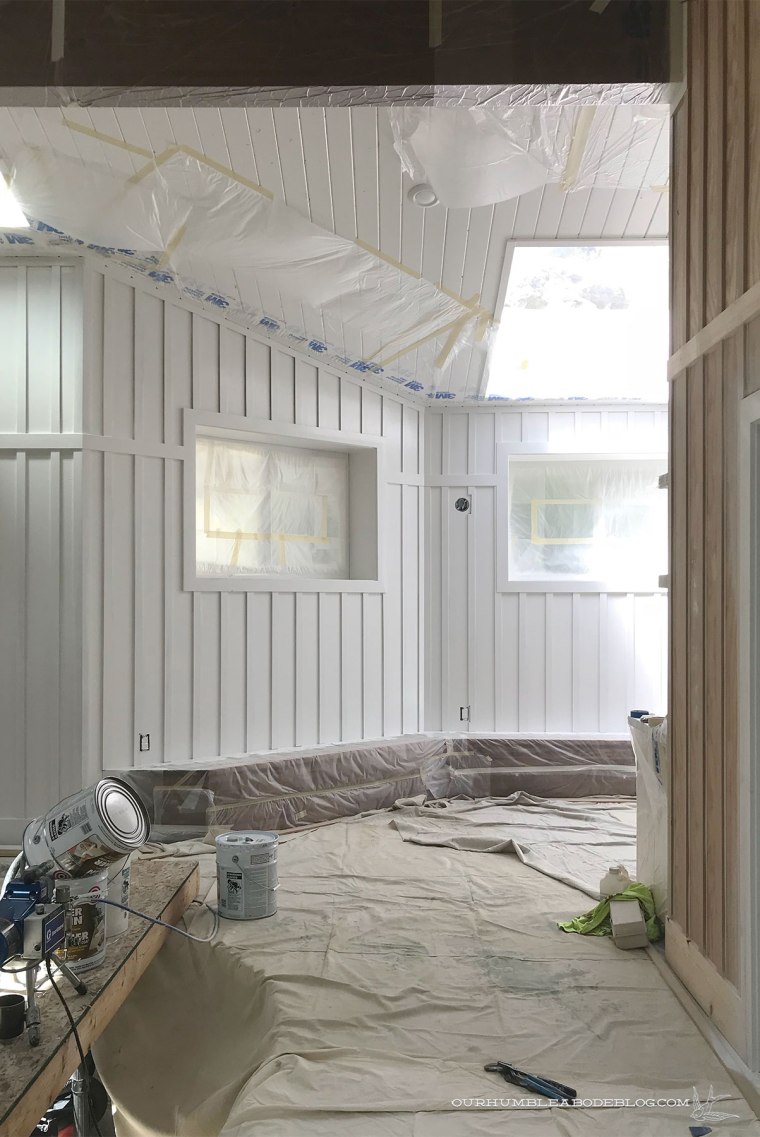
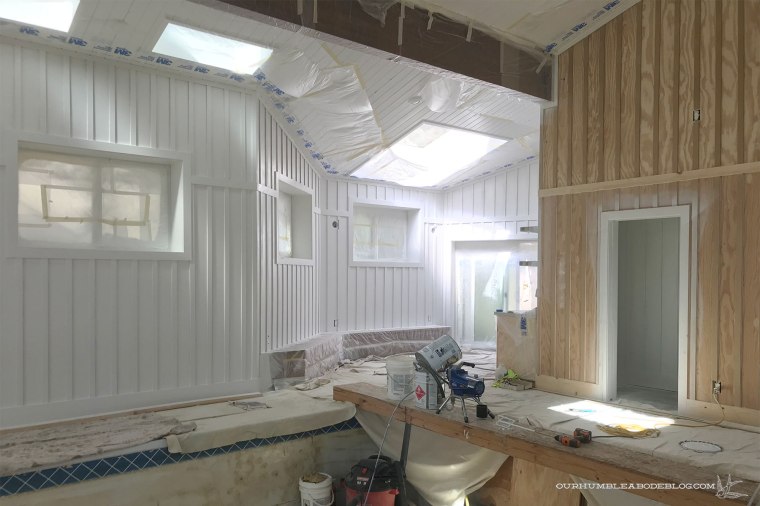
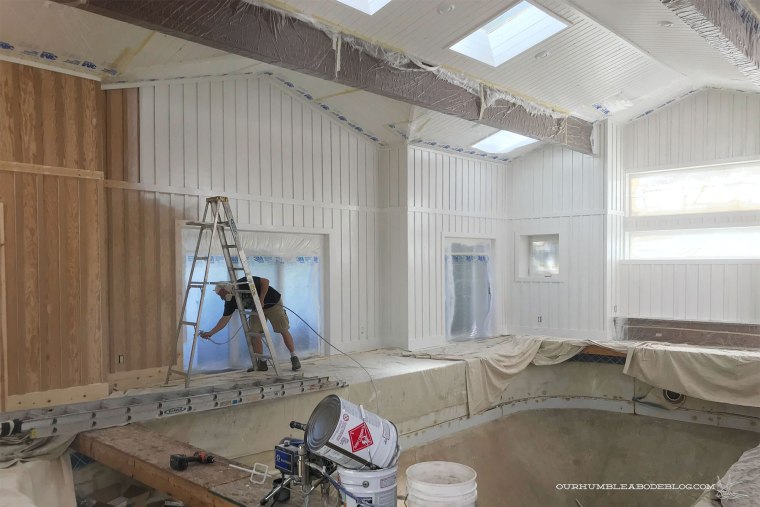
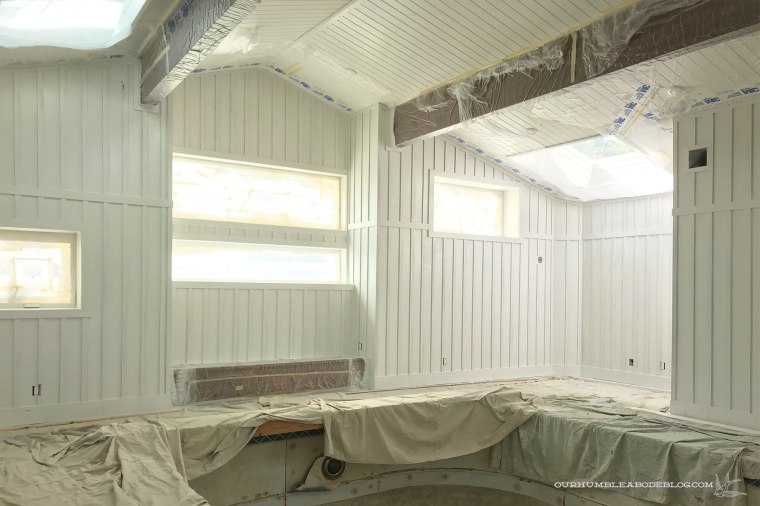
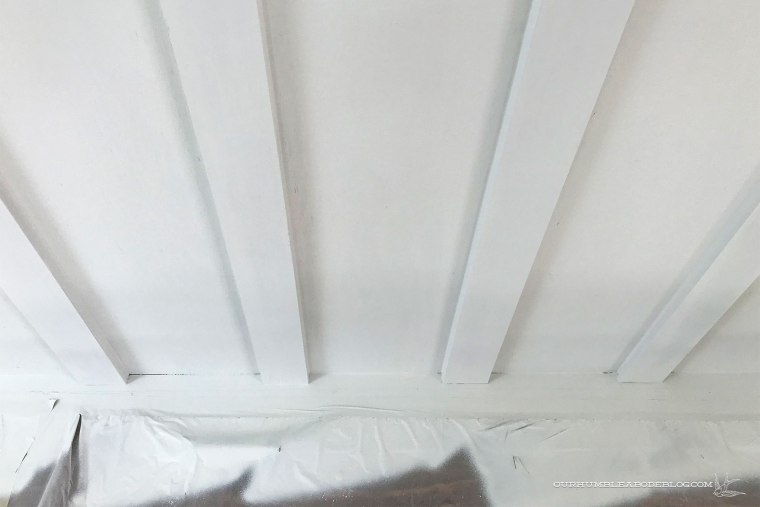
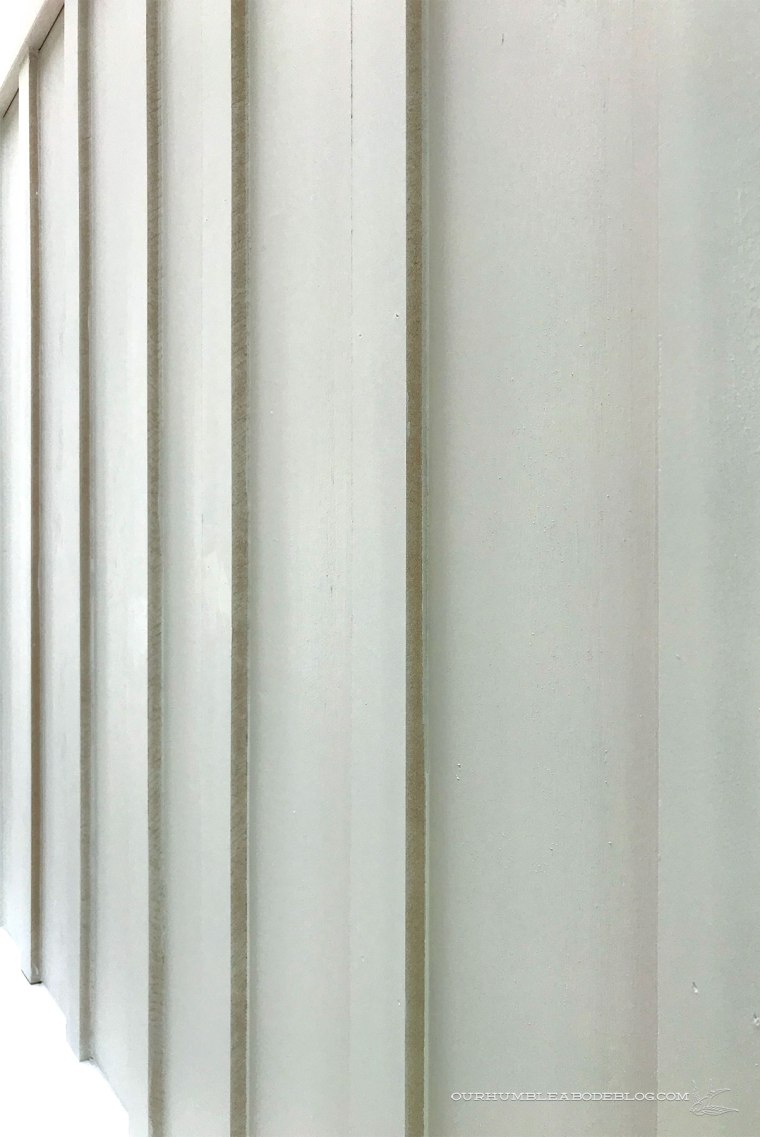
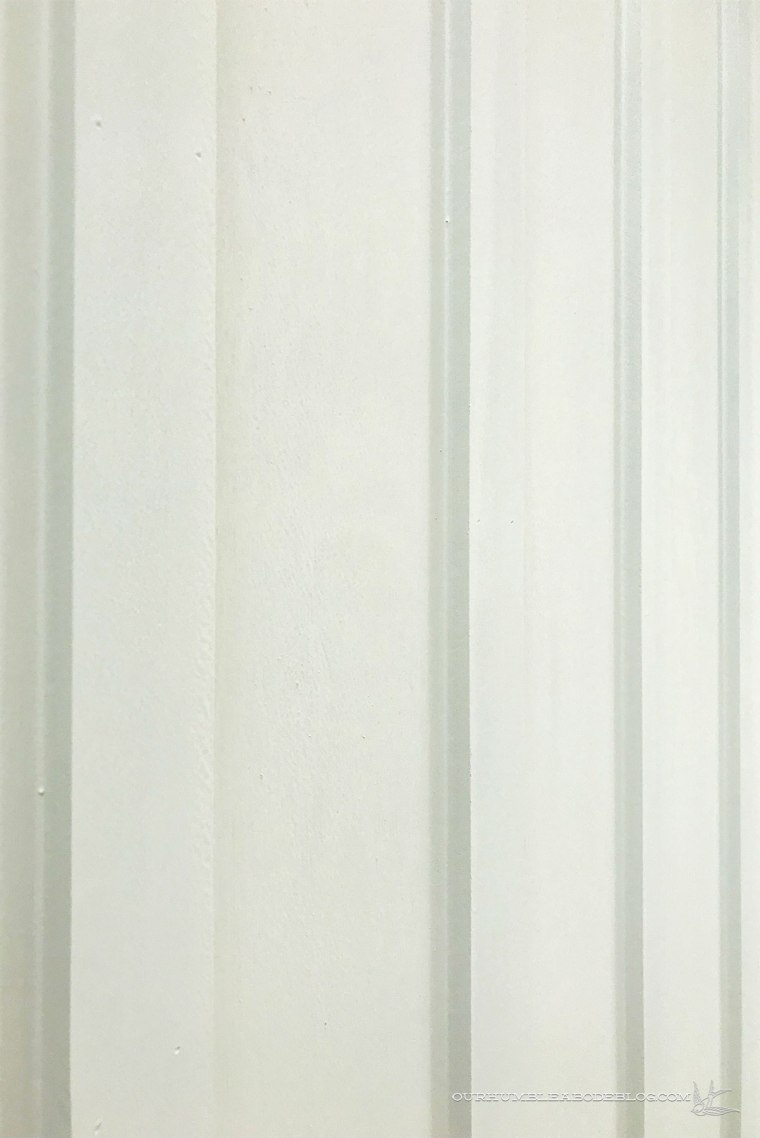
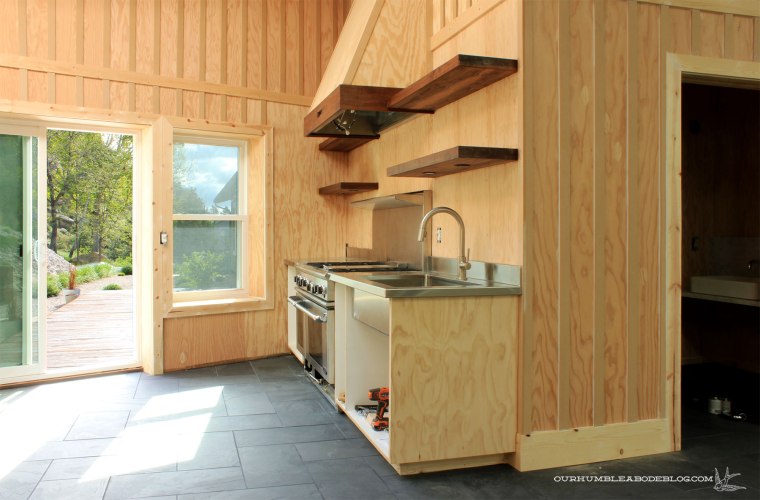
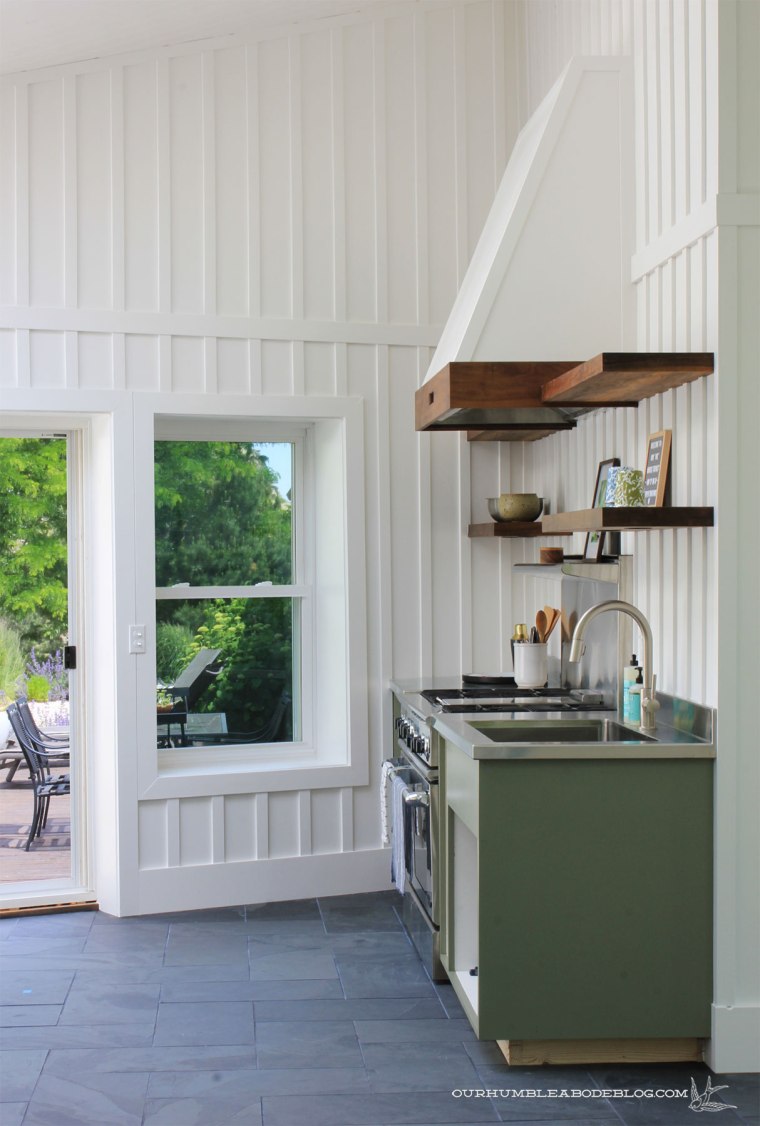
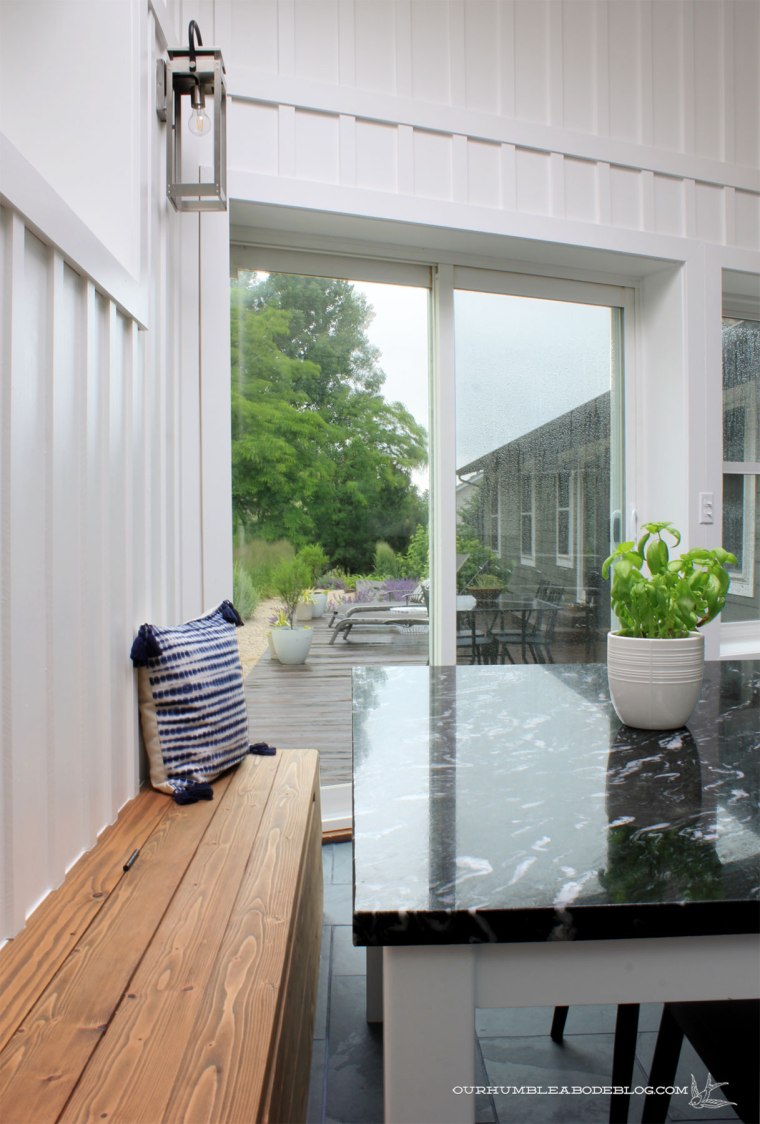
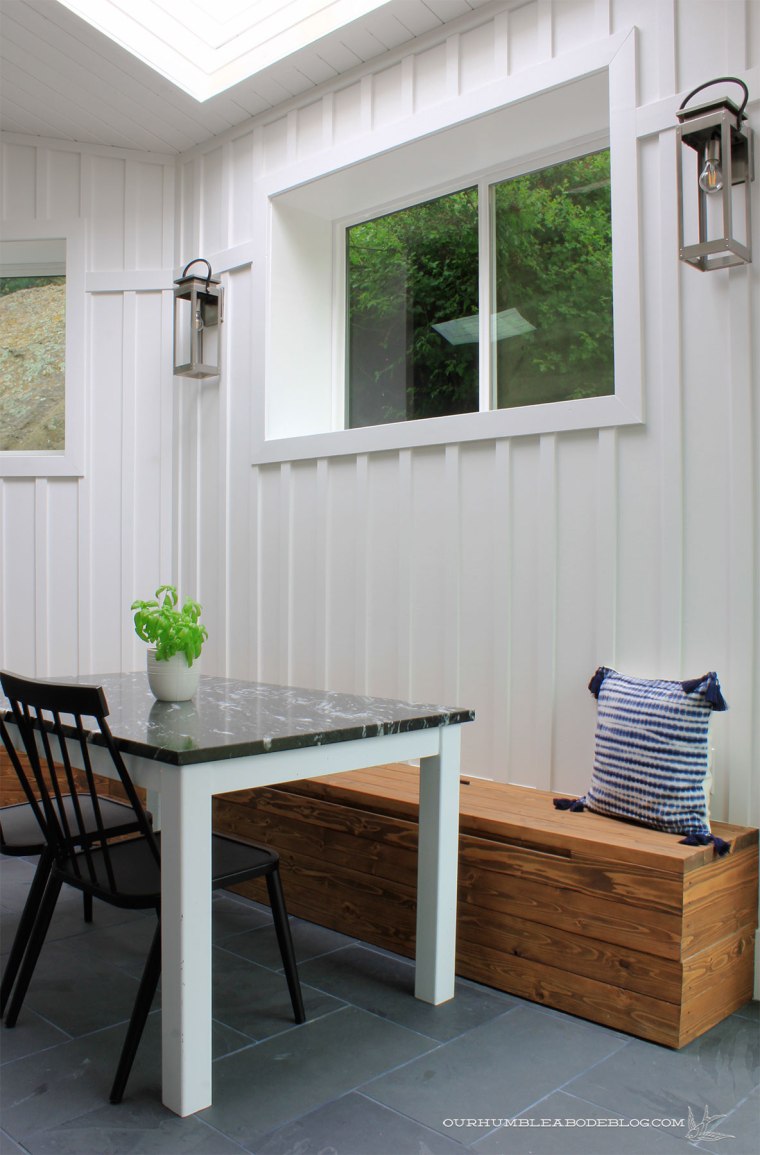
As with the rest of the room, the floors are slate and the walls got the tedious board and batten treatment.

Pool-House-Slate-Tile-Setting-in-Kitchen-Area

After paint, it looked relatively finished, excluding the cabinets.


Pool-House-After-Painting-Kitchen

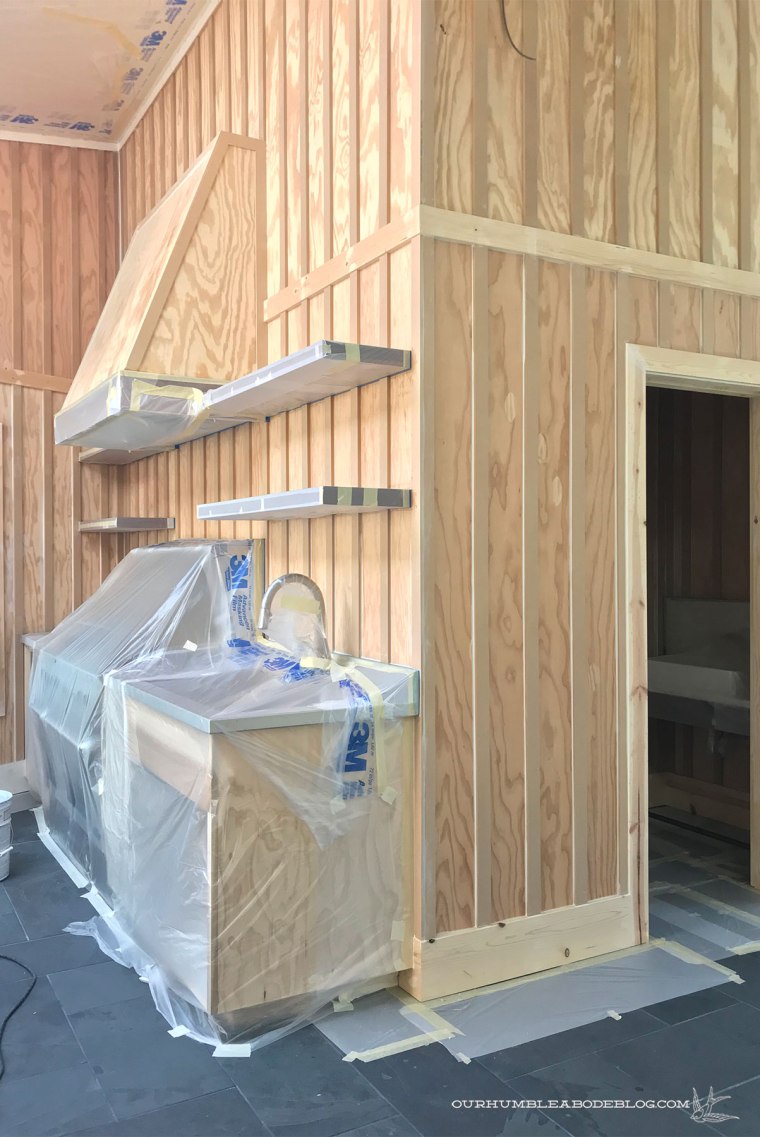
With such neutral floors and walls, I wanted to add a bit of color.  Painted cabinets are beautiful, and this small section is the perfect place to experiment.

Pool-House-Kitchen-Two-Shelves-Without-Backsplash

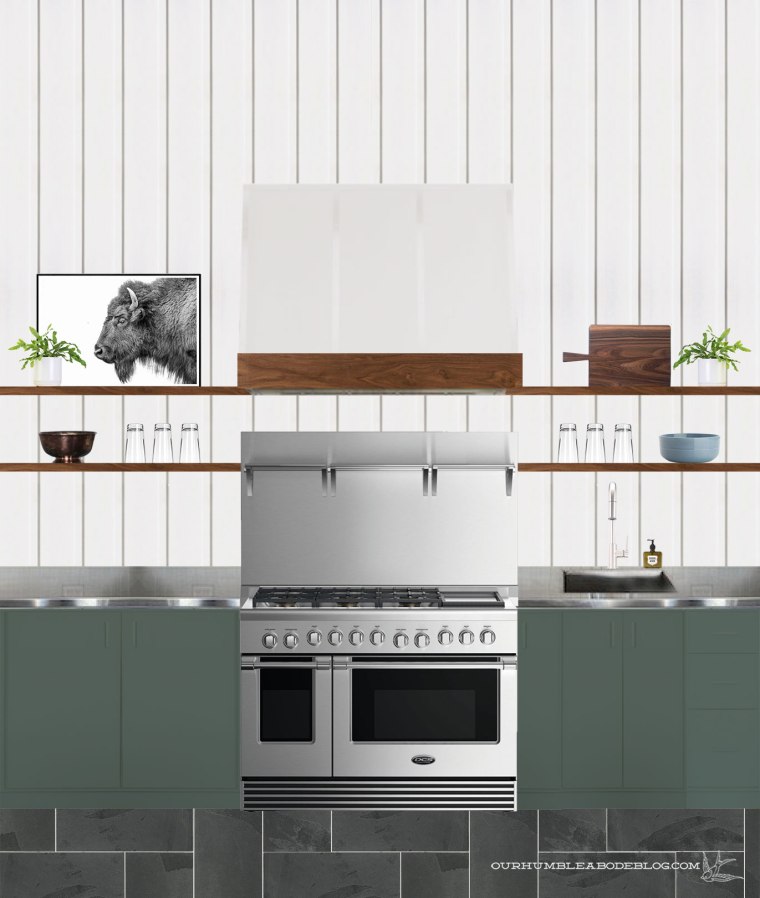
Green was always my front-runner, and I picked out a mid to dark tone slightly olive green.  Right away, I painted the cabinet boxes to get a feel for it.

Pool-House-Kitchen-Benches-with-Light-Green-Cabinets-Front

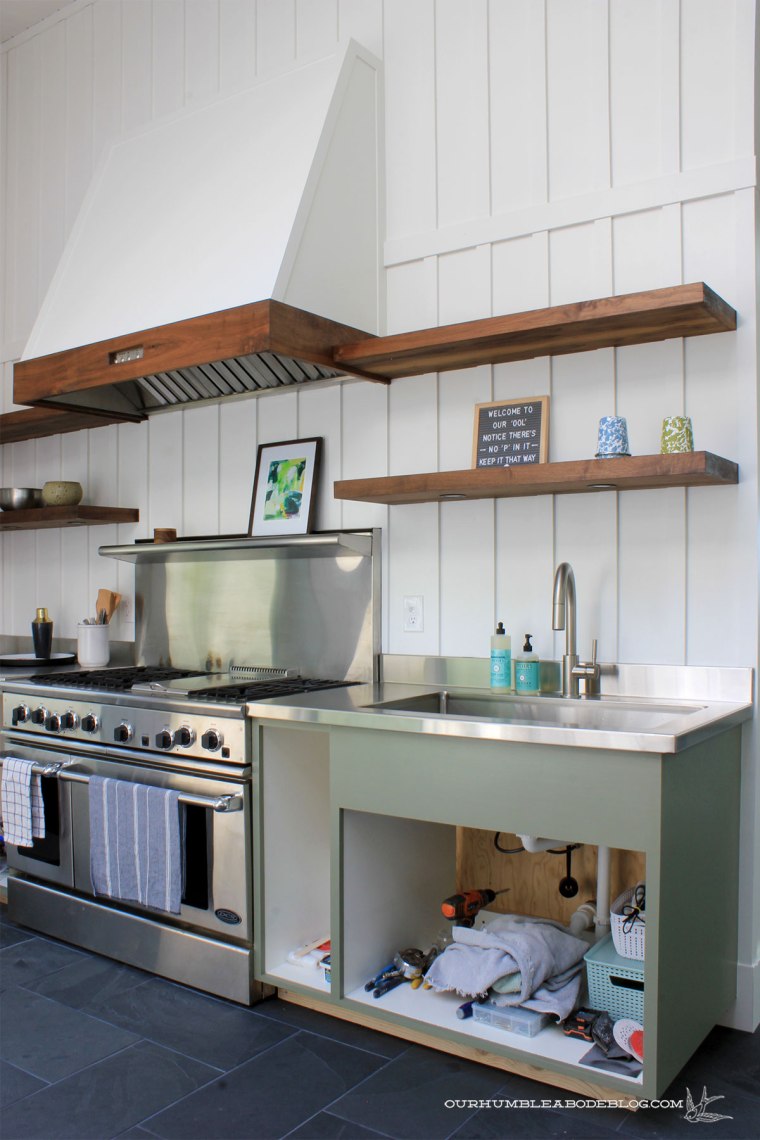
I didn’t hate it, but I didn’t love it.  It was a touch more sage toned than I had in mind, and it was a similar value to the stainless steel counters.

Pool-House-Kitchen-Cabinet-End-Light-Green

Before changing anything, I lived with it for a few days and turned my attention to the other side of the room.

Pool-House-Kitchen-Cabinet-Light-Green-Masked-Table

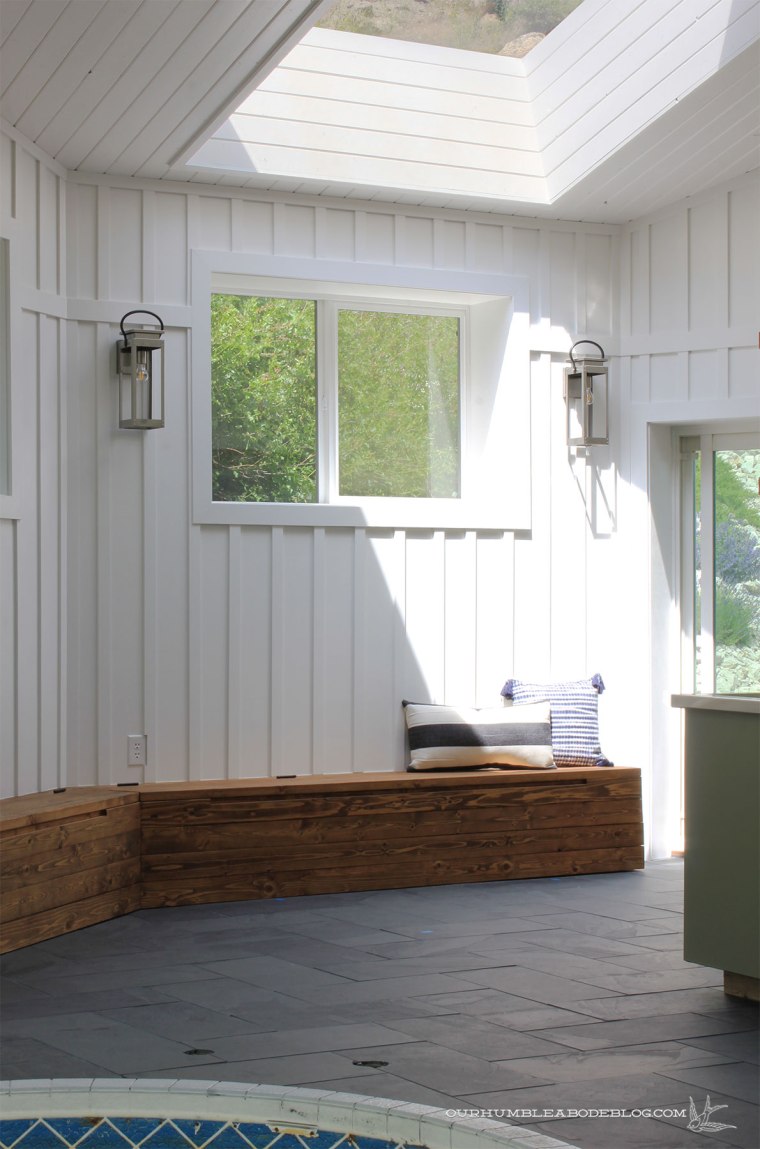
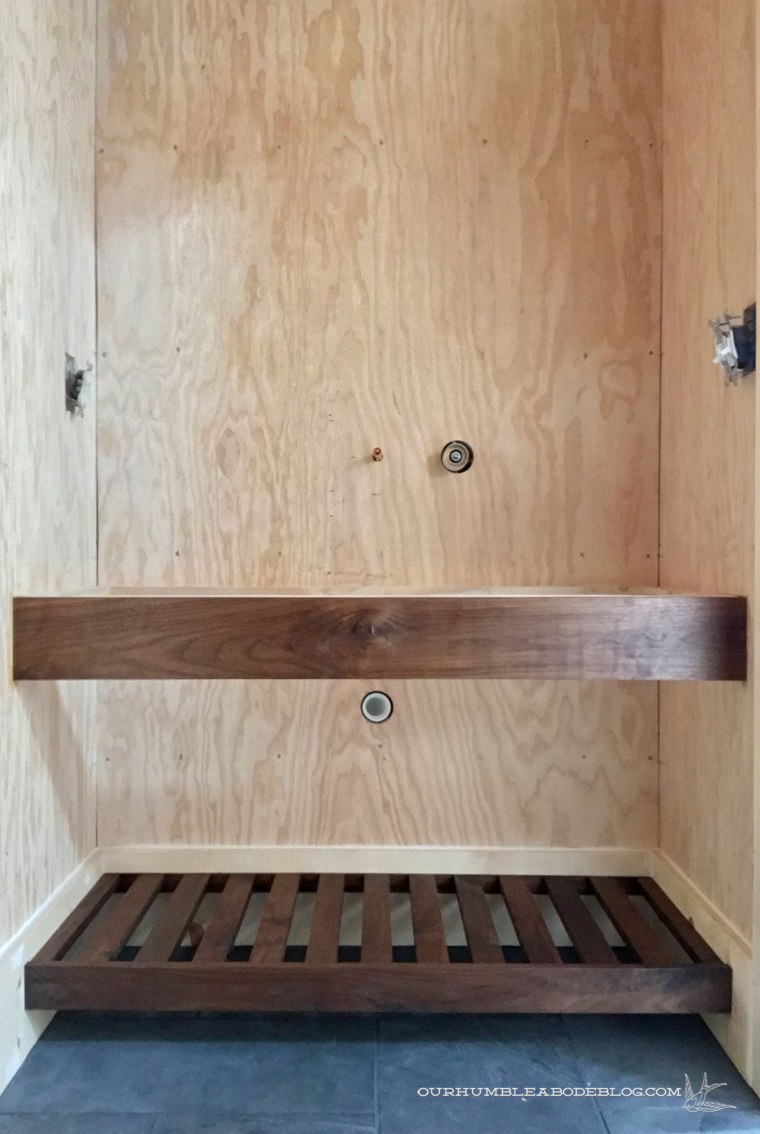
For this side, we slightly changed plans by building wooden storage benches.  Not only will they store necessary pool related stuff, they’re functional seating for the dining table.  Pool-House-Bench-Area

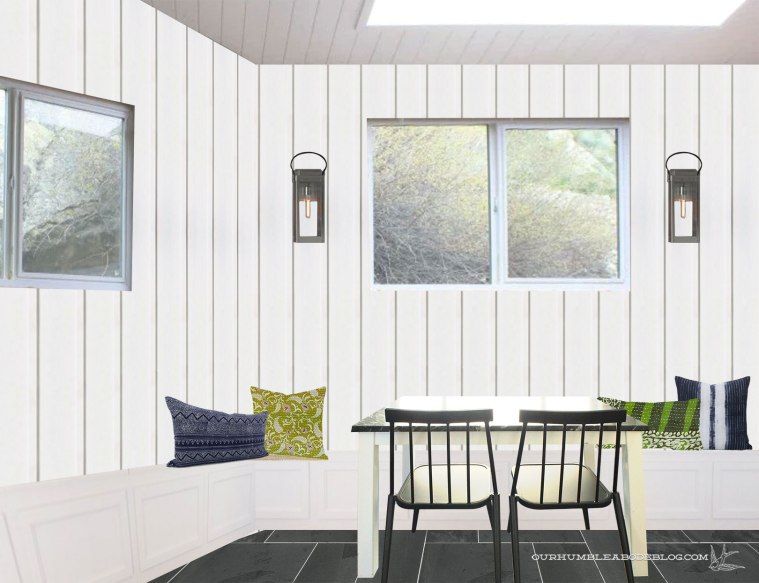
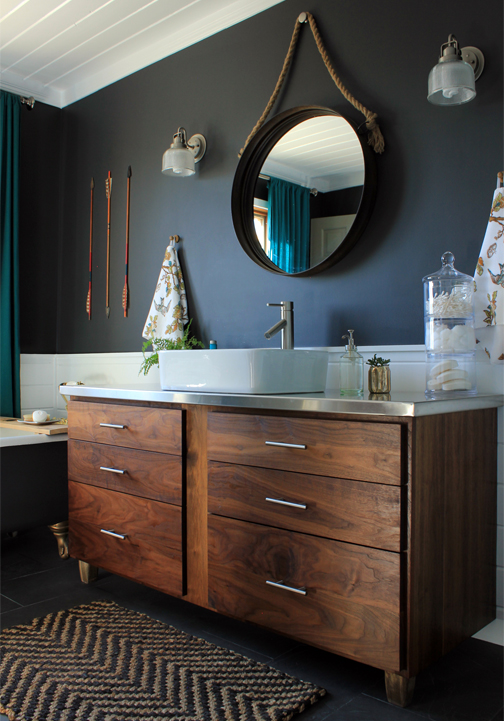
This one might look familiar, because it was in our breakfast nook.

Breakfast-Table-with-New-Chairs-Family-Room-Shelves

The size, metal base, and dark green marble top are a perfect match for this bench.  A pair of Union Square sconces from Progress define this area from the rest of the large room.

Pool-House-Kitchen-Table-Detail

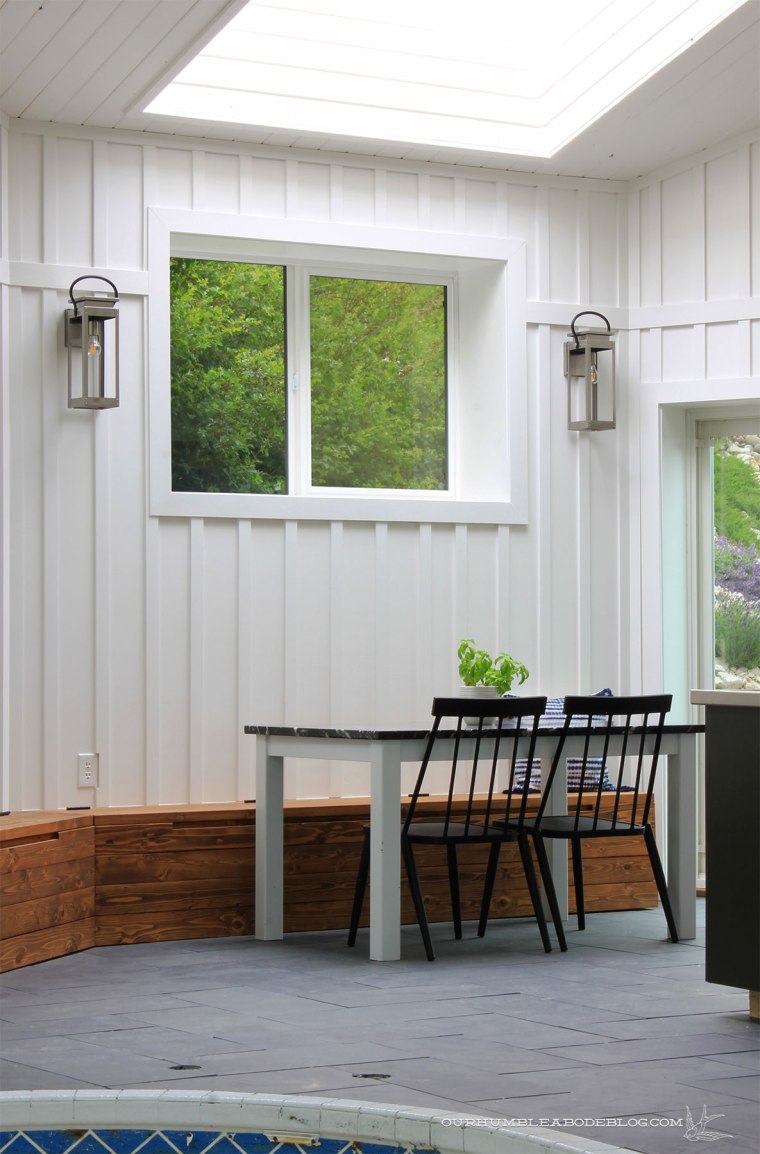
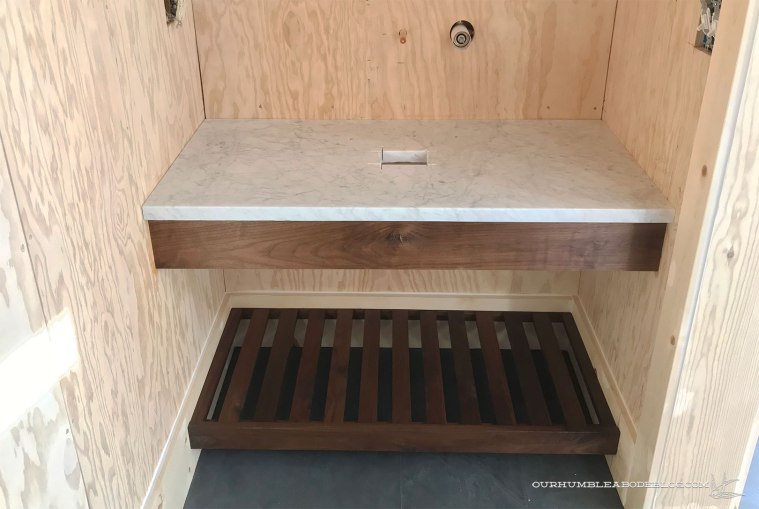
Floating the legs several inches away allows easy sliding in and out of the bench.

Pool-House-Kitchen-Table-Toward-Door

Pool-House-Kitchen-Table-From-Back-Door

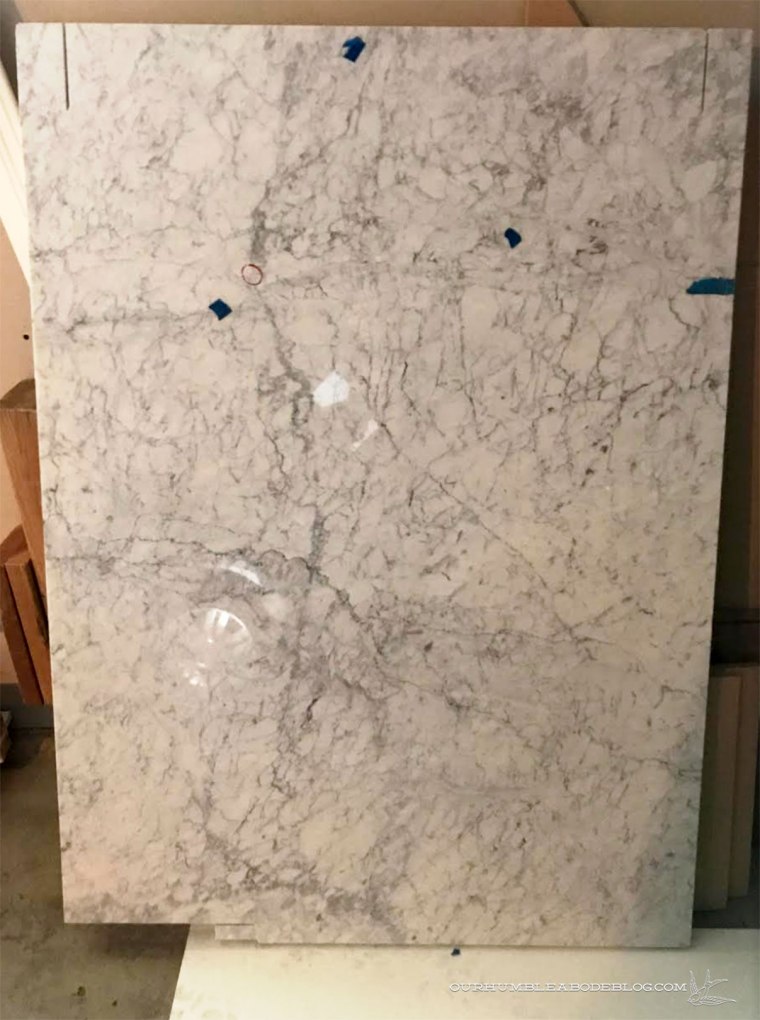
Seeing the dark green swirls in the top made the sage toned green look even more off, so I had the quart retinted.  Of course, because I’m super impatient when it comes to things like this, I started painting the sink box to get a look at it.

Pool-House-Kitchen-Cabinets-Picking-Green

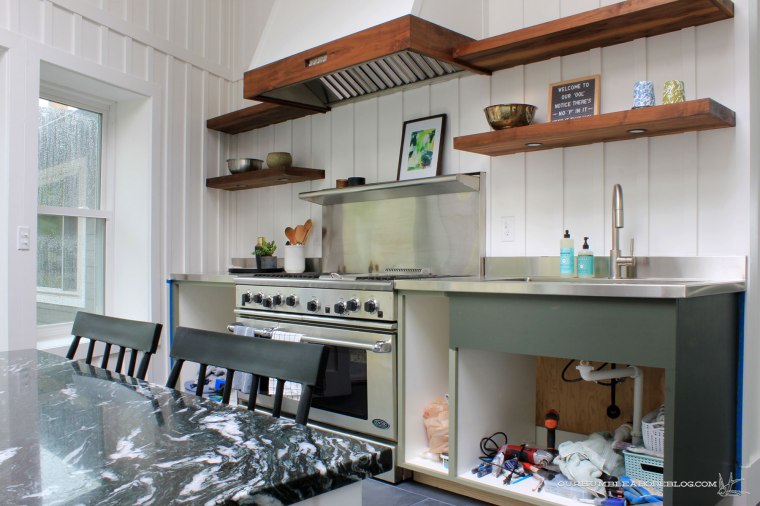
On overcast or rainy days, it reads much darker, almost black.  But on sunny days, it’s perfect.

Pool-House-Kitchen-from-Pool-End

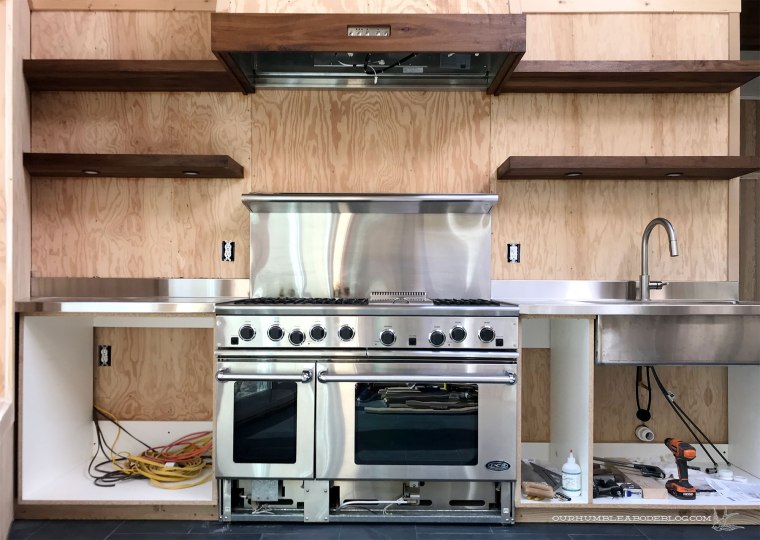
Toe kicks and cabinet doors are still in the works, but good things take time.


Pool-House-Kitchen-Table-Overall

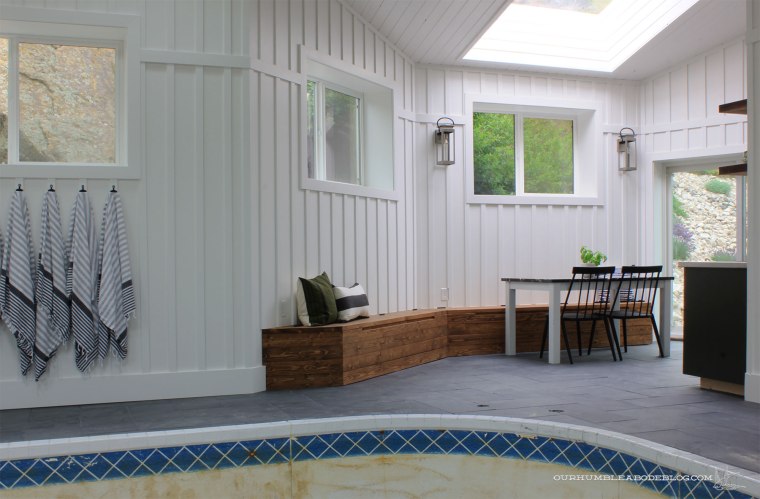
Skylights are always amazing, but these giant ones drench the area in the most gorgeous light.

Pool-House-Kitchen-Table-with-Bath

Even with the room unfinished, I love going out there just to appreciate how different it feels.  And we’ve used the oven a few times, too.  Pizza and pool parties to come as soon as we get the liner and water.

Before & After: The Pool House Bathroom

Exciting things have been happening in the pool house recently.  We primed and painted the walls white, which makes much of the room look finished.  Certainly a far cry from our starting point of dark stained (in color and in a literal uneven way) walls, fiberglass sheeting on the ceiling, and outdoor grade carpet covering the floor.

New-House-Pool-to-House-April-13-2012

In the photo above, there’s a half bathroom squished in behind a swinging door.  It was so small and dark, I never got photos of the room before, but you can see the vanity peeking out in a progress pic.

Pool-House-Bath-and-House-Aug-2014

Starting with the digital design…

Pool-House-Bathroom-Vanity

Onto cladding the walls in plywood sheeting, starting on the walnut vanity…

Pool-House-Bath-Vanity-Oiled

To marble counters and tall back splash…

Pool-House-Bath-Marble-Backsplash-and-Sink-Installed

Getting primer and paint on the walls…

Priming-Pool-House-Walls-Bathroom-Sink

This space, at long last, is looking cute.  A locking frosted glass pocket door separates the bath from the main pool area, but still allows natural light to flood in.

Pool-House-Finished-Bathroom-Overall-Pocket-Door

Unlike the bathroom before, the pocket door allows the room to feel open, not cramped.  Walking in is easy, and doesn’t require snugging against the vanity to close the door.

Pool-House-Finished-Bathroom-Overall

When planning this space, I wanted to keep storage to a minimum.  I know, the exact opposite of the usual desire for as much storage as possible.  Unlike a full bathroom, we don’t need to store extra products, just the basics.  A basket of toilet paper and a cute metal bin stocked with first aid supplies sit on the slatted shelf.

Pool-House-Finished-Bathroom-Overall-Closer

Simple, free to download bird prints add color to the otherwise bare toilet side.

Pool-House-Finished-Bathroom-Overall-Toilet-Side

Other than the change of art, the only deviation from the original plan is the frameless mirror.  This one was in the original bathroom, and I had planned to build a wooden frame around it, painting it black for a metal look.

Pool-House-Finished-Bathroom-Vanity-Lights-Off

After resting it on the top of the marble back splash, I liked the streamlined look more than a framed mirror.   With the decision to forgo a frame, Ben hung the mirror using four sleek metal mirror clips that are barely noticeable.

Pool-House-Finished-Bathroom-Mirror-Clip-Detail

Without a frame, the interesting Beaker sconces from Progress command more attention.

Pool-House-Finished-Bathroom-Sconce

Measuring 17 inches tall, they’re on the large side for a small bathroom (as is the over sized  marble slab back splash), but both height, making the room feel bigger.

Pool-House-Finished-Bathroom-Sconce-Detail

The mirrored glass shades provide a beautiful, soft glow that creates the slightest pattern on the walls.  The faux pulley and cute cloth cord offer a lot of style, while the glass shade keeps visually light.

Pool-House-Finished-Bathroom-Vanity-Lights-On

A wall mount faucet has been on my wish list for years, and I was finally able to get Ben on board with it in here.  Mostly due to the marble backing, preventing unnecessary wall splashing.  However, it didn’t come without challenges and an excessive amount of measuring.  And re-measuring, followed by second guessing.  Followed up with several four letter words when cutting the holes in the marble to accommodate it.

Pool-House-Finished-Bathroom-Marble-Detail

I worried it’d be too ‘splashy’, so we placed the bottom of the spout 2 inches from the top of the vessel sink.  It forces people to keep their hands in the bowl, but doesn’t feel crammed in our wide sink.

Pool-House-Finished-Bathroom-Sink-Detail

At 44 inches wide, with a large part taken up by the sink, there’s enough counter space for a small tray of cotton swabs (useful when the pool is functional) and a cute soap pump.  Basically, all of the little elements I’ve been compiling over the months and finally get to use.

Pool-House-Finished-Bathroom-Soap-Detail

It’s been a long road to get to this point, but I’m basking in the bright, open, fresh space we have now.

Pool-House-Bath-Before-and-After

If you spy something you might want to get for yourself, here’s the list of everything shown.

Montauk Black Slate Tile     .     Frosted Pocket Door     .     Pocket Door Hardware     .     Progress Beaker Sconces     .     Delta Trinsic Faucet     .     Vessel Sink     .    Delta Trinsic Black Towel Ring     .     Towel (similar)     .     Mirror Clips     .     Blue Rimmed Cup     .     Izola Soap     .     Black Gingham Tray     .     Round Wire Basket     .     First Aid Box     .     Kohler Highline Toilet     .     Paper Holder (similar)     .     Picture Frames     .     Audubon Art

Seeing White

Our previously decrepit indoor pool house has been our single biggest, longest, and most expensive room makeover to date.  Though we had demolished the raised wet bar in 2012, replaced windows and doors in 2015, we really got to work in November 2016, working from the ceiling down.

While the ceiling was a lot of work, mostly due to the awkward working space, the walls win the most tedious award.

Pool-House-Plywood-Hanging-Progress

Although I only have myself to blame for that, because I was set on a floor to ceiling board and batten wall treatment.  First, hanging sheets of plywood backing, followed with hundreds of batten strips.

Pool-House-Tile-Install-Finished

The single most time-consuming, finger killing part was the miles of caulking.  I trudged through because I knew the result would be 100 percent worth it all.  This weekend, we made it one giant leap closer to the final, completed room.  Before we could get to the satisfying part, spraying primer, we had to mask off everything we didn’t want to get paint on.

Priming-Pool-House-Walls-Masking-Room

Floors, ceiling, cabinets, shelves, benches, doors, and windows.  Probably most fun, the two huge support beams that span the entire room.

Priming-Pool-House-Walls-Masked-Kitchen

When masking, I prefer to start with a good quality painter’s tape, closely following the edges.  Then I come back with my sheet of plastic to quickly mask the remaining open areas.  When in doubt, tape every single seam.  It’ll prevent over spray coming through as well as the plastic flapping up from the sprayer air.

Priming-Pool-House-Walls-Masked-Door

With the plastic applied, we laid drop cloths on the floor to completely cover it.

Priming-Pool-House-Walls-Masked-Room

With the prep work out of the way, we cracked open the oil based primer and got to spraying.  Ben started in the kitchen, working around the walnut shelves and vent hood.  My heart was beating so fast, a mixture of excitement of how great it looked already and worry that I hadn’t masked well enough.  I felt the same way about the ceiling beams and those turned out perfectly, so I have my fingers crossed.

Priming-Pool-House-Walls-Kitchen-Bench-Detail

This step is the single most satisfying part of a job.  In a matter of seconds, the walls went from unfinished plywood to crisp white.

Priming-Pool-House-Walls-Kitchen-Benches

Ben rocked the priming, knocking out the entire room in about 2 hours.  Despite being unfinished, the primer gives us an idea of the finished look and feel.

Priming-Pool-House-Walls-Center-Bump-out

Even with the windows covered, it’s so bright and fresh (looking, because the smell was terrible).

Priming-Pool-House-Walls-Hot-Tub-Area

Priming-Pool-House-Walls-Bathroom-Sink

It’s taking everything in me not to peel back the tape on the benches to see how it looks, but we still have to paint.

Priming-Pool-House-Walls-Masked-Bench-Detail

One minor annoyance is that the rough edges of each batten strip absorbed most of the paint.

Priming-Pool-House-Walls-Batten-Strip-Side-Detail

We hoped to paint on Sunday, but instead took the day to brush each edge with a second coat of primer.

Priming-Pool-House-Walls-Touched-Up-Edged

Not ideal, but necessary for the best possible paint finish.  We’ll spray the walls white, Snowbound from Sherwin Williams, this weekend and that’ll be the last whole room project.  After that, it’s all minor tasks to complete.  We’ll install sconces, finish the kitchen cabinets, and add the pool liner.  Then, it’s party time.

Stainless Steel Counter Tops

Between the teacher lounge makeover and building a pergola for a client, we haven’t spent much time in the pool house.  That doesn’t mean we’re not excited to make progress, but we did check one more piece off the list.

Pool-House-Kitchen-Walnut-Shelves-with-Range-from-Door

We built basic cabinet boxes a few weeks ago, which allowed us to place our stainless steel counter top order.  Ben measured everything and I transferred the measurements to a digital format to hand off to the fabricator.  For easy cleaning, we had them build a sink and 4 inch tall back splash into the counters.

Sink Measurements

Counter Measurements

With the details nailed down, they told us three weeks before they’d be ready.  A week and two days later, they called saying the counters are finished and ready for pick up.  What a pleasant surprise.  Ben picked them up and paid the $1200 and installed the two pieces.

Pool-House-Kitchen-Stainless-Countertops-from-Door

Though we initially considered a small, bar sized sink, we decided to go for a full size.  Easier for washing, or we can fill it with ice as a cooler when we have people over.

Pool-House-Kitchen-Stainless-Countertops-Sink-and-Range

Obviously, the faucet and drain aren’t fully hooked up, but it’s enough for us to install the remaining batten strips.

Pool-House-Kitchen-Stainless-Countertops-and-Sink

A horizontal strip will butt up to the steel back splash top, with the vertical battens terminating into that piece for a seamless look.

Pool-House-Kitchen-Stainless-Countertops-Sink-and-Faucet

We’ve been so happy with the stainless counters in our master bath and the laundry room that these were an easy decision.

Pool-House-Kitchen-Stainless-Countertops-Faucet

The one inch thick back splash top is a nice, custom detail that adds a finishing touch.

Pool-House-Kitchen-Stainless-Countertops-Sill-Detail

The contrast of the shiny stainless and the warm walnut is perfect in my book, which can only get better once the walls are painted white.

Pool-House-Kitchen-Stainless-Countertops-Overall

Now that the counters are in, we can face the cabinets, including a support piece across the sink front, and build doors.

Pool-House-Kitchen-Stainless-Countertops-Installed

We’re getting so close to functional and can’t wait to have our first pool party!

Tips for Cutting Marble and Placement of a Wall Faucet

Between several projects this weekend, Ben made time to cut the marble remnant we picked up in January.  At roughly three feet wide by 50 inches tall, the size was perfect for our half bathroom counter and a slab back splash.  It wasn’t in perfect condition, with blue tape and a red circle noting scratches or tiny surface chips.

Pool-House-Bath-Marble-Slab

Even so, we knew we could make it work.  Before we could even get to the install point, I did a lot of measuring and number crunching to determine the faucet placement.  This is the first wall mount faucet we’ve installed, and it’s an entirely different process.  With a traditional deck mount faucet, you only need to know how many holes (1 to 3) and whether it’s mounted to the counter or the sink.

Our Humble Abode Blog Master Bathroom Vanity

A wall mount faucet is more like a shower control, hidden in the wall, so the height of every element determines the faucet height.  To place our faucet, we had to determine: the gap between the floor and shelf+the space between the shelf and walnut band+the height of the wooden walnut+the counter thickness+the sink height+the space between the top of the sink and bottom of the faucet spout.

Pool-House-Bath-Determining-Wall-Faucet-Height

It was a lot of marking on walls, mock hand washing, and heaps of second guessing.  Once closed up, that’s it.  No changes from there on out, so no pressure.

With the vanity frame built, we got started on the marble.  Using a masonry blade in a circular saw, Ben cut the marble pieces to size as well as a rough square for the sink drain.  The sink hides it, so it didn’t have to look good.

Pool-House-Bath-Marble-Counter-Installed

The back splash was a bit trickier, as we had two holes to cut and very little wiggle room.  And no material for a re-do if it was wrong.  Ideally we would have used a diamond tip hole saw, but didn’t have one in the two sizes we needed.  We made do with a standard hole saw, which worked fine, but took a little longer.  After a test fit, it wasn’t quite perfect, so Ben made slightly wider holes.

Pool-House-Bath-Marble-Backsplash-and-Sink-Installed

Second time was the charm and he installed the spout and handle to finish it off.

Pool-House-Bath-Marble-Backsplash-Installed

With the counter top cut, we had just over 16 inches of marble left.  We decided to use the rest to create an over-sized, statement making back splash.

Pool-House-Bath-Marble-Backsplash-Sink-Detail

Between the sleek faucet and the extra tall slab, this should be a breeze to keep clean.

Pool-House-Bath-Marble-Backsplash-Faucet-Detail

That’s all great, but how did we hide the scratches?  I’m glad you asked!  I love the look of honed marble, so we sanded the entire surface, first with 60 grit, followed up with 120 grit paper.  It takes off the sheen and makes any imperfections nonexistent or noticeable only if pointed out.

Pool-House-Bath-Marble-Backsplash-Sheen-Detail

I can’t help wandering in and sneaking a peek.  It’s just as beautiful and luxurious as I’d hoped it would be.