
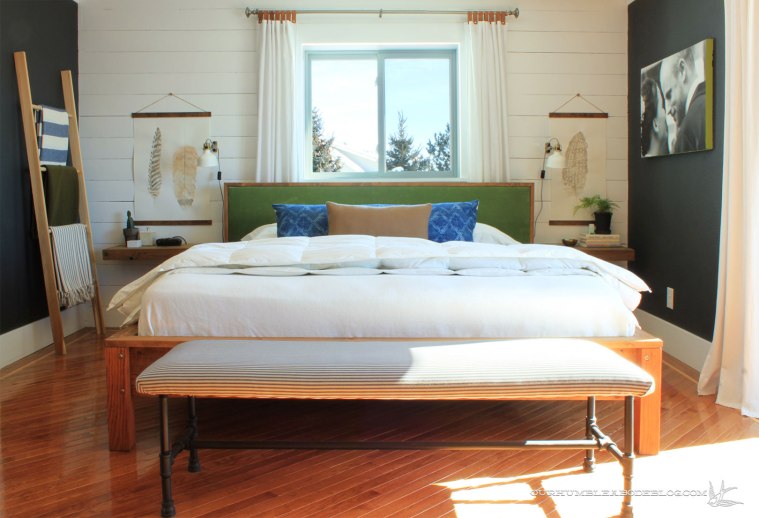
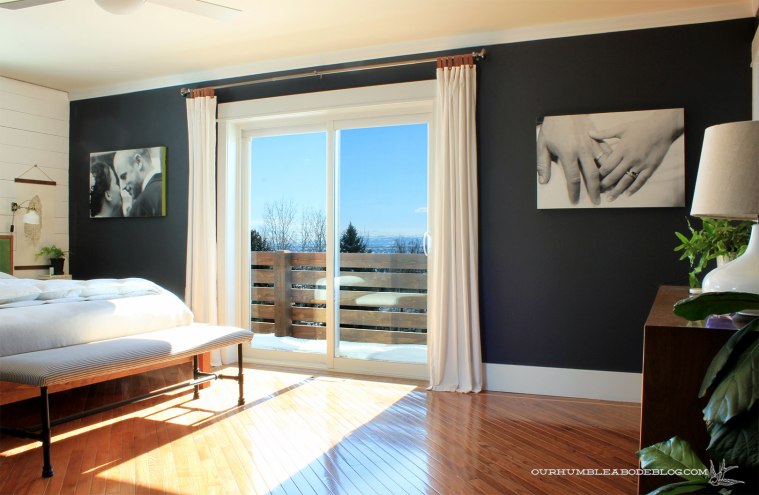
Our master bedroom is over-sized, measuring a normal 13 feet wide, but just under 19 feet long. It’s sized to have a small seating area directly ahead of the entrance, along the shared bathroom wall. Which is what we set up when we moved in using a left over bench.

It wasn’t ideal, but I patiently waited for the perfect vintage dresser to replace the bench. Stalking Craigslist paid off when I brought home the dresser of my dreams.

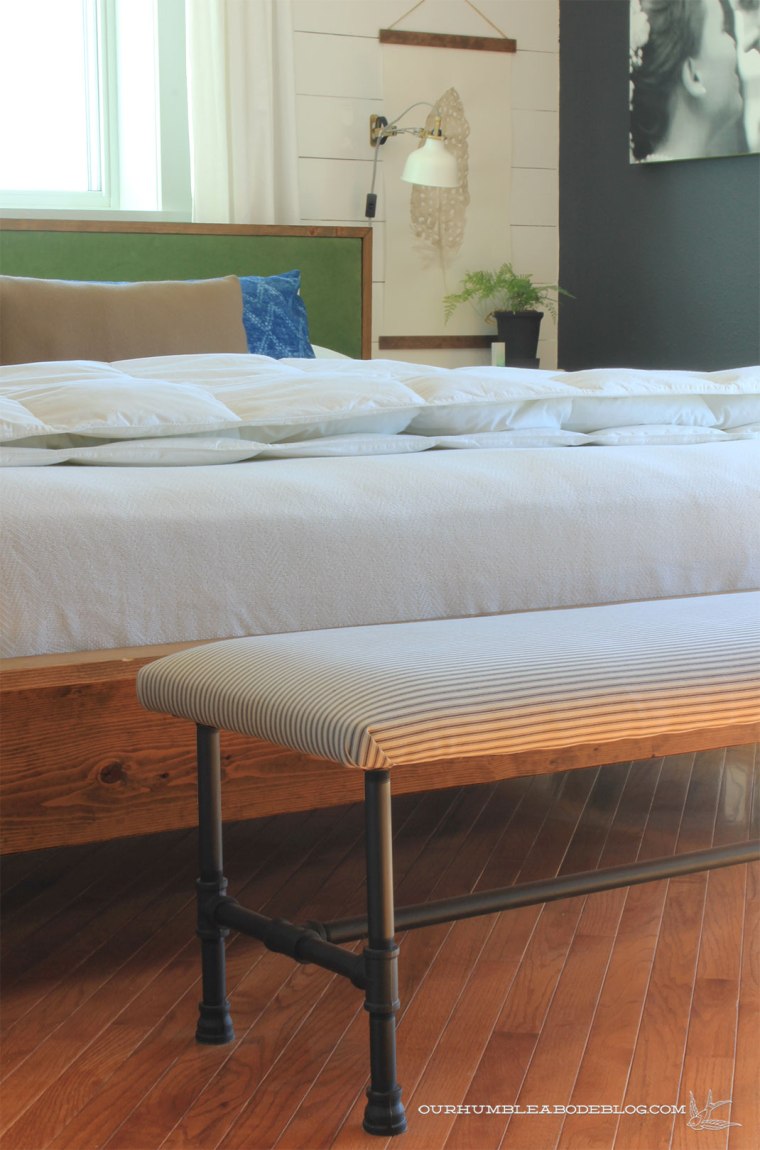
After building our king bed, we had a slightly too large space between the bed and dresser. Just enough room for a bench.

As usual, we took the DIY route and made a 60 inch long by 19 inch wide bench, with a base made from galvanized pipe.
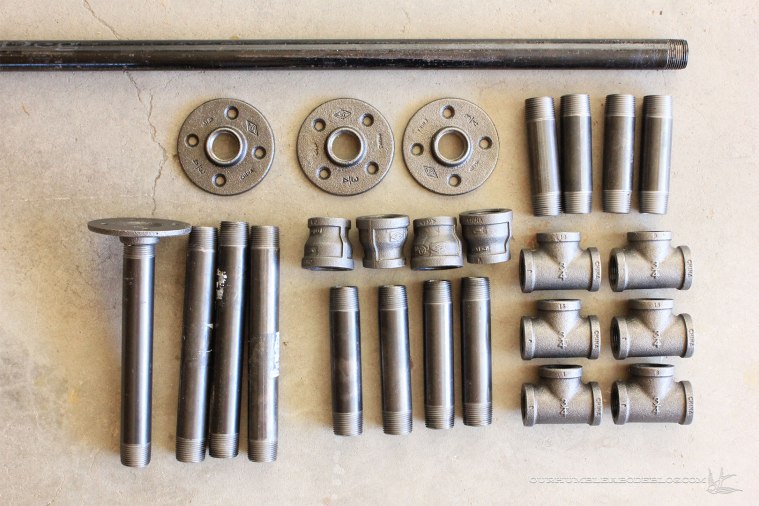
Crunching numbers and a trip to Home Depot later, we returned home with:
1 54 inch long section of pipe (cut and threaded at the store)
4 7 1/2 inch long pieces of pipe (cut and threaded at the store)
4 4 inch long galvanized nipples
4 3 inch long galvanized nipples
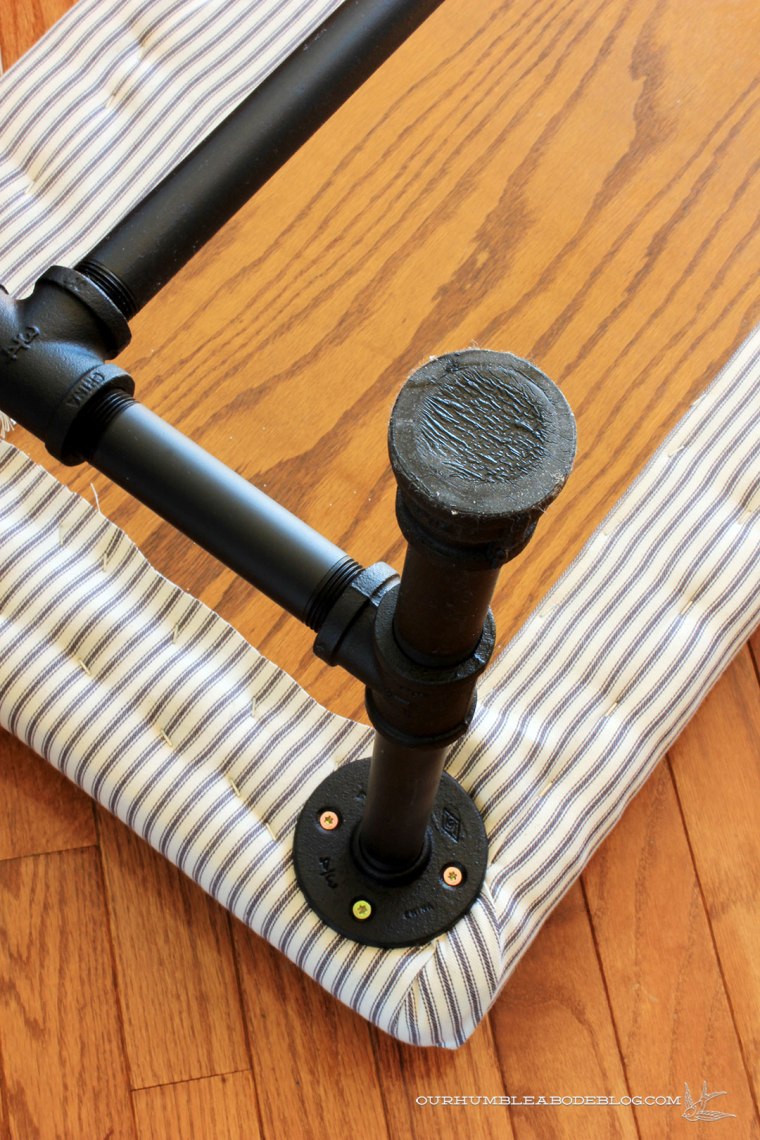
6 3/4 inch diameter galvanized tees
4 3/4 inch galvanized floor flanges
4 1 inch to 3/4 inch galvanized reducing couplings
1 package of black rubber adhesive pads
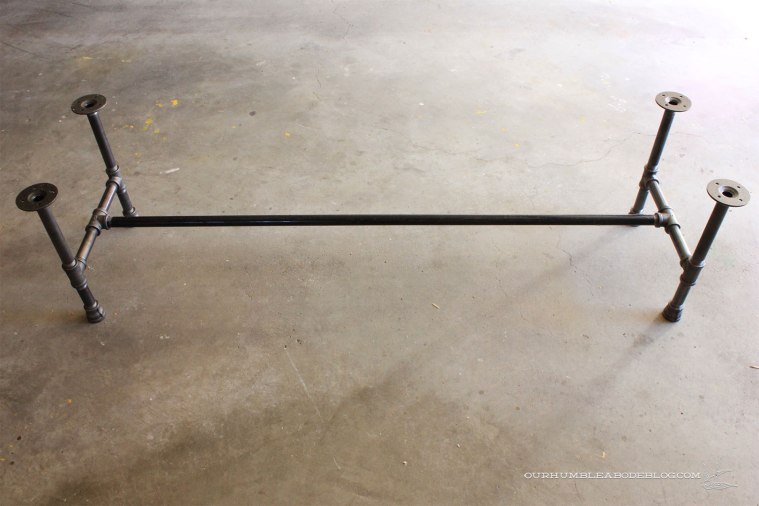
Before assembling, I cleaned the pipes with mineral spirits to clean off the manufacturing oil that coats the surfaces. Then, started screwing the pieces together. All 4″ pieces into either side of two of the tees. A tee and reducing coupling on each end of the 3″ sections. A floor flange on one end of the 7 1/2″ pipes.

To complete the leg assembly, first screw the tees into the horizontal bars. Follow up with the long section with the floor flange to create two H shaped leg sides.

Attach the center bar, tighten everything up, and spray paint to match your decor.
With the base dry, we were ready to make the top. We added two inches on the depth and three inches past each end of the length.
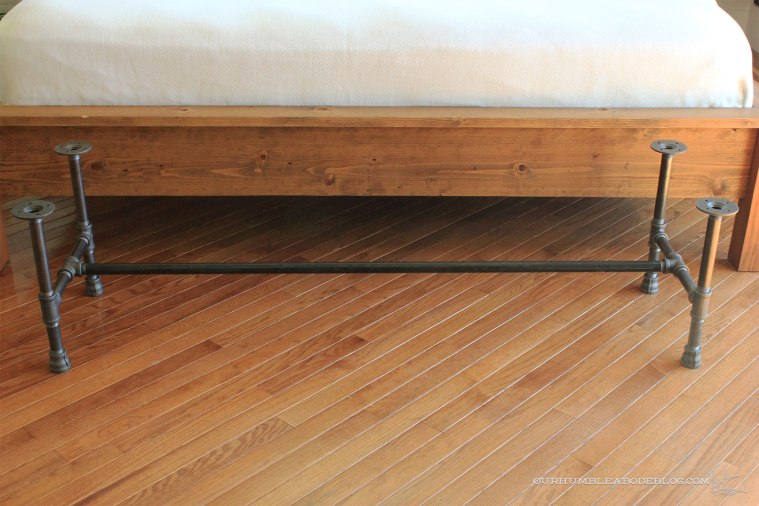
For a really sturdy top, we screwed two pieces of plywood together before wrapping both in a thin foam. I found a thick ticking stripe fabric to wrap the top with, careful to keep the lines straight. Adding black pads to the base prevents unnecessary scratches, but the sticky rubber also keeps the bench from sliding around on our wood floors.
The bench is the perfect perch to put on socks, or to toss the extra pillows at night.
There’s still a fair amount of floor space between the bench and dresser, but each piece has a purpose.
What do you think of bedroom sitting arrangements? Do you have a tricky room or floor plan to work with?

Do you have an estimate of the cost? This bench, without the padding and fabric, might solve an outdoor problem for me.
I love this bench so much! My husband built me a coffee table for Mother’s Day a few years ago and it has a very similar base. http://www.tazandbelly.com/2016/08/diy-concrete-pipe-fitting-coffee-table.html
I always like a bench at the end of the bed. I use it at night for my lounging hoodie and the extra blanket. And it comes in handy for extra seating in other places in the house when you need it.
Yours turned out great. Ticking is a classic good look.
Wow, what a lovely bench with fun fabric and cool materials. We have a long, narrow LR, which is tricky to furnish and design, partly because one precious interior wall has to have an upright piano, and it’s a room that we also need to pass through. Oh, and we have all hand-me-down furniture that wasn’t selected for this space, ha! Anyway, I really like the bench – thanks for sharing!