Modern Built in Planters

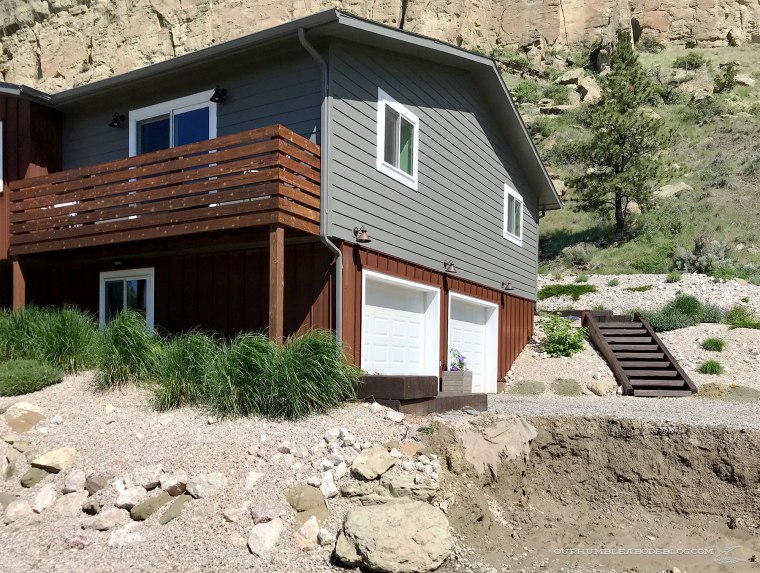
We’re taking advantage of this warm but not too warm spring weather with an outside project that has never been a priority.  Apparently I don’t have many pictures of the cobbled together rock planter, seen on the right, likely because I’ve always hated it.

Front-Yard-Hill-from-Driveway

It divides the flat parking and the steep driving sides of our driveway, with nearly a four-foot height difference between the two.  The planter is needed to help bridge the gap of elevation difference, but is difficult to navigate around with bigger vehicles.  A native Ponderosa Pine grew in the planter, taking up even more space.  We did like the height and interest it added, but weren’t sad when it died from beetle damage and had to be cut down.

Stained-Balcony-from-Walkway

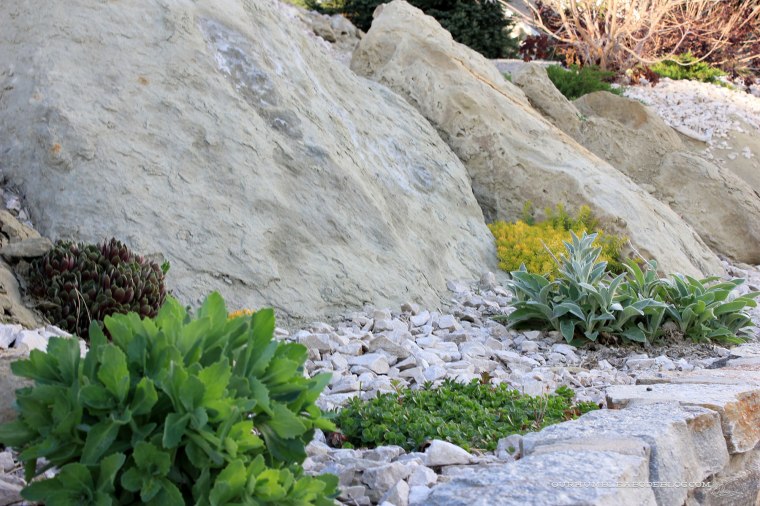
Aside from the too large size, the planter construction was an ugly cobbled together mixture of leftover rocks.  Sandstone boulders from the property, left over landscape blocks, and thin sandstone stacked together made a wobbly structure.Peonies-and-Boxwood-by-Front-Walk

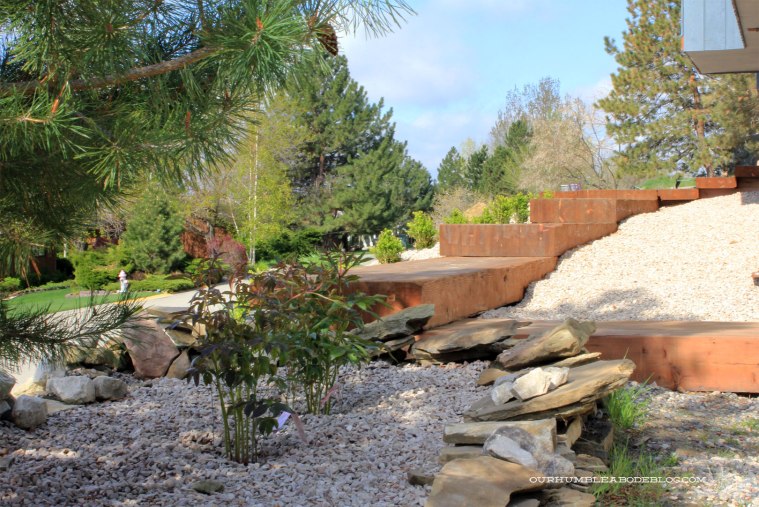
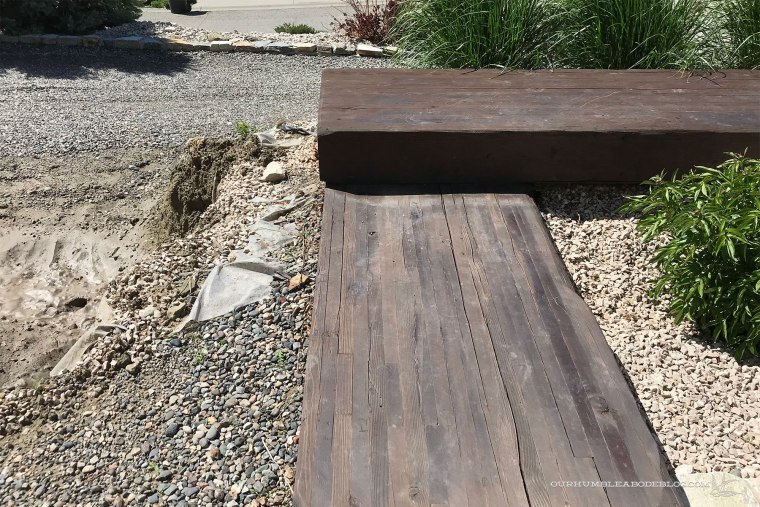
Earlier this spring, I transplanted the peonies that were in here and starting pulling out the loose rocks.

Rock-Planter-Before-Removing

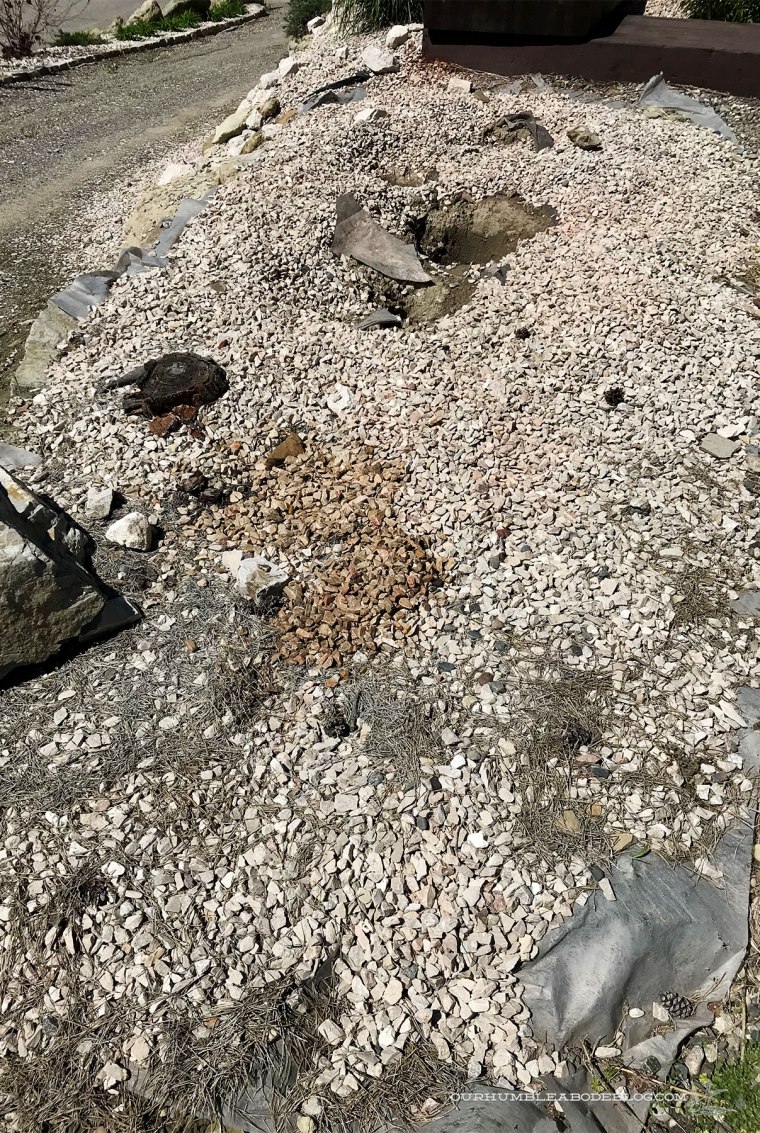
In order to prep for the new planter, Ben used the bobcat to dig out the big rocks.

Removing-Rock-Planter-Bobcat

He dug down four feet to create an area to set the new planter in, which will get back filled after.

Rock-Planter-Removed-Culvert-Ready-wuth-House

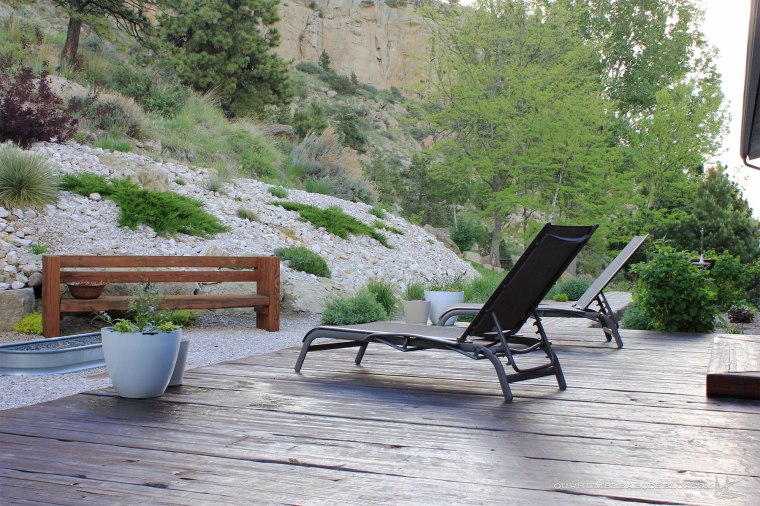
We intentionally left a 30 inch space between the wooden walkway and the future planter.  I’ll add plants to fill the gap, but also trail down the front slope.

Rock-Planter-Removed-Culvert-Ready-by-Walkway

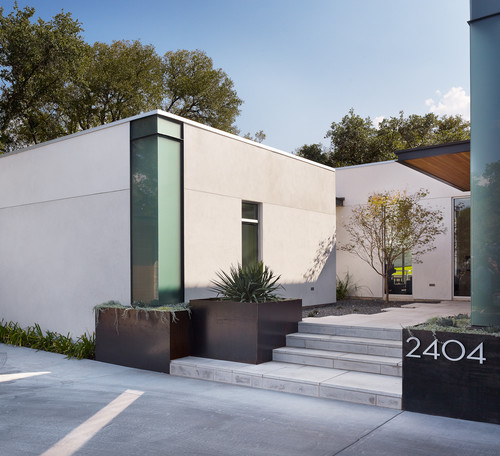
So what type of planter are we installing?  Well, we kicked around several options.  Maybe a square plate steel design, similar to these:

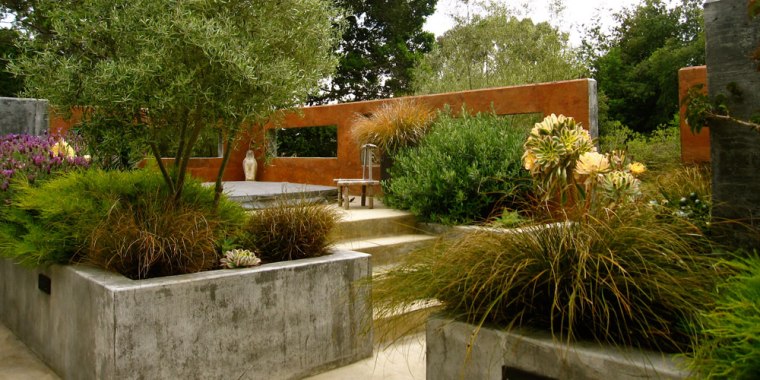
Or a poured concrete shape, like this:

Kathleen Shaefer Landscape

Perhaps even a horizontal wood one to mimic the balcony and deck railings.

Contemporist Built in Planter

All would be great, but I decided I wanted something softer and not angular; something round.  Preferably something with thin walls to allow as much planting space inside, without taking up more of the driveway.  Ben suggested a section of culvert, and though it seems strange, I really like it.

Culvert Planter

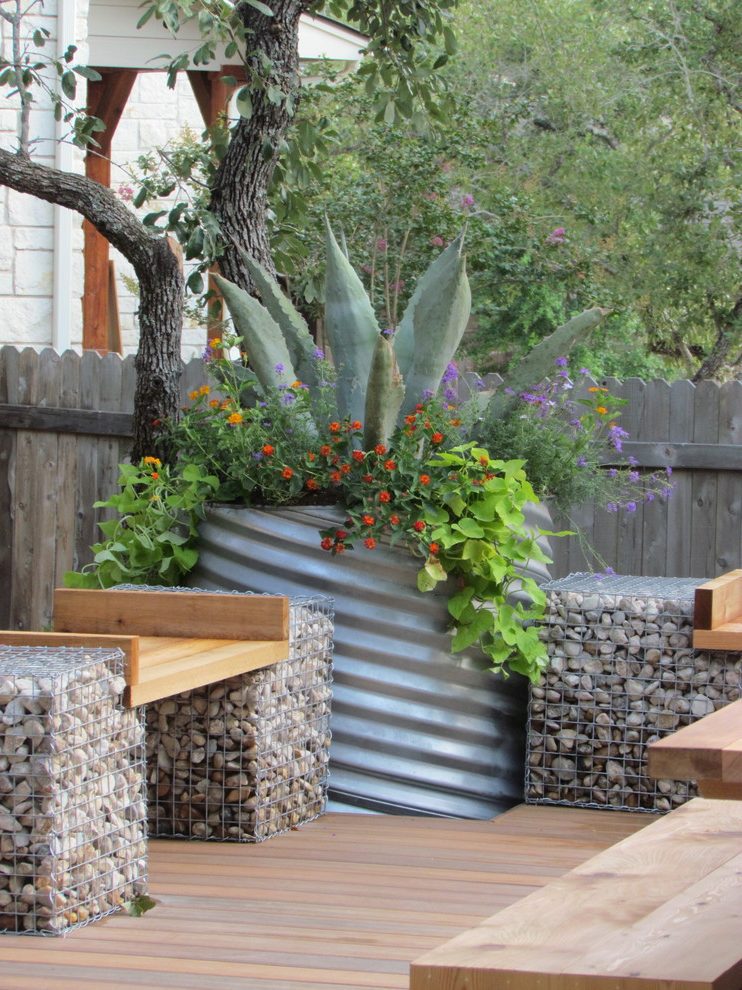
I prefer the parallel grooves compared to the angled screw thread pattern.  To better blend with the house materials, I hope to rust the metal to bring a bit of the rust steel to the planter.

Horizontal Culvert Planter

Inside, I want to add a compact tree and surround the base with lavender to greet guests (and us) with that beautiful scent.  For now, we wait for our culvert section to come in.  Until then, I’ll be searching for trees, but I’m leaning toward an Ivory Silk Tree Lilac or an Amur Maple tree.  I’d love to hear your tree suggestions, keeping in mind we are zone 4 and want something that maxes out around 20 feet tall.

Our Spring View

Spring is easily my favorite time of year.  It’s glorious to get out of the house after a long winter; seeing everything come to life again is a fresh start.  I’ve been spending as much time as possible outside, transplanting a few plants, pulling weeds, and filling my empty pots.

May-2018-Garden-Growing-Road-Catmint

Back when we started landscaping our steeply sloped lot, we spread a lot of limestone rock.  Since then, I’ve slowly added plants throughout, and with several years to grow, things are finally filling in.  The Russian sage tends to spread, so I pull what I don’t want and leave the rest.  Free plants are a win in my book.

May-2018-Garden-Growing-Entry-from-Street

Along the road frontage, I’ve tucked a mix of succulents into gaps between the big boulders.  Lamb’s ear and lavender are drought tolerant, but form big, mounding piles that cover a lot of ground for one plant.

May-2018-Garden-Growing-Succulents

The row of Stella de Oro daylilies are filling in along the driveway, softening the edge.  Three Royal Purple Smoke Trees have tripled in size since planting, but are slow to fill out.

May-2018-Garden-Growing-Driveway-Plants

For a nice welcome at the top of the driveway, a clematis sits in a pot between the two garage doors.

May-2018-Garden-Growing-Garage-Planter1

Depending on how it does in the planter, I’ll build a bigger trellis, but this small one works for now.

May-2018-Garden-Growing-Garage-Planter

Lining the front walkway, the row of Karl Foerster grasses will soon be at eye level, creating a living fence of sorts.  The swish sound in the wind combined with the nearby lavender scent is the perfect summer calm.

May-2018-Garden-Growing-Front-Walk

This spring, while checking out plants at Lowe’s, I saw two concrete pots for $28 each and quickly loaded them in the cart.  A lilac plant adds height, with succulents and a purple sweet potato vine to fill in.  Come fall, I’ll transplant the lilac near the top of the back hill.

May-2018-Garden-Growing-Front-Pots

Off to the side of the stone path, I set a Shepard’s hook into the rock with a hanging basket of succulents for a somewhat sculptural interest.

May-2018-Garden-Growing-Hanging-Plant

My first plant additions are thriving, though I now wish I had added more variety,  for more height and color.

May-2018-Garden-Growing-Front-Detail

The view from the back stairs is my favorite.  What looked like this in 2013, right after adding all of the limestone:

Back-Yard-from-Stairs

Now looks like this:

May-2018-Garden-Growing-Stair-Plants

A viburnum proudly stands nearest the stairs, with a succulent below.  I think the deer carried a few little pieces of another over, which is a happy little accident that I let grow.

May-2018-Garden-Growing-Stair-Plants-Detail

Spring blooming viburnum is a great pair to the hydrangea near the deck.  Unfortunately, it had a terrible aphid problem last year that I could only fix by cutting off the new growth.

May-2018-Garden-Growing-Viburnum

Viburnum tend to get leggy, so it worked to keep it compact, but also decreased the amount of blooms.

May-2018-Garden-Growing-Back-Deck

Off the right end of the stairs is a cut flower garden with a mix of peonies, coreopsis, daylilies, hyssop, and a honeysuckle training on an orb.

May-2018-Garden-Growing-Orb

Catmint have grown so, so well that they dot throughout our property.  Soon, they’ll be covered in unruly purple blooms and the bees will love it.

May-2018-Garden-Growing-Back-Deck-Detail

Another great grower is lavender, with the bonus of the amazing smell.  Angelina stonecrop has spread into the crannies of large rocks, carrying chartreuse color all around.

May-2018-Garden-Growing-View-from-Back-Deck

We haven’t put the table back on the deck, but the lounge chairs are out.  Our kids especially love these.

May-2018-Garden-Growing-Back-Deck-Chairs

Flanking the chair are (chipping) pots loaded up with purple butterfly bushes and lime green sweet potato vines.  Though they look pathetically small right now, I hope they’ll fill in as the seasons progress.

Stainless Steel Counter Tops

Between the teacher lounge makeover and building a pergola for a client, we haven’t spent much time in the pool house.  That doesn’t mean we’re not excited to make progress, but we did check one more piece off the list.

Pool-House-Kitchen-Walnut-Shelves-with-Range-from-Door

We built basic cabinet boxes a few weeks ago, which allowed us to place our stainless steel counter top order.  Ben measured everything and I transferred the measurements to a digital format to hand off to the fabricator.  For easy cleaning, we had them build a sink and 4 inch tall back splash into the counters.

Sink Measurements

Counter Measurements

With the details nailed down, they told us three weeks before they’d be ready.  A week and two days later, they called saying the counters are finished and ready for pick up.  What a pleasant surprise.  Ben picked them up and paid the $1200 and installed the two pieces.

Pool-House-Kitchen-Stainless-Countertops-from-Door

Though we initially considered a small, bar sized sink, we decided to go for a full size.  Easier for washing, or we can fill it with ice as a cooler when we have people over.

Pool-House-Kitchen-Stainless-Countertops-Sink-and-Range

Obviously, the faucet and drain aren’t fully hooked up, but it’s enough for us to install the remaining batten strips.

Pool-House-Kitchen-Stainless-Countertops-and-Sink

A horizontal strip will butt up to the steel back splash top, with the vertical battens terminating into that piece for a seamless look.

Pool-House-Kitchen-Stainless-Countertops-Sink-and-Faucet

We’ve been so happy with the stainless counters in our master bath and the laundry room that these were an easy decision.

Pool-House-Kitchen-Stainless-Countertops-Faucet

The one inch thick back splash top is a nice, custom detail that adds a finishing touch.

Pool-House-Kitchen-Stainless-Countertops-Sill-Detail

The contrast of the shiny stainless and the warm walnut is perfect in my book, which can only get better once the walls are painted white.

Pool-House-Kitchen-Stainless-Countertops-Overall

Now that the counters are in, we can face the cabinets, including a support piece across the sink front, and build doors.

Pool-House-Kitchen-Stainless-Countertops-Installed

We’re getting so close to functional and can’t wait to have our first pool party!

A Teacher Lounge Makeover

Over the last few months, I’ve been working on a side project: a teacher lounge update.  Some days involved planning and shopping, while others involved sewing and painting.  The final install happened over the weekend, when a friend and I loaded in everything we’d been stockpiling.  First, let’s look at the before:

Teacher-Lounge-Before-End-Wall

Everything was a mish mash of garage sale finds or left over school furniture.  Of course, there’s nothing wrong with garage sale stuff, but it all served just one purpose and took up extra floor space.  Over on the opposite side, there’s a built-in cabinet and sink, a refrigerator, and a door to a supply room.  Please note the lovely wallpaper border with cans and lemons.

Teacher-Lounge-Before-Fridge-Wall

Freeing up more floor space while giving more storage was the main goal, with bonus points for style.  Oh, and we had a $1000 budget to make it all happen.  To save money, we kept the full-sized refrigerator, drink fridge, and chest freezer.  The tables and chairs were okay, so we kept those too.  The sofa, bakers rack, and random desks/tables left to make room for a full wall of cabinets.  To maximize the budget, we bought two unfinished base cabinets from Home Depot for $157 each.

Teacher-Lounge-Base-Cabinets-at-Store

For a dose of color, we painted these Sea Serpent from Sherwin Williams.

Teacher-Lounge-Base-Cabinets-Painting

Ben built us a 12 foot long laminate counter top and I stained twelve-foot long 2 by 12 pine boards, to create open shelves.

Teacher-Lounge-Building-Countertops

Before, the built-in cabinet had bypass sliding doors that no longer slid smoothly.  After removing the doors and tracks, I painted the cabinet to match the new ones.

Teacher-Lounge-Painting-Built-in-Cabinet

For a little flair, I chose to sand and stain the shelves.

Teacher-Lounge-Painted-Built-in-Cabinet-with-Shelves

Finally, last Thursday, we got to work in the room, giving the walls a fresh coat of light gray paint, Campfire Ash from Behr.

Teacher-Lounge-End-Wall-After-Paint

Already, the room looked bigger.  After painting, we quickly moved the furniture into place, snugging the table ends against the wall.  Straightening the refrigerator left enough room for the chest freezer.

Teacher-Lounge-Fridge-Wall-After-Paint

The old sofa had seen better days, so I spruced up a mid-century modern beauty I had planned to use in the pool house, but no longer needed.

Teacher-Lounge-Refinished-Sofa

Allowing the paint to dry on Friday let us get in on Saturday to start installing the cabinets and shelves.  It only took a few hours with Ben and allowed us to use the vertical space that previously was ignored.  The small drink fridge tucked neatly between the base cabinets.

Teacher-Lounge-Mid-Set-Up2

Teacher-Lounge-Mid-Set-Up

That evening, we organized all the drinks, snacks, utensils, plates, and the other goodies.

Teacher-Lounge-After-End-Wall

Teacher-Lounge-After-Fridge-Wall

A cabinet full of dishes is equally beautiful and functional.  We’re looking forward to seeing other quotes pop up on that letter board.

Teacher-Lounge-After-Built-in-Cabinet

Baskets of snacks anchor the center of the two shelves, with extra dishes on either side.  Two matching microwaves allow multiple users to make lunch.  A few teachers asked for an ice maker, so we happily bought a counter top machine.

Teacher-Lounge-After-Cabinet-and-Shelf-Wall

In our quest to make the lounge feel more comfortable and homey, I created two botanical engineer prints to hang from the tack strip.  A big impact for less than ten bucks is great for our slim budget.  Faux succulents add a much needed look of life, without the hassle of someone having to actually take care of it.

Teacher-Lounge-After-Art-by-Tables

A parent donated the wood art above the sofa and it’s a perfect addition.

Teacher-Lounge-After-Arranged-Tables

Our biggest difficulty was the lack of outlets, so we had to get creative with our arrangement.  Placing the Keurig, coffee pot, and jar of K cups on the table end created another work zone to prevent cramped working spaces.  Though the teachers knew we were updating the room, we kept them out while working on it to make it a surprise.  Monday morning, they were surprised to see the new space and all gave rave reviews.  It certainly functions and looks better, but that starting point made nearly anything an improvement.  Teachers work so hard, we are really happy to give them a space that shows our appreciation.

Tips for Cutting Marble and Placement of a Wall Faucet

Between several projects this weekend, Ben made time to cut the marble remnant we picked up in January.  At roughly three feet wide by 50 inches tall, the size was perfect for our half bathroom counter and a slab back splash.  It wasn’t in perfect condition, with blue tape and a red circle noting scratches or tiny surface chips.

Pool-House-Bath-Marble-Slab

Even so, we knew we could make it work.  Before we could even get to the install point, I did a lot of measuring and number crunching to determine the faucet placement.  This is the first wall mount faucet we’ve installed, and it’s an entirely different process.  With a traditional deck mount faucet, you only need to know how many holes (1 to 3) and whether it’s mounted to the counter or the sink.

Our Humble Abode Blog Master Bathroom Vanity

A wall mount faucet is more like a shower control, hidden in the wall, so the height of every element determines the faucet height.  To place our faucet, we had to determine: the gap between the floor and shelf+the space between the shelf and walnut band+the height of the wooden walnut+the counter thickness+the sink height+the space between the top of the sink and bottom of the faucet spout.

Pool-House-Bath-Determining-Wall-Faucet-Height

It was a lot of marking on walls, mock hand washing, and heaps of second guessing.  Once closed up, that’s it.  No changes from there on out, so no pressure.

With the vanity frame built, we got started on the marble.  Using a masonry blade in a circular saw, Ben cut the marble pieces to size as well as a rough square for the sink drain.  The sink hides it, so it didn’t have to look good.

Pool-House-Bath-Marble-Counter-Installed

The back splash was a bit trickier, as we had two holes to cut and very little wiggle room.  And no material for a re-do if it was wrong.  Ideally we would have used a diamond tip hole saw, but didn’t have one in the two sizes we needed.  We made do with a standard hole saw, which worked fine, but took a little longer.  After a test fit, it wasn’t quite perfect, so Ben made slightly wider holes.

Pool-House-Bath-Marble-Backsplash-and-Sink-Installed

Second time was the charm and he installed the spout and handle to finish it off.

Pool-House-Bath-Marble-Backsplash-Installed

With the counter top cut, we had just over 16 inches of marble left.  We decided to use the rest to create an over-sized, statement making back splash.

Pool-House-Bath-Marble-Backsplash-Sink-Detail

Between the sleek faucet and the extra tall slab, this should be a breeze to keep clean.

Pool-House-Bath-Marble-Backsplash-Faucet-Detail

That’s all great, but how did we hide the scratches?  I’m glad you asked!  I love the look of honed marble, so we sanded the entire surface, first with 60 grit, followed up with 120 grit paper.  It takes off the sheen and makes any imperfections nonexistent or noticeable only if pointed out.

Pool-House-Bath-Marble-Backsplash-Sheen-Detail

I can’t help wandering in and sneaking a peek.  It’s just as beautiful and luxurious as I’d hoped it would be.