Pool House Progress: Slate Tile Floors

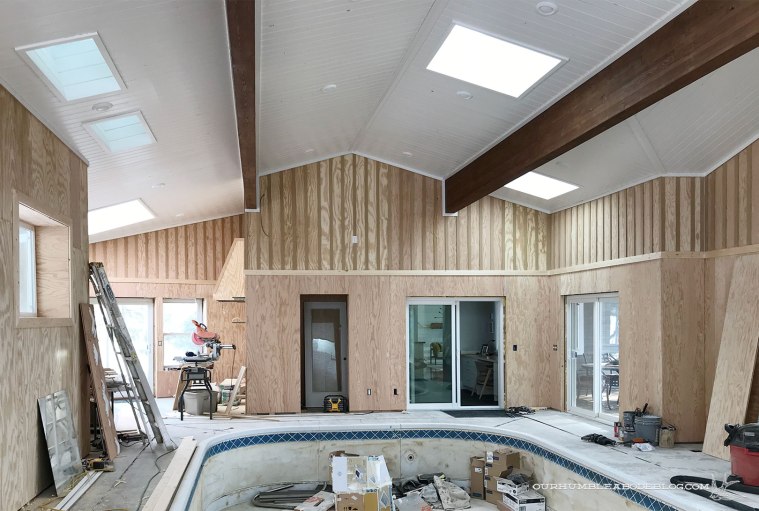
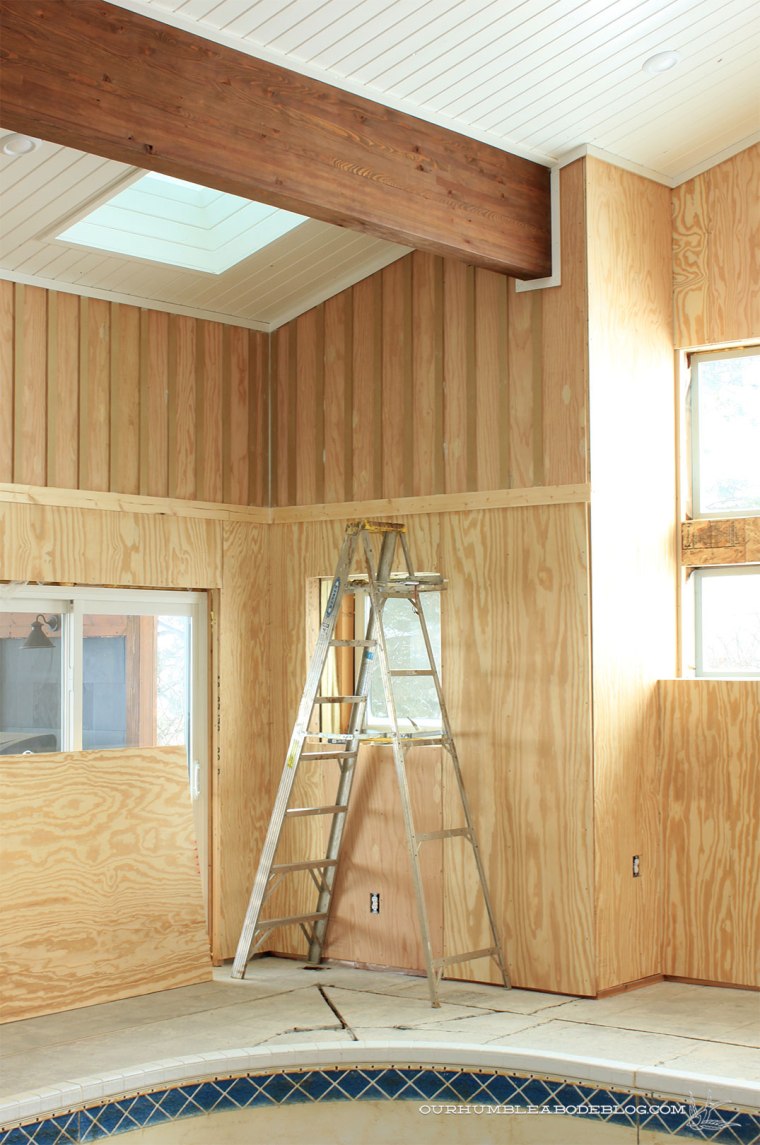
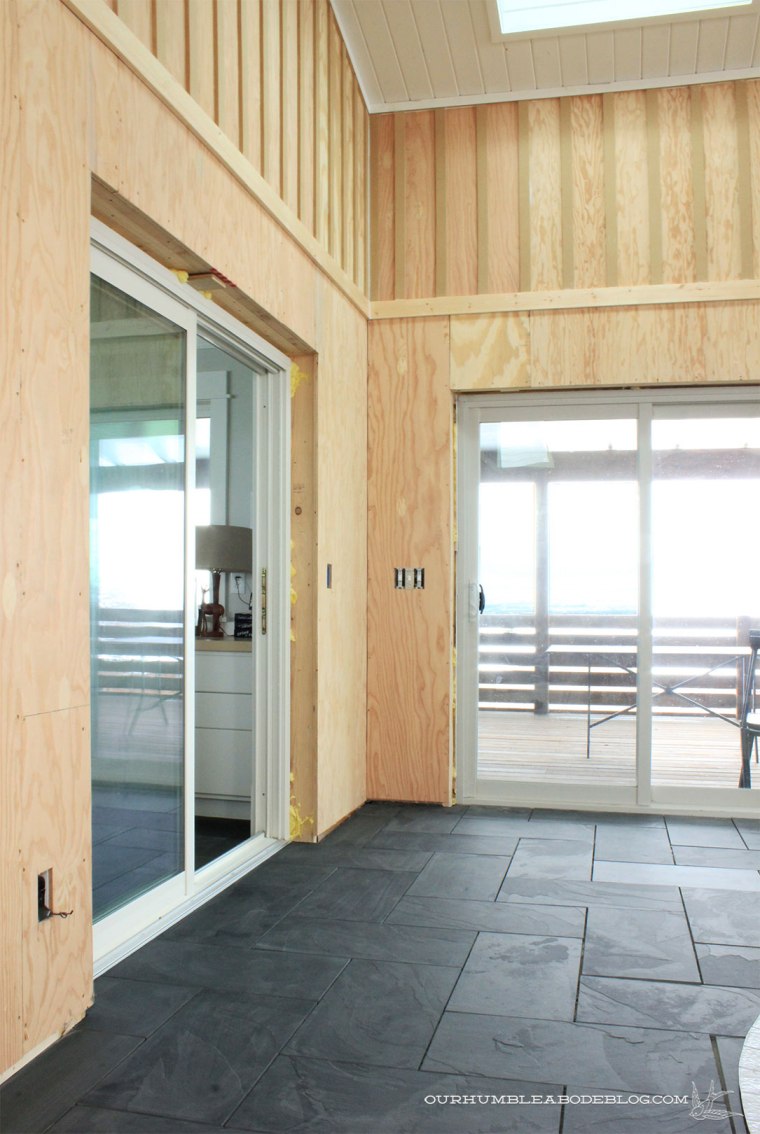
Last we shared of the pool house was the addition of the batten strips and framing out the vent hood.  Certainly progress, but there’s one big step to cross off the list before the walls can be completed.  Tiling the entire floor, or roughly 600 square feet.  Dun dun dunnnnn.  Though I have the easiest part of the process, carrying/opening boxes of tile, I was dreading this step.

We know from framing the walls that nothing is square in here, with the floors sloping up to two inches over the length of the space.  Luckily, not much phases Ben and on Saturday, he jumped right in.

For a continuous feel, we’re using the same slate tile and herringbone pattern as the kitchen.

Pool-House-Slate-Tile-Setting-Near-House-Door

One small difference is slightly wider grout lines.  Knowing the floors are a touch uneven, we decided on 3/8 inch grout lines (versus 1/16 inch in the kitchen) to help minimize discrepancies.

Pool-House-Slate-Tile-Setting-Near-Middle-Door
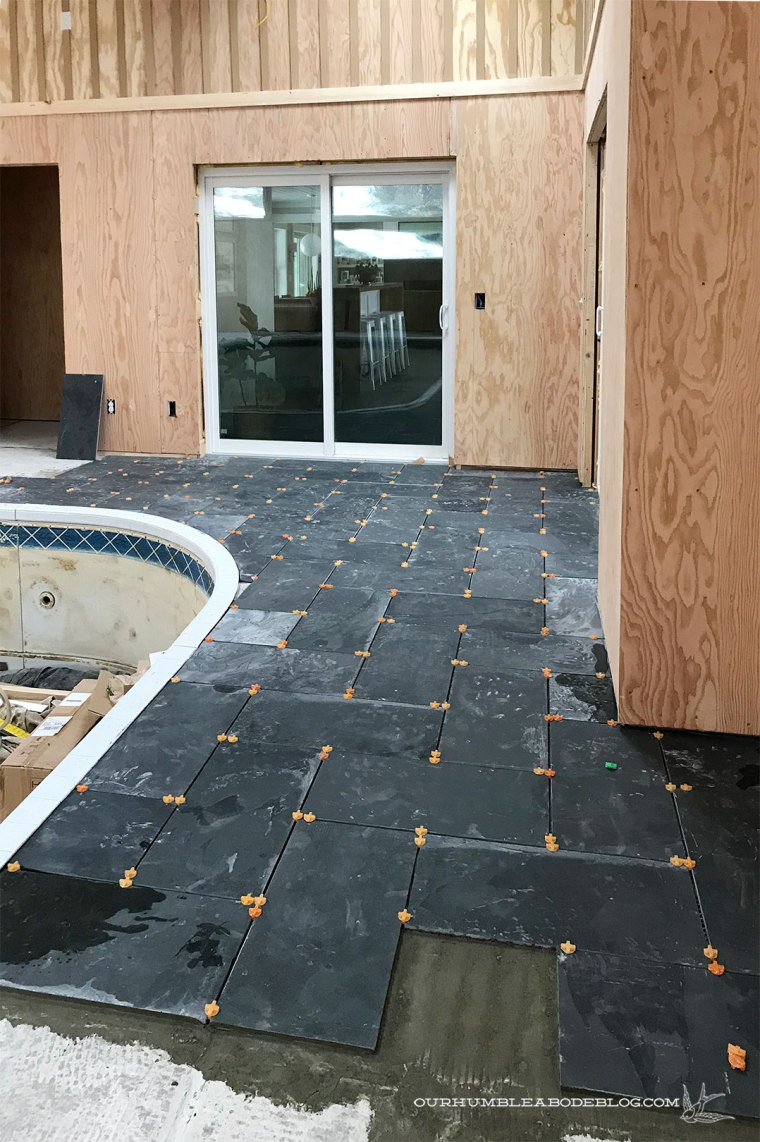
Working around the pool proved trickiest, until Ben built himself a marking jig.  Scraps of plywood set to the depth of the pool lip with a screw slightly through the top piece.

Pool-House-Slate-Tile-Pool-Edge-Scorer

The bottom strips slide along the inside edge of the pool, with the screw scoring the top of the tile, marking where to cut.

Pool-House-Slate-Tile-Pool-Edge-Scorer-Top.jpg

At the end of tile day one, Ben got roughly 1/4 or 1/3 of the space done.

Pool-House-Slate-Tile-Setting-Day-1

The next morning, the tile had set so we pulled out the spacers.  I followed up by washing the tile, scrubbing off any extra mastic.

Pool-House-Slate-Tile-Cleaning-Day-2

Obviously, grout is still to come.


Pool-House-Slate-Tile-Wall-Detail


Pool-House-Slate-Tile-Pool-Edge-Detail

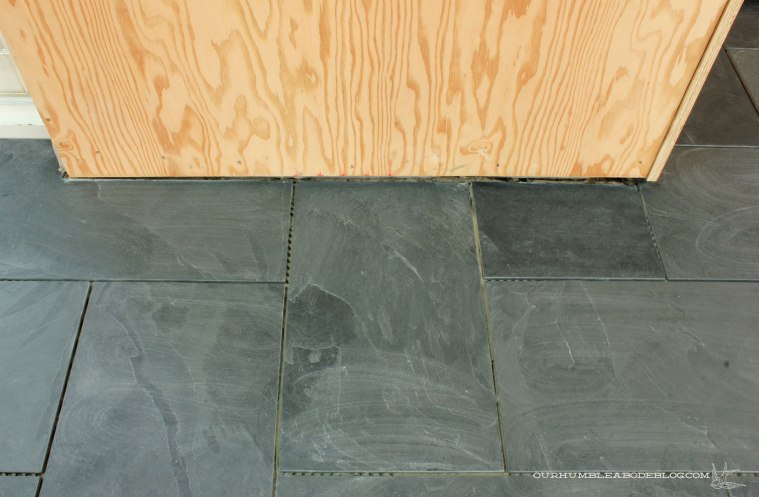
Having this tile in various rooms throughout our house, we know this tile is durable and the texture is naturally slip-resistant.

Pool-House-Slate-Tile-Toward-Front

Dark floors paired with (what will be) white walls will ground this bright space.

Pool-House-Slate-Tile-Toward-House

We still have at least several days of tile or tile related tasks in our future, but progress always feels good.

Over-Sized Lumbar Pillow DIY

Every week, I strip our bed and wash our white sheets and bath towels.  And every week, when making the bed, I searched for the small tag at the bottom (or top) of the fitted sheet.  Finally fed up with that, I ordered a set of Organic Harmony Sheets from West Elm and impatiently waited the delivery.

Ceiling-Fan-in-Master-Bedroom-Overall


When the UPS delivery arrived, I quickly ripped open the package, washed the sheets, and made the bed.

Oversized-Lumbar-Pillow-in-Master-Bed-From-Door


In the few days wait, I ran some errands and popped in JoAnn fabric.  I came across an indigo inspired fabric and bought a yard to sew up a new pillow.  Fabric in hand, I stopped into Wal-Mart and bought a basic body pillow for $9 and a 32 inch long zipper for three bucks.

Oversized-Lumbar-Pillow-in-Master-Overall

I love the simple look of one large lumbar pillow with a smaller one in front for contrast.  Fewer pillows to remove, but still high impact.  Even more so, a body pillow is super affordable.  Sometime in the near future, I’d like to sew a camel leather lumbar pillow, but the tan wool backing of another pillow works for now.

Oversized-Lumbar-Pillow-in-Master-Side

Though I do make our bed every morning, I usually don’t take the time to fold the top over, but the cute pattern makes it worth it.

Oversized-Lumbar-Pillow-in-Master-Pattern-Detail

But the real reason for the pattern is to have an obvious direction, taking the guess-work out of which side of the king sheet goes where.  If you’re in the market for new sheets and pillows, here are a few other options I considered.

Sheet-and-Pillow-Combinations

  1.  Organic Hand Drawn Stripe Sheet Set + Shibori Tye Dye Body Pillow + Pieced Leather Pillow Cover
  2. Bedford Navy Stripe Sheet Set + Fawn Body Pillow Cover + Evergreen Velvet Lumbar Pillow
  3. Nate Berkus Dotted Triangle Sheet Set + Boho Body Pillow Cover + Mongolian Faux Fur Lumbar Pillow
  4. Threshold Performance Sheet Set in Natural + Mud Cloth Body Pillow Cover + Green Velvet Lumbar Pillow


Where do you fall on the bed pillow count?  Are you the less is more type or the more is more type?  Do you have any bed making tips or tricks?

How To: Organize an Office

My little office sits just off the kitchen, with the door on the right (see that bit of trim?) leading to the pool house.  It’s not a huge or grand space, but it does everything I need.

Office-Organization-from-Kitchen

At least it does now.  The before was slightly bigger, shaped like an L, with a smaller door out to the pool.

New-House-Office-April-13
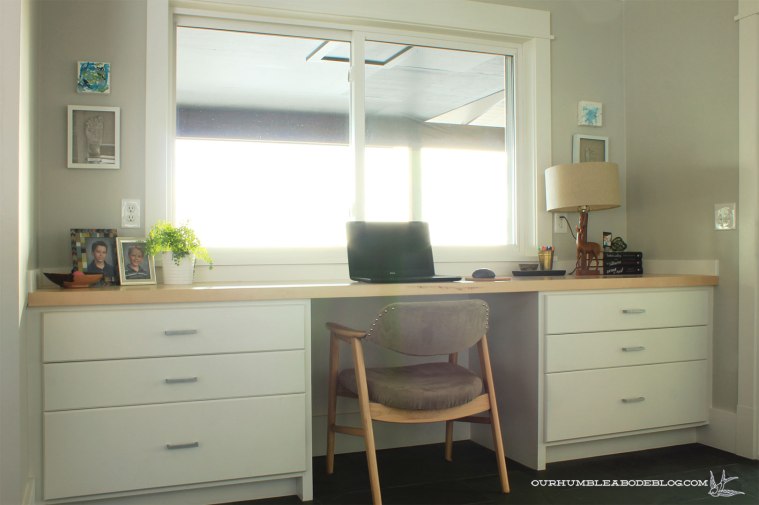
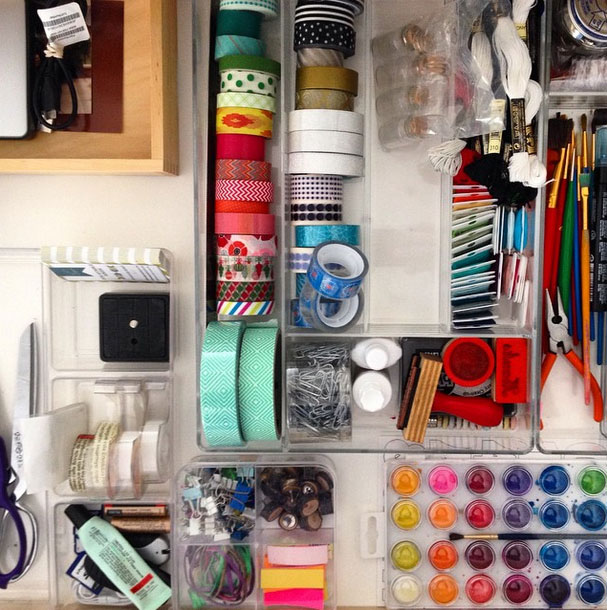
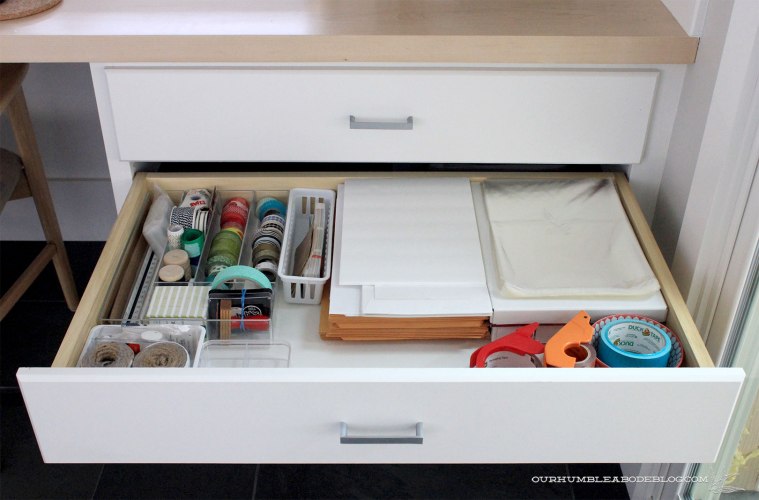
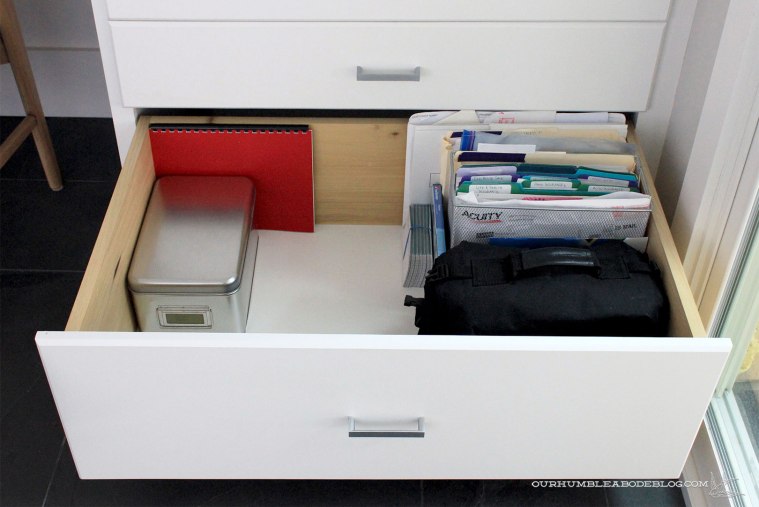
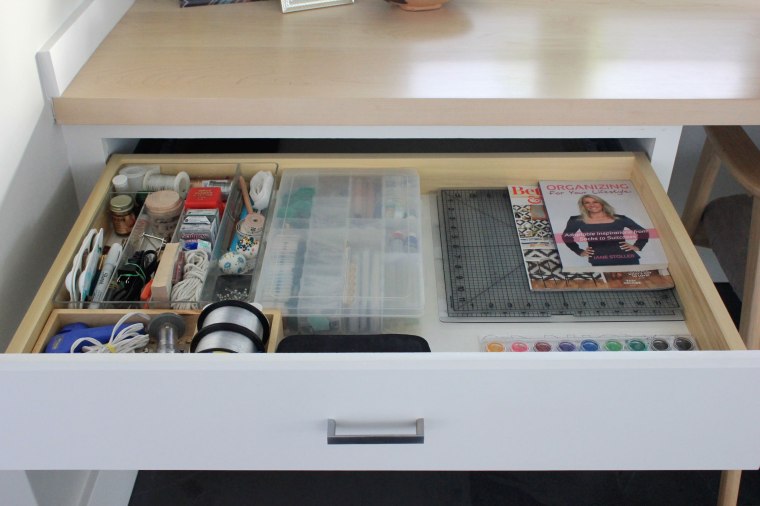
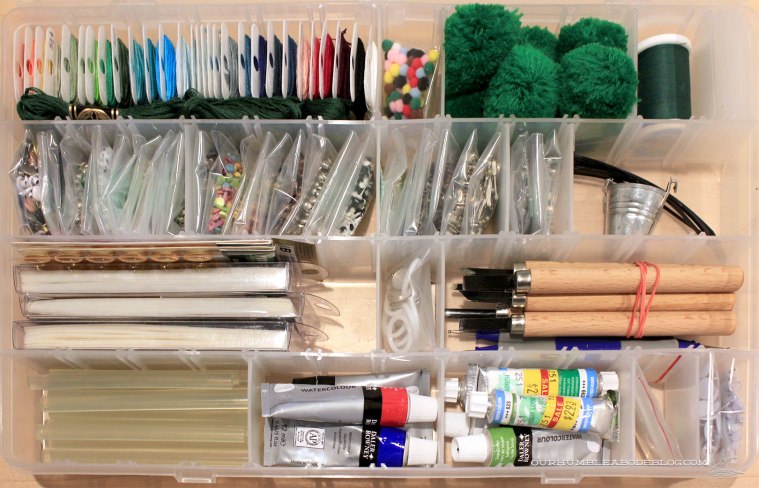
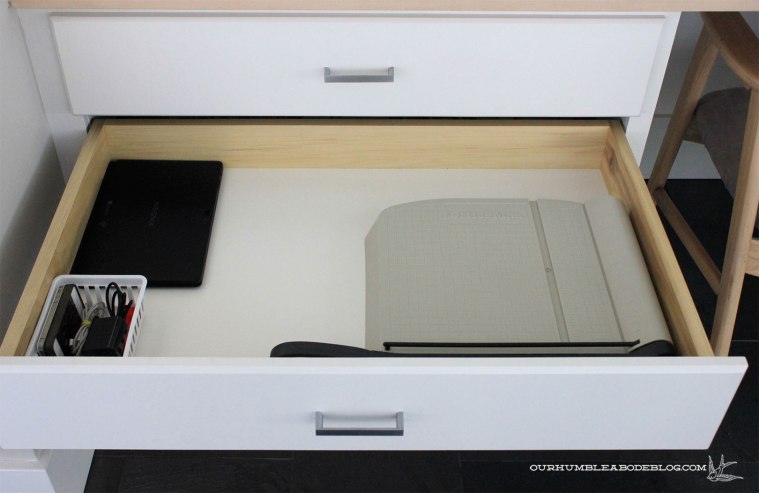
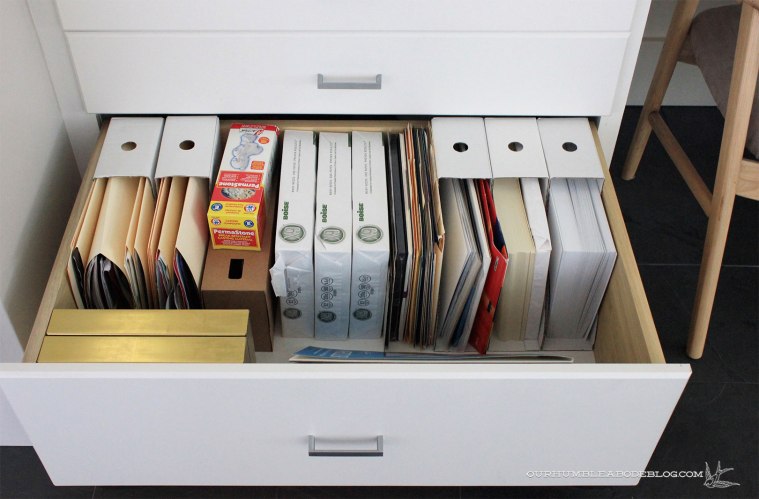
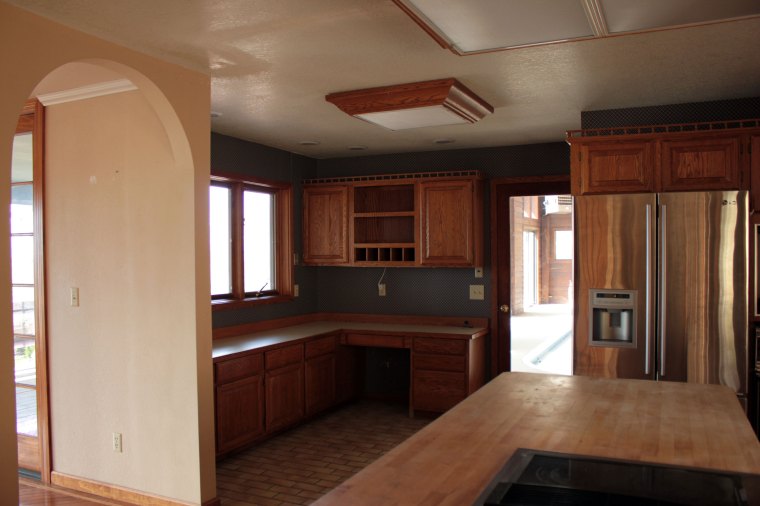
As an extension of the kitchen, we remodeled the office along with the kitchen.  Deep, wide drawers make organizing any room a dream, and I quickly filled each one up as soon as the office was functional again.

Organizing-Office-Drawers

My original placement worked just fine for almost two years, but I’ve been taking on more graphic design work and it just wasn’t cutting it anymore.  Especially after Christmas where things got tossed in and the drawer closed.

The top right drawer, seen above, was a mixture of office staples and craft supplies organized into clear dividers.  Notebooks, paper, and important documents were in the top left drawer.  One day, not too long ago, I grabbed a pen from the right drawer and a notebook from the left and realized it was annoying.  Sorting by like items wasn’t the most efficient use of the space, or my time.  I started by reading through the few organizing books I have, Real Simple: The Organized Home and Organizing for Your Lifestyle and it sparked a change.

With a bit of extra time this week, I was able to empty out everything, donate/toss what I no longer used, and load everything left back in.  This time, by like use.  Pens, paper, scissors, tape, rubber bands, and other often reached for basics all live in one drawer now.  Cute file folders hold important client info and kids school papers.

Office-Organization-Top-Right-Drawer

Below, the middle drawer is my packing and shipping center, filled with mailing labels, envelopes, packing and cute tape.

Office-Organization-Middle-Right-Drawer

The tall bottom drawer stows important files, my camera and bag, and a bin of craft paints.

Office-Organization-Bottom-Right-Drawer

Basically, the right side is the business side, whereas the left is filled with craft supplies.  one of the original clear dividing trays holds paint brushes, a wood burner, polymer clay, sewing basics, and glues.

Office-Organization-Top-Left-Drawer

A lidded adjustable compartment box is perfect for keeping the smaller craft items like embroidery floss, tiny brads, glue sticks, paint tubes, and more corralled.  But it’s still easy to grab and move to another area to do some crafting.

Office-Organization-Craft-Divider

The middle drawer is still pretty empty, with just my paper-cutter and the boys’ computer inside.

Office-Organization-Middle-Left-Drawer

But the bottom one is chock full of papers.  White card stock, colored card stock, carbon paper, and printer paper.  Cardboard magazine files keep everything sorted and in place.  The two on the far left hold the favorite school documents and art from the boys, with a manila folder inside to sort by year.

Office-Organization-Bottom-LeftDrawer

Grouping all items by use keeps everything I need for a task in one area.  How do you organize your home?

DIY Vent Hood Cover

With the decision made to install the board and batten wall treatment above the eight foot mark before flooring, we set our sights on finishing the vent hood.  It’s right off the main pool area, and near the house kitchen, but we wanted a range for entertaining and summer cooking/baking.  When we found a 48 inch range for a steal on Craigslist, we snapped it up for this space.

As a refresher, here’s the plan:

Pool-House-Kitchen-Vent-Hood-Plan

Before we can attach the batten strips, we have to address everything at or above the horizontal dividing band.

Pool-House-Board-and-Batten-Vault-Trim-Installed

The vent hood straddles that band, which meant it was time to build the cover.  To start, Ben nailed a strip of wood a few inches above the top of the duct work.  A 2 by 8 board rests on top, nailed into the wooden piece, creating the top of the vent hood frame.

Pool-House-Vent-Hood-Building-Frame

High ceilings call for a different vent hood treatment, and I personally prefer a tall vent hood that doesn’t go all the way up to the ceiling.  This example from Studio McGee is pure perfection:

Studio McGee Vent Hood

Holding a scrap of plywood in place, Ben was able to get an accurate measurement for the front of the cover.  Before boxing it all in, he also added 2 by 4 pieces vertically between the vent hood top and the base of the wood structure.

Pool-House-Vent-Hood-Frame-Building

Then wrapped it with plywood, screwing through the upper part of the vent hood stainless and into the plywood to keep the sides as streamlined as possible.

Pool-House-Vent-Hood-Boxed-In

Quarter inch thick by 2 inch wide strips line the edges, covering the seams of the plywood sheeting.

Pool-House-Vent-Hood-Trimmed-Out-Overall

A six-inch walnut band (to be installed after paint) will wrap the front and sides.

Pool-House-Vent-Hood-Trimmed-Out

Two floating walnut shelves will flank each side of the range.

Pool-House-Vent-Hood-Trimmed-Out-Side

Until then, we have plenty of work to keep us busy, but we’re rounding the corner from construction crazy to cohesive cool.

Pool-House-Vent-Hood-and-Batten-Strips

If you can ignore the mess of junk scattered throughout the room, that is.

DIY Board and Batten, Step 2

This is the year of the pool house, hopefully the year we get it all (or mostly) wrapped up.  Last year consisted of a lot of ugly, but necessary work inside the walls, but we did finish the tongue and groove ceiling.

With the ceiling complete, walls covered in plywood sheeting, we’ve started adding batten strips to create the tone on tone texture.

Pool-House-Board-and-Batten-Design

Above is obviously a photoshopped version, while below is the starting point of reality.

Pool-House-Board-and-Batten-Overall

Initially, we planned to install the tile floors immediately after hanging all of the plywood sheets.  After a discussion, we agreed it would be best to add the batten strips to everything above the eight foot mark, caulk, prime, and paint.  This way we can avoid dragging ladders over the new tile, potentially damaging it in the process.  The lower wall portions will get the same treatment after the floors are finished, allowing the batten strips to terminate into the baseboard.

Before the vertical strips could be attached, we nailed two-inch strips into place along the ceiling, hiding the gap between the wall and ceiling.  A 3 1/2 inch wide piece of pine casement straddles the eight foot mark, covering the plywood seams.

Pool-House-Board-and-Batten-Horizontal-Strips

Two inch strips also cover the ceiling seams, keeping the measurements consistent.

Pool-House-Board-and-Batten-with-Ceiling-Detail

The areas following the vault are square strips, while the rest are cut at a 16 degree angle to snug up against the ceiling slope.

Pool-House-Board-and-Batten-Vault-Trim-Installed

Strips also wrap around the beams, with the ceiling pieces butting into those.  Wires for speakers are still dangling.

Pool-House-Board-and-Batten-Beam-Detail

With most of the horizontal strips in place, we started installing the vertical pieces.  When I proposed the board and batten idea, Ben wasn’t totally on board with it, but he started researching material and prices.  Pre-cut two-inch by half-inch thick strips aren’t particularly affordable, especially when spaced 8 inches apart.  To keep the material cost as affordable as possible, we cut sheets of MDF into two inch strips.  Once covered in oil based primer and paint, we shouldn’t have swelling issues.

Pool-House-Board-and-Batten-Strips-Detail

While on the ladder, Ben called out measurements, I’d cut to length and walk it over, then he’d nail into place.  Nailing into plywood is much easier than drywall as it has more bite.  As such, we can get away with small 18 gauge nails, leaving tiny holes to fill.

Pool-House-Board-and-Batten-Center-Bump-Out

To further speed up the process, he cut a scrap of plywood to six inches wide to use as a spacing guide.  Similar to hardwood floor install, once the first row is square, the rest go in quickly.

Pool-House-Board-and-Batten-Along-Peak

Everything above was installed over a weekend, which is exciting because this part of the process should go along quickly.  I spent my Monday afternoon caulking, so this stretch is almost primer ready!