State {of the} Art

Three and a half years ago, we had just finished our master bedroom and needed art to fill the bare walls.  To keep things cheap, I cut out silhouettes of Ben and myself to fit in a frame I already owned.


To add a splash of pink, I ordered 8 vintage Pierre J. Redoute botanical prints.  The 9 inch by 11 inch prints were cheap, and $3.50 frames from Michael’s were a cheap solution.

Though having art on the walls was great, we never really loved the prints in the space.  Just a little too ‘old lady’, especially when paired with the traditional trim and bed.  We’ve been wanting new art, but just couldn’t find the art.  Until recently.  We featured an Idaho watercolor painting from Poppy and Pinecone, but didn’t see Montana.  After a few conversations with Elisabeth, we had an agreement to trade custom art.  Here’s a tip: If you sell anything on Etsy, trading is a great way to save money, but get items you like.  I sent her a Family Tree cut out in orange in exchange for two custom 11 inch by 14 inch state watercolor prints.

Ben is from Montana, so I wanted his print in greens and blues.  Because I’m from Minnesota, I wanted my painting in girly colors, pinks and purples.  And here is where my custom vision turned Elisabeth into a rock star.  I needed both prints in a landscape orientation, to maintain symmetry.  For Montana, that’s easy.  Minnesota, however is usually vertically printed.  I left it to Elisabeth to somehow turn vertical Minnesota into a horizontal design without looking strange.  I knew, based on the work I’ve seen, that the prints would be fantastic.  When I received that beautifully packaged art, I couldn’t wait to tear it open to see what Elisabeth made.  Do you want to see?  Of course you do.  Here is Ben’s Montana:

And my Minnesota:

Isn’t that fantastic?!?  I know!  And, the quality was even better than I could have imagined.  The watercolor paper is rich, textural, heavy, and luxurious.  I waited until the prints arrived to buy frames, just to make sure the size worked.  I needed something to fill the wall, and two 16 inch by 20 inch frames looked great.  Then, I remembered I had one black frame sitting in the closet.  A matching frame hung in the basement bathroom holding a print from The Living Room Floor.  I snagged the frame (and mat) to use in our bedroom.  Now, I had only one frame to buy to replace the one I just stole.  I cut another mat to the same dimensions using a sharp utility knife and straight edge and popped the new State Love prints inside.

The new frames are much larger than the two 11 by 14 frames we had on each side.  I hung the new frames on the old nails, so the art interacts more with the bed, which I like.

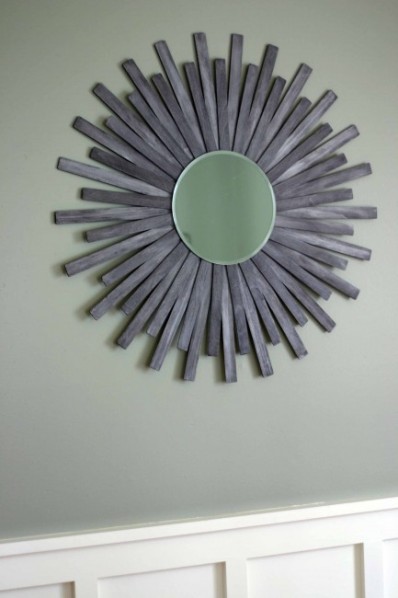
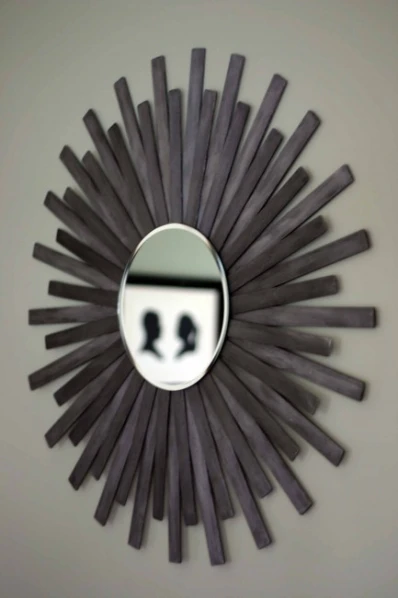
When walking down the hall, I catch a glimpse of the Minnesota art.  Also, the art reflects beautifully in the new sunburst mirror directly across the room.

For another fun, custom touch, (you caught a glimpse of above) I framed a 5 by 7 wedding invitation from Ello There.  Just goes to show art is anything you find beautiful.  We added our ceremony information and customized the colors to match our decor.  It is such a cute print, and an adorable wedding invitation.  And, I’ve added even more birds to our house.  The paper is a nice smooth, thick card stock of great quality and Maddy was a pleasure to work with.  She put up with my annoying questions and accommodated my requests.  Yes, this is a trend.  I am annoying and have many requests.  Moral of the story, I’m a pain in the arse.

A lamp, cheapo 5 by 7 frame, $1 ceramic bird, and black lacquer and capiz jewelry box are the perfect bedside table accessories to round out our bedroom makeover.  Both fun and functional.  Just my style.  Our personalized, colorful bedroom art overhaul makes me smile every time I go in.  As does the cost of the revamp.  Just $10.00 for the print, an art trade, reused frames and a three dolla paint stick mirror.  I had all of the supplies for the silhouettes, for a grand total of $13.00 spent for an entire room of art.

Which room have you spent the least for art?  Where did you find it?  Maybe you made it.  Any tricks you’ve found to keep the cost low?

Please note:  We were not compensated for this post, we simply love the items we’ve purchased and traded from these shops and want to share with you.

Sun Bursting

I’m sure you’ve seen DIY sunburst mirrors all around the blogosphere recently, but because this is a hot trend (pun intended), I don’t think you’ll mind if I share another one.  Last fall, I hot glued bamboo kitchen skewers to the back of a bevel edged mirror.  After spray painting it white and living with it in our master bedroom for the winter, I decided it wasn’t the right fit.  You see, most of the accessories and furniture in our room are black, and the white didn’t stand out against the wall like I had hoped.  And the skewers we a little too thin for my liking, at least in this case.  I may hang it in the basement bedroom for some drama.

So, I started brainstorming a cheap or free way to make an awesome, chunkier sunburst mirror.  Then, while planning a paint chip project, it figuratively hit me.  Paint sticks!  They’re free and chunky.  I snagged 27 from Wal-Mart thinking I would have plenty.  Then, I chose a 12 inch diameter beveled mirror from Hobby Lobby (in the candle section).  Candles were 50% off, so my mirror cost $3.00.

I went home ready to get my sun bursting on.  I started by marking the mirror in quarters, using a Sharpie.  Then, I placed a stick on each mark and filling in.  Then, I realized I wouldn’t have enough for two tiers.  Our weather took a turn for the worse, so I waited to get more sticks.  While waiting for the weather, Kate at Centsational Girl posted about her DIY paint stick mirror.  Apparently, great minds think alike.  Though our plans of attack were slightly different, I knew the results would be stunning, too.

Finally, our weather cleared up and I packed the kids to go to Home Depot.  I avoid Wal-Mart like the plague.  Immediately, I knew the Wal-Mart sticks were thinner and had rounded corners, so I had to make a few changes.

Turns out 80  grit sand paper rounds corners of paint sticks really quickly.

Now that I had all of my supplies, I got started.

I applied a coat of black paint to the front and sides of each stick.  For my first tier, I knew I had to cut the sticks so the curved edge didn’t show, so I didn’t bother painting that far.

After the black paint dried, I applied a coat of metallic silver paint.  The silver is semi transparent, so the black still showed through making a really great metallic charcoal grey.  See the difference?

So, after a few hours of painting, letting it dry, painting again, and letting it dry, I warmed up my glue gun.  Before I could start gluing, I had to cut the sticks.  With a baby and toddler in tow, it wasn’t an option to use a saw.  I opted for a wire cutter.

I just squeezed hard twice on each side and then snapped it off.  Worked great, but not a super clean edge.  I measured 8 inches long on a sample stick and marked the back of each stick for a reference to keep the same length.

I tried to place each stick as evenly as possible.  A few lines of hot glue held each stick firmly in place.  After finishing the first tier, I flipped it for a quick look.  I’m a likin’.

On to the next round.  I was able to keep half of the sticks the full length by alternating non cut and cut.  This round is 10 inches long with the curved edges hidden behind the first round.  Yay for not needing to trim everything down.

With the sticks in place, I glued a picture hook to the back of the mirror with Liquid Nails.  48 hours of dry time later, I hung the mirror on our wall.

Paint Stick Sunburst Mirror Over Bench

The grey contrasts beautifully against the grey/green walls.

Paint Stick Sunburst Mirror After

The metallic sheen also changes with the lighting.  The wall against the bench is now nicely filled with the sun burst mirror.

Paint Stick Sunburst Mirror Over Bench

How about a little budget breakdown?

50 paint sticks:  Free

Paint:  Already owned

Glue gun and sticks:  Already owned

Picture hook:  Already owned (are you noticing a trend?)

Mirror:  Originally $5.99, but 50% off to $3.00

Total:  $3.00

Have you jumped on the sun burst band wagon?  Did you go the store-bought or DIY route?  Which store version do you have your eye on?  Maybe you have a favorite tutorial?  If you’ve made a mirror, we’d love to see yours on our Facebook page.

We’re still looking for questions for our blog anniversary.  If there’s something you want to know, just ask.

P.S.  We’ve had another request to size down our photos.  What do you think of this change?  Too large, too small?  We need your opinions so we can make the best changes.

Clothes the Door: A Bedroom Story

You know we’re participating in Jen’s 30 in 30 challenge.  We’ve already shared our living room and kitchen progress.  We stuck to the schedule and focused on the bedroom.  How did we do?  On Tuesday, we woke up to six inches of snow, but we made our own fun by purging clothes from our bedrooms and dressing up, just for kicks.  I mentioned Mr. Packrat, aka Ben, actually got rid of stuff.  This folks, is rather rare.  While he’s quick to toss my stuff, Ben keeps things because he might use or need it someday.  Five years of someday have passed, so, Tuesday was the day.  For your viewing pleasure, our pile of clothing.

Ben’s stack consisted of:

5 sweatshirts

5 pairs of shorts (or short pants, if you’re my dad)

5 baseball hats

1 cowboy hat

1 Indiana Jones hat

2 belts

3 pairs of pants

2 dress shirts

2 jackets (the man has 6!)

Socks and underwear, which we didn’t donate, just to clarify.

So, 26 items for Ben, which is major progress.  What did I donate?

4 pairs of jeans

1 pair of shorts, which Ben wore for his Reno 911 costume.

8 short-sleeved tops

11 long-sleeved tops

1 bathing suit

25 articles of clothing for me.  I think Ben donated one more thing just so he could win.  So, counting the 31 items (94, if we count individually) from the kitchen, and the desk, floor lamp, bag of books and bag of clothes we sent back to Minnesota with my parents we’ve purged 86 items so far.  Wahoo!  If only I could lose weight this quickly…

And thanks everyone for your interest in the kitchen organizer.  I sold it to the first person to contact me about it.  Sorry, I didn’t realize it would be such a hot item.

So, how are your purging efforts going?  Which room do you find the most difficult?  The easiest?  Are you a sentimental hoarder?  Do you keep something just because it was a gift?  Have you donated or sold something and now regret it?  Or do you have a good riddance mentality?

The Crowning Jewel

When we asked our readers to take a brief survey at the beginning of the year, we asked if you’ve seen something in our house that you would like to know more about.  One reader was wondering how the lighting in our master bedroom worked.  Let’s start at the beginning, the trim.

We decided to install crown moulding over the doors and windows of our master bedroom and adjoining bathroom.  Ben had a great idea, why not install rope lighting on a dimmer switch above each?  I said, “Sure.  You’re the one doing the wiring, so if it’s a pain, you have yourself to blame.”

You see, I have a tendency to come up with tedious projects that Ben has to complete, so this was all him.  Guess what?  It was a pain.  But I already said that.  Why was it a pain you ask?  Well, dear friends, because each window and door has a header above, made of 2 by 4s, to give the structure strength.  So, Ben had to drill through finished sheetrock, through each header, then fish his wiring through his holes.

Once he ran the wiring, it was easy.  Ben wired outlets, all set on a dimmer switch, inside each crown piece.

(Please disregard the dust, its there for moral support, though I did vacuüm inside for you.  Oh yeah, you see the traces of red, that’s not blood, it’s paint.  Yeah, Ben wanted our bedroom burgundy.  So, we painted it, then quickly painted it again).

Then, we bought basic rope lighting from Home Depot.  Home Depot has tons of rope light options, but we chose five 6 foot lengths.  Why 6 feet?  Rope lighting isn’t especially bright, so we decided to double up anything that was shorter than 6 feet.  Next, plug the lights in.  Luckily, the windows and doors don’t look any brighter than the closet.  After tucking the lights down in the crown moulding, Ben used plastic fasteners to keep everything tucked neatly in its place.

Here, you can catch a glimpse of the crown construction.  Ben cut the crown pieces to size, then applied glue to the joints and nailed in place.  Ben always goes a little overboard to make sure things he builds are super strong, so he cut scraps of wood to match the angle of the inside corners.  Then, he nailed the crown into the blocks and they’re like a rock.

The room glows with the lights on at night.

Please note:  If you are not an electrician or comfortable working with electrical systems, please do not attempt this your self.  This post is not a step-by-step tutorial, just a guide on how Ben created our lighting.  We are not liable for any damages or injury.

Let There Be Light

Ben has a lot of great ideas, especially when it comes to accent lighting.  When we added this trim to our master bedroom, Ben got the idea to add hardwired rope lights inside.  After taking the time to drill through each header, Ben had the wiring ready.  Ben bought 3 to 6 foot long rope light strips from Home Depot.  The lengths of the rope lighting depended on the width of the door or window they would go over.  Ben plugged the lights in and wired in a dimmer switch.  We love how handy the lights are, especially now that we’re waking up in the middle of the night to change diapers.

I had been planning my office for quite some time, but over looked the lighting.  Ben suggested we install halogen puck lights to create task lighting.  We have two sets, one on each side of the upper cabinets.  The lights have two hidden switches located under my marble desktop.

I love how much task lighting I have now.  It makes my work so much easier!