DIY Vertical Kitchen Divider

As much as we love a good full gut before and after remodel, don’t discredit smaller projects that can have a huge impact on function.  One of the small builds we recently completed for the kitchen in a stand alone vertical divider to easily store and sort cutting boards, baking sheets, and other slim items.  When organizing a kitchen, I try to keep items as close to the place they’re used as possible.  The cabinet above our double ovens had never been maximized and sat mostly empty until we added this handy compartment.

Lingering-To-Do-Vertical-Divider-Over-Ovens

To get started on this, we measured the smallest inside dimensions of the cabinet and built a self-contained box to fit inside.  Rather than taking up the entire cabinet, we built it 16 inches wide, creating four 4 inch compartments.

Vertical-Divider-Box

To create the compartments, we cut pieces of 1/2 inch MDF to fit between, using a piece of scrap material and dimes to space.

Vertical-Divider-Detail

The dimes allow wiggle room for the painted verticals to easily slide in and out without sticking.  Pieces of 1/2 inch MDF also function as the dividers.

Vertical-Divider-Box-with-Dividers

By cutting those pieces a little small, the boards come out without needing to get serious muscle involved.

Vertical-Divider-Top-Detail

Once in the cabinet, I loaded it up each compartment sorting cookie sheets, plastic cutting boards, wood cutting boards, and muffin tins and cooling racks.  All things that are light weight and not breakable, but don’t stack well or fit easily in other cabinets.

Vertical-Divider-Box-Inside-Cabinet

This freed up the drawer below for our heavier glass baking dishes that nestle in.  Such a simple project that really upped the usability of the kitchen and put a higher cabinet to good use.  Do you have a favorite quick organizer you’d like to share with us?

Laundry Room

Do you hear that?  No, I’m not crazy, the choir of angels is singing because we have one room in the basement without anything on the to do list.  As in, finished.  100% done.  Complete.  Granted it’s one of the smallest rooms, but it does boast nearly as much custom cabinetry as our kitchen, so it wasn’t as simple as throwing down flooring, slapping up trim, and tossing paint at the walls.  While the appliances have been functional nearly the entire duration of the remodel, the room as a whole has caught up.

To really feel accomplished, let’s take a look back four years ago to the beginning.   New-House-Laundry-Room-April-13-2012

I’m sorry for the orange overload seared into your brain, but that’s what we lived with until demo started.  Across the room sat the side by side washer and dryer with a utility sink oddly stuffed behind the door.  Oh yeah, and we had glue covered floors so I tucked a rug in the room to make it feel a little less gross under foot.
Laundry-Room-Washer-and-Dryer

With a few minor tweaks like scooting the door frame over, adding a pocket door, and different cabinets, we’ve got a fully functional laundry room.

Laundry-Room-Right-Side

Bright white cabinets help lighten up the windowless space, while stainless counters provide a durable work surface with a touch of shine.

Laundry-Room-From-Door

A tall cabinet in the corner holds a vacuum and ironing board, with bulky cleaning products above.

We decided to stack the washer and dryer, leaving space for our upright freezer on one side and a sink with a bit of countertop on the other.

Laundry-Room-Sink-Side-from-Door

After precariously balancing things on the edge of the old utility sink, I knew I wanted a little more space to set soaking clothes, soaps, and paint brushes.  Two shelves store the most used laundry and cleaning items, keeping it in reach.

Laundry-Room-Sink-and-Shelves

In place of the plastic wash bin, we used a single bowl stainless steel kitchen sink and pull down faucet for easy spraying or rinse action.  Don’t worry about the standard looking outlet, it’s actually connected to a GFCI in the bathroom, on the other side of the wall.

Laundry-Room-Sink

Since we buy in bulk, I decant laundry staples into containers for easy handling.  Big boxes tuck in the cabinet below for a quick refill.

Laundry-Room-Soap-Detail

Just for fun, and because I wash nearly everything on a cold cycle, I added a sarcastic laundry chart to the room.  If you really want to know what all those crazy symbols mean, here’s a real chart option.

Laundry-Room-Chart-Detail

Back to the other side, custom drying rack drawers tuck neatly away behind slim fronts.  A six-foot long counter space makes folding and sorting a breeze, and the drying racks come in handy as extra surface space to drape hanging shirts and pants on.

Laundry-Room-Drawers-Drying-Rack

On the counter, I added a Great Lakes cut out from Crafterall, along with a wooden sculpture to have something pretty to break up the gray and white.  A little cup holds chang, ear plugs, rocks, and other items I find in pockets.

Laundry-Room-Counters-and-Cabinets

This is the first time in my life having such a functional, fully finished, and if I do say so myself, beautiful and clean laundry room.  I know most people see it as strictly utilitarian, but choosing durable, hard-working elements doesn’t automatically equate to ugly.

Incorporating Wood & a JORD Watch Giveaway

Nothing can brighten and liven up a room like a lush house plant.  Just as plants add a dose of happy, nothing can add warmth to a room like real wood.  I know white, light, bright, and airy rooms are all the rage right now, and I even love the look.  But I also love contrast, and there’s just something perfect about the combo of white and wood.  I’m a self-proclaimed lover of natural elements, including but not limited to wood, plants, leather, linen, cotton, and metals.  To each their own, but I see a lot of beautiful rooms that could be amazing if only a bit of wood was included.

So, how do you go about incorporating wood pieces without overwhelming a space?  Start with a small item, like a side table, mirror, picture frames, or lamp.  You’d be surprised at how much character just that small item can add to a room.  Don’t belive me, just look at the difference a mirror made in our main bathroom.  Before:

Our Humble Abode Blog Main Bathroom Vanity

After:

House-Tour-Four-Years-In-Main-Bath-Vanity

When choosing and adding larger furniture, wood detailing can add a lot of character.  Look for classic, clean lined pieces with wood accents in natural places.  An exposed frame, legs, even heavy wear areas of arms.

House-Tour-Four-Years-In-Family-Room-Toward-Fireplace

Avoid wood additions to odd places, like the top of the back of a sofa.  I’m totally thinking of a couch my parents used to have on that one.

Even though this petite sofa is 90 percent fabric, the slim lined exposed wood frame offers a touch of wood with a beautiful grain.

House-Tour-Four-Years-In-Entry-and-Linen-Sofa

For larger furniture, I think the most important thing to consider is the grain.  Grain is impossible to change, so if you want a more refined look, typically finer grained wood is a better fit.  If going for a rustic look, a heavier or more prominent grain may be ideal.

Craigslist-Dresser-in-Bedrrom-by-Bath-Door

Furniture is one thing, because it isn’t permanently attached, therefore easy to replace, but what about cabinetry?  Of course white cabinetry is an easy option due to the go with anything simplicity, but cabinets can look stunning in wood.  That’s not to say all wood varieties are created equal.  Pine, oak, poplar and such are prime candidates for painting based on availability and price point.  Finer, more expensive wood varieties are better suited to cabinetry.  When choosing wooden cabinets, I prefer to stick with unstained, natural walnut.  For the last ten or so years, it has been a favorite of mine and pairs nicely with many finishes.

Our Humble Abode Blog Master Bathroom Vanity

Keep in mind that trends come and go, and try to avoid the dark, nearly ebony tones of the 70’s or honey oak that plagued the 80’s and 90’s.  When in doubt, keep wood cabinets as clean lined and simple as possible, opting for flat slab or shaker fronts.

Walnut-Island-Drawer-Fronts-Finished-Toward-Pantry

Solid wood cabinets can cost considerably more, especially depending on the species.  Consider creating a wood wrapped island, which will give that warmth, without the added expense of wooden perimeter cabinets.

If you’re hunting for furniture at thrift shops, Craigslist, or estate sales, keep in mind that solid wood or thick veneer can be refinished.  A thorough sanding can erase dents and scratches as well as a terrible stain color.  Don’t walk away from a piece with good lines just because of an ugly finish.  I’ve found that most often, I prefer a mid tone warm stain.  Special Walnut from Minwax is usually my choice for fresh or refinished wood around our house.  In this post alone, I used that stain on the campaign style mirror, the mid-century modern chairs, the wood frame sofa, as well as the bed and night stands seen below.

Lingering-To-Do-Bedroom-Bench

JORD-Watch-on-NightstandMost recently, I’ve incorporated a bit of wood in my wardrobe, thanks to my new JORD watch.  Based on my favorite stain color, it shouldn’t be a surprise that I chose a Koa and Ash Frankie watch.

JORD-Watch-on-Nightstand-Dish

Though I’m far from a fashionista, I love how easy it is to slip this watch on for a casual accessory.

JORD-Watch-Detail

I love that it’s a unique, but not glitzy or flashy addition to my daily outfits that usually consist of jeans/shorts and a t-shirt.

JORD-Watch-Detail-2

Now it’s your turn to get a wood watch on your wrist.  Go ahead and enter the giveaway here, where one lucky winner will win a $75 coupon code.  All other entries will receive a $20 coupon code, so get your entries in before the giveaway closes July 28th at 11:59pm.


Watches Made From 100% Natural Wood by JORD

Upgrades to Consider

I know full remodels, big overhauls, and before and after room reveals are incredibly fun and exciting to see-in our own homes as well as on tv shows and web sites.  Sometimes, it’s easy so feel bogged down or inferior because real, lived in homes are never perfect.  Even if you can’t start a full remodel, there are minor upgrades you can add to increase the function of your home.  The following are my favorite additions, none of which are style related, but most are easy to implement.

  1.   Tubular Skylight/sun tunnel: Prices start at $170 for materials, labor/install prices will vary.

In dark, windowless rooms in the center of a home, consider installing a tubular skylight/sun tunnel.  It adds all the benefits of a traditional skylight, but are smaller and easier to install.

House-Upgrades-Solar-Tube-in-Bathroom

Ben installed ours, so we saved the labor costs, so ask a contractor for a total cost.

2.  Rain Shower Head:  Prices vary widely based on extension arms, shower head size, and brand.

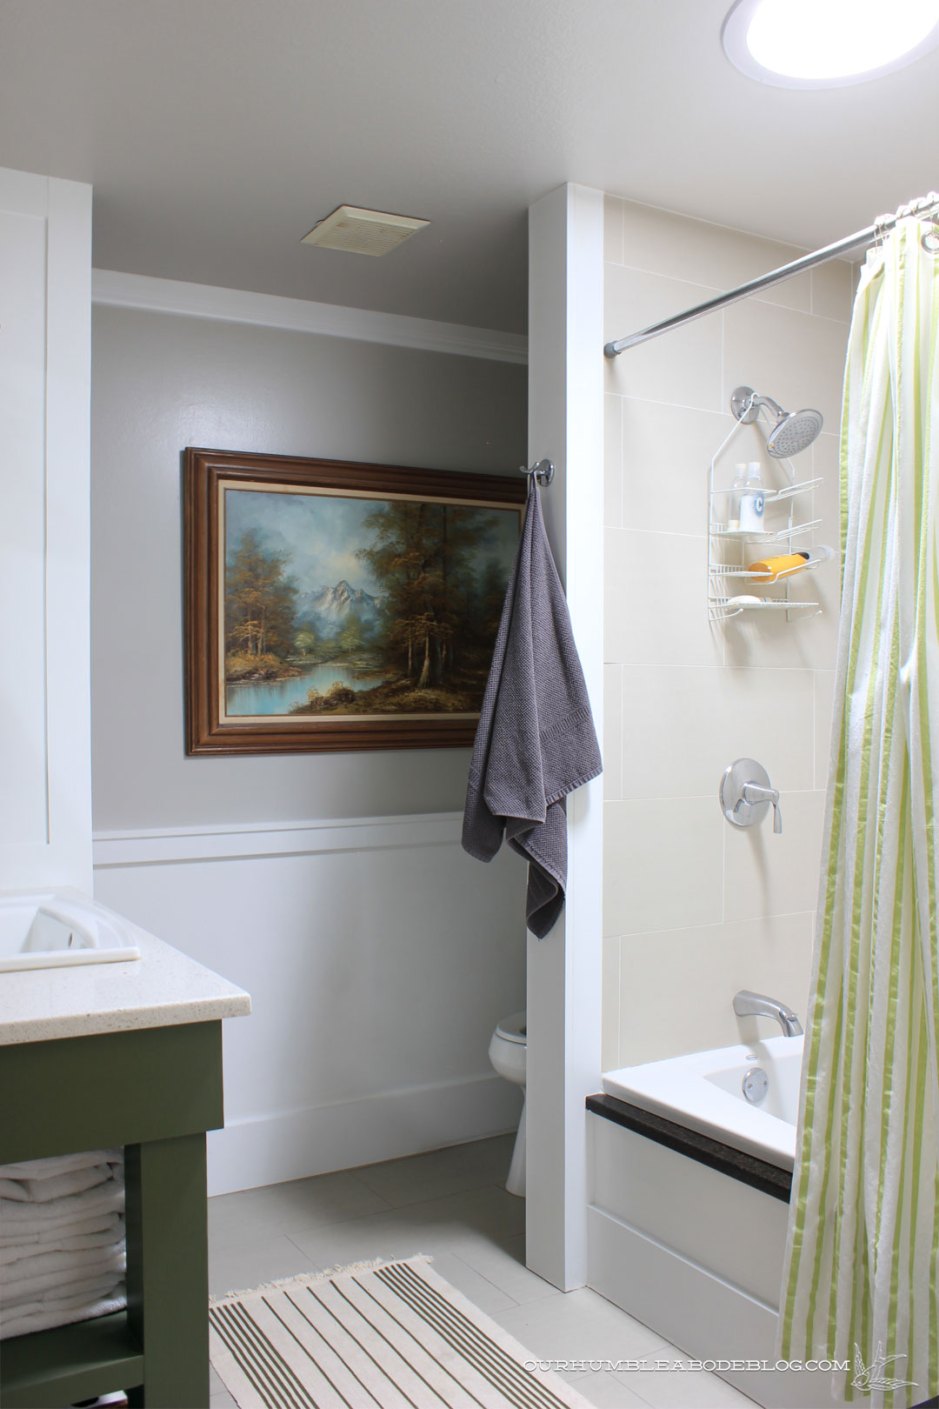
Another minor change that we adore is the ceiling mount rain shower head.  In fact, we love it so much we suggested it to our friends in their new build home.  The day after move in, they said they love it so much more than a traditional wall mount shower head.

House-Upgrades-Rain-Shower

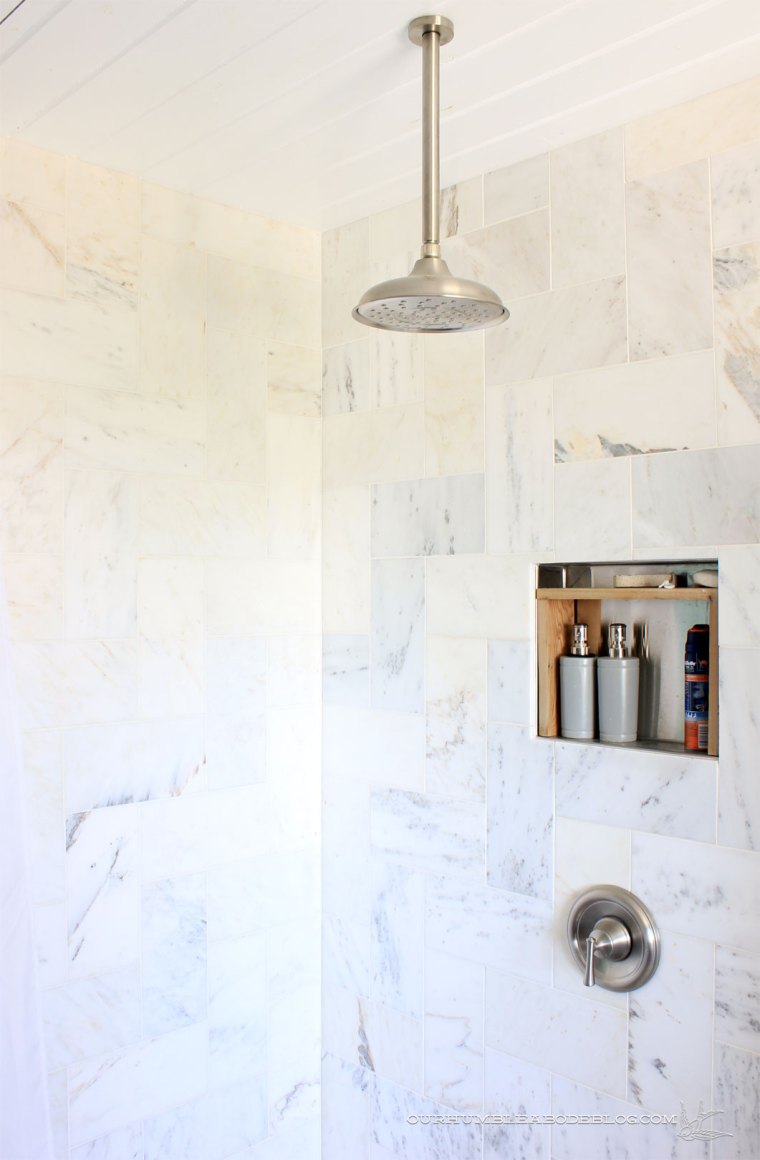
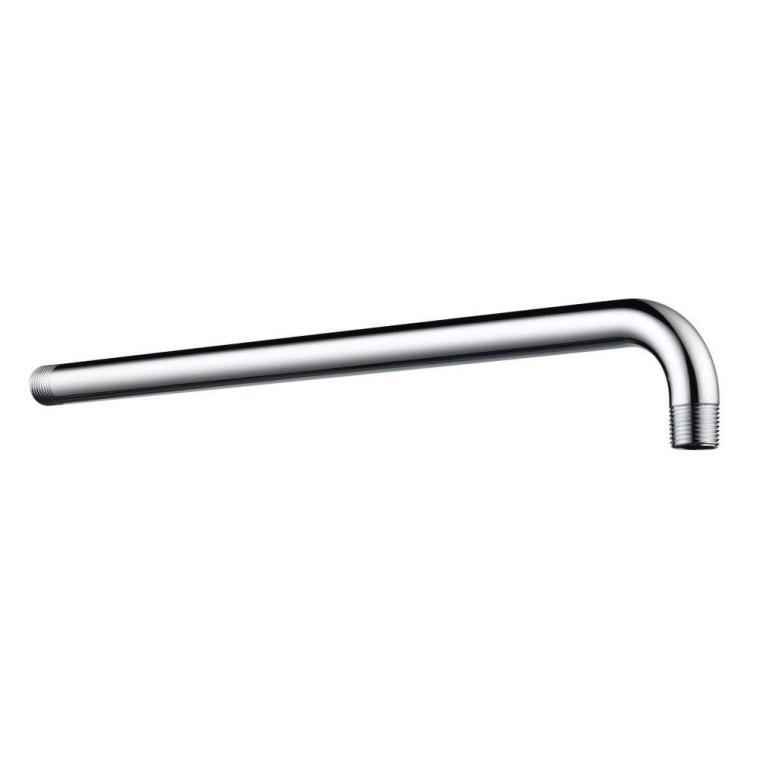
If you don’t want to move plumbing, don’t worry, there’s a similar option.  Hit up your local Home Depot to pick up a wall mount shower arm.

94031ff8-3b57-45b3-be72-006a5eba6179_1000

3.  Outlets with Integrated Guide Lights:  GFCI Outlets cost $20, SnapPower covers are $15

Another quick bathroom upgrade is a GFCI outlet with integrated LED guide lights.  A small sensor turns the lights on or off automatically and provides enough light to navigate in the dark.  This style keeps outlets free and is perfect for rooms kids use.

House-Upgrades-Light-in-Outlet

If swapping outlets is out of your DIY realm, check out SnapPower guidelight covers.  After nearly two years of use, I can attest to the greatness.  Not only are the covers simple to install (literally unscrew the old and screw in the new), they’re great for illuminating main walkways.  We have sever throughout the house, near the back door, top of the stairs, and halls on both levels.

House-Upgrades-SnapPower-Outlet-Cover

4.  Junction Box Mount LED Lights:  $30.00 per light with easy install

Speaking of lighting and the basement, let’s discuss a cool new lighting option.  Since the ceilings are a bit lower than the standard eight feet, we chose recessed lights.  During our kitchen remodel, we installed traditional can housings, then popped LED lights inside.  Each housing and light cost about $40.  After the remodel, we learned about a new style of LED light.  It gives the look of a recessed can, but installs in a standard junction box.

House-Upgrades-LED-J-Box-Installed

Everything you need comes in this little box, and costs about thirty dollars per light.  A standard junction box costs around a dollar and accommodates this light, making install quick.

House-Upgrades-LED-J-Box

5.  GE Bright Stik LED Bulbs:  Cost $10 for three

While you’re stocking up on LED lights, look for GE Bright Stik LED bulbs.  Some LED bulbs are still expensive, but the prices are steadily dropping as more come out.  After getting annoyed by the CFL bulbs in our main bathroom, I looked for a better option.  When I spotted a three pack for $10, I didn’t have much to lose if I didn’t like the bulbs.  What a difference!  Unlike CFL bulbs, LED lights don’t have a warm up time and are even more energy-efficient and long-lasting.  Look for the soft white to avoid a blue tint.

House-Upgrades-LED-Bright-Stik

So, those are the cheapest and easiest functional upgrades we’ve done, but I have a few more that we love.

6.  Central Vacuum:  Prices vary based on house size, vacuum system, and accessories package, but pipe materials are somewhere around $300.

If you’re building a house, or have an unfinished basement, I can’t recommend a central vacuum system highly enough.  Pipes are run through the walls, similar to plumbing, but come out to outlet sized receptacles that the hose plugs into.

House-Upgrades-Central-Vacuum

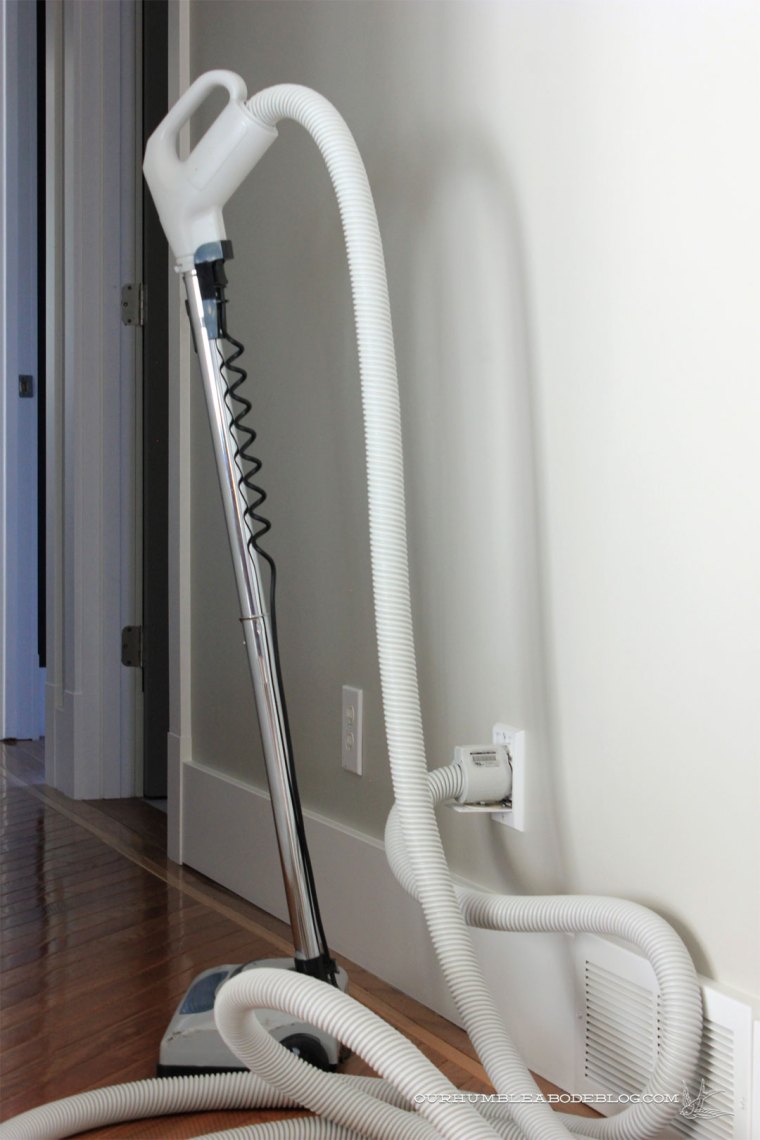
In our first home, Ben installed the system before we finished the basement, while we still had easy access to everything.  This house came set up, but Ben installed another system at a friend’s house.  Once the pipes are inside the walls, replacing or upgrading elements is straight forward.

7.  Whole House Fan:  Units start around $200 and go up depending on CFM

House-Upgrades-Whole-House-Fan

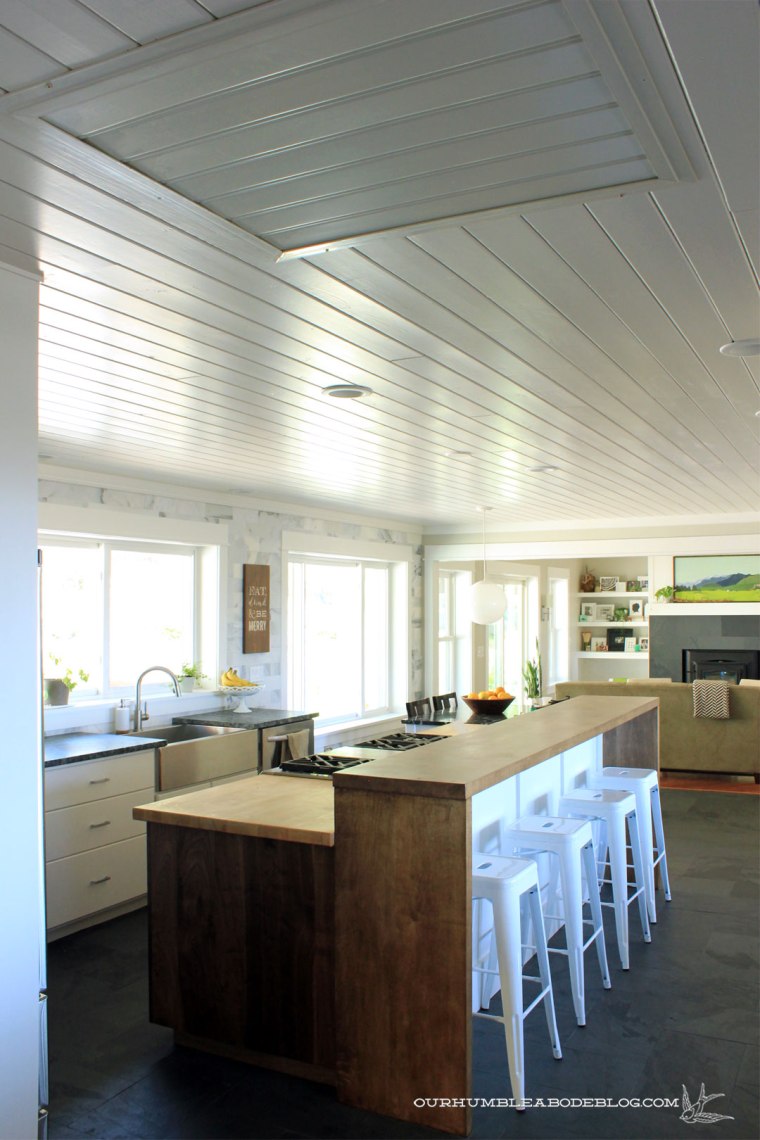
If you don’t have central air, or even if you do, take a look at whole house fans.  On cool summer mornings, we open several windows, turn on the fan and let it run for a while to pull the cool outside air in.  Depending on the high temperature, it either delays or eliminates the need for air conditioning.  By placing ours near the kitchen, we are also able to nix a big, low hanging vent hood over our cooktop.  If the kitchen gets smoky, we crack the window over the sink, flip on the fan, and it’s cleared within minutes.

What are your favorite upgrades that increase the function of your home?  Do you have any of my seven favorites in your home?

Lingering Little To Dos

Over the course of the last four years, we’ve updated every room in this house as well as our outdoor spaces.  Pool house not included, as that is serving as a personal warehouse of building materials until we have time to finish it off.

Most rooms are completely functional, minus the basement bathroom that currently sits showerless.  Despite functionality, we’re solid 95 percenters, as I like to say.  With as many big projects to tackle as we have, it’s easy, too easy, to get side tracked and move onto the next task.  So, there are little unfinished tasks throughout the house.  All are purely cosmetic, which means they’re low on the priority list until we wrap up the basement remodel.  Ironically, most of these are quick fixes and wouldn’t take even a weekend to finish.

Replacing the cracked, stained beige entry tile with beautiful slate is on the to do list.  Removal, laying the tile, and grouting should be a weekend task.  I’m just dreading the dust storm that removal will create.

Lingering-To-Do-Entry-Tile

In the living room, our entertainment center is still without doors, and I’m greatly regretting painting the backs yellow.  We’ve gone back and forth on how we want to handle air and sound flow that isn’t an option with solid wood.  Fabric and perforated metal insets are the top contenders.

Lingering-To-Do-Entertainment-Center-Doors

Directly across from there is where I’d love to have a wall to wall window seat with bookshelves on either side.  I’ve nailed down my plan, so the hardest part is out of the way-haha.

Lingering-To-Do-Window-Seat

Over in the dining room, I had started patching the hole from the previously off centered light fixture, but still haven’t finished sanding and painting.

Lingering-To-Do-Dining-Room-Ceiling-Patch

A quick addition of thin trim along the top of the bar hutch will finish it off, covering the small gap along the ceiling.

Lingering-To-Do-Hutch-Top-Trim

In the kitchen, I’d love to add vertical dividers above the double ovens to store and divide cutting boards and baking sheets.  Right now, they’re stacked up in the drawer below.

Lingering-To-Do-Vertical-Divider-Over-Ovens

A pesky, improperly installed can light hangs down in the family room.  The housing isn’t screwed into place in the attic, so the insert can’t go completely in.  It wouldn’t take long to fix, but climbing in the hot, dusty attic isn’t high on our to do list right now.

Lingering-To-Do-Family-Room-Can-Light

In addition to wanting cabinet doors on the entertainment center, I’d like to add a set covering the wood storage area next to the fireplace.  When full, it’s a dirty mess that may be easier to contain behind closed doors.

Lingering-To-Do-Wood-Storage-Cabinets

While the back deck is finished, we still have to run wiring and install two outdoor sconces on either side of the pool house door.  Until then, we have holes with insulation stuffed inside.

June-Garden-Update-Toward-Back-Deck

Rooms on the sleeping side of the house are more finished.  No unfinished parts in either bathroom, the guest room or the boys’ bedroom.  A simple addition of a bench at the foot of our bed would fill in the awkward open space and complete the room.

Lingering-To-Do-Bedroom-Bench

Moral of the story, don’t feel bad if your home isn’t 100% finished.  Ours certainly isn’t, and that’s okay.  Everything is a work in progress, eventually those tasks will be completed, just in time for more I’m sure.