Getting Preppy

Finally having the ugly popcorn off the boys ceiling feels great, but that was the easy part.  The texture came off rather smoothly and easily, but that doesn’t mean the ceiling is primer or paint worthy.  Because we’ve had a few ‘what to do after scraping’ questions, I’m back to share my steps.  Our sheet rock is held in place with nails (the quick way to hang it) and every nail hole needed filling.

Nail-Holes-in-Boys-Ceiling-to-Fill

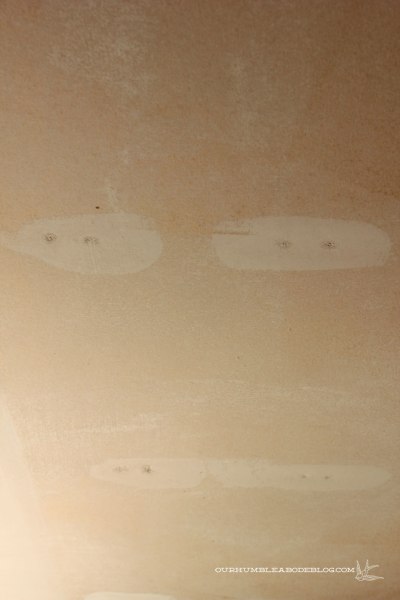
A few areas had scrapes from my spatula and some minor popcorn residue was still on the ceiling.  Before I could break out the primer, I first filled every nail hole (twice), filled in any scratches, then sanded the whole ceiling smooth.  I started with a drywall pole sander (like this one) but quickly got frusterated with it.

Lacking serious upper arm strength, I couldn’t keep the sander head flat on the ceiling with enough pressure to do much.  Instead, it kept flipping over, causing more damage.  So I ditched it, filled in the scratches from it, and used a sanding sponge to get ‘er done.  Oh, and I taped off the door to contain the dusty mess.  Also, wear glasses and a mask because the dust is everywhere.

Ceiling-in-Boys-Room-Ready-to-Prime

Use a fine grit paper and sand until smooth to the touch.  Carefully, sanding through the tape can be a serious pain in the butt.  Drywall mud should sand easily off, as will the popcorn residue.

Sanding drywall, it’s a dirty job (said as Mike Rowe).

It was annoying to use a small sanding block, moving a chair all around the room, but it’s done.  Even primed and painted.  Looking gloriously smooth.

Painted-Ceiling-in-Boys-Room

Unfortunately for me, the ceiling wasn’t the only wall needing attention, sanding, and spackling.  I’m 99% sure the two outside walls had wall paper.  Wall paper was all over this house: the kitchen, previously in the family room and guest room (found pieces behind outlet covers), and some painted over in our master bedroom (which will make it super easy to remove, I’m sure).  Either this paper really stuck on or someone was especially careless when removing, leaving big triangular gouges behind.  That’s bound to happen.  Then the chunks were filled, but apparently not sanded before painting over.  Behind Everett’s crib was the worst spot.

Wall-to-Fix-in-Boys-Room

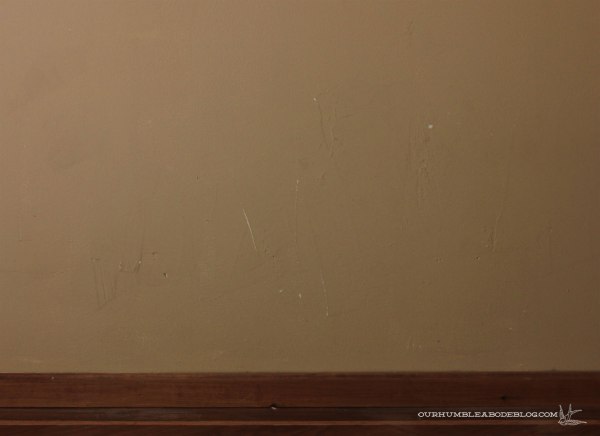
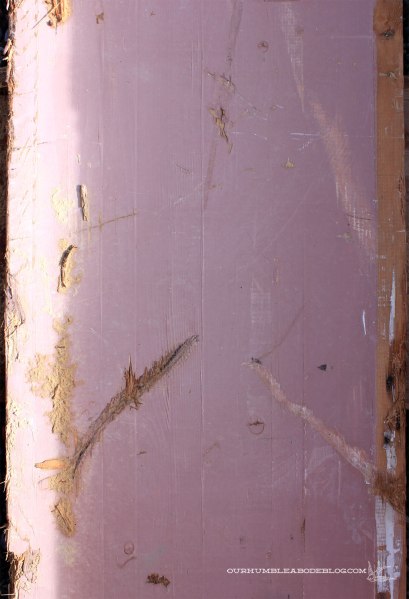
So I’m currently tending to the walls before we can prime and paint.  First I used a metal putty knife to scrape off the uneven areas, filled, sanded, even primed the problem areas.  But the moisture of the primer made the surrounding paint bubble.  I scraped again, making the area larger, sanding smooth, and filling again with mud.  Annoyingly, the wet mud made more paint bubble.  You guessed it, more scraping, sanding, and filling.  Now I’ve got this to work with:

Patching-Wall-in-Boys-room

Hopefully (key word here!) I’ve gotten the flaky paint off and I can carry on with my plans.  Which should include new door trim, crown, and base boards before a few coats of Anjou Pear paint.

Door-in-Boys-Room-Waiting-for-Trim

It’s exciting to take another virtually untouched since we’ve moved in room and make it ‘us’.  Kind of getting sick of feeling like I’m living in someone else’s house, you know what I mean?  So tell me, what’s the strangest thing a previous home owner has done to your house?  Something that has you wondering, “why in the world did that happen?!”

Pop Off Popcorn

Disclaimer: Before I get to the details, it’s super important to know if your ceiling has asbestos.  You can buy a test kit to do yourself, or call a professional to check.  If your ceiling tests positive for asbestos, leave this job to the pros.  If your ceiling doesn’t have asbestos, read on.

As I mentioned last week, scraping the popcorn off our ceiling was easier than I expected.  Lucky for us, these ceilings hadn’t been painted over, allowing the texture to absorb more water.  If you’ve got a ceiling you want to smooth, get a weed sprayer, wide metal spatula, hot water, and white vinegar.  You’ll also want safety glasses or goggles, a mask, and probably a hat.

Popcorn-Scraping-Supplies

If your floors are finished (or just for easy clean up), tape plastic over floors and finished walls.  Fill the weed sprayer with the hottest water you can get from your faucet.  No need to boil or anything, just hot.  Add in vinegar.  I poured about 1 to 1 1/2 cups in the sprayer.  Start spraying the ceiling and don’t be stingy!  Note, I’m not sure if the vinegar really helped because I didn’t do a side by side test, but vinegar did help with wall paper removal…

Popcorn-Scraping-Boys-Room-Plastic

Spray a large area (the wet areas should be noticeably different from the dry ceiling – see along the back wall?), then test scrape.  If it comes off easily, keep on going.  Be careful to have your spatula at an angle so you don’t gouge the sheet rock below.

If it doesn’t come off, spray again, let it soak a few minutes then try.  If your ceilings are painted, scraping the outermost layer off to expose fresh texture, then spraying again could really help.

Popcorn-Scraping-Mid

Also, when you come up to a taped seam, scrape along it, not against it.  This way you won’t tear the tape leaving a cracked ceiling behind.  I worked toward the center, leaving my light up.  When I got close, I pulled down the canopy, covered the electrical box with plastic, carefully sprayed around the box, and scraped off the rest.

Popcorn-Scraping-Around-Light

Clean up was pretty easy thanks to the protective plastic layer, but the water did loosen the tape in some spots.  After rolling up the sheeting, I hauled the shop vac in to get the rest off the floors.

Popcorn-Scraping-After

The actual scraping took only an hour, which is about 23 shorter than I expected.  Ha!  Now I’ve got to fill a few holes to get ready for paint, which is always the tedius part.

Gimme a Giveaway: Super Sweet Life

This giveaway is closed.  Thanks for entering!  See who won here

Jeez, this year is already almost half over.  Can you believe it?  Usually January seems to be the time to get organized, but June is a good time, too.  And Super Sweet Life can help you get there.

Maybe you need a set of completely custom pantry labels to whip your kitchen into shape?  You tell Laura exactly what you want and need.  Text, sizes, everything for a perfect fit.

Don’t forget to label those spices while you’re at it.

Of course you can label anything, anywhere else in your home.

While we’re focusing on the kitchen, get your hands on a $50 Williams Sonoma gift card, provided by the Wilsonart Social Media Team.

The Goods: A $50 credit good for or toward anything in the Super Sweet Life shop and a $50 Williams Sonoma gift card from the Wilsonart Social Media Team.

To Enter:  Leave a comment, which can (but doesn’t have to) include our Just for Fun question.

Just for Fun: Tell us your one thing you’d love to have in your dream kitchen.  Fancy appliances?  A new layout?  Custom lighting?

For additional entries:

1.  Like Super Sweet Life on Facebook.

2.  Like Our Humble Abode on Facebook.

Contest Closes: Thursday, June 27th, 2013.

Number of Winners: One lucky guy or gal.

Ships: Anywhere on planet earth!

Other Info: We will select the winners using random.org and announce on Friday, June 28th.  Good night and good luck.

The Gross Kind of Popcorn

Gross popcorn certainly does not come from the movie theater.  Or in the cheddar cheese and caramel mixed bag at Costco.  Oh no, those are delicious.  The gross popcorn plagues hundreds of thousands of homes across America.  An epidemic especially in homes built between 1970 and 2000.  We’ve got it, maybe you do too?  In an effort to rid ourselves of the dreaded popcorn, I moved the boys’ bedroom furniture into the guest room.  Leaving me with an empty room ready for popcorn removal.

Popcorn-Scraping-Boys-Room-Empty

Of course I had to move the guest furniture out before that.

Popcorn-Scraping-Boys-Furniture-in-Guest-Room

Because I was alone in the moving process, I dragged the mattress and box spring across the hall to our room.

Popcorn-Scraping-Master-Bedroom-with-Guest-Furniture

Three rooms affected by the dreaded popcorn.  Yes, all that to say goodbye to this:

Popcorn-Scraping-in-Boys-Room

Yesterday I did something I’d never done before.  After wrapping the room in Dexter-ish plastic, I scraped popcorn off a ceiling.

Popcorn-Scraping-Boys-Room-Plastic

Guess what?  It wasn’t hard or bad.  In fact, it was satisfying.  Watching the ugly peel off, leaving behind a near paint-ready ceiling.  Which gives me a boost of confidence to get our larger room done, too.  For those with a popcorn ceiling problem, I’m working on a removal tutorial right now.  Something to look forward to next week.

So tell me, do you hate popcorn ceilings?  What’s the worst wall finish?

Green = Green: Reclaimed Wood

Hey everyone!  Glad to see you here today.  Did you have a good weekend?  We’ve spent most of our last two (including Memorial Day) working on a back yard deck.  If you’re thinking, “Wait, I thought you were going to have a concrete patio back there?” you’d be right.

Back-Yard-Landscape-Plan-Sept-2012

That was the plan up until a few weeks ago, but our plans are kinda fluid.  If our original plan won’t work, we find a better project, or a kick butt deal, we’re willing to switch things up.  Heck, that’s how we ended up with wood countertops at our last house.

When Ben stumbled into the deal of the century, we couldn’t say no.  You see, a commercial building in town was in the process of being demolished.  Outside sat a giant stack of glulam beams, originally used to support the roof.

Back-Deck-Reclaimed-Beams

Ben called around until he found the guy responsible for these dudes and asked what the heck deal was.  Well, they were destined for landfill.  Landfill, not on our watch!  Instead Ben cut these giants down, hauled ’em home, and we’re building a deck now.  But they’re not deck ready in their original condition.

Deck-Beam-Before

Purple paint, screw and nail holes, and gouges from the not super concerned excavator operator need some attention.

Back-Deck-Mud-Pit

But, the mud pit we call a back yard is slowly becoming a user-friendly, dirt free space.  Here’s where we are today:

Back-Deck-Progress

Nineteen beams in place, seven to go.  Each beam is 5 1/4 inches thick, 19 1/4 inches wide, 15 or 16 feet long, and weighs about 300 pounds each.  In a word, massive.  Admittedly, I’m of little help moving these bad mamba jambas.  It’s quite comical, actually.  Ben summons his Hulk powers while I’m all Captain America, pre experimental serum.  However, I can fetch tools, pull nails, and help decide which side of each beam looks better.

Back-Deck-Reclaimed-Beam-Stack

The deck sits about six inches off the ground with a slight cantilever off the ends.

Back-Deck-Over-Hang

Before we can put each beam in place, we’ve got to pull out all nails and screws, sand off the paint, and smooth the grooves from the demo.  Damage from the removal gives each beam some rustic character.

Back-Deck-Character-of-Beams

Even though the sides have a some pitting, the tops are super smooth.  I’ve carefully and scientifically measured the tripping hazard of each side, not yet stubbed a toe or fallen.

Back-Deck-Character

Of course we’re still not done.  Seven more beams until we’re at the desired width.

Back-Deck-Toward-Stack

Then we’ll use a large sander (likely a rented one for hardwood floors) to go over the top, smoothing everything.  Oh, we’ll have the fun task of cutting all the ends to make a clean, straight edge, too.  Normal skill saws don’t even come close to cutting through.

Back-Deck-Uneven-Ends

We’ll seal the virgin wood with a mid-toned stain, for a little depth and color.  And we’ll have to build stairs to this little rock landing.  No more mudslides, thank you.

Back-Deck-Stairs-to-Make

Despite not being done, we’re already enjoying using the deck.  For waterfall sitting, of course.

Back-Deck-Toward-Waterfall

Once we’ve finished the deck, we’ll cover the rest of the muddy areas with plastic, crushed limestone, and add some plants.  Because we need greenery.  I’m thinking a shady little hosta/bleeding heart/lily of the valley bed outside of the bedroom windows.  And build a pergola.  And add a gas fire pit.  And cover the house in new siding.  Yes, we’ve got big plans for this summer.

What do you think of the newest addition?  We’re smitten with him so far.  Anyone else building a deck?  Or adding greenery to a yard?