Pop Off Popcorn

Disclaimer: Before I get to the details, it’s super important to know if your ceiling has asbestos.  You can buy a test kit to do yourself, or call a professional to check.  If your ceiling tests positive for asbestos, leave this job to the pros.  If your ceiling doesn’t have asbestos, read on.

As I mentioned last week, scraping the popcorn off our ceiling was easier than I expected.  Lucky for us, these ceilings hadn’t been painted over, allowing the texture to absorb more water.  If you’ve got a ceiling you want to smooth, get a weed sprayer, wide metal spatula, hot water, and white vinegar.  You’ll also want safety glasses or goggles, a mask, and probably a hat.

Popcorn-Scraping-Supplies

If your floors are finished (or just for easy clean up), tape plastic over floors and finished walls.  Fill the weed sprayer with the hottest water you can get from your faucet.  No need to boil or anything, just hot.  Add in vinegar.  I poured about 1 to 1 1/2 cups in the sprayer.  Start spraying the ceiling and don’t be stingy!  Note, I’m not sure if the vinegar really helped because I didn’t do a side by side test, but vinegar did help with wall paper removal…

Popcorn-Scraping-Boys-Room-Plastic

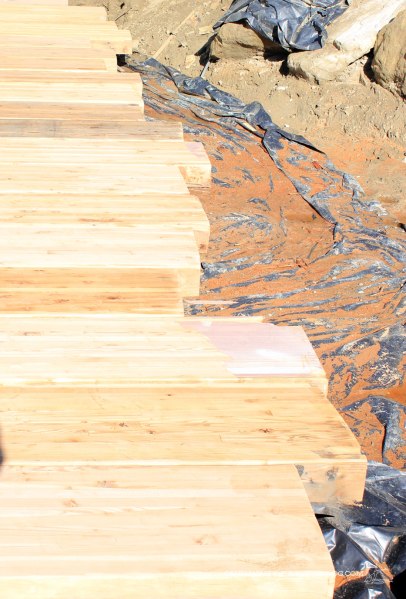
Spray a large area (the wet areas should be noticeably different from the dry ceiling – see along the back wall?), then test scrape.  If it comes off easily, keep on going.  Be careful to have your spatula at an angle so you don’t gouge the sheet rock below.

If it doesn’t come off, spray again, let it soak a few minutes then try.  If your ceilings are painted, scraping the outermost layer off to expose fresh texture, then spraying again could really help.

Popcorn-Scraping-Mid

Also, when you come up to a taped seam, scrape along it, not against it.  This way you won’t tear the tape leaving a cracked ceiling behind.  I worked toward the center, leaving my light up.  When I got close, I pulled down the canopy, covered the electrical box with plastic, carefully sprayed around the box, and scraped off the rest.

Popcorn-Scraping-Around-Light

Clean up was pretty easy thanks to the protective plastic layer, but the water did loosen the tape in some spots.  After rolling up the sheeting, I hauled the shop vac in to get the rest off the floors.

Popcorn-Scraping-After

The actual scraping took only an hour, which is about 23 shorter than I expected.  Ha!  Now I’ve got to fill a few holes to get ready for paint, which is always the tedius part.

Gimme a Giveaway: Super Sweet Life

This giveaway is closed.  Thanks for entering!  See who won here

Jeez, this year is already almost half over.  Can you believe it?  Usually January seems to be the time to get organized, but June is a good time, too.  And Super Sweet Life can help you get there.

Maybe you need a set of completely custom pantry labels to whip your kitchen into shape?  You tell Laura exactly what you want and need.  Text, sizes, everything for a perfect fit.

Don’t forget to label those spices while you’re at it.

Of course you can label anything, anywhere else in your home.

While we’re focusing on the kitchen, get your hands on a $50 Williams Sonoma gift card, provided by the Wilsonart Social Media Team.

The Goods: A $50 credit good for or toward anything in the Super Sweet Life shop and a $50 Williams Sonoma gift card from the Wilsonart Social Media Team.

To Enter:  Leave a comment, which can (but doesn’t have to) include our Just for Fun question.

Just for Fun: Tell us your one thing you’d love to have in your dream kitchen.  Fancy appliances?  A new layout?  Custom lighting?

For additional entries:

1.  Like Super Sweet Life on Facebook.

2.  Like Our Humble Abode on Facebook.

Contest Closes: Thursday, June 27th, 2013.

Number of Winners: One lucky guy or gal.

Ships: Anywhere on planet earth!

Other Info: We will select the winners using random.org and announce on Friday, June 28th.  Good night and good luck.

The Gross Kind of Popcorn

Gross popcorn certainly does not come from the movie theater.  Or in the cheddar cheese and caramel mixed bag at Costco.  Oh no, those are delicious.  The gross popcorn plagues hundreds of thousands of homes across America.  An epidemic especially in homes built between 1970 and 2000.  We’ve got it, maybe you do too?  In an effort to rid ourselves of the dreaded popcorn, I moved the boys’ bedroom furniture into the guest room.  Leaving me with an empty room ready for popcorn removal.

Popcorn-Scraping-Boys-Room-Empty

Of course I had to move the guest furniture out before that.

Popcorn-Scraping-Boys-Furniture-in-Guest-Room

Because I was alone in the moving process, I dragged the mattress and box spring across the hall to our room.

Popcorn-Scraping-Master-Bedroom-with-Guest-Furniture

Three rooms affected by the dreaded popcorn.  Yes, all that to say goodbye to this:

Popcorn-Scraping-in-Boys-Room

Yesterday I did something I’d never done before.  After wrapping the room in Dexter-ish plastic, I scraped popcorn off a ceiling.

Popcorn-Scraping-Boys-Room-Plastic

Guess what?  It wasn’t hard or bad.  In fact, it was satisfying.  Watching the ugly peel off, leaving behind a near paint-ready ceiling.  Which gives me a boost of confidence to get our larger room done, too.  For those with a popcorn ceiling problem, I’m working on a removal tutorial right now.  Something to look forward to next week.

So tell me, do you hate popcorn ceilings?  What’s the worst wall finish?

Green = Green: Reclaimed Wood

Hey everyone!  Glad to see you here today.  Did you have a good weekend?  We’ve spent most of our last two (including Memorial Day) working on a back yard deck.  If you’re thinking, “Wait, I thought you were going to have a concrete patio back there?” you’d be right.

Back-Yard-Landscape-Plan-Sept-2012

That was the plan up until a few weeks ago, but our plans are kinda fluid.  If our original plan won’t work, we find a better project, or a kick butt deal, we’re willing to switch things up.  Heck, that’s how we ended up with wood countertops at our last house.

When Ben stumbled into the deal of the century, we couldn’t say no.  You see, a commercial building in town was in the process of being demolished.  Outside sat a giant stack of glulam beams, originally used to support the roof.

Back-Deck-Reclaimed-Beams

Ben called around until he found the guy responsible for these dudes and asked what the heck deal was.  Well, they were destined for landfill.  Landfill, not on our watch!  Instead Ben cut these giants down, hauled ’em home, and we’re building a deck now.  But they’re not deck ready in their original condition.

Deck-Beam-Before

Purple paint, screw and nail holes, and gouges from the not super concerned excavator operator need some attention.

Back-Deck-Mud-Pit

But, the mud pit we call a back yard is slowly becoming a user-friendly, dirt free space.  Here’s where we are today:

Back-Deck-Progress

Nineteen beams in place, seven to go.  Each beam is 5 1/4 inches thick, 19 1/4 inches wide, 15 or 16 feet long, and weighs about 300 pounds each.  In a word, massive.  Admittedly, I’m of little help moving these bad mamba jambas.  It’s quite comical, actually.  Ben summons his Hulk powers while I’m all Captain America, pre experimental serum.  However, I can fetch tools, pull nails, and help decide which side of each beam looks better.

Back-Deck-Reclaimed-Beam-Stack

The deck sits about six inches off the ground with a slight cantilever off the ends.

Back-Deck-Over-Hang

Before we can put each beam in place, we’ve got to pull out all nails and screws, sand off the paint, and smooth the grooves from the demo.  Damage from the removal gives each beam some rustic character.

Back-Deck-Character-of-Beams

Even though the sides have a some pitting, the tops are super smooth.  I’ve carefully and scientifically measured the tripping hazard of each side, not yet stubbed a toe or fallen.

Back-Deck-Character

Of course we’re still not done.  Seven more beams until we’re at the desired width.

Back-Deck-Toward-Stack

Then we’ll use a large sander (likely a rented one for hardwood floors) to go over the top, smoothing everything.  Oh, we’ll have the fun task of cutting all the ends to make a clean, straight edge, too.  Normal skill saws don’t even come close to cutting through.

Back-Deck-Uneven-Ends

We’ll seal the virgin wood with a mid-toned stain, for a little depth and color.  And we’ll have to build stairs to this little rock landing.  No more mudslides, thank you.

Back-Deck-Stairs-to-Make

Despite not being done, we’re already enjoying using the deck.  For waterfall sitting, of course.

Back-Deck-Toward-Waterfall

Once we’ve finished the deck, we’ll cover the rest of the muddy areas with plastic, crushed limestone, and add some plants.  Because we need greenery.  I’m thinking a shady little hosta/bleeding heart/lily of the valley bed outside of the bedroom windows.  And build a pergola.  And add a gas fire pit.  And cover the house in new siding.  Yes, we’ve got big plans for this summer.

What do you think of the newest addition?  We’re smitten with him so far.  Anyone else building a deck?  Or adding greenery to a yard?

Gimme a Giveaway Winner & A Self Issued Challenge

We’ve come to another Friday and the end of May.  Which means we’ve got another giveaway winner to announce.  And, the winner of one MT Photo Journal print iiiiissssssss Maryanne.

Congrats, Maryanne!  Thank you (and everyone else!) for following along with us, showing your support, and encouraging us.

We’ve had rain every day this week, so we’ve been stuck in the house more than usual.  I get antsy and irritable when that happens.  Then I take it out on the house, getting annoyed with unfinished projects and messes.  It’s high time something happen to solve those problems.

Unorganized-Right-Office-Cabinet

So I’ve issued myself a challenge; to purge, condense, and organize the problem areas of our house.  Namely my office, the boys’ bedroom, linen closet, and pool house.  Random junk and clutter freaks me out.  A lot.  This cabinet in my office has fabric that I usually forget about, scrapbooking supplies I haven’t used in years, half used materials (plaster and wire anyone?).

Unorganized-Left-Office-Cabinet

Right above that is a drawer of art supplies for the boys.  I’m debating moving it, but don’t know where else to keep it.  Where do you store kids art supplies?

Unorganized-Art-Drawer

Right next to my office is a cabinet of vases, candle holders, and candles.  And other junk.

Unorganized-Vase-Cabinet

Lower parts of the linen closet are organized, but this top shelf is a pile of pillows that I can’t reach without a chair.  And a random Easy Bake Oven handle.

Unorganized-Top-of-Linen-Closet

We’ve got picture frames scattered around the house, including a box in the boys’ closet.  A bag of swim diapers we don’t need any more that I don’t know what to do with, too.

Unorganized-Boys-Closet-Top

When we bought this house everyone seemed most excited for the pool house.  The most frequently asked question we get is, “what are you doing with the pool?”  Or “what’s the plan for the pool house?”  Someday we’ll do something cool with it.  Keep the pool (it need some serious fixing before it can ever be used).  Sadly, it’s just a supply warehouse and tool workshop right now.

Unorganized-Pool-House

Just looking at this makes me itch.  So. Much. Stuff.  It has gotten worse since starting on the back deck.  Tools galore.  I don’t even know where to start cleaning this.

Unorganized-Pool-House-Door

So what’s the challenge?  To clean these areas up, purge what we can, and organize the rest over the next week.  Please, please tell me you’ve got at least one problem spot.  Want to join in the organizing fun?