Back on closing day, nearly four years ago now, our living room had a lovely variety of honey toned oak. Floors, doors, trim, and the railing. The light fixtures, red accent wall, and arch over the railing were high points, too.
We’ve since added new trim, painted the doors and walls, replaced the lighting. Basically changed everything except the floors (which will remain the same) and until recently, the railing.
With the basement completely gutted and free of drywall, we finally had access to the underside of the railings.
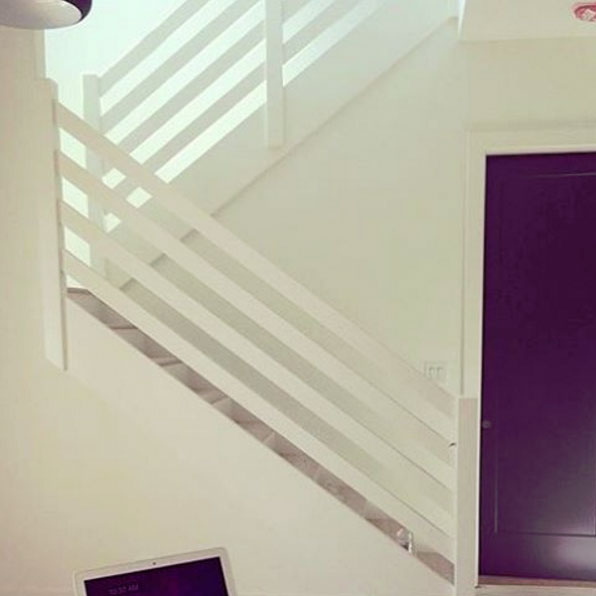
Over the weekend we removed the old oak railings and built a new, sleeker design. Two years or so ago I started planning what would eventually replace the oak and thought a horizontal layout would look best. A few months ago I spotted this railing by Milk and Honey Home and knew it would work for our home, too.
To build our railing we used four by four posts and two by six boards for the rails. It took a day to build and install, and even before primer and paint, it looked light years better.
One coat of primer and three coats of white paint later and here we are today:
Be prepared for photo overload.
The simple design doesn’t attract unnecessary attention and is sturdier than the old design.
Getting the straight section by the living room done was pretty straight forward, but the angled section was trickier.
I’ve got a post in the works covering the building process, so I’ll save the specifics for then.
It’s much more modern and more in keeping with the straight lines of the house.
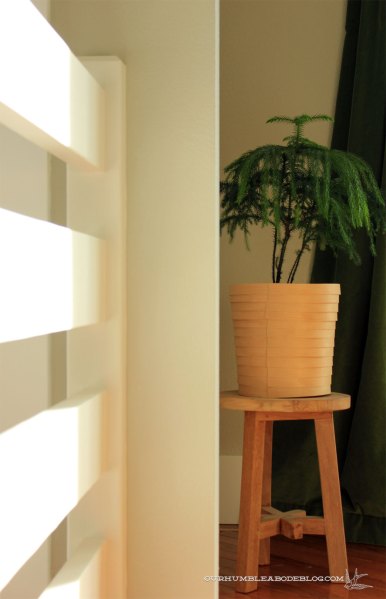
I may regret my decision to paint it white after the millionth round of washing dirty hand prints off, but I love the way it blends with the tongue and groove wall.
The post tops are simply a 45 degree angle and rise 2.5 inches above the top rails.
To give the boards a defined termination into the wall, we cut a post in half for a seamless look.
Every new change is so exciting to see when walking past, and this one has been a long time coming.
The way it brightens up the entry and living room is my favorite.
Once we’ve replaced the tile, our entry checklist will be complete.
And with the railing complete, we can continue work in the basement and should be ready for sheet rock soon. Then the fun can begin! I’m already gathering paint samples, measuring for furniture, and we’ve purchased a couch for the theater room.


It looks gorgeous. I love the look from the kitchen to the front door…totally transformed!
Hi lauralou! Thanks so much! It makes a huge difference, doesn’t it?!
Thanks!
Amanda
Wow!! Amazing!!
Hi Ashley!
Thanks so much! 🙂
This is totally gorgeous! Just out of curiousity, is this allowable according to your local building code? Ours prevents any horizontal rail that results in a “ladder effect”.
Hello Kelly!
Our code allows anything 36 inches tall. Gotta love Montana. 🙂
This looks amazing! What a difference! Love it.
Thanks so much, Maryanne! We’re loving it already.
Love it!!
Thanks, 3littlehops!! 🙂
It looks great! What an improvement this is.
Hi Barbara H!
It makes such a big difference in the way the entry (and the adjoining living room) feel. Bonus, it’s so much easier to wipe clean. 🙂
I love this look – the difference is breath taking. I have been looking for something that I would like for our entry way. I need to check the building codes to see if we would be allowed to do this.
Hi Tanja!
Definitely look into local building codes, as some can be more specific. This was a pretty easy project (especially the straight side) so I’d totally recommend it!
Thanks!
Amanda
A huge improvement, so updated! You are especially lucky to to be so carpentry-gifted. I fear you may regret the white paint (she says after spending weeks stripping white paint from the hand rails of her banisters). Would it have spoiled the look if the top rail and maybe the posts were natural wood?
Hi Pamela!
So far, I haven’t regretted the white paint. I figure I can wipe it down, or worst case scenario, I’ll have touch ups to do. Realistically, the top rails should be the only areas to worry about, so for me it’s an okay trade off.
Thanks!
Amanda
Looks great!
Thanks so much, Meredith!
How amazing! Must have been so tough making do with the old railing. Absolutely successful choices on redoing this entire entry area.
Hi Viola!
At least the old railing wasn’t falling apart or anything, just not our personal preference. Instead, we donated it for someone else to use.
Wow! Love it!! I also love your new blog look 🙂
Thanks, Esther! I figured it was high time for a change. Glad to hear you like it!
Such an improvement! I’m impressed you knocked this out in a weekend, great job!
Hi Rebecca!
Thanks so much for the sweet comments! For the most part, it was a smooth, straight forward project which is always nice between big projects.
Thanks!
Amanda
Hi! I was so excited to see a railing like this. Have you put up a tutorial yet? I am wondering how to connected the 2×6 boards to the posts. I would also like to know how You changed from horizontal to slanted as you go down the stairs. Thanks!
Hi Charissa!
Yep, I shared the full tutorial on it right here: https://ourhumbleabodeblog.com/2016/02/12/building-a-sleek-railing/ If you still have questions about it, ask and I’ll do my best to answer. 😀
Thanks!
Amanda
Hi Amanda! My husband and I are going to build a horizontal stair railing like yours and I’m wondering if you can tell me how you attached the rails to the posts. We’re at a loss and googling is not working! 🙂 I can’t find the building instructions on your blog. Would you please direct me to that page if it is available? Your work is absolutely gorgeous!
Oh I’m sorry, I just noticed the link in one of the comments! I’ll check it out, thanks!
How did you update your windows? Did they originally have the wood/oak interior? What did you do when you changed the trim? We can’t replace all our windows so that has held us back from doing the trim. Thank you
Hi Tim,
We replaced all of the old windows throughout the house. This can be done either one room at a time or the entire house. We changed the trim as we replaced windows. If you can do it one room at a time, that’s still better than nothing. Does that help at all?
Thanks!
Amanda
Hi,
I’m very impressed with your blog and thanks for the detailed how-to link for your horizontal railing. We have some redwood we milled from our property and want to do something similar, but want to highlight the beauty of the wood and just stain it. Do you have any suggestions on how you would have built your railing to hide the attachments if you were staining rather than painting your wood? I haven’t been able to find any tips on the web. Thanks!
Hi! It looks fabulous. What is the paint color for the stairs? And also the walls.
Thank you!