How To: Trim Out a Door

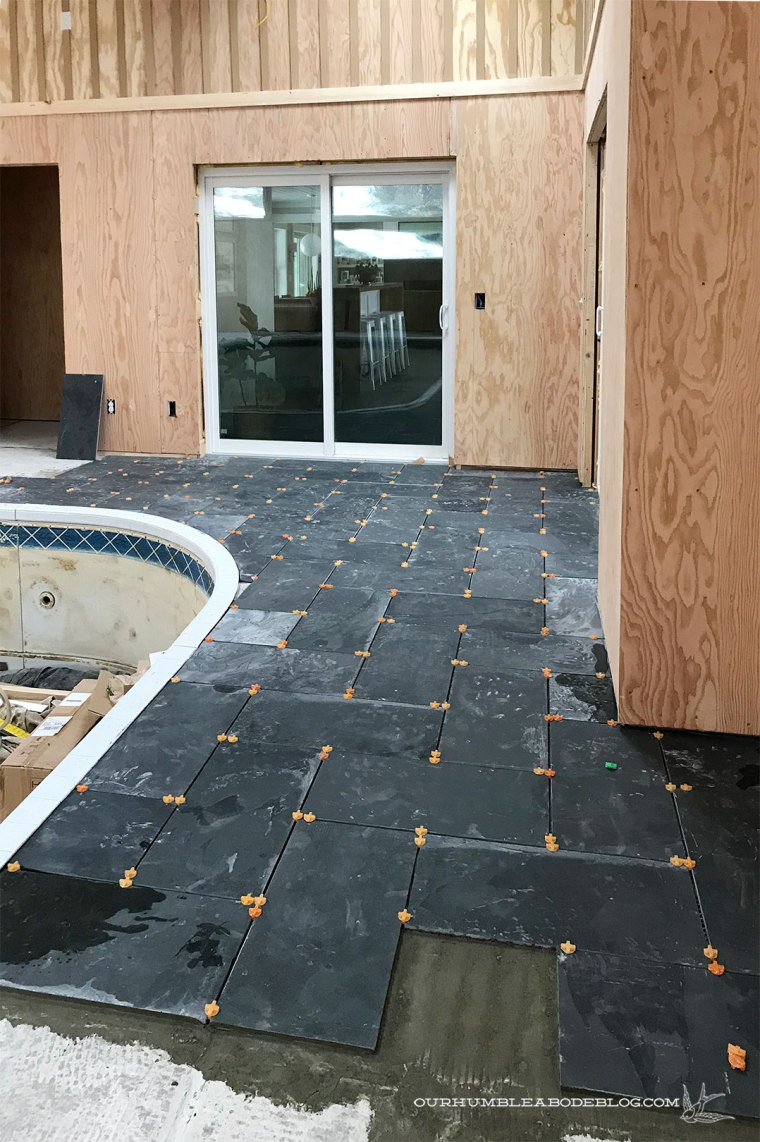
Our Saturday started with tracking down hinges for the storage benches, followed up by checking out hot tubs.  Then the real fun kicked in, with grout by the bucketful.

Pool-House-Slate-Tile-Wall-Detail

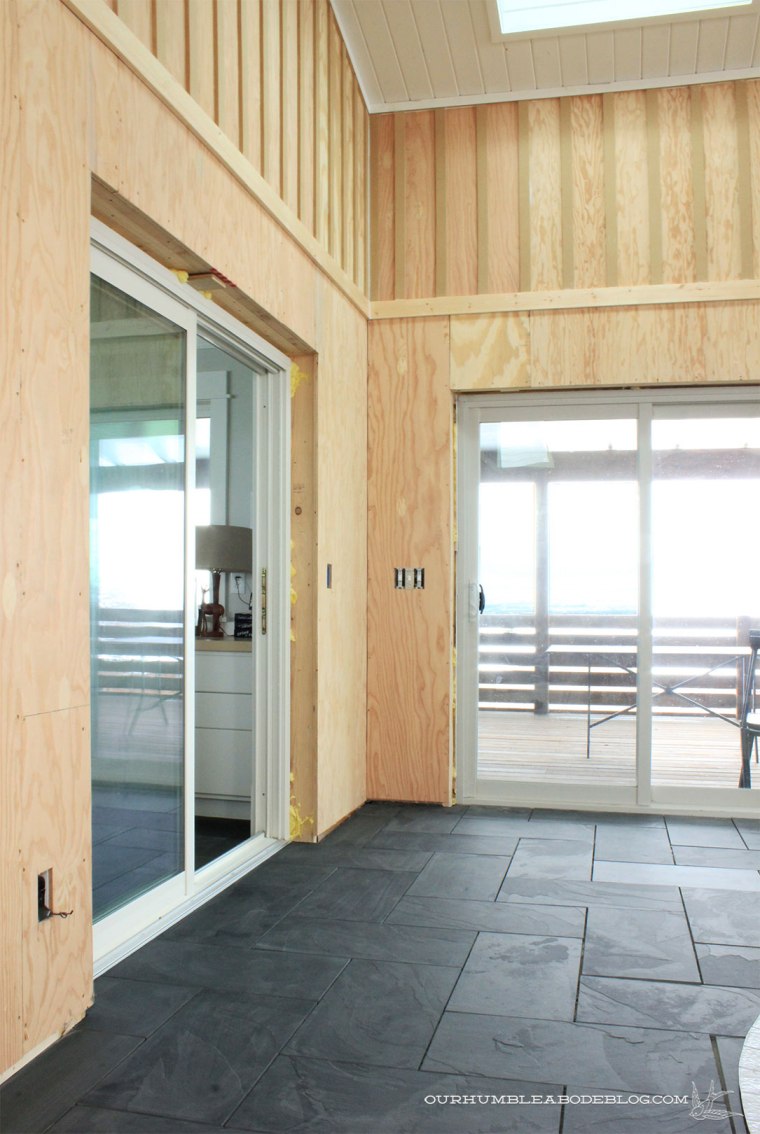
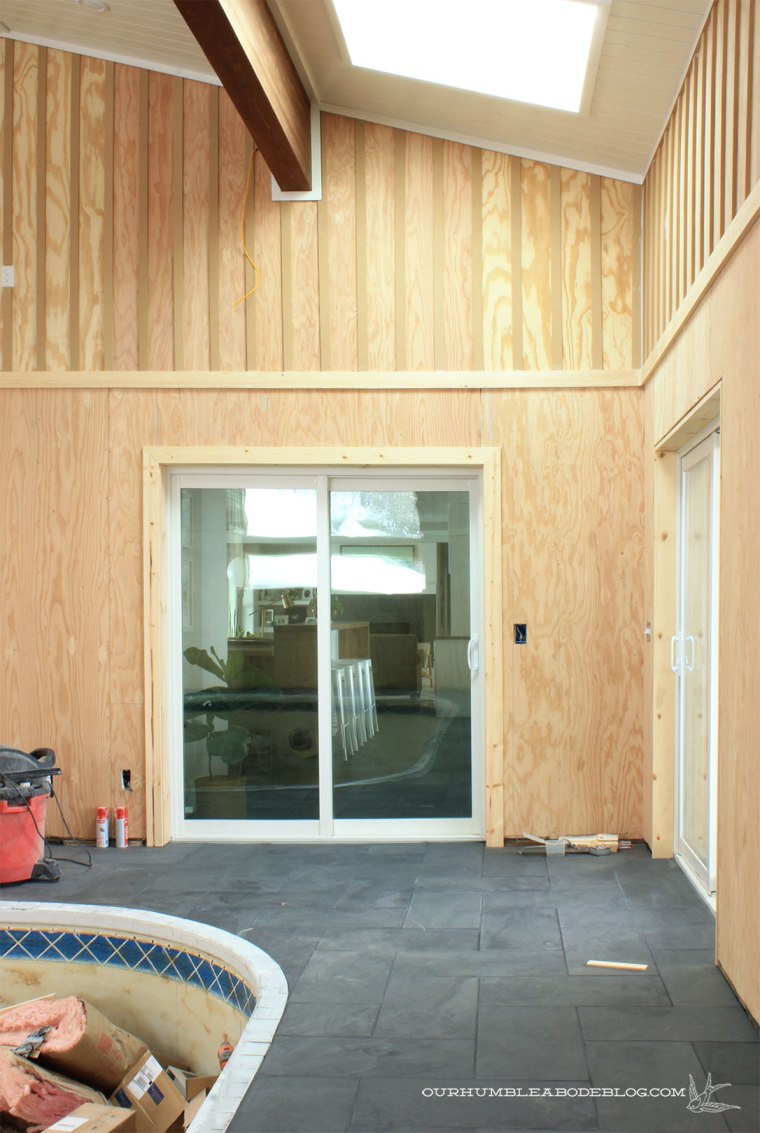
Initially, Ben and I both applied the grout.  We quickly realized it was easier for him to apply grout and for me to follow-up with a sponge, cleaning off the bits left behind.  Sunday morning, we both thoroughly washed all 800 square feet, leaving most of our bodies aching.  With the floors grouted and clean, we’re able to start installing the remaining trim.  Trimming out the five sliding doors was first on our list, as the baseboard and batten strips terminate into these.

How-To-Trim-Out-a-Door-Beginning

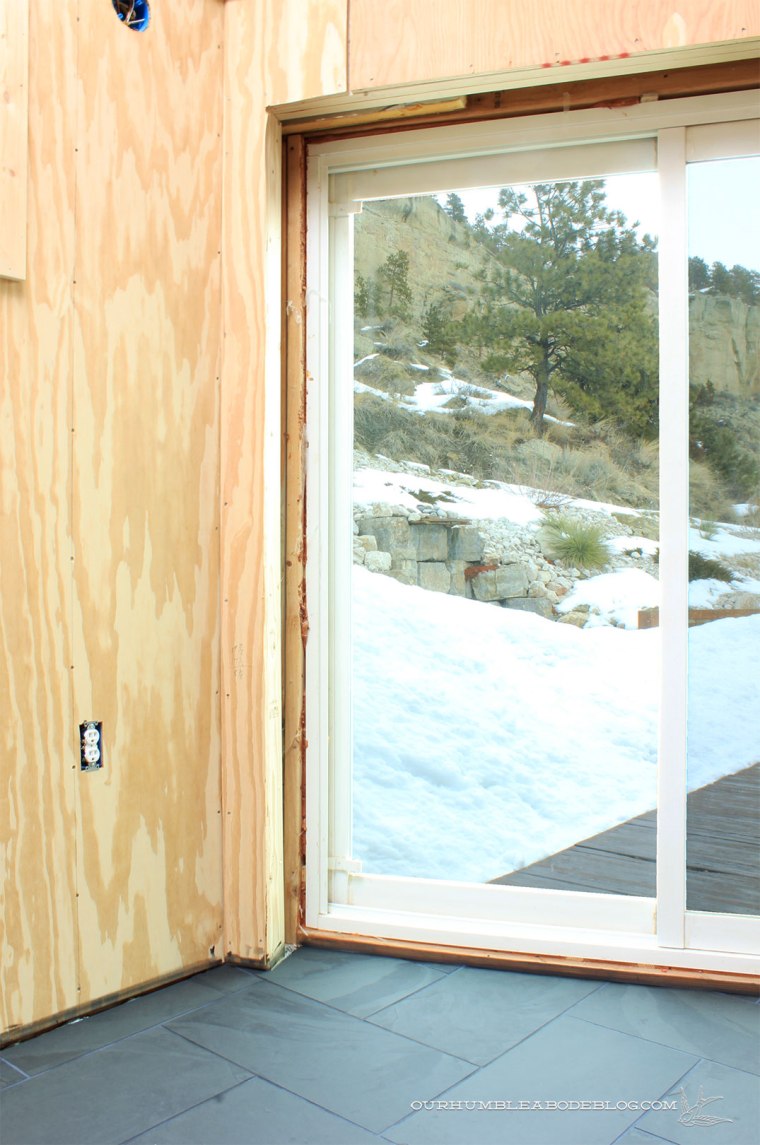
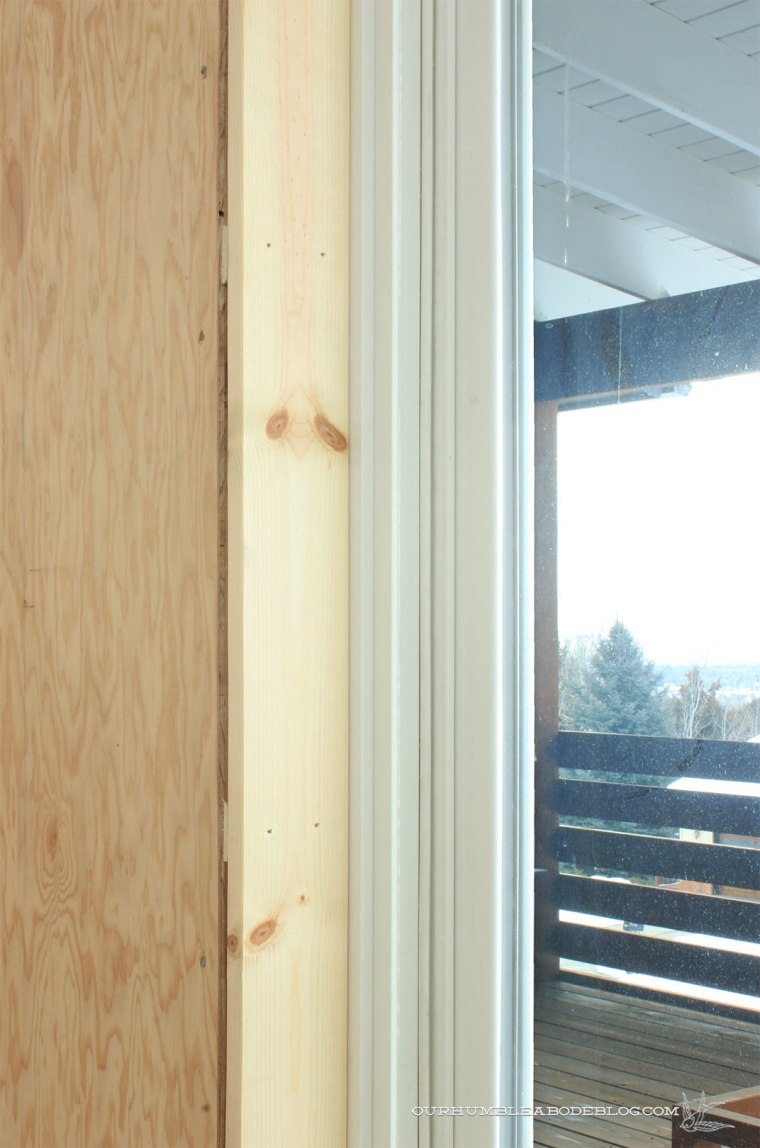
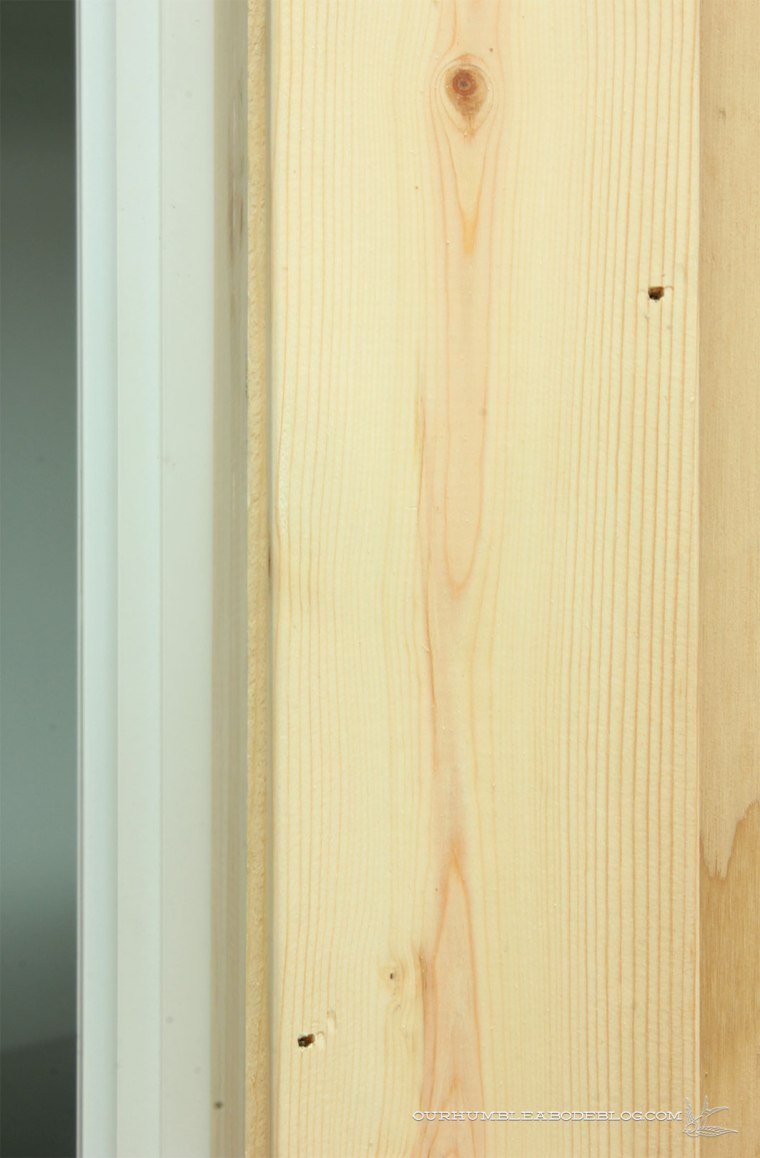
Working on the top piece first, Ben uses a scrap of the finish wood to measure the thickness of the door reveal.  He then secures shims behind, making the reveal of all doors match.

How-To-Trim-Out-a-Door-Checking-Reveal

The same happens on the sides of the doors, extending the frame to fill the depth of the wall.

How-To-Trim-Out-a-Door-Shim-Detail

How-To-Trim-Out-a-Door-Side-Detail

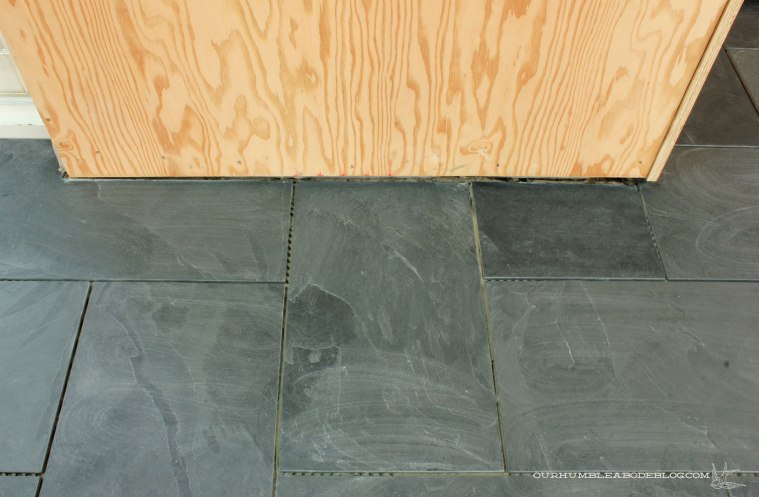
Carefully cut and measure to ensure a tight fit against the floor.

How-To-Trim-Out-a-Door-Frame

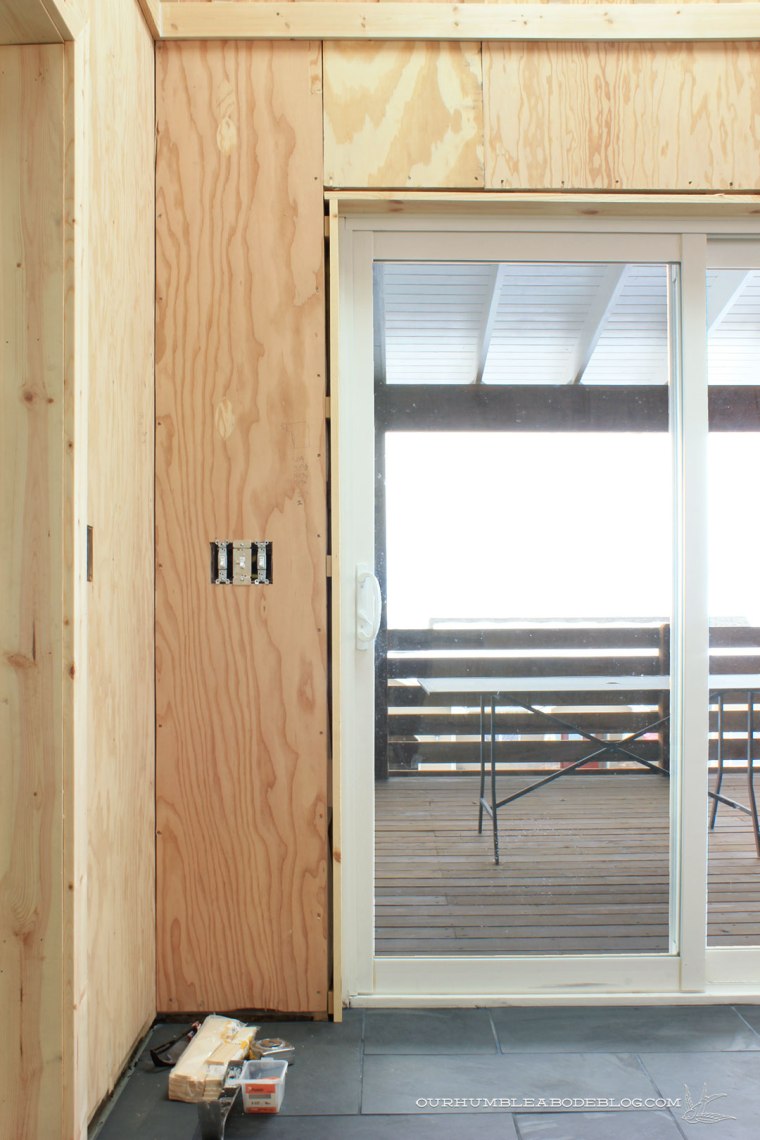
Before attaching the trim around the door, Ben sprays compressed insulation in the gap to eliminate air infiltration.

How-To-Trim-Out-a-Door

Now, the exciting part-adding the finish trim to the doors.  We chose 3 1/2 inch wide square fir trim for a simple, modern look.

How-To-Trim-Out-a-Door-Detail

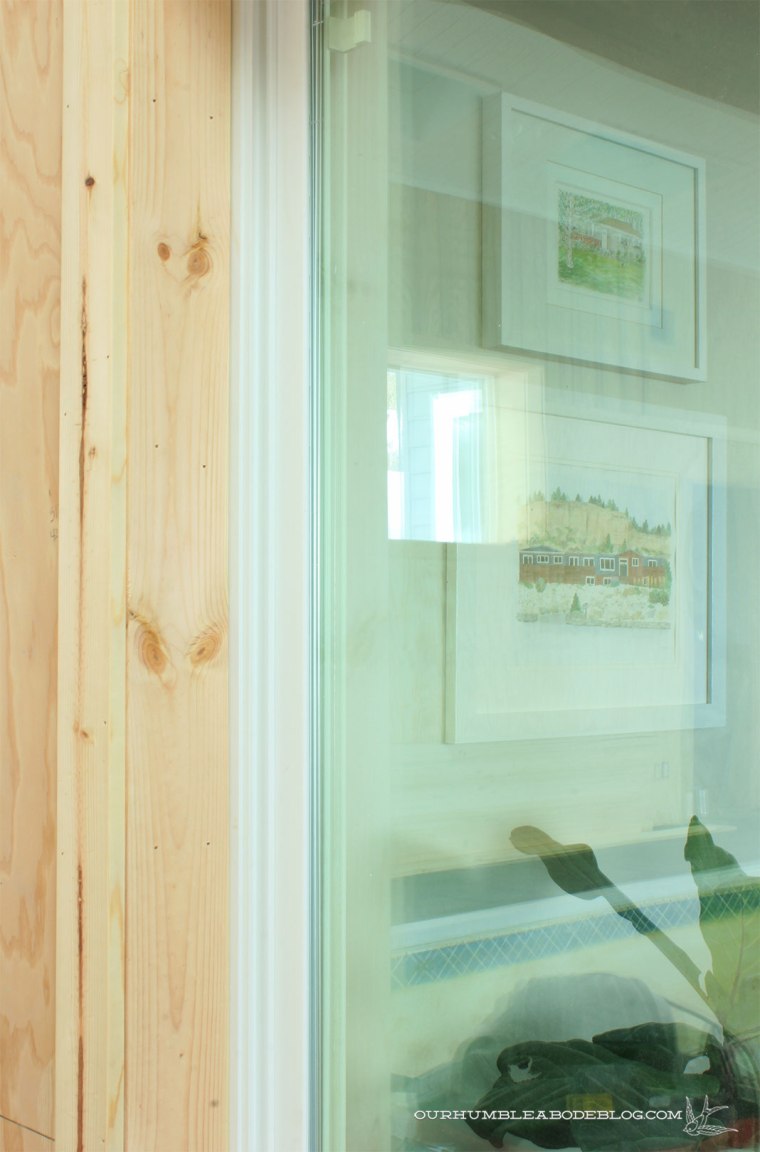
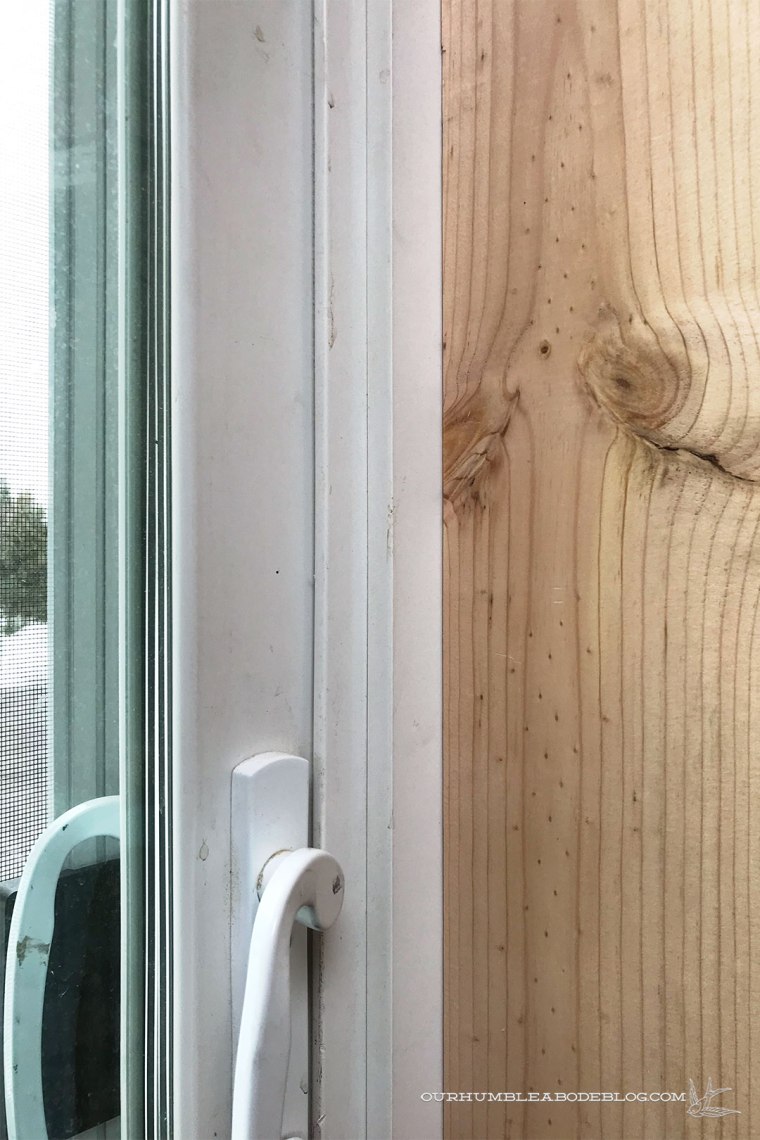
For a little interest, and the ease of not having to perfectly match the trim to the extension, we leave about a quarter-inch of the extension showing.

How-To-Trim-Out-a-Door-Trim-Reveal

It’s a simple process, not taking much time, but does make the space look more finished.

Pool-House-Slate-Tile-Toward-House

How-To-Trim-Out-a-Door-To-House

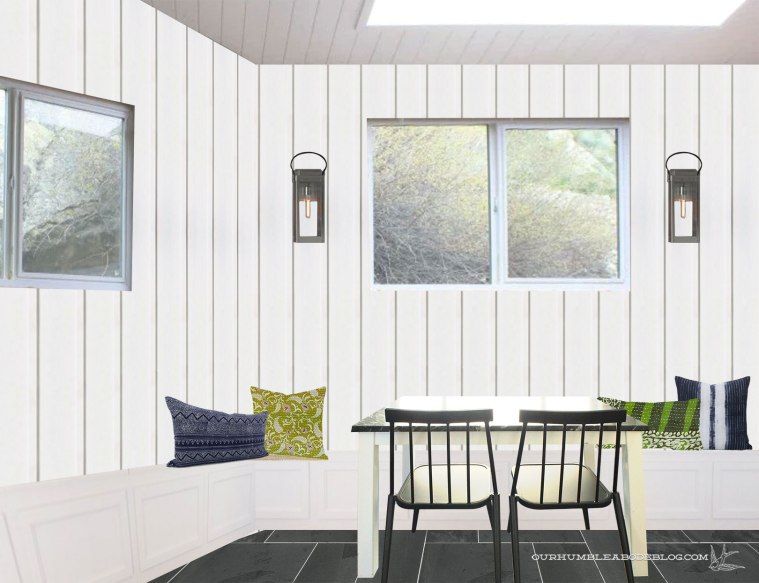
Is it Saturday yet, so we can get some more trim work done in here?  I’m incredibly excited to get paint on these walls!

Tile and Bench Planning

We laid the last tile in the pool house this weekend and it’s a relief to have this huge task out of the way.  Grouting will come next, fingers crossed this weekend.

Pool-House-Tile-Install-Finished

Once grout is complete, that concludes the floor saga for the pool house.  We’ll move on to trimming out doors, installing base boards, and attaching the rest of the vertical batten strips.  Creating the built-in benches will also happen somewhere in that mix, so I’ve given too much thought on the design of those.

Initially, I thought we’d have white benches, for simplicity, with wooden tops for durability.  A pair will follow the angled walls of the kitchen area, meeting at the corner.  Another bench will fill the recessed nook at the far end of the pool, as seen above.

Pool-House-Bench-Area

Recently, while picturing everything in my head, I realized wooden bench tops weren’t going to cut it.  In a room with a white ceiling and (what will be) white walls, tile floors, and few other accessories, I don’t want this space to lack warmth.  Sure, adjacent areas will have wood in small doses, like the floating kitchen shelves:

Pool-House-Kitchen-Vent-Hood-Plan

And the half bathroom vanity:

Pool-House-Bathroom-Vanity

But it’s still a stark contrast to the house, with hardwood floors and wooden furniture/accessories in every room.  In addition to the structural beams, the benches will be the main source of wood tones.

After considering options, I’ve decided I like the look of four horizontal planks along the front, similar to this:

to-outdoor-benches-with-storage-wooden-storage-benches-outdoor-outdoor

The tops will open to access items inside, and I like the look of continuing the same boards along the top.  I’d love to have a very slight overhang of the top, with a cut in handle detail, like this CB2 bench, for a sleek look.

CB2 Wooden Bench

Loaded with pillows, it should be a perfect perch to hang out before/after swimming.  Or a place to watch the kids from.

Pipe Base Bench

Our master bedroom is over-sized, measuring a normal 13 feet wide, but just under 19 feet long.  It’s sized to have a small seating area directly ahead of the entrance, along the shared bathroom wall.  Which is what we set up when we moved in using a left over bench.

Master-Bedroom-Painted-Blue-Sage-from-Bed

It wasn’t ideal, but I patiently waited for the perfect vintage dresser to replace the bench.  Stalking Craigslist paid off when I brought home the dresser of my dreams.

Craigslist-Dresser-in-Bedrrom-by-Bath-Door

After building our king bed, we had a slightly too large space between the bed and dresser.  Just enough room for a bench.

Ceiling-Fan-in-Master-Bedroom-Overall

As usual, we took the DIY route and made a 60 inch long by 19 inch wide bench, with a base made from galvanized pipe.

Bedroom-Bench-Complete-in-Bedroom

Crunching numbers and a trip to Home Depot later, we returned home with:

1 54 inch long section of pipe (cut and threaded at the store)

4 7 1/2 inch long pieces of pipe (cut and threaded at the store)

4 4 inch long galvanized nipples

4 3 inch long galvanized nipples

6 3/4 inch diameter galvanized tees

4 3/4 inch galvanized floor flanges

4 1 inch to 3/4 inch galvanized reducing couplings

1 package of black rubber adhesive pads

Bedroom-Bench-Base-Pieces

Before assembling, I cleaned the pipes with mineral spirits to clean off the manufacturing oil that coats the surfaces.  Then, started screwing the pieces together.  All 4″ pieces into either side of two of the tees.  A tee and reducing coupling on each end of the 3″ sections.  A floor flange on one end of the 7 1/2″ pipes.

Bedroom-Bench-Base-Assembly

To complete the leg assembly, first screw the tees into the horizontal bars.  Follow up with the long section with the floor flange to create two H shaped leg sides.

Bedroom-Bench-Legs-Assembled

Attach the center bar, tighten everything up, and spray paint to match your decor.

Bedroom-Bench-Base-Assembled1

With the base dry, we were ready to make the top.  We added two inches on the depth and three inches past each end of the length.

Bedroom-Bench-Base-Assembled

For a really sturdy top, we screwed two pieces of plywood together before wrapping both in a thin foam.  I found a thick ticking stripe fabric to wrap the top with, careful to keep the lines straight.  Adding black pads to the base prevents unnecessary scratches, but the sticky rubber also keeps the bench from sliding around on our wood floors.


Bedroom-Bench-Base-Foot-Detail

The bench is the perfect perch to put on socks, or to toss the extra pillows at night.

Bedroom-Bench-Finished-Detail

There’s still a fair amount of floor space between the bench and dresser, but each piece has a purpose.

Bedroom-Bench-Complete-in-Bedroom-from-Door.jpg

What do you think of bedroom sitting arrangements?  Do you have a tricky room or floor plan to work with?

Pool House Progress: Accessories

Guess what we did this weekend.  I’ll give you a hint:

Pool-House-Slate-Tile-Setting-Tile-Spacers

More tile in the pool house!!  We really know how to have fun.

Pool-House-Slate-Tile-Setting-in-Kitchen-Area

When the pool was initially built, everything immediately surrounding the pool had tile.  As the new structure settled, some of the tile cracked, a ladder on the deep end was removed, and outdoor grade carpet covered everything.

Pool-House-Tile-Before

Only the bathroom hadn’t been tiled and was a quarter of an inch lower than the rest of the floor.  Ben laid sheets of 1/4 inch Hardie backer to even it out, then carried the tile into the room.

Pool-House-Slate-Tile-in-Bathroom

From there, the tile continues into the home of the future kitchen, going under the cabinet locations.

Pool-House-Slate-Tile-at-Stove-Side-of-Kitchen

Unfortunately, the white ’tile’ edge is molded into upper fiberglass portion forming the pool walls.  Without completely reforming the pool, it has to stay.  Womp, womp, woooomp.

Pool-House-Slate-Tile-Around-Pool-Edge-Detail

From this angle, it looks like we’re finished with our tiling adventure, but we still have about half left.

Pool-House-Slate-Tile-in-Kitchen-Area

All of the angled cuts took longer than the previous section, but it’s really taking shape.

Pool-House-Slate-Tile-Weekend-2-Tile

With the end of the project drawing nearer each weekend, I’m slowly stockpiling accessories as I find something I like.  Due to the nature of the room, accessories will be limited, so I’d like for each one to be both fun and functional with maximum impact.


Pool-House-Purchased-Accessories

  1.  Snowbound Painted Walls
  2. Montauk Black Slate Tile
  3. Metal Peyton Barrel Planters
  4. Black and Gray Turkish Towels
  5. Svartsjon Hooks
  6. Vintage Ram Skull
  7. Brass and Marble Side Table (similar)
  8. Black and Ivory Geometric Key Pillow
  9. Green and Black Striped Lumbar Pillow
  10. Indigo Tie Dye Ripple Pillow
  11. Wooden Storage Bench Tops

Do you have any favorite outdoor accessories?  Or pool/beach essentials?

Pool House Progress: Slate Tile Floors

Last we shared of the pool house was the addition of the batten strips and framing out the vent hood.  Certainly progress, but there’s one big step to cross off the list before the walls can be completed.  Tiling the entire floor, or roughly 600 square feet.  Dun dun dunnnnn.  Though I have the easiest part of the process, carrying/opening boxes of tile, I was dreading this step.

We know from framing the walls that nothing is square in here, with the floors sloping up to two inches over the length of the space.  Luckily, not much phases Ben and on Saturday, he jumped right in.

For a continuous feel, we’re using the same slate tile and herringbone pattern as the kitchen.

Pool-House-Slate-Tile-Setting-Near-House-Door

One small difference is slightly wider grout lines.  Knowing the floors are a touch uneven, we decided on 3/8 inch grout lines (versus 1/16 inch in the kitchen) to help minimize discrepancies.

Pool-House-Slate-Tile-Setting-Near-Middle-Door
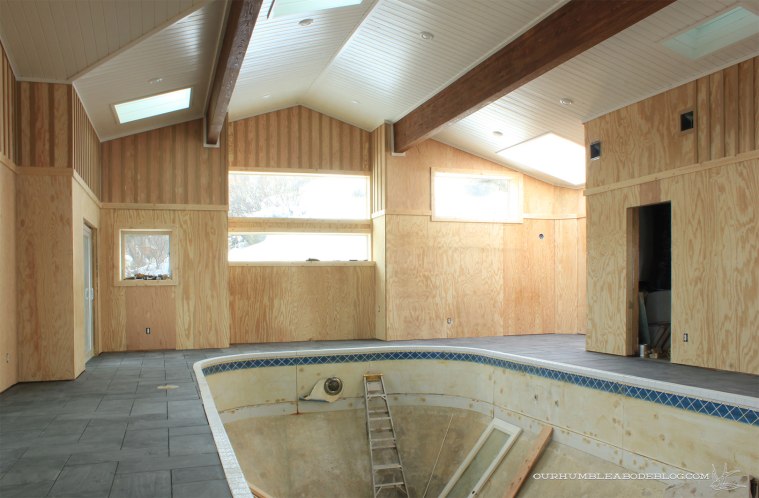
Working around the pool proved trickiest, until Ben built himself a marking jig.  Scraps of plywood set to the depth of the pool lip with a screw slightly through the top piece.

Pool-House-Slate-Tile-Pool-Edge-Scorer

The bottom strips slide along the inside edge of the pool, with the screw scoring the top of the tile, marking where to cut.

Pool-House-Slate-Tile-Pool-Edge-Scorer-Top.jpg

At the end of tile day one, Ben got roughly 1/4 or 1/3 of the space done.

Pool-House-Slate-Tile-Setting-Day-1

The next morning, the tile had set so we pulled out the spacers.  I followed up by washing the tile, scrubbing off any extra mastic.

Pool-House-Slate-Tile-Cleaning-Day-2

Obviously, grout is still to come.


Pool-House-Slate-Tile-Wall-Detail


Pool-House-Slate-Tile-Pool-Edge-Detail

Having this tile in various rooms throughout our house, we know this tile is durable and the texture is naturally slip-resistant.

Pool-House-Slate-Tile-Toward-Front

Dark floors paired with (what will be) white walls will ground this bright space.

Pool-House-Slate-Tile-Toward-House

We still have at least several days of tile or tile related tasks in our future, but progress always feels good.