Kitchen Cabinets, Part 1

During our last kitchen renovation, I shared how we built our cabinets.  Over the weekend, Ben built every drawer, 9 total, for the island.  We’ve made a few changes while building our new cabinets, so I’m giving the scoop now.  To get as much detail as possible, I’m sharing how he built the boxes and drawers now.  Once we finish the fronts, I’ll discuss the materials and process for those.

As he finished each drawer, I sanded the tops and sides smooth for clear coat.  Four days later, here’s our island, ready for install.

Kitchen-Cabinets-Island-Build

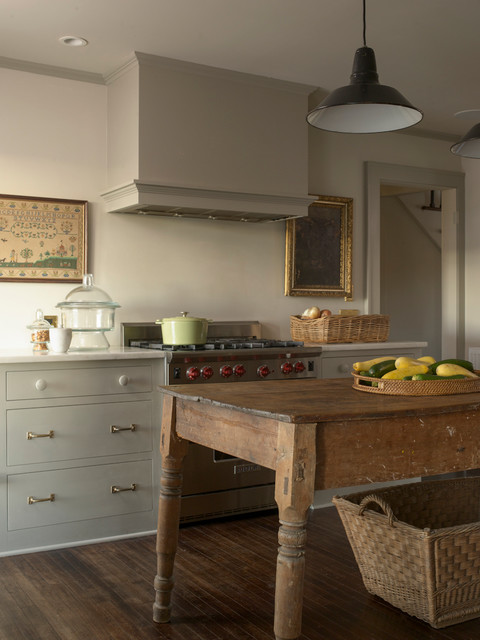
The right stack are for either side of the stove.  On the left are the shorter cabinets the cook top will rest on.  Originally, we planned to put the trash under the sink again, but started discussing and agreed it is better under the stove.  With a half width drawer under, if someone is cooking, it’s easy enough to scoot to the side to throw something away.  At the sink, you have to step all the way over, stopping what you are doing.  So, that’s why there’s only one drawer in the lower box.

Our bathroom vanity was a trial run of sorts for the kitchen cabinet process.  All boxes are constructed with 3/4 inch thick, double-sided melamine coated particle board.  Melamine is ideal for wet or potentially wet areas such as kitchens.  Box assembly is otherwise the same as before.

One big change we made is the drawer material.  Last time we used 3/4 inch plywood.  It’s sturdy, but everything we can get now is a lower grade.  Low grade plywood warps easier, which can skew the drawer.  We also didn’t want to fill ugly edges.  This time around, we went with 3/4 inch thick poplar for the sides and 1/2 inch double-sided melamine for drawer bottoms.  Using a dado bit in the table saw, Ben cut a 1/2 inch wide by 3/8 inch deep groove a half-inch from the bottom.

Kitchen-Drawer-Assembly-GroovesHe repeated this process for both sides and the front.  The backs are an inch shorter and are glued directly to the drawer base.  A bead of glue inside the groove holds the base in place.  Each side slips in over, nailing the corners for added strength.

Kitchen-Cabinet-Drawer-Base-Grooves

After the three sides are in place, Ben runs a line of glue on the base and side corners before sliding the back in.  A few more nails and the drawer is assembled.  That’s when I get to start working.  I used 220 grit paper to sand the top edges and sides smooths, paying extra attention to the joints.  Before sealing, I quickly vacuum off dust.  To keep the melamine base clean, I taped off the edges before applying two coats of clear water based poly.

Kitchen-Drawers-Taped-Off-Base

One really great advantage of building our own cabinets is tailoring them to our needs.  For instance, the drawer heights are perfect for us.  We always prefer three drawers over a shorter stack of four.

Before we start building drawers, I measure a bunch of items to decide the minimum height for each drawer.  I tell Ben what I need the usable space to be.  To accommodate tall pots, leaving a little breathing room, our bottom drawer inside space is 11 inches tall.  Our top drawer can be no shorter than 4 1/2 inches inside to store our spice drawers.  Middle drawers are always the remaining space.  Knowing my measurements and that the bottom and glides take up 1 inch, Ben knows where to attach the glides.

Kitchen-Drawer-Glides-Mounted-in-Box

Another big difference this go around are the drawer glides.  Last time, we didn’t want to sacrifice drawer height, so we used side mount glides.  With a bigger kitchen, we are less concerned about that and chose Blum soft close, under mount glides.

Comparatively, these puppies are not cheap.  About $17 per pair versus $6 for the same size.  We made our island deeper than standard, 31 inches, to leave space between the cooktop and bar.  Longer pairs cost $45 each.  That’s 405 dollars in drawer glides for just the island!  Even with the price tag, after using these in the bathroom, neither of us would go back to the old style.  These are the cats pajamas.  Seriously, full extension, 100 pound heavy-duty rating, quiet, and smooth.

Kitchen-Drawers-Inside-Box

With the slide installed, he secures clips to the under side of each drawer.  That’s the orange thing you see in the above photo.

Kitchen-Drawers-Blum-Undermount-Clips-Side

These clips are the only thing physically holding the drawer to the glide.

Blum-Drawer-Glides-from-Under

Did I mention these glides are tucked completely underneath, hidden out of sight.

Kitchen-Drawers-Undermount-Glides

That’s all we can do on cabinets until we get everything set in the kitchen.  Then we add the face frames, drawer fronts, and hardware.  We’re nailing down those details soon.

We also made unexpected progress on the countertops over the weekend.  Hoping to get pricing and see our options, we popped in a local marble and granite supplier.  I said I preferred a dark, matte to satin finish stone.  The owner showed us really beautiful leathered granite and a gorgeous soap stone remnant pile.  After talking it over with him, he made us an offer we couldn’t refuse: 100 bucks for six soap stone pieces.  Three are more than enough for our kitchen, so we loaded it up that day.  Because soap stone is on the soft side, it’s easy to cut and polish at home.  Ben’s no stranger to working with stone counters, so we’re thrilled.  Right now, the slabs are stacked together, with the backs facing out.  But, I can’t wait to share more!

Our rule is to have everything on site and ready for install before anything gets ripped out.  Slowly, things are coming in.  Flooring, a new door, and the sink should arrive soon.  It can’t get here soon enough.  Almost daily, Ben threatens to tear things out.

Dependant Pendants

We’re making progress with the kitchen.  All cabinet boxes are built, except the sink which we’re waiting to build until we have a sink in hand.  As of now, half of the basement is cabinet shells, stacked tetris style.

Kitchen-Cabinets-Stored-in-Basement

For appliances, we’re only missing our sink.  The current dishwasher and refrigerator are staying.  A gorgeous 48 inch cook top, stainless vent hood insert, and stacked double ovens are hanging out, waiting for a permanent home.

What we expected to be easy, has become a search: finding the perfect sink. Knowing we loved the last custom-made sink (as well as our bathroom shower pan and counter by the same fabricator), we started there.  Unfortunately, their rates have almost tripled to complete our design.  Much like Duran Duran, we’re on the hunt.  And hungry like the wolf.

In the interim, Ben is starting drawer assembly and we’re waiting for our new sliding door to arrive.  Nitty gritty details are being discussed and planned regularly.  Lighting is the most recent debate.  After several discussions, I think we’ve settled it.  The smaller white dots represent recessed cans and the black show pendants.

Kitchen-Floor-Plan-with-Lighting

I quite like these small pendants at Home Depot.  Directing the lighting down should make the bar area feel cozier, and won’t blind people in other rooms.

Sleek glass pendants are my back up, if we feel the black attract too much attention.  

Then I start second guessing whether I want pendants or not.  We need a vent hood, and the wider cook top needs a larger fan.  But, with the cook top in the island, that vent hood takes up a fair amount of space.  Visually and literally.  The plan is to box around it as simply and minimally as possible.  Perhaps similar to this, but in the middle of the room.

This white with wood band is really stunning, too.

I’m not sure if I’ll like the look of the big hood and smaller pendant combo.  Especially when the lights are less than two feet from the boxing.  I’ve searched for inspiration, but most island set ups have either pendants or a vent hood.  Not both.  Few that do, have pendants to the sides, not over a bar, like this:

Any ideas, suggestions, or pictures you have to help decide?

Kitchen Planning

It seems fitting this is our 1,000th post.  We’re talking kitchens, which was the only full, real-time remodel we shared from our last house.  Living in this kitchen for the past 2 1/2 years has made us realize what we like and dislike about the layout.  Using our last kitchen as a guide, we have a better idea of what we’re getting into.  We also know more about materials we’d prefer.  Here’s a reminder of our current layout and design.

Kitchen-Two-Years-Later

Here’s a scaled layout of the space:

Kitchen-Floor-Plans-Current

It’s a long room, 29 feet from the family room to the pool house door and 13 feet wide.  Big and totally workable, with three different work zones inside.  The main kitchen, a breakfast nook, and my office.

Painted-Office-from-Kitchen

Painted-Office

From the office, you can go to the pool house.  If you do a 180 spin, you’ll see a large bay of cabinets we use as a pantry and large item storage.  Small appliances, large dishes, and such.

Office-to-Family-Room-One-Year-Later

While the kitchen looks (and is) large, the layout of cabinets aren’t the most functional or well planned.  Several cabinets are essentially filler.  Like this large corner cabinet that doesn’t do much beside hold Ben’s cheap wine collection:

Corner-Cabinet-in-Kitchen

Or our giant cabinet housing only a trash can.

Trash-Cabinet-in-Kitchen

I like the idea of this vertically divided cabinet, but we could get away with only half like this:

Divider-Cabinet-in-Kitchen

We’re also not in love with the fridge next to the oven combo.  Especially with the built-in microwave space above.  Our tiny microwave doesn’t help the look either.

Kitchen-Appliance-Side-by-Side

The 3 foot space between the island and perimeter is frustrating, too.  When the oven and/or dishwasher are open, it’s a maze. Add someone at the sink and it’s really cramped.

Kitchen-Doors-Open-Maze

Given those dislikes, we’ve come up with a new plan.  It includes all drawer lowers, which we greatly miss from our last kitchen.  Here’s what we’ve got in mind:

Kitchen-Floor-Plans-New

Most appliances are staying in the same location; refrigerator, sink, dishwasher, and cooktop.  We’ll swing a double wall oven around the corner, turning the wasted space into a shallow walk-in type pantry.  A pocket door means one less door swing to accommodate.

Kitchen-Floor-Plans-New-Details

To get more working room, we’re moving the island another foot away from the perimeter cabinets.  Across from the island, we’re going to widen the doorway, matching the width of the adjacent dining room.  Because we’re losing the big pantry bay, we’ll add in a smaller cabinet to house the microwave and other small appliances.  My office will also get a different layout, nixing the L shape to the corner.  In place, we’ll widen the pool house door to match the other sliding doors we’ve installed.  Our plan is to use the same tile throughout the two spaces, for a seamless flow.  I’ll talk more about the design elements when we get more nailed down.  We’ve already started building cabinets, so hopefully we can demo before the new year.

A Weekend of Difference

Whew, I’m exhausted today.  Over the weekend we knocked out several projects.  First, I scraped the popcorn off our ceiling.  This is my second go round, so I knew what to expect and followed the same steps as before.  Being home alone, I couldn’t move our big bed out of the room completely.  So I pushed all the furniture to that end of the room.  A layer of plastic protected everything, then I covered the floors and doors.

Master-Bedroom-Ceiling-Scraping

Scraping went quickly.  With one half done, I cleaned up the floor and pushed the furniture to the other end.  Repeat same process.  I learned something from my last session: when you reach a seam, scrape with it, not against.  If you go against, you could catch the tape and cause unnecessary damage.

Speaking of unnecessary damage, someone patched an area near the light fixture.  Even with the popcorn, the patch was noticeable.

Master-Bedroom-Ceiling-Patch

I’ve got that spot, a crack, and small nail holes to fill and smooth before I can prime and paint.  I accidentally peeled the mesh tape off when the mud was wet, hence the hole.  So I have at least two more coats to go here.

Master-Bedroom-Light-Patch

It doesn’t seem like it’d make a big difference, but it’s nice to see a smooth ceiling.  Over the weekend, Ben spray textured the recently wallpaper free wall to match the other two.  With that dry, we trimmed out the rest of the room, windows, and doors.

Master-Bedroom-Ceiling-Texture-and-Trim

Clearly, I have plenty of priming and painting in my future.

Master-Bedroom-Door-Trimmed

Our other walls are heavily orange peel textured, unfortunately.  At least the three painted walls with match.

Master-Bedroom-Texture-and-Trim-Detail

While we had texture going, we finished the knock down in the dining room.  I’ll share more on that process soon.  I’m so close to having a painted bedroom I can taste it.  Or that’s sticky caulking on my thumb as I lick off chocolate.  Doesn’t matter, our bedroom is seeing real, noticeable progress.

We Did It

Something crazy and exciting happened last week.  While getting our usual groceries, I saw the new October issue of Better Homes and Gardens was out.

Better-Homes-and-Gardens-Oct-2014-Issue-Cover

You know, the one with our DIY master bathroom vanity featured in the ‘I Did It’ column?

I flipped to the back page and saw our bathroom and faces and I’m sure a huge, goofy grin crossed my face.  I resisted the urge to show others in the store.

Better-Homes-and-Gardens-I-Did-It

I showed Ev and he said, “That looks like our bathroom.  Wait!  That’s you and dad!”  Cracked me up!  I’m not sure about you, but I never fully realized how much time, effort, or equipment went into styling and photographing a room.  Stylist Char and photographer Edmund showed up the first afternoon to drop off three bags of cameras and lighting tools.

Better-Homes-and-Gardens-Equipment

The next morning, Char came in with several bags of styling goodies.  Soon after, our master bedroom was full of diffusers, stands, and other things I wouldn’t even begin to know how to use.  They had a 10 hour day of work.  Staging the accessories.  Photographing, then nit-picking over the computer.  Tweaking the rug ever so slightly.  Changing the way the towel hung.  Shifting a bottle a half in to the right.  It was so fun to observe.  Char and Edmund were awesome to chat with, too.  Lots of fun stories to hear from their glamorous lives.  After getting all the shots from their list in the master bathroom, the equipment went into the guest room for safe storage.

Better-Homes-and-Gardens-Guest-Room-with-Equipment

Oh, and we preëmptively took the doors off the hinges because the bathrooms are so small.  Edmund said it was a genius idea and made everything easier.  Day three in town, the main bathroom got a little attention.  Prop rugs, towels, jars, bins, even cotton balls.  Here’s a little peek at the first styling round of the shelves.

Better-Homes-and-Gardens-Main-Bath-Sneek-Peak

I did get to keep some of the goodies, too.  From the master bathroom, I still have the only three added props: a soap pump, teal hand towels, and the jute chevron rug.  The rest was already ours, just elsewhere in the house.  A few more things from the main bathroom stayed.  Lidded Jars, a few bins, and the toiletries.  All things that had been openend or tags removed.  Here’s where most of those accessories live now:

It was a wonderful experience.  Something I was so nervous about.  I asked Char a million questions about wardrobe options.  I’m usually in jeans and a t-shirt or paint covered work clothes, so fashion is far from my strong point.  Luckily, Kit, Char and Edmund were excellent at their jobs.  We’re so honored to be featured!  Thank you so much, BHG!