Office Space

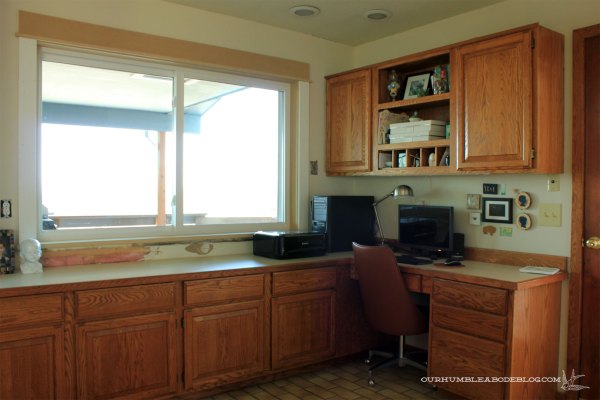
While focusing on the kitchen, my office nook didn’t get as much attention.  For a while it had only floors, looking blank and sad.

Kitchen-Remodel-Empty-Office

Then Ben set the drawer boxes and it stalled again.

Office-Cabinets-Set

Once the kitchen was fully functional, we were able to focus on the office.  A matching maple desk top is warm against the white cabinets and drawers.

Office-Drawers-Priming

Office-Cabinet-Primed

After spending several days priming and painting, the office is nearly complete.  By complete, I mean useable.

Office-Drawer-Stack

These drawers are already getting loaded up.

Office-Drawer-Detail

Organizing-Office-Drawers

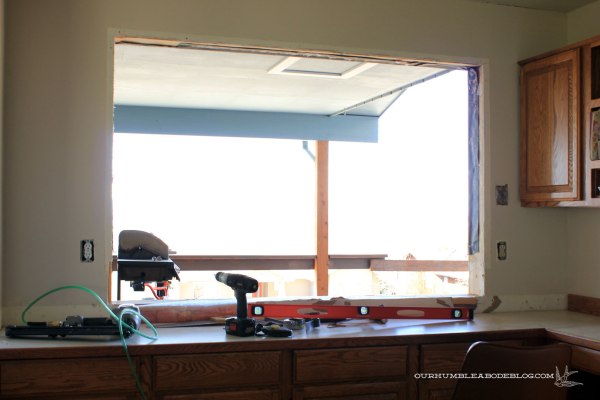
We have to add trim under the window before the office is back at 100% capacity.  Though torn sheet rock and foam is beautiful.

Office-Drawer-Stack-with-Top

I’ll also need to apply a last coat or two of poly on the maple.  Before settling on water based poly, I tested six other options: mineral oil, cutting board oil, Danish oil, butcher block oil, wax, and teak oil.

Oil-and-Wax-Test-Strips

Oil-and-Wax-Testing

Based on color, sheen, and water repelling abilities, I loved the paste finishing wax.  It looked natural, but still brought out the depth of the wood.

Office-Desk-Top-Wax

It looked and felt wonderful – so smooth with a subtle gloss.  To test durability, and stray marker/pen situations, I wiped the desk with a damp cloth.  As expected, the water wiped the wax right off, raising the grain.  I knew right then and there the wax wasn’t for me.  So far, the three coats of Polycrylic with light sanding between is perfect.

In addition to useful office supplies, I celebrated a new office with greenery.

Maple-Desk-Top-Above

A lemon button fern and succulent.

Maple-Desk-Top-Detail

Just a few small steps left in here.  I’m itching to get everything out of the closet and from under the bed.  To work at a desk instead of a tiny dresser.  Any favorite office file organization systems?

Work Zones

Before tearing the kitchen apart, I used Photoshop to build a to scale floor plan to make sure the changes worked on paper.

Kitchen-Floor-Plans-New-Details

We’ve already made a lot of progress on the main kitchen area, but still not fully functional.  Gas and electric still need to be run for the cooktop and the dishwasher has to get hooked up.  To get the wall ovens in, we’ll have to frame and paint the cabinets.  Clearly things are very much a work in progress.

Kitchen-Base-Cabinets-Island-Back-Toward-Sink

Less necessary areas, ahem the office, have taken a back seat for now.  That doesn’t mean there aren’t plans.  Oh no, the office is seeing a slightly different layout.

Painted-Office-from-Kitchen

Instead of the L shape, we’re keeping the cabinets to the long wall only.

Kitchen-Remodel-Empty-Office-Plans

This will allow us to install a wider sliding door out to the pool house.  Currently, the pool house is a hot mess, but eventually, when it is pretty, we’ll appreciate the connection.

Kitchen-Remodel-Empty-Office-Plan-Drawings

Working around the wider door leaves a 9 1/2 foot long stretch to work with.

Kitchen-Remodel-Empty-Office

Two 36 inch wide base drawers will sit on either end, leaving a chair gap centered below the window.

Kitchen-Remodel-Office-Drawings

It looks as though we’re losing a lot of cabinet space, which we are, if you go by linear measurements.  Similar to the kitchen cabinets, there was a lot of wasted space.  Having all drawers for the lowers offers more usable storage.  Another untouched area is along this small stretch of wall along the dining room.

Kitchen-to-Dining-Blank-Wall

A four-foot wide base cabinet will work as an appliance garage of sorts.  Storage for the microwave behind closed doors as well as the coffee maker.  Just a small area to set up without being in the main traffic side.

Kitchen-to-Dining-Blank-Wall-Cabinet-Sizing

Eventually, Ben wants to hang a TV over it.

Wrecking Ball

We sure know how to holiday around here.  As a Christmas gift to each other, we’re tackling the kitchen remodel.  Tuesday evening, Ben removed the bay of 2 feet deep pantry cabinets.  He was able to get each one out fully intact, so they’re in the garage, waiting for a new home.

Kitchen-Pantry-Cabinets-Out

Christmas Eve morning, we picked up 10,000 pounds of slate tile for the kitchen and pool house.   After Ben and a friend unloaded it all, the remodel literally started with a bang.  Ben was itching to knock out this wall.  Unlike our last kitchen remodel, this wall is not load bearing, thanks to free span trusses.

Kitchen-to-Dining-Wide-Opening-Frame-Removal

All the planning and ideas of how this would look still didn’t prepare us for the result.  It’s amazing how open everything is!  We could host a cooking show in here now.  Okay, not right now.  Maybe once we’re finished.

Kitchen-to-Dining-Wide-Opening

Over the weekend, we installed pine tongue and groove ceiling planks.  Keeping the kitchen functional as long as possible is our goal, so the ceiling was something we could work on without interrupting anything else.

Kitchen-Tongue-and-Groove-Planks-Starting

Replacing the large flourescent light with 6 inch cans and LED bulbs has really changed the mood of the room.

Kitchen-Ceiling-Tongue-and-Groove-Planks

Soft light radiates down, rather than the surgical light before.  After finishing the ceiling, we started emptying and removing cabinets.  Instead of this:

Kitchen-Two-Years-Later

We’ve got this:

Kitchen-After-Moving-Fridge

Fridge in the dining room.  Clutter all over the counters until we get more bins to pack everything away.

Kitchen-Ceiling-Tongue-and-Groove-Planks-and-Wide-Door

A wonderfully large opening connecting the rooms.

Kitchen-to-Dining-Opening-without-Uppers

And loads more work ahead of us.

Kitchen-Ceiling-Tongue-and-Groove-Planks-Toward-Family-Room

Next up, removing upper cabinets, spraying the ceiling white, and then out with everything else.

Dependant Pendants

We’re making progress with the kitchen.  All cabinet boxes are built, except the sink which we’re waiting to build until we have a sink in hand.  As of now, half of the basement is cabinet shells, stacked tetris style.

Kitchen-Cabinets-Stored-in-Basement

For appliances, we’re only missing our sink.  The current dishwasher and refrigerator are staying.  A gorgeous 48 inch cook top, stainless vent hood insert, and stacked double ovens are hanging out, waiting for a permanent home.

What we expected to be easy, has become a search: finding the perfect sink. Knowing we loved the last custom-made sink (as well as our bathroom shower pan and counter by the same fabricator), we started there.  Unfortunately, their rates have almost tripled to complete our design.  Much like Duran Duran, we’re on the hunt.  And hungry like the wolf.

In the interim, Ben is starting drawer assembly and we’re waiting for our new sliding door to arrive.  Nitty gritty details are being discussed and planned regularly.  Lighting is the most recent debate.  After several discussions, I think we’ve settled it.  The smaller white dots represent recessed cans and the black show pendants.

Kitchen-Floor-Plan-with-Lighting

I quite like these small pendants at Home Depot.  Directing the lighting down should make the bar area feel cozier, and won’t blind people in other rooms.

Sleek glass pendants are my back up, if we feel the black attract too much attention.  

Then I start second guessing whether I want pendants or not.  We need a vent hood, and the wider cook top needs a larger fan.  But, with the cook top in the island, that vent hood takes up a fair amount of space.  Visually and literally.  The plan is to box around it as simply and minimally as possible.  Perhaps similar to this, but in the middle of the room.

This white with wood band is really stunning, too.

I’m not sure if I’ll like the look of the big hood and smaller pendant combo.  Especially when the lights are less than two feet from the boxing.  I’ve searched for inspiration, but most island set ups have either pendants or a vent hood.  Not both.  Few that do, have pendants to the sides, not over a bar, like this:

Any ideas, suggestions, or pictures you have to help decide?

Make it Bigger

Some recent projects lately haven’t been of the super fun and exciting variety.  Changing out the front door was a huge change that greatly impacts the look and feel of the space.  Trimming it out didn’t take much time, but it’s the icing on the cake.  That finishing touch.

Finished-Front-Door-Entry

Using a 12 inch tall header for stability, it was a funky space to trim.  After discussing our options – decorative door trim with simple casement around the window, one straight trim piece across – we chose to make the window and door look like a set.

Finished-Front-Door-Trim-Top-Detail

Craftsman style trim along the top (to match the other windows and doors) with casement around the door and window, all painted white.  Leaving the gap between sheet rock looks more interesting than a solid, flat trim piece.  Painting the door frame white lets it all flow together.

Finished-Front-Door-Trim-Painted

The warm wood door is in great shape, so we’re leaving it for contrast.

Finished-Front-Door-Trim-Detail

Only window on the front of the house finished.  Ten more to go!

Finished-Front-Door-Trim-Entry

Living and dining gridded windows exempt, the windows were all original to the house.  Most in poor shape so that’s this summer’s big task.  We swapped the office window this weekend.  Fogged between the two pieces of glass, it clearly had seen better days.

Painted-Office-from-Kitchen

Since the new dining window and office nearly meet at the corner, we made the office window 8 inches closer to the floor to match height.

New-Window-in-Dining-Room-Front

First a bigger hole:

Larger-Window-in-Office-Hole

Then the larger window to let in more light.

Larger-Window-in-Office

Projects that make a big difference (hey, we can open the window!) but isn’t exactly nice to look at yet.  Gotta get out my white paint.