Seeing White

Our previously decrepit indoor pool house has been our single biggest, longest, and most expensive room makeover to date.  Though we had demolished the raised wet bar in 2012, replaced windows and doors in 2015, we really got to work in November 2016, working from the ceiling down.

While the ceiling was a lot of work, mostly due to the awkward working space, the walls win the most tedious award.

Pool-House-Plywood-Hanging-Progress

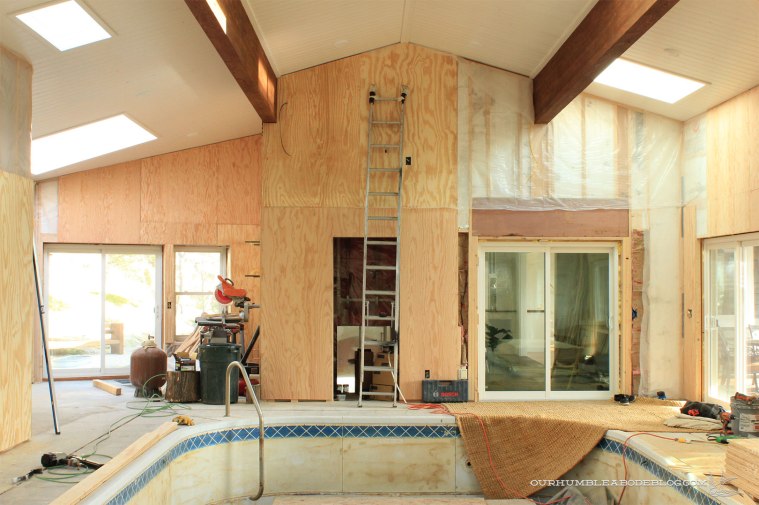
Although I only have myself to blame for that, because I was set on a floor to ceiling board and batten wall treatment.  First, hanging sheets of plywood backing, followed with hundreds of batten strips.

Pool-House-Tile-Install-Finished

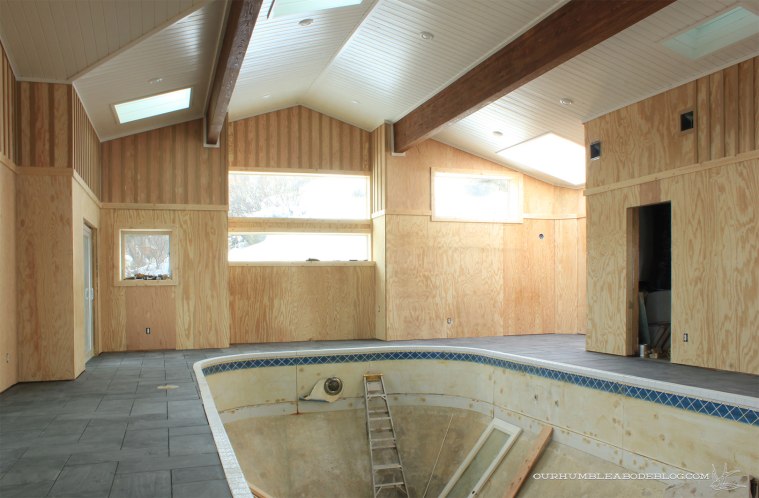
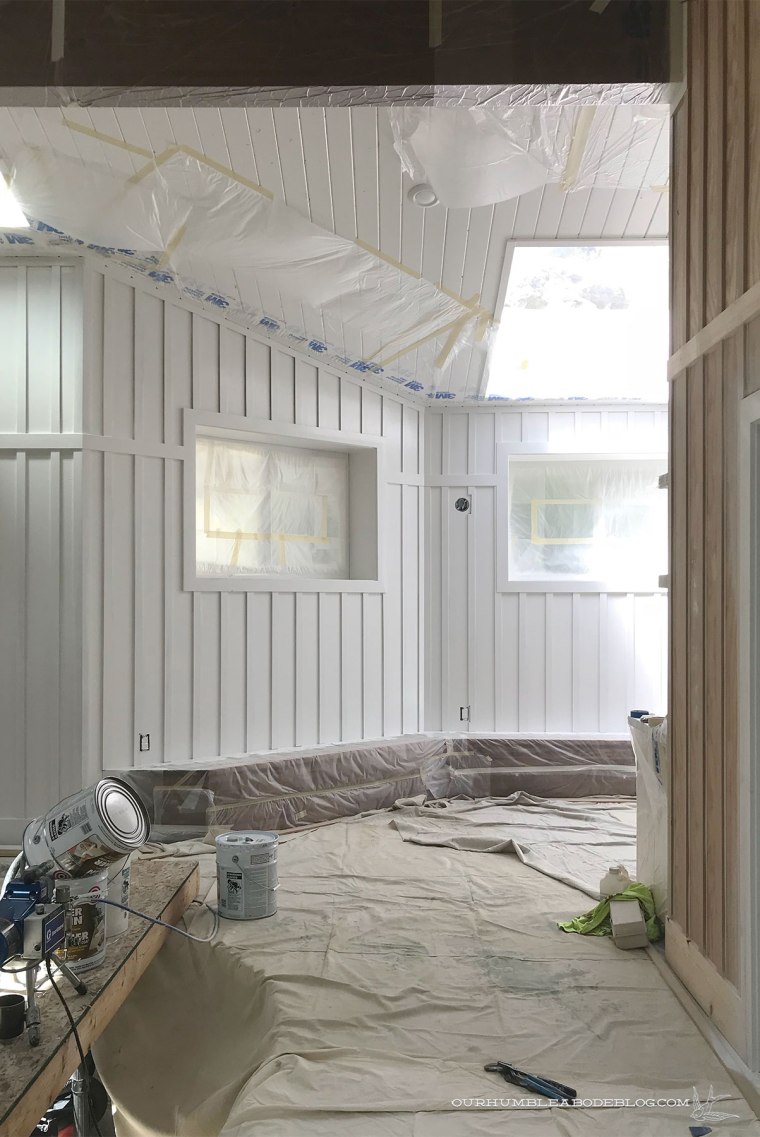
The single most time-consuming, finger killing part was the miles of caulking.  I trudged through because I knew the result would be 100 percent worth it all.  This weekend, we made it one giant leap closer to the final, completed room.  Before we could get to the satisfying part, spraying primer, we had to mask off everything we didn’t want to get paint on.

Priming-Pool-House-Walls-Masking-Room

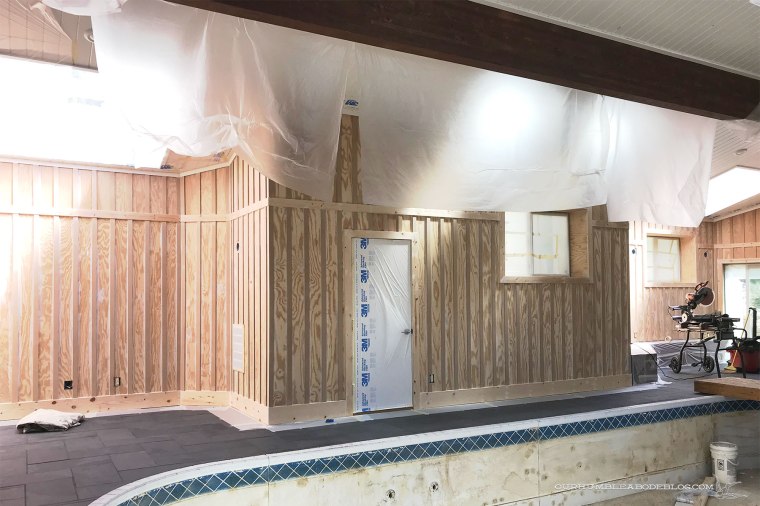
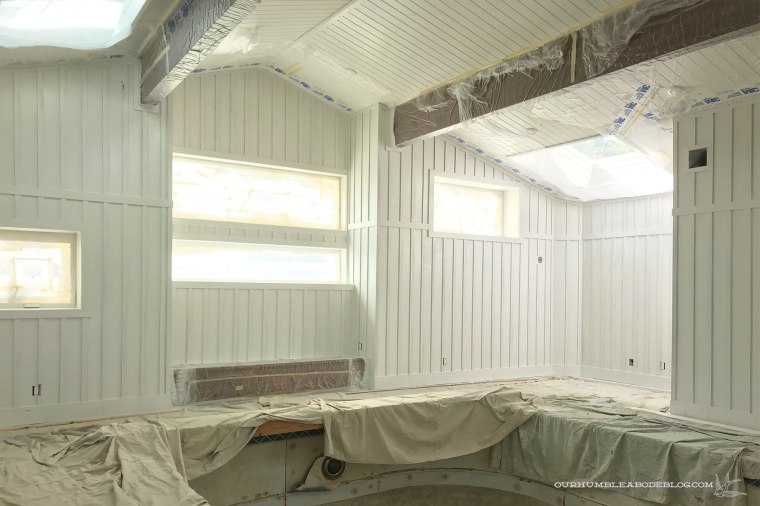
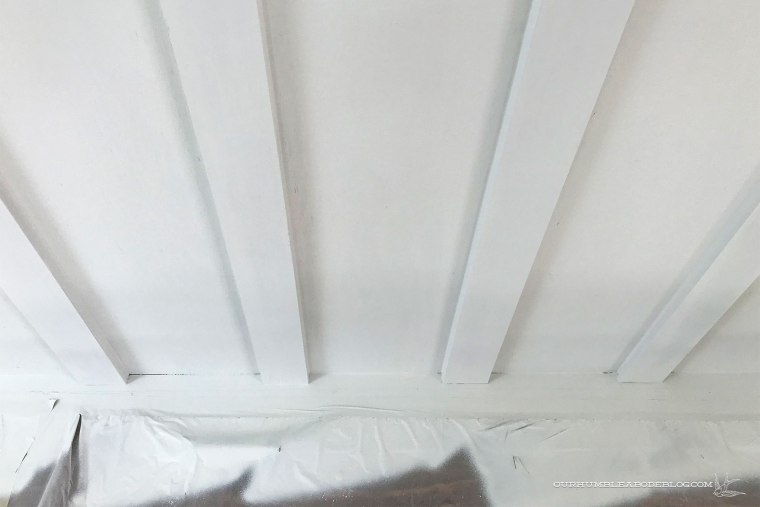
Floors, ceiling, cabinets, shelves, benches, doors, and windows.  Probably most fun, the two huge support beams that span the entire room.

Priming-Pool-House-Walls-Masked-Kitchen

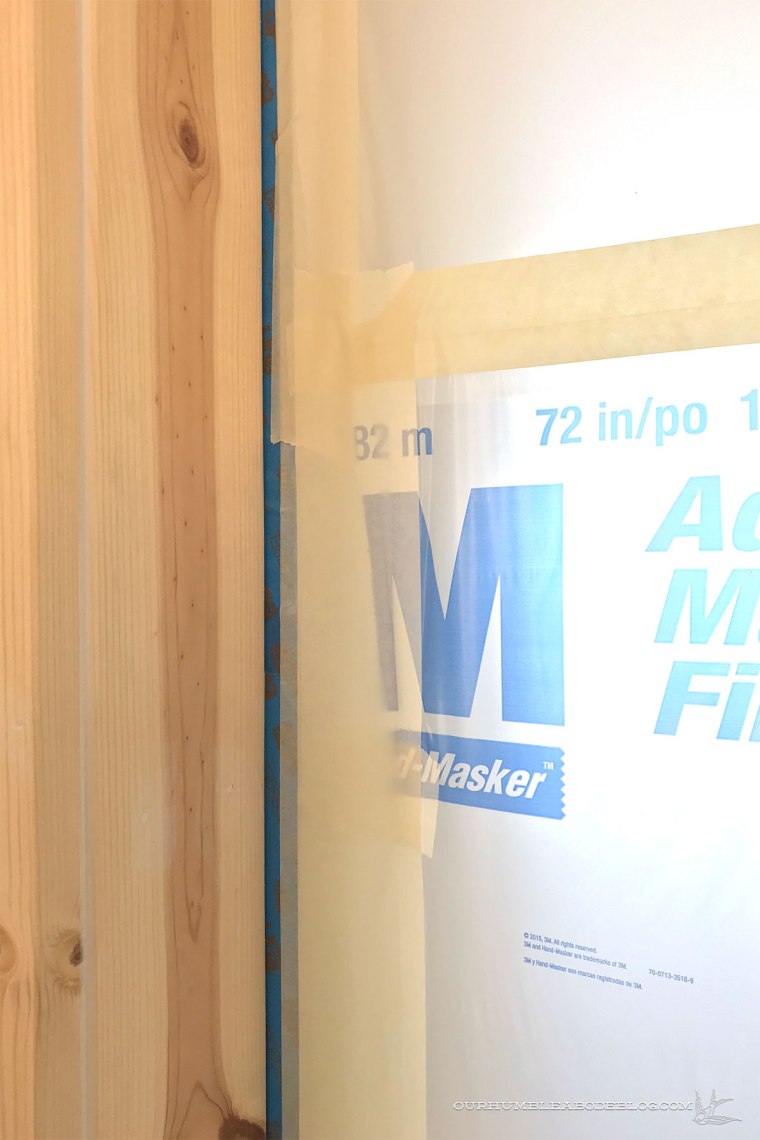
When masking, I prefer to start with a good quality painter’s tape, closely following the edges.  Then I come back with my sheet of plastic to quickly mask the remaining open areas.  When in doubt, tape every single seam.  It’ll prevent over spray coming through as well as the plastic flapping up from the sprayer air.

Priming-Pool-House-Walls-Masked-Door

With the plastic applied, we laid drop cloths on the floor to completely cover it.

Priming-Pool-House-Walls-Masked-Room

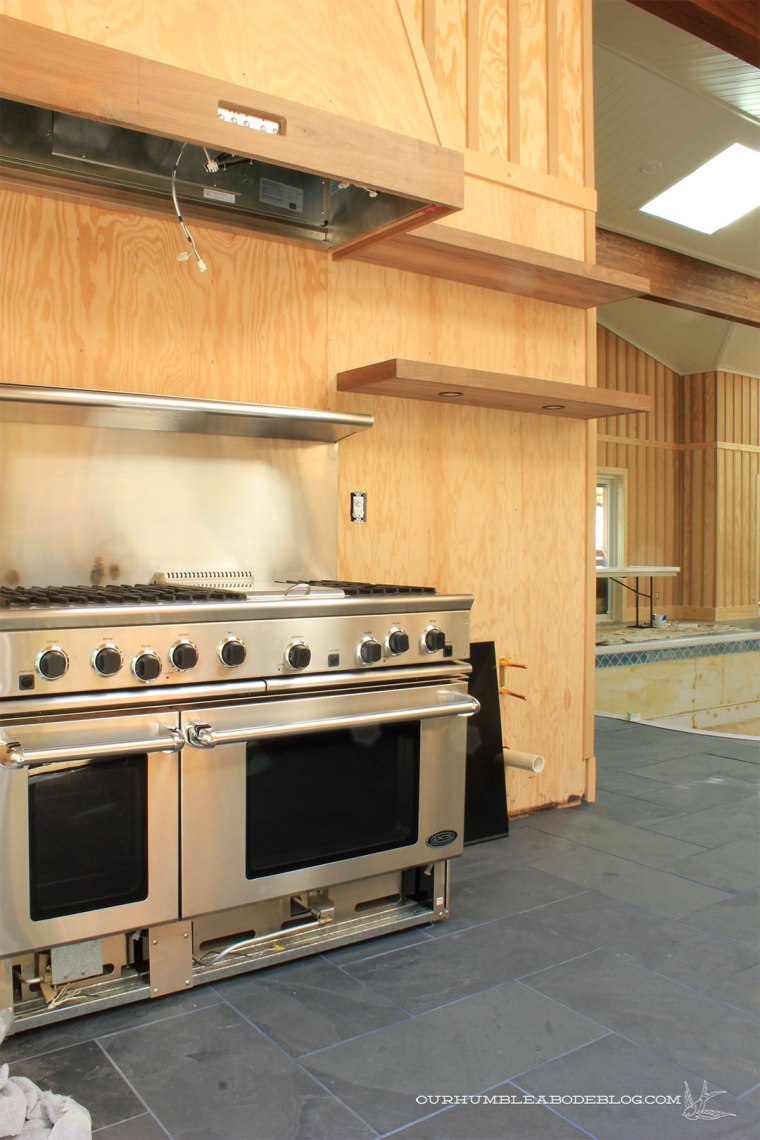
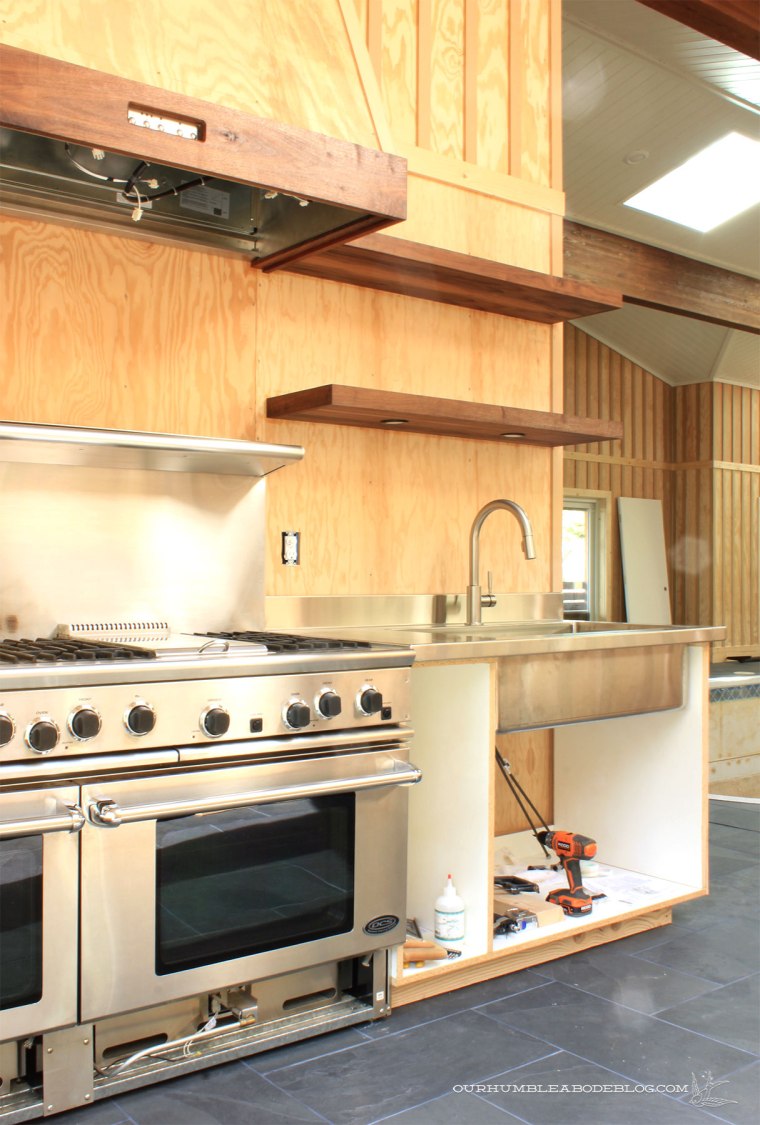
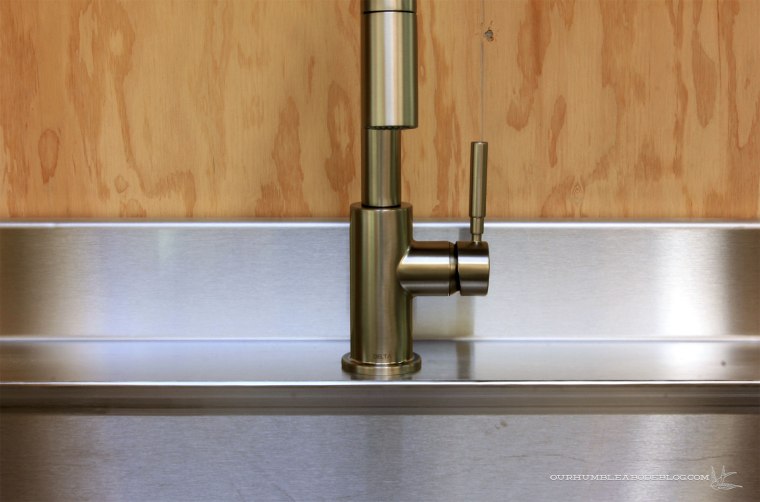
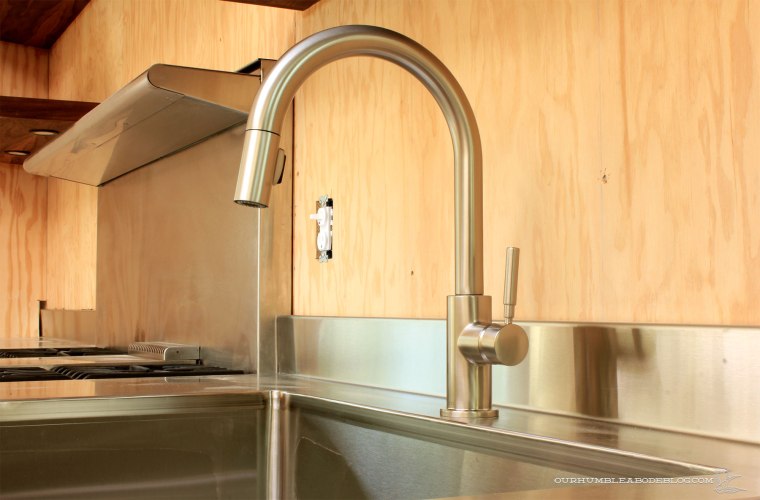
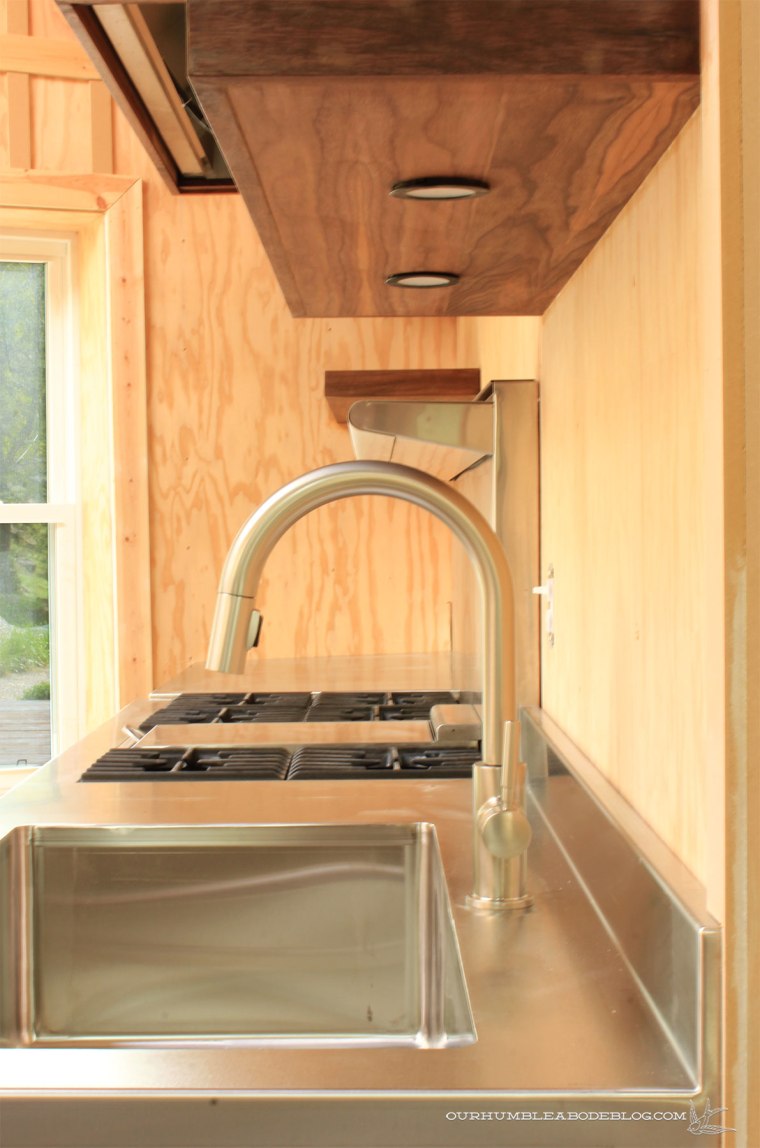
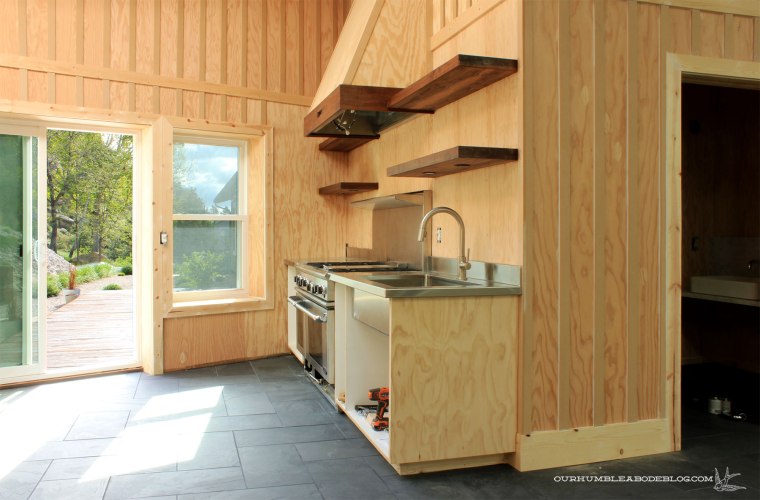
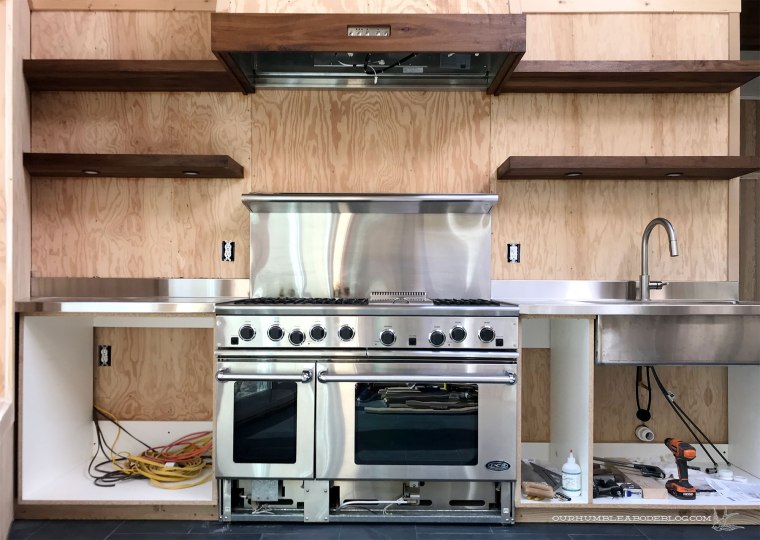
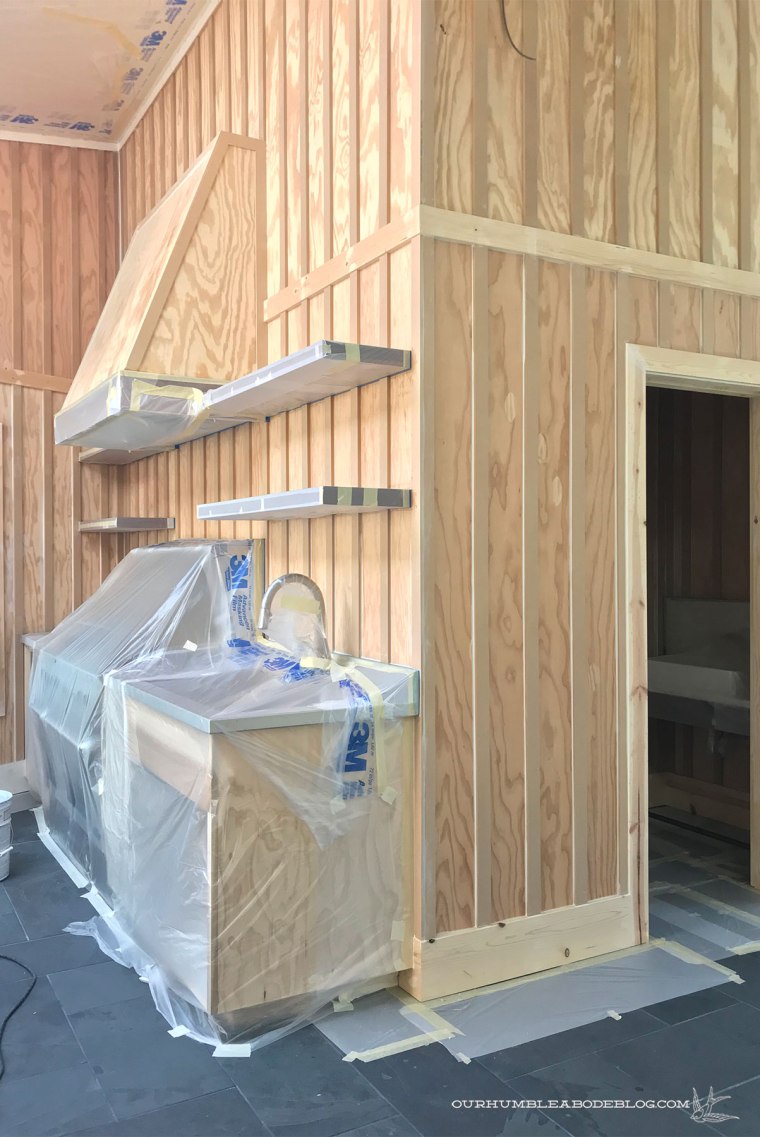
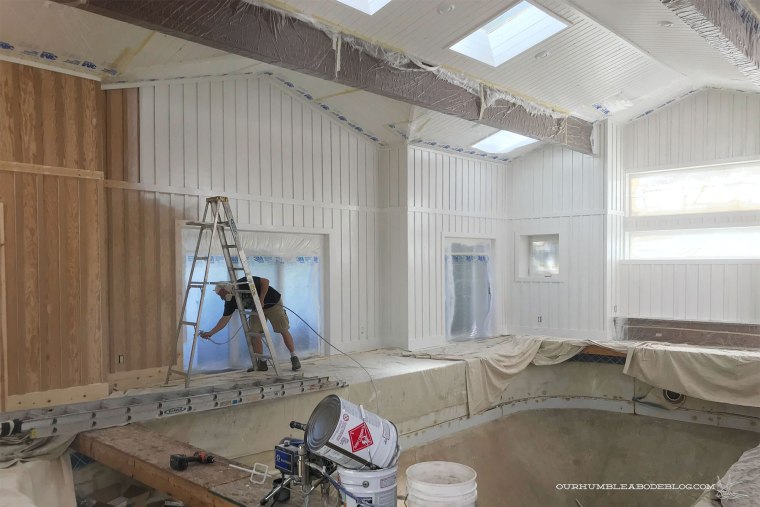
With the prep work out of the way, we cracked open the oil based primer and got to spraying.  Ben started in the kitchen, working around the walnut shelves and vent hood.  My heart was beating so fast, a mixture of excitement of how great it looked already and worry that I hadn’t masked well enough.  I felt the same way about the ceiling beams and those turned out perfectly, so I have my fingers crossed.

Priming-Pool-House-Walls-Kitchen-Bench-Detail

This step is the single most satisfying part of a job.  In a matter of seconds, the walls went from unfinished plywood to crisp white.

Priming-Pool-House-Walls-Kitchen-Benches

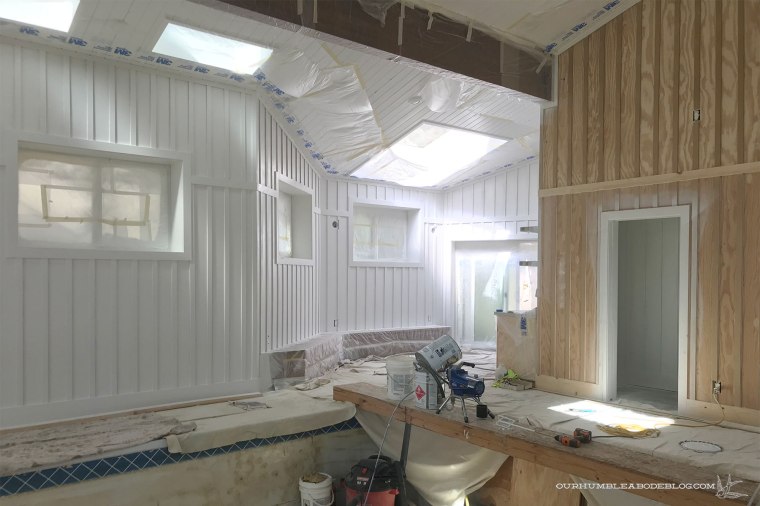
Ben rocked the priming, knocking out the entire room in about 2 hours.  Despite being unfinished, the primer gives us an idea of the finished look and feel.

Priming-Pool-House-Walls-Center-Bump-out

Even with the windows covered, it’s so bright and fresh (looking, because the smell was terrible).

Priming-Pool-House-Walls-Hot-Tub-Area

Priming-Pool-House-Walls-Bathroom-Sink

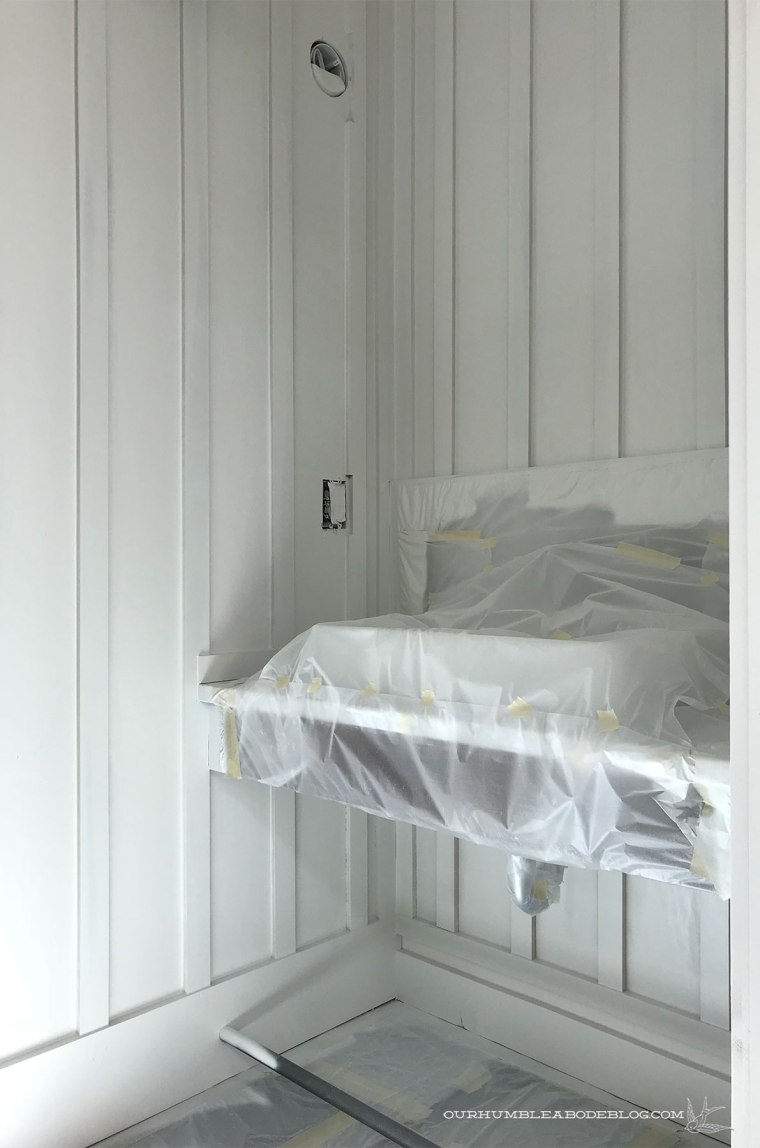
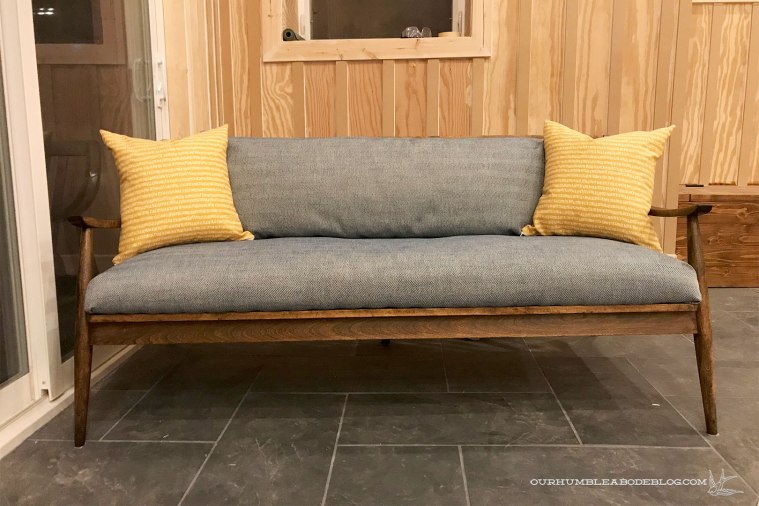
It’s taking everything in me not to peel back the tape on the benches to see how it looks, but we still have to paint.

Priming-Pool-House-Walls-Masked-Bench-Detail

One minor annoyance is that the rough edges of each batten strip absorbed most of the paint.

Priming-Pool-House-Walls-Batten-Strip-Side-Detail

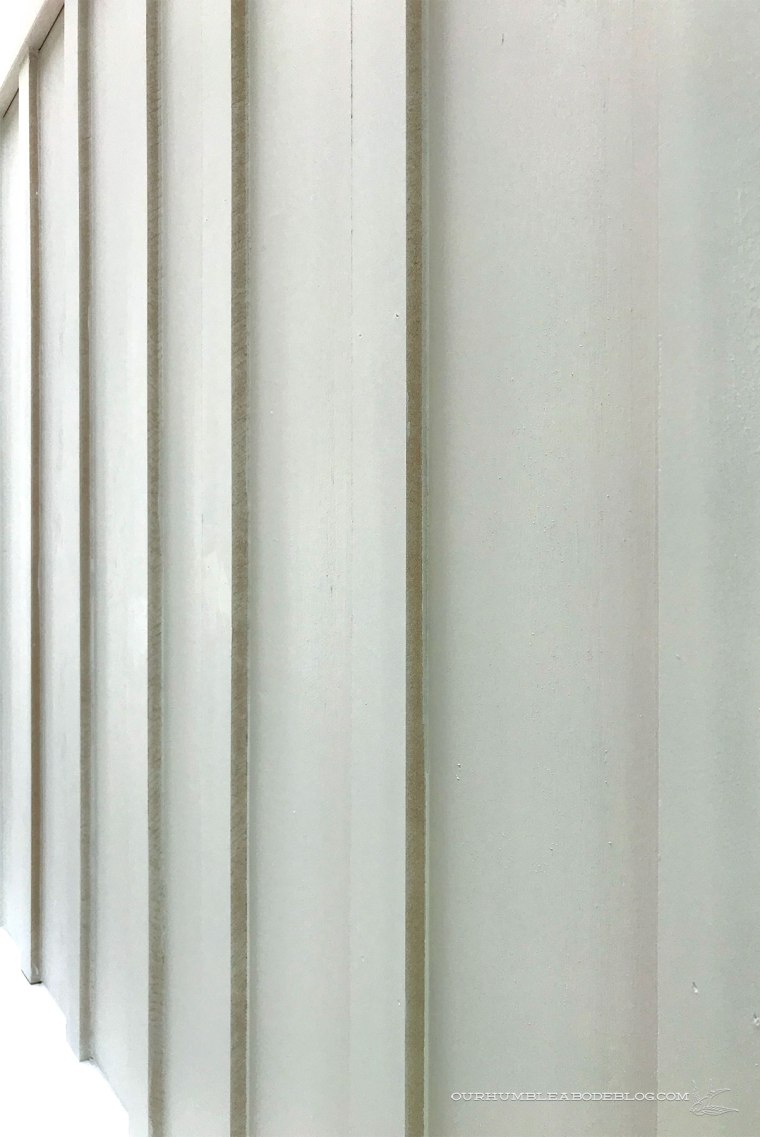
We hoped to paint on Sunday, but instead took the day to brush each edge with a second coat of primer.

Priming-Pool-House-Walls-Touched-Up-Edged

Not ideal, but necessary for the best possible paint finish.  We’ll spray the walls white, Snowbound from Sherwin Williams, this weekend and that’ll be the last whole room project.  After that, it’s all minor tasks to complete.  We’ll install sconces, finish the kitchen cabinets, and add the pool liner.  Then, it’s party time.

Modern Built in Planters

We’re taking advantage of this warm but not too warm spring weather with an outside project that has never been a priority.  Apparently I don’t have many pictures of the cobbled together rock planter, seen on the right, likely because I’ve always hated it.

Front-Yard-Hill-from-Driveway

It divides the flat parking and the steep driving sides of our driveway, with nearly a four-foot height difference between the two.  The planter is needed to help bridge the gap of elevation difference, but is difficult to navigate around with bigger vehicles.  A native Ponderosa Pine grew in the planter, taking up even more space.  We did like the height and interest it added, but weren’t sad when it died from beetle damage and had to be cut down.

Stained-Balcony-from-Walkway

Aside from the too large size, the planter construction was an ugly cobbled together mixture of leftover rocks.  Sandstone boulders from the property, left over landscape blocks, and thin sandstone stacked together made a wobbly structure.Peonies-and-Boxwood-by-Front-Walk

Earlier this spring, I transplanted the peonies that were in here and starting pulling out the loose rocks.

Rock-Planter-Before-Removing

In order to prep for the new planter, Ben used the bobcat to dig out the big rocks.

Removing-Rock-Planter-Bobcat

He dug down four feet to create an area to set the new planter in, which will get back filled after.

Rock-Planter-Removed-Culvert-Ready-wuth-House

We intentionally left a 30 inch space between the wooden walkway and the future planter.  I’ll add plants to fill the gap, but also trail down the front slope.

Rock-Planter-Removed-Culvert-Ready-by-Walkway

So what type of planter are we installing?  Well, we kicked around several options.  Maybe a square plate steel design, similar to these:

Or a poured concrete shape, like this:

Kathleen Shaefer Landscape

Perhaps even a horizontal wood one to mimic the balcony and deck railings.

Contemporist Built in Planter

All would be great, but I decided I wanted something softer and not angular; something round.  Preferably something with thin walls to allow as much planting space inside, without taking up more of the driveway.  Ben suggested a section of culvert, and though it seems strange, I really like it.

Culvert Planter

I prefer the parallel grooves compared to the angled screw thread pattern.  To better blend with the house materials, I hope to rust the metal to bring a bit of the rust steel to the planter.

Horizontal Culvert Planter

Inside, I want to add a compact tree and surround the base with lavender to greet guests (and us) with that beautiful scent.  For now, we wait for our culvert section to come in.  Until then, I’ll be searching for trees, but I’m leaning toward an Ivory Silk Tree Lilac or an Amur Maple tree.  I’d love to hear your tree suggestions, keeping in mind we are zone 4 and want something that maxes out around 20 feet tall.

Our Spring View

Spring is easily my favorite time of year.  It’s glorious to get out of the house after a long winter; seeing everything come to life again is a fresh start.  I’ve been spending as much time as possible outside, transplanting a few plants, pulling weeds, and filling my empty pots.

May-2018-Garden-Growing-Road-Catmint

Back when we started landscaping our steeply sloped lot, we spread a lot of limestone rock.  Since then, I’ve slowly added plants throughout, and with several years to grow, things are finally filling in.  The Russian sage tends to spread, so I pull what I don’t want and leave the rest.  Free plants are a win in my book.

May-2018-Garden-Growing-Entry-from-Street

Along the road frontage, I’ve tucked a mix of succulents into gaps between the big boulders.  Lamb’s ear and lavender are drought tolerant, but form big, mounding piles that cover a lot of ground for one plant.

May-2018-Garden-Growing-Succulents

The row of Stella de Oro daylilies are filling in along the driveway, softening the edge.  Three Royal Purple Smoke Trees have tripled in size since planting, but are slow to fill out.

May-2018-Garden-Growing-Driveway-Plants

For a nice welcome at the top of the driveway, a clematis sits in a pot between the two garage doors.

May-2018-Garden-Growing-Garage-Planter1

Depending on how it does in the planter, I’ll build a bigger trellis, but this small one works for now.

May-2018-Garden-Growing-Garage-Planter

Lining the front walkway, the row of Karl Foerster grasses will soon be at eye level, creating a living fence of sorts.  The swish sound in the wind combined with the nearby lavender scent is the perfect summer calm.

May-2018-Garden-Growing-Front-Walk

This spring, while checking out plants at Lowe’s, I saw two concrete pots for $28 each and quickly loaded them in the cart.  A lilac plant adds height, with succulents and a purple sweet potato vine to fill in.  Come fall, I’ll transplant the lilac near the top of the back hill.

May-2018-Garden-Growing-Front-Pots

Off to the side of the stone path, I set a Shepard’s hook into the rock with a hanging basket of succulents for a somewhat sculptural interest.

May-2018-Garden-Growing-Hanging-Plant

My first plant additions are thriving, though I now wish I had added more variety,  for more height and color.

May-2018-Garden-Growing-Front-Detail

The view from the back stairs is my favorite.  What looked like this in 2013, right after adding all of the limestone:

Back-Yard-from-Stairs

Now looks like this:

May-2018-Garden-Growing-Stair-Plants

A viburnum proudly stands nearest the stairs, with a succulent below.  I think the deer carried a few little pieces of another over, which is a happy little accident that I let grow.

May-2018-Garden-Growing-Stair-Plants-Detail

Spring blooming viburnum is a great pair to the hydrangea near the deck.  Unfortunately, it had a terrible aphid problem last year that I could only fix by cutting off the new growth.

May-2018-Garden-Growing-Viburnum

Viburnum tend to get leggy, so it worked to keep it compact, but also decreased the amount of blooms.

May-2018-Garden-Growing-Back-Deck

Off the right end of the stairs is a cut flower garden with a mix of peonies, coreopsis, daylilies, hyssop, and a honeysuckle training on an orb.

May-2018-Garden-Growing-Orb

Catmint have grown so, so well that they dot throughout our property.  Soon, they’ll be covered in unruly purple blooms and the bees will love it.

May-2018-Garden-Growing-Back-Deck-Detail

Another great grower is lavender, with the bonus of the amazing smell.  Angelina stonecrop has spread into the crannies of large rocks, carrying chartreuse color all around.

May-2018-Garden-Growing-View-from-Back-Deck

We haven’t put the table back on the deck, but the lounge chairs are out.  Our kids especially love these.

May-2018-Garden-Growing-Back-Deck-Chairs

Flanking the chair are (chipping) pots loaded up with purple butterfly bushes and lime green sweet potato vines.  Though they look pathetically small right now, I hope they’ll fill in as the seasons progress.

Stainless Steel Counter Tops

Between the teacher lounge makeover and building a pergola for a client, we haven’t spent much time in the pool house.  That doesn’t mean we’re not excited to make progress, but we did check one more piece off the list.

Pool-House-Kitchen-Walnut-Shelves-with-Range-from-Door

We built basic cabinet boxes a few weeks ago, which allowed us to place our stainless steel counter top order.  Ben measured everything and I transferred the measurements to a digital format to hand off to the fabricator.  For easy cleaning, we had them build a sink and 4 inch tall back splash into the counters.

Sink Measurements

Counter Measurements

With the details nailed down, they told us three weeks before they’d be ready.  A week and two days later, they called saying the counters are finished and ready for pick up.  What a pleasant surprise.  Ben picked them up and paid the $1200 and installed the two pieces.

Pool-House-Kitchen-Stainless-Countertops-from-Door

Though we initially considered a small, bar sized sink, we decided to go for a full size.  Easier for washing, or we can fill it with ice as a cooler when we have people over.

Pool-House-Kitchen-Stainless-Countertops-Sink-and-Range

Obviously, the faucet and drain aren’t fully hooked up, but it’s enough for us to install the remaining batten strips.

Pool-House-Kitchen-Stainless-Countertops-and-Sink

A horizontal strip will butt up to the steel back splash top, with the vertical battens terminating into that piece for a seamless look.

Pool-House-Kitchen-Stainless-Countertops-Sink-and-Faucet

We’ve been so happy with the stainless counters in our master bath and the laundry room that these were an easy decision.

Pool-House-Kitchen-Stainless-Countertops-Faucet

The one inch thick back splash top is a nice, custom detail that adds a finishing touch.

Pool-House-Kitchen-Stainless-Countertops-Sill-Detail

The contrast of the shiny stainless and the warm walnut is perfect in my book, which can only get better once the walls are painted white.

Pool-House-Kitchen-Stainless-Countertops-Overall

Now that the counters are in, we can face the cabinets, including a support piece across the sink front, and build doors.

Pool-House-Kitchen-Stainless-Countertops-Installed

We’re getting so close to functional and can’t wait to have our first pool party!

A Teacher Lounge Makeover

Over the last few months, I’ve been working on a side project: a teacher lounge update.  Some days involved planning and shopping, while others involved sewing and painting.  The final install happened over the weekend, when a friend and I loaded in everything we’d been stockpiling.  First, let’s look at the before:

Teacher-Lounge-Before-End-Wall

Everything was a mish mash of garage sale finds or left over school furniture.  Of course, there’s nothing wrong with garage sale stuff, but it all served just one purpose and took up extra floor space.  Over on the opposite side, there’s a built-in cabinet and sink, a refrigerator, and a door to a supply room.  Please note the lovely wallpaper border with cans and lemons.

Teacher-Lounge-Before-Fridge-Wall

Freeing up more floor space while giving more storage was the main goal, with bonus points for style.  Oh, and we had a $1000 budget to make it all happen.  To save money, we kept the full-sized refrigerator, drink fridge, and chest freezer.  The tables and chairs were okay, so we kept those too.  The sofa, bakers rack, and random desks/tables left to make room for a full wall of cabinets.  To maximize the budget, we bought two unfinished base cabinets from Home Depot for $157 each.

Teacher-Lounge-Base-Cabinets-at-Store

For a dose of color, we painted these Sea Serpent from Sherwin Williams.

Teacher-Lounge-Base-Cabinets-Painting

Ben built us a 12 foot long laminate counter top and I stained twelve-foot long 2 by 12 pine boards, to create open shelves.

Teacher-Lounge-Building-Countertops

Before, the built-in cabinet had bypass sliding doors that no longer slid smoothly.  After removing the doors and tracks, I painted the cabinet to match the new ones.

Teacher-Lounge-Painting-Built-in-Cabinet

For a little flair, I chose to sand and stain the shelves.

Teacher-Lounge-Painted-Built-in-Cabinet-with-Shelves

Finally, last Thursday, we got to work in the room, giving the walls a fresh coat of light gray paint, Campfire Ash from Behr.

Teacher-Lounge-End-Wall-After-Paint

Already, the room looked bigger.  After painting, we quickly moved the furniture into place, snugging the table ends against the wall.  Straightening the refrigerator left enough room for the chest freezer.

Teacher-Lounge-Fridge-Wall-After-Paint

The old sofa had seen better days, so I spruced up a mid-century modern beauty I had planned to use in the pool house, but no longer needed.

Teacher-Lounge-Refinished-Sofa

Allowing the paint to dry on Friday let us get in on Saturday to start installing the cabinets and shelves.  It only took a few hours with Ben and allowed us to use the vertical space that previously was ignored.  The small drink fridge tucked neatly between the base cabinets.

Teacher-Lounge-Mid-Set-Up2

Teacher-Lounge-Mid-Set-Up

That evening, we organized all the drinks, snacks, utensils, plates, and the other goodies.

Teacher-Lounge-After-End-Wall

Teacher-Lounge-After-Fridge-Wall

A cabinet full of dishes is equally beautiful and functional.  We’re looking forward to seeing other quotes pop up on that letter board.

Teacher-Lounge-After-Built-in-Cabinet

Baskets of snacks anchor the center of the two shelves, with extra dishes on either side.  Two matching microwaves allow multiple users to make lunch.  A few teachers asked for an ice maker, so we happily bought a counter top machine.

Teacher-Lounge-After-Cabinet-and-Shelf-Wall

In our quest to make the lounge feel more comfortable and homey, I created two botanical engineer prints to hang from the tack strip.  A big impact for less than ten bucks is great for our slim budget.  Faux succulents add a much needed look of life, without the hassle of someone having to actually take care of it.

Teacher-Lounge-After-Art-by-Tables

A parent donated the wood art above the sofa and it’s a perfect addition.

Teacher-Lounge-After-Arranged-Tables

Our biggest difficulty was the lack of outlets, so we had to get creative with our arrangement.  Placing the Keurig, coffee pot, and jar of K cups on the table end created another work zone to prevent cramped working spaces.  Though the teachers knew we were updating the room, we kept them out while working on it to make it a surprise.  Monday morning, they were surprised to see the new space and all gave rave reviews.  It certainly functions and looks better, but that starting point made nearly anything an improvement.  Teachers work so hard, we are really happy to give them a space that shows our appreciation.