A Railing Redo

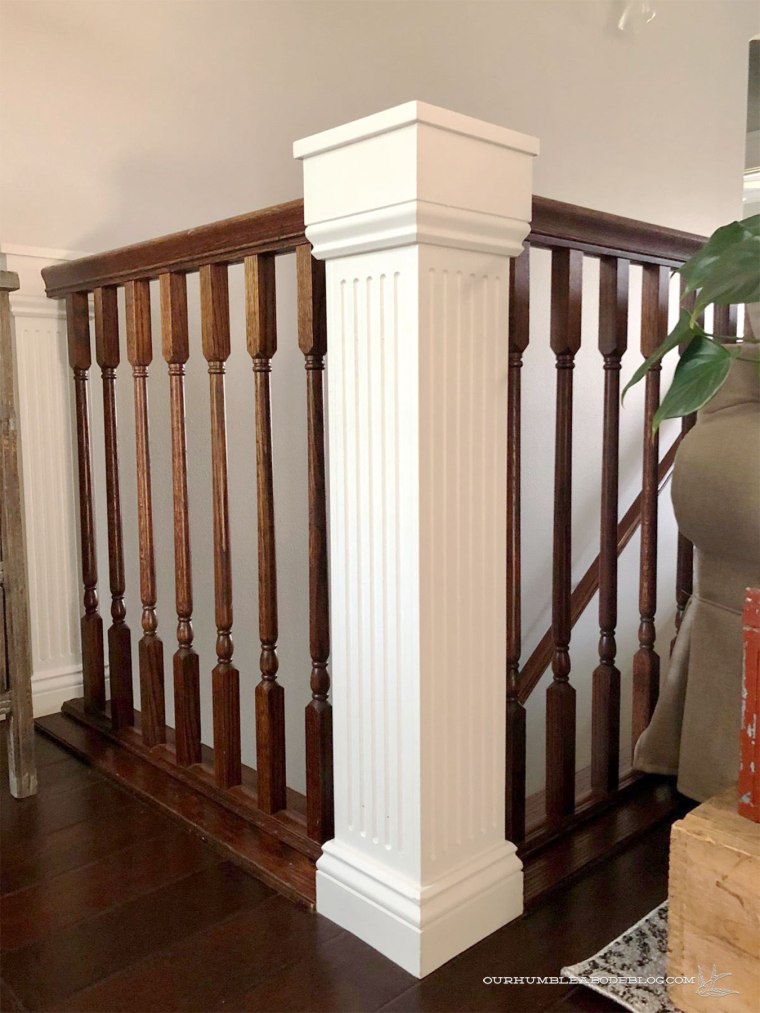
About a year ago, a friend of ours bought a house filled with traditional, detailed trim.  She updated the trim by painting it white, which worked wonders, but she never loved the railing.  The glossy mahogany stained rail and detailed baulsters just didn’t fit her style.  However, the posts match other details throughout the house, so she wanted those to stay.

Railing-Redo-Mid-Demo

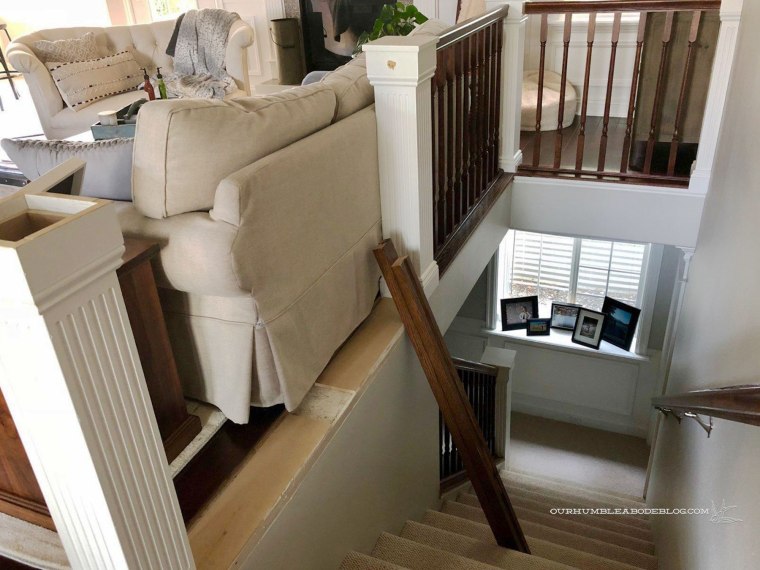
In addition to changing out the rail and baulsters, she wanted Ben to firm up the end post, which was held in place by angled brackets.

Railing-Redo-Post-Detail

Ideally, she wanted something with straight, simple lines but not overly modern.  Also pieces with some heft to them to fit in with the chunky posts.  Initially, she had an idea to place horizontal metal pieces.

Railing-Rendering-Horizontal-Railing

Due to the fluting on the posts, I didn’t think it would work well.  Then, we chatted about other designs.  Still wanting simple, but adding just enough detail to keep it interesting.  Maybe by adding one horizontal piece, breaking the baulsters up just a bit.

Railing-Rendering-Single-Baulsters-Divided

Or the same idea, but not continuing the baulsters above, terminating into the rail.

Railing-Rendering-Single-Baulsters

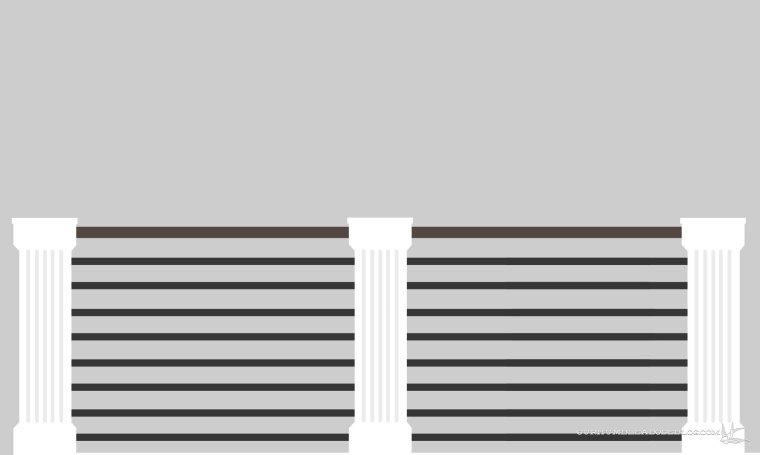
Maybe playing with spacing and pattern, something like this:

Railing-Rendering-Triple-Single-Baulsters

I love the mix of baulster spacing, but that horizontal piece would still throw a wrench in the system.  Regardless of the distance from the wooden top rail, the painted rail would have to tie into the fluted section.  Before ordering materials, I took more measurements and spread masking tape along the top rail, marking out spacing options.

Railing-Rendering-Triple-Baulsters

After testing various widths, I liked the spacing a group of three 1 1/4 inch square baulsters, spaced 1 1/4 inches apart looked.  It mimicked the repeat of the fluted detail on the posts, blending well with the traditional posts.  One call to explain and she agreed, so we set to work making it happen.  Stay tuned to see the real version.

Pool Liner Prep Work

Our pool has never been in good shape while we owned this house.  On closing day, the liner was stained and falling off the track.

New-House-Pool-to-House-April-13-2012

We pulled it out to uncover a solid base, with three-foot tall fiberglass side panels.

Pool-House-After-Painting-Toward-End-Bench

Due to the way the pool was originally constructed, it will always need a full liner.  Before installing the liner, Ben had to fill any cracks.  A few in the hopper of the pool were large, which Ben used mortar to fill, in addition to the broken main drain.

Pool-House-Patched-Large-Cracks-in-Pool-Application

Pool-House-Patched-Large-Cracks-in-Pool

For smaller cracks, he applied a heavy-duty sealant, smoothing it with a putty knife.

Pool House Patched Cracks in Pool Overall

Pool-House-Patched-Cracks-in-Pool-Sealant

Gaps between the fiberglass panels and hairline cracks in the concrete could potentially show through the liner.

Pool-House-Patched-Cracks-in-Pool

A new aluminum track will surround the pool coping stones, with the liner lip tucking in the groove.

Pool-House-Aluminum-Track-Detail

Speaking of the coping stones, they were looking a bit rough after the construction mess.


Pool-House-Dirty-Edge-Detail

I stocked up on Magic Erasers and scrubbed off the grout residue and old caulking.

Pool-House-Patched-Cracks-in-Pool-Edge-Detail

Thankfully, it all came off pretty easily and looks as good as new.  While I don’t love the white fiberglass tile, I think once the white terrazzo liner is in, it won’t be such a stark contrast against the dark tile.

Green Cabinets & Walnut Handles

This weekend was a productive one, filled with small tasks that have been on our to do list for a while.  Filling cracks in the pool base, ordering the new liner, and finishing the pool kitchen cabinets.

Pool-House-Kitchen-Benches-with-Light-Green-Cabinets-Front

Last I shared, I had painted the cabinet boxes Rolling Hills from Benjamin Moore.  The color is beautiful, but didn’t have enough contrast for this space.  I brought the quart back to the store, hoping to have it tinted closer to Forest Floor, the darkest color on the swatch strip.  Unknowingly, the paint guy accidentally added too much black, making my color a bit darker.

Pool-House-Kitchen-Cabinets-Picking-Green

I tested it out, thinking maybe it read more black than green like I had in mind.  Even still, I knew on the larger door fronts it would be a more accurate representation.

Pool-House-Green-Cabinets-with-Walnut-Handles-from-Pool-End

After realizing the hinges we had weren’t right, then exchanging them for the right ones, Ben hung the unpainted panels.  Knowing they all fit, I set to work priming and painting the panels.  If you have two-sided paint projects in your future, get paint pyramids to cut your time in half.

Pool-House-Painting-Green-Kitchen-Cabinets

Waiting for paint to dry isn’t a strength of mine, but it is crucial for a durable paint job.  After several days to cure, we attached the hinges to the doors, then doors to the frames.

Pool-House-Green-Cabinets-with-Walnut-Handles-Overall

A few more days of waiting, then I marked the placement for the custom walnut hardware.  With that step, the pool house kitchen is complete, minus styling.

Pool-House-Green-Cabinets-with-Walnut-Handles

With the vast amount of stainless steel in this space, I knew I wanted warm hardware.  I considered leather, but worried about durability.

Pool-House-Green-Kitchen-Cabinets-with-Walnut-Handles

When I asked Ben if he could make walnut handles, he asked what exactly I had in mind.  Something simple with clean lines.

Pool-House-Green-Cabinets-with-Walnut-Handles-Panel

Using the table saw, he cut a strip of walnut to width, then made a few passes to notch out the side.  The result is an L shape, perfect for grabbing the side.

Pool-House-Green-Kitchen-Cabinets-with-Walnut-Handles-Detail

Each handle has so much character, and I love the warm tone against the deep green.

Pool-House-Green-Kitchen-Cabinets-with-Walnut-Handles-Left-Side-Detail

Each handle has a standard hole width, making it easy to swap out if we ever decide we no longer want these.

Pool-House-Green-Kitchen-Cabinets-with-Walnut-Handles-from-Back-Door

The handles bring just a touch of the walnut shelving and vent hood wrap down; a warm contrast against the sleek stainless counters.

Pool-House-Green-Kitchen-Cabinets-with-Walnut-Handles-Right-Side-Detail

The pool liner and mechanical components are all that remain to finish in this space.  With our current temps hovering around 100 degrees, I’m so ready to have water to jump in whenever the mood strikes.

Our Summer View

With client work and busy summer schedules taking up the majority of our time, progress on our own house has been slow.  Not that there’s much left, mainly the pool liner (and hooking up the mechanics to make it function) and the pool kitchen cabinets.  Some outdoor progress happens while needing little effort on our part.

July-2018-Garden-Update-from-Street

Our CorTen rust steel siding continues to patina and darken, creating a look similar to stained board and batten from the road.

Rusted-Steel-Siding-on-Bathroom-Bump-Out

Plants have gone crazy since the last garden update two months ago.  In early June, I added nine more lavender plants along our road frontage, and they’ve doubled in size since.  It’s hard to beat that bright purple, the heavenly scent, and the low water usage.

July-2018-Garden-Update-New-Lavender

An Autumn Joy sedum is ready to burst open with flowers.

July-2018-Garden-Update-Succulent-Detail

The row of Karl Foerster grasses are over five feet tall, and a far cry from the puny little plants from three years ago.  Russian Sage have seeded to other areas down the slope, nestling in areas that would be impossible for me to add a plant.

July-2018-Garden-Update-Front-from-Driveway

Placed between the road and the front walkway, the grasses create a living privacy fence of sorts.  The Limelight hydrangea is a late bloomer, just now filling in with white flower clusters.

July-2018-Garden-Update-Front-Walk-Plants

July-2018-Garden-Update-Front-Hydrangea-Detail

Another row of grasses soften the tall front deck railing, and the row of Black Eyed Susans in front add a burst of cheery yellow.

July-2018-Garden-Update-Front-Paver-Plants

July-2018-Garden-Update-Black-Eyed-Susan

New this year, I planted a low growing succulent to soften the front of the fountain.

July-2018-Garden-Update-Fountain

A stray Virginia Creeper vine has crept through the deck, growing in a little cluster behind the fountain.  Virginia Creeper spreads quickly, overtaking surrounding plants, but it’s relatively contained here.

July-2018-Garden-Update-Fountain-Detail

In the back, the Snowball Viburnum planted three years ago has gone crazy, proudly standing over 6 feet tall,

July-2018-Garden-Update-Back-Viburnum-Detail

Both Russian Sage and Catmint are drought tolerant and attract bees.  Both have gotten huge!  The Catmint was over four feet in diameter, taking up half the walkway, before I hacked it back.

July-2018-Garden-Update-Back-Deck

A Honeysuckle vine is quickly covering the metal garden sphere, filling the air with that beautiful scent.

July-2018-Garden-Update-Honeysuckle

Our landscape was definitely a challenge for me, desperately wanting greenery without the impracticality and expense of grass.  Now that the plants have had time to mature, the previously rock covered hillside is looking less barren by the day.

July-2018-Garden-Update-Back-Deck-Overall

An Annabelle Hydrangea near the house has thrived, producing flower balls bigger than my head.

July-2018-Garden-Update-Back-Shade-Detail

July-2018-Garden-Update-Hydrangea-Detail

Native Yucca continue to pop up at random, no hole digging required.  Ignore the chipping patio pots, lesson learned: don’t get painted planters.

July-2018-Garden-Update-Back-Deck-Table-Detail

As time allows, I water plants and pull weeds that keep coming back.  Sure, it takes some time and effort, but it beats a high water bill and mowing weekly.

July-2018-Garden-Update-Back-Deck-Detail

What was once an obstacle to this novice gardener has become a highlight.  The slope is dotted with height, texture, and color grass could never accomplish.  I’ve only started caring and learning about plants in the last three years, but I no longer feel overwhelmed with what to do.


A Classic Wooden Pergola

Back in March, we had clients ask us to build a pergola on their back patio.  The pad had been poured in the fall, with landscape progress in various stages, but they wanted to create a great hang out space for their family.

Pergola-Area-Before

After measuring, planning, sketching, and pre-cutting and staining all of the pieces, we got to work assembling the structure.  First, two posts connected to one beam, secured in to cleats.

Building-Pergola-One-Side-Up

Followed up with the other side, then the beams connecting the two pieces together.

Building-Pergola-Frame-Up

Joists spaced 16 inches apart make up the overhead structure.

Pergola-Building-Joists-Up

Our clients didn’t know how dark they wanted the inside, so we spaced the top slats 12 inches on center apart.

Building-Pergola-Upper-Slats

This allows for added slats down the road, if they decide they need more sun coverage.

Building-Pergola-Half-Upper

Arched braces look great while firming up the overall frame.

Pergola-Arch-Detail

Once complete, the 16 foot square structure adds a lot of character to their backyard.

Pergola-After-Angled-Back

Pergola-After-Looking-East

The pergola connects the house to the fire pit, offering multiple zones to hang out and relax.

Pergola-After-Overall-Side

Pergola-After-Looking-North

Under the pergola, the slats add a graphic grid of shade to the dining table.

Pergola-After-Seating-Detail

Pergola-After-from-House

Along with new landscaping, these clients now have a backyard oasis to relax and watch their kids play.

Pergola-After-Underside-Overall

At the end of the long work day assembling the pieces, our clients were thrilled with the results.  And we are/were so grateful for such wonderful people to work with and for.