You Can Hang Your Hat On It

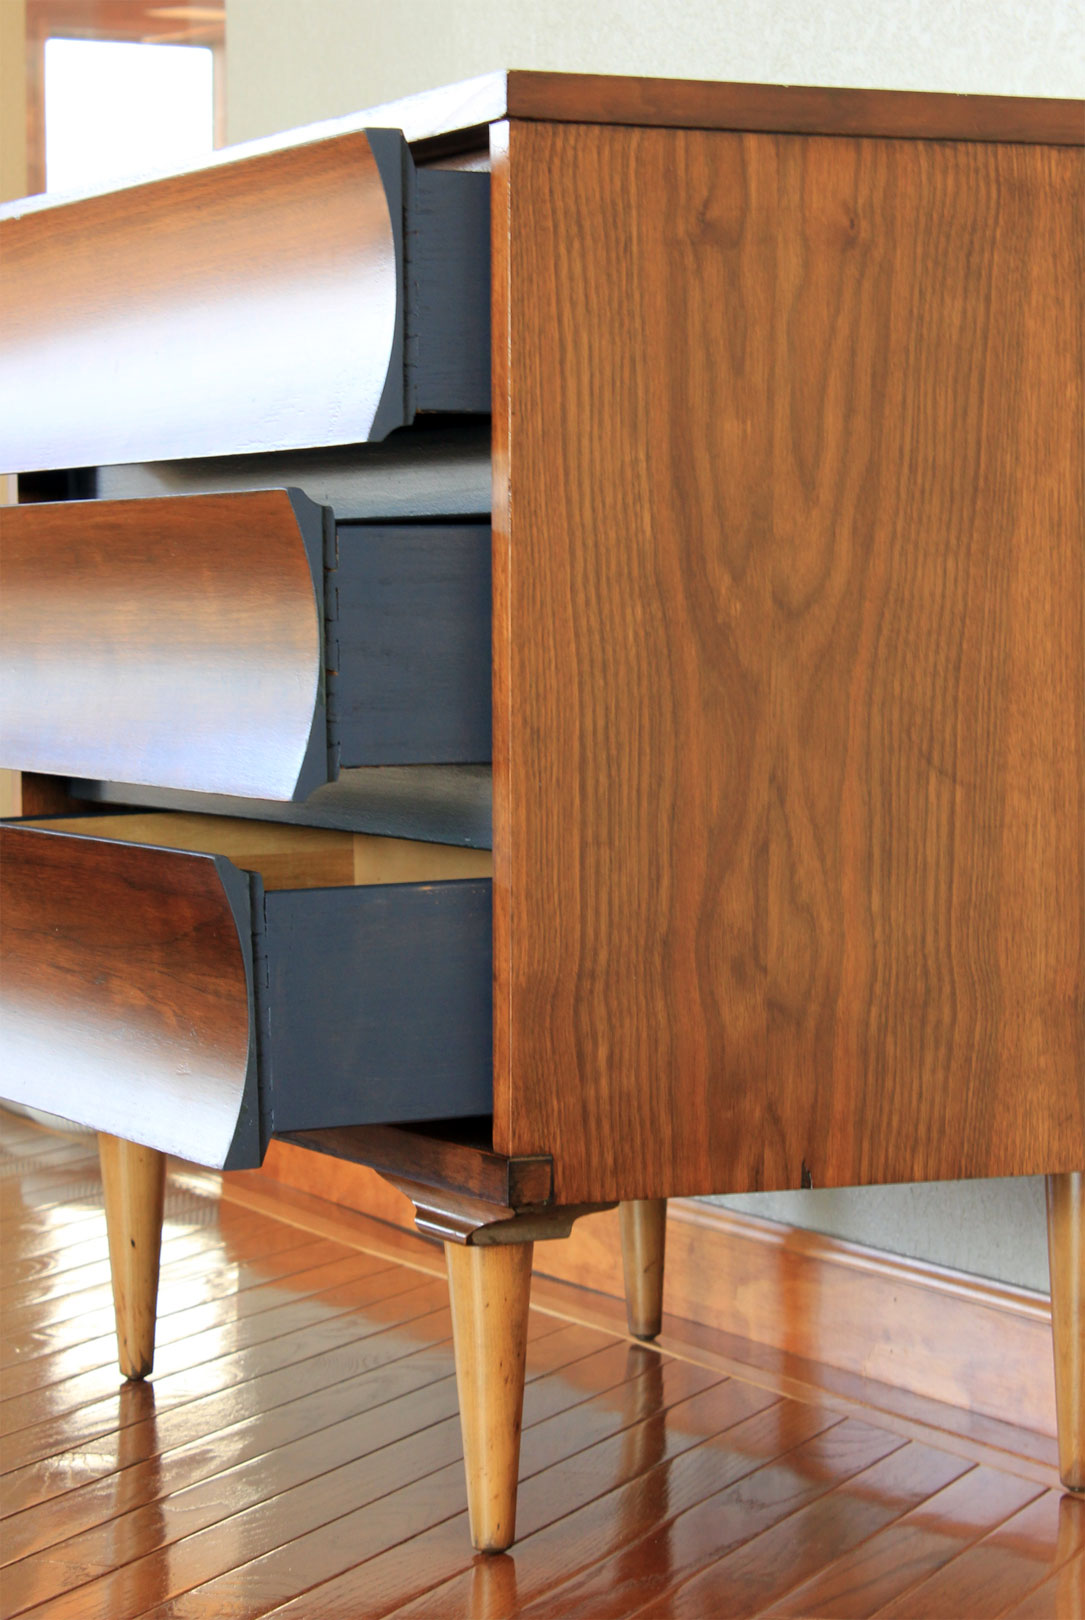
Hello and happy Monday!  Well, as happy as a Monday can be.  How was your weekend?  Saturday brought beautiful weather with temps in the low sixties.  A touch of spring that I’m desperately clinging to.  Yesterday started out nice, but ended with a snow storm complete with thunder and lightning.  Never have I witnessed a snow/thunder storm combo.  We took advantage of the nice weather and ran errands and grabbed lunch on Saturday.  Which is always a treat.  And we made a little tweak to the entertainment center.  But let me back up, several weeks ago, Ben put in all the drawers.  Then I primed and painted the inside and outsides.

Entertainment-Center-Drawers

Last weekend he attached the drawer fronts using this technique.

Entertainment-Center-Drawer-Front-Detail

After some debate and opinion gathering, we chose handle option number 1, the simple (cheapest) square ended one.

Entertainment-Center-Lower-Drawers

My favorite and so pretty.  After all, hardware is jewelry for a room.

Entertainment-Center-Drawers-Detail

As usual, our projects are never in the quick one week and done style.  Oh no, we like to drag it out, because what else would we want to do?  Pshh, that’s totally it.  That means we still have a few things to do.  Number one, cut pieces for the toe kick, prime, and paint.  The only wood accent I want is the pretty top, not unfinished pine.

Entertainment-Center-with-Drawers-Vertical

Annnnd I still want doors on the upper cabinets.  We don’t have a lot of clutter there, but the bounty of speakers and electronics doesn’t look pretty.  Doors would also help cut down the amount of dust.

Entertainment-Center-with-Drawers

For now, I grin like a fool when I see finished drawer fronts with functional storage behind.  The boys now have a place to keep toys.

Toy-Drawer-in-Entertainment-Center

The top drawer closest to the stairs is super handy to store hats and gloves (and other randoms like plastic pea pods) that normally get lost in the closet.

Hat-Drawer-in-Entertainment-Center

And that brings us to this weekend’s little tweak.

Entertainment-Center-with-Hanging-TV

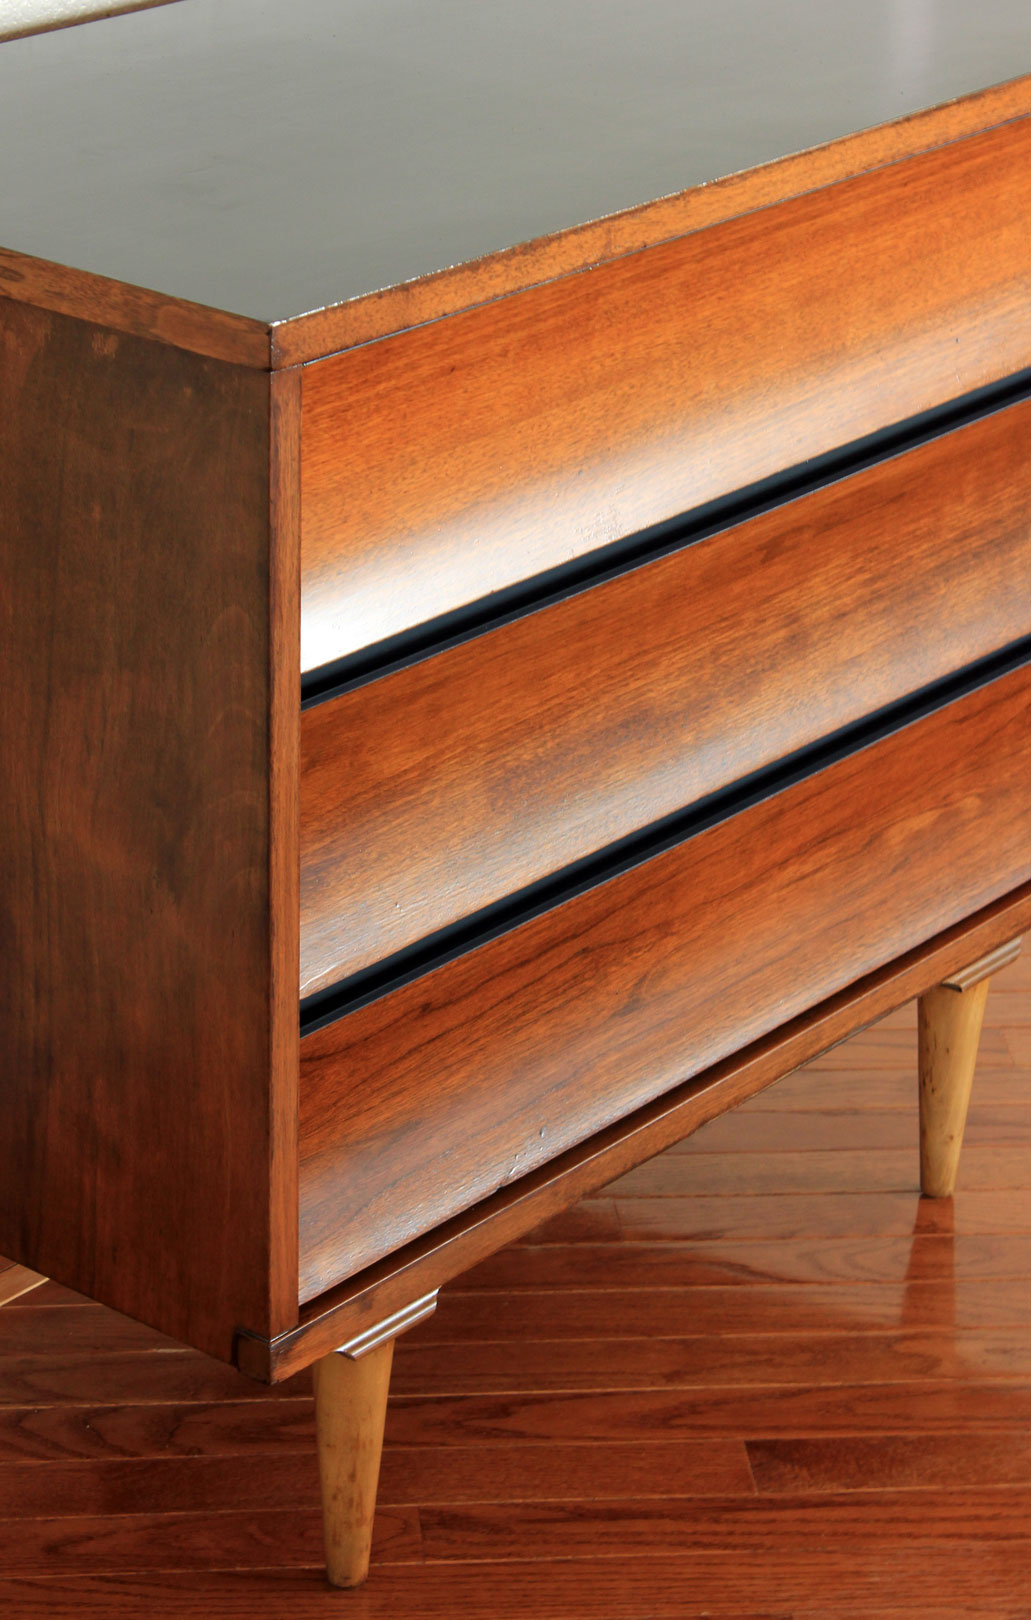
We hung the tv to the back wall, making it easier to clean under.

Entertainment-Center-with-Hanging-TV-Side

In addition to showing off more of the dark wood top.  What do you think of the nearly finished entertainment center?  Tall, dark, and handsome, right?  Of course that’s about the only thing that is done in the living room.  Now I want to repaint the walls with a little color (notice the blue swatches?) in a flat paint.  Satin is entirely too glossy on the knock down texture.

Gimme a Giveaway: Lamps Plus

This giveaway is closed.  Thanks for entering!  See who won here.

First day of March (yay spring!).  And Friday.  Wow, today is goo-ood.  But wait, it gets better.  Not only did Lamps Plus send us two beautiful sconces, they’ve graciously offered up a giveaway.  Lamps Plus is offering one very lucky winner 250 bucks to spend on anything(s) in their store.

LP Dollar Chandelier 2

Chandeliers, pendants, table lamps, sconces, even furniture.  Whatever your heart doth desire.

Maybe a dark bronze Murray Feiss pendant (or two!) for a hallway or over an island:

A dual shade semi-flush light for bedrooms:

Robert Abbey’s Delta lamp is a fun splurge:

I’d be totally jealous if you added Kenroy Floren Accordion swing arm sconces to a reading nook or as bedside lamps:

Splurge on a favorite fancy item or two or get your money’s worth.  It’s up to you.

The Goods: A personal shopper and 250 dollars to spend at Lamps Plus.

Lamps Plus Lighting Store

To Enter:  Leave a comment, which can (but doesn’t have to) include our Just for Fun question.

Just for Fun: Tell us who or what lights up your life.  Your spouse?  Kids?

For additional entries:

1.  Like Lamps Plus on Facebook.  Be sure to leave another comment to increase your chances of winning.

2. Like Our Humble Abode on Facebook.

Contest Closes: Thursday, March 28th, 2013.

Number of Winners: There can be only one.

Ships: United States residents only.

Other Info: We will select the winners using random.org and announce on Friday, March 29th.  Good luck!

Sandstone Cove

Do you remember my itch to paint?  I’ve finally scratched it.  Monday included priming and painting our newly installed crown.  Tuesday I edged the ceiling – Ben will roll it after we finish patching a few hairline cracks.  Yesterday I put two coats of Behr’s Sandstone Cove (color matched to Glidden) on the family room and hall walls.  Good news!  We love the color.

Painted-Family-Room

Rember the peach-y walls of yore?  Here’s a refresher.

Square-Pattern-Rug-in-Family-Room-toward-Fireplace

It changes from beige to gray depending on the lighting.  And makes the white trim stand out.  With nail holes patched, we’re assessing our art.  Ben says I hang cluttered groups and would like to see simpler, larger pieces.  I’m thinking the 2 foot by 3 foot frame could look nice hanging on this wall.  Perhaps I’ll change out the art, but the boys like to find places on the map, so it might stay for them.

Painted-Family-Room-Door

The hall gallery is gone, at least until I can figure out a way to simplify it.  For now, the Montana and Minnesota watercolors will hang just above the thermostat.

Painted-HallYesterday wasn’t all smiles at the new paint though.  After three days of painting, I had a problem and a frustration meltdown happened.  I completely blame this:

Peeled-Paint-in-Family-Room

(Yes, I realize this is a first world problem and I’m a major brat)  Unfortunately, in at least 20 spots, my Frog tape peeled off the trim paint.  Wop wop.  Worst of all, I don’t know why that happened.  The tape wasn’t stuck on forever, the paint was dry, I peeled it off when the paint was still wet at an angle.  It doesn’t make sense.  I’ll have to sand the areas, touch up the semi gloss trim paint, then the satin wall paint.  Inevitably the touch up will be obvious thanks to a sheen difference.  Unless you have suggestions.  After my meltdown, Ben cheered me up by installing our new sconces from Lamps Plus.

Painted-Family-Room-and-New-Sconces

Ahh, so pretty and simple.

New-Sconces-Hung

Love a touch of satin nickel.

New-Sconce-Detail

Even better, the low profile means fewer bumps and bruises for the adults in this house.

New-Sconce-Profile

Overall, I’m thrilled with the brighter, sleek look.  And a warm, diffused light.  I give these sconces two enthusiastic thumbs up.  Check back tomorrow for a light-ning giveaway!

P.S.  Lamps Plus kindly sent us two sconces after we featured them.  We’re psyched to Lamps Plus wanted to team up with us. 

Mini Dresser Pretties

I admit, I totally teased you yesterday about the mini dresser.  But, I hadn’t gotten pictures of it until later yesterday afternoon.  So, here it is, finished and ready to use.  Boom, in yo’ face.

Mini-Dresser-Front-After

Maybe finished.  See those pale legs?  Even after two coats of stain like everything else.  The different woods took the stain their own way. Thin veneer sides are slightly less red toned than the fronts.  Luckily it’s not noticeable in the small guest room.  But I might get a different, darker stain to try on the legs, just to see how it goes.  I haven’t coated those in poly for that reason.

Mini-Dresser-Finished-Side

Notice the blue between the drawers?  I did that to match the laminate top I painted.  And the top of the drawers to cover the plywood edges.  We’ve had a Carrara marble remnant in the garage that I considered using as the top.  Not sure the skinny legs could handle that much weight.  And I didn’t want to ask Ben to cut it.  I’m still hoping we can use it for a coffee table someday.

Mini-Dresser-Top-After

Taping the wood edges gave me a crisp straight line so only the top got paint.

Mini-Dresser-Top-Detail

For a little more fun, I painted the outer sides of the drawers blue, too.  (Mysterious from Benjamin Moore, color matched to a sample can of Glidden Duo)

Mini-Dresser-Drawer-Sides

I’m calling this make over a success.  What is better than simple lines, dark wood, and navy blue?

Mini-Dresser-Top-and-Side-Detail

That ends the mini dresser love fest.  What do you think of the changes?

Mini Dresser Make Over

I’ve been searching for a simple, affordable, MCM style wooden dresser for several months.  Various thrift stores and very few options.  Until last week, when I spotted a five foot dresser for $50 and a matching mini dresser for 25 bucks.  This dresser is for the tiny library/guest room which makes the nightstand size perfect.

Mini-Dresser-Before

Clean lines, MCM style, in good condition (a few scratches and a laminate top).  Perfection.  I could have left it as is, but I knew it could be better.  Refinishing to the rescue.  The dresser is plywood with a thin wood veneer.  For solid wood I prefer to sand the surface to prepare for stain.  But, I worried I’d sand through the veneer.  Despite my last paint stripper experience, I decided to use Citristrip on the drawer fronts, sides, and legs.

Mini-Dresser-Stripper

While it did its magic, we hit up the hardware store for a plastic scraper, a sample of Ben Moore paint, and came back to get started.  It seemed ready.

Mini-Dresser-Stripper-on-Drawer

Scraping most of it off was quick, leaving me with a pile of spaghetti like stuff.  The round legs took a little more time, but the finish came off cleanly.

Mini-Dresser-Legs-Strip

With the scraping done, I used an old rag and odorless mineral spirits to clean off the residue.  Which didn’t work.  Instead it just made a gummy, tacky mess.  I let it dry, then used 220 grit sand paper on the laminate top and flat sides.

Mini-Dresser-Sanded-Top

The darker patches are from the stripper.

Mini-Dresser-Side-Sanded

Lesson learned, skip the paint stripper, Amanda.  It might work, but the clean up is more than I’m willing to deal with.  But, I was able to start staining.  Dark wood floats my boat.  Wait, that didn’t come out right.  I had a can of Dark Walnut stain (left over from a bookshelf I refinished a few years ago).  Two coats on the fronts, sides, and legs.  But I had to paint the drawer edges and sides to hide the layered plywood that before were painted dark brown.

Mini-Dresser-Primed-edge

To protect my freshly stained sides, I taped off everything so I could prime and paint the laminate top and drawer dividers.

Mini-Dresser-Primed-Top

A few coats of paint on the primed spots followed by two coats of satin polyurethane gave a nice shine, protecting and enhancing.  Come back tomorrow to see how it turned out.  Yes, I’m a total tease, but I’ve got to take pictures still.