The Appeal of Stainless Steel

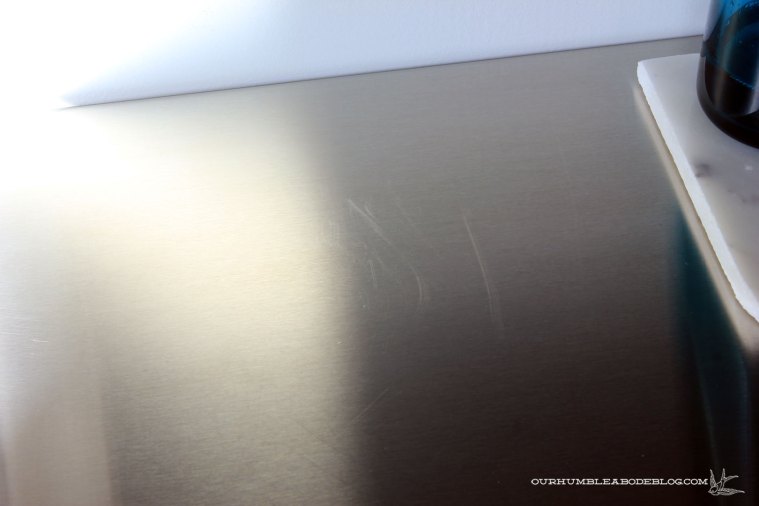
Nearly three years ago, while researching finishes for our master bathroom remodel, we decided on a stainless steel countertop and shower base.  Stainless isn’t the most commonly used material, but it has performed wonderfully in this room.

stainless-steel-counters-in-bathroom


Of course, like any material, there are pros and cons.  Stainless is a durable, waterproof, solid surface material that is more affordable than stone (remnants not included).  Unlike granite, marble, and concrete, it doesn’t require a sealant or any maintenance.  However, the shiny finish does show dust easily.

stainless-steel-counters-bathroom-dust

stainless-steel-counters-dust

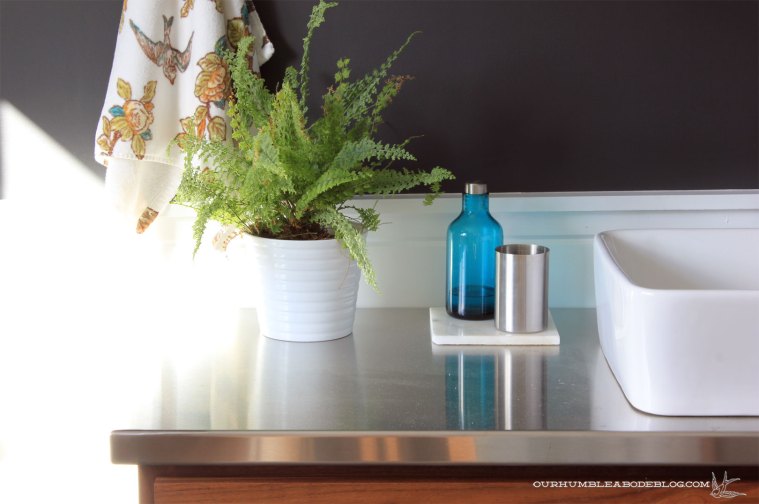
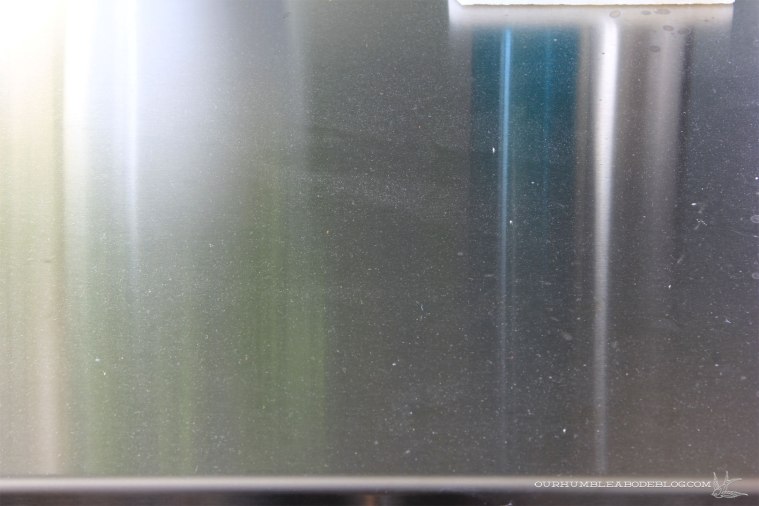
Water spots are another issue, as well as finger prints.

stainless-steel-counters-dust-waterspots

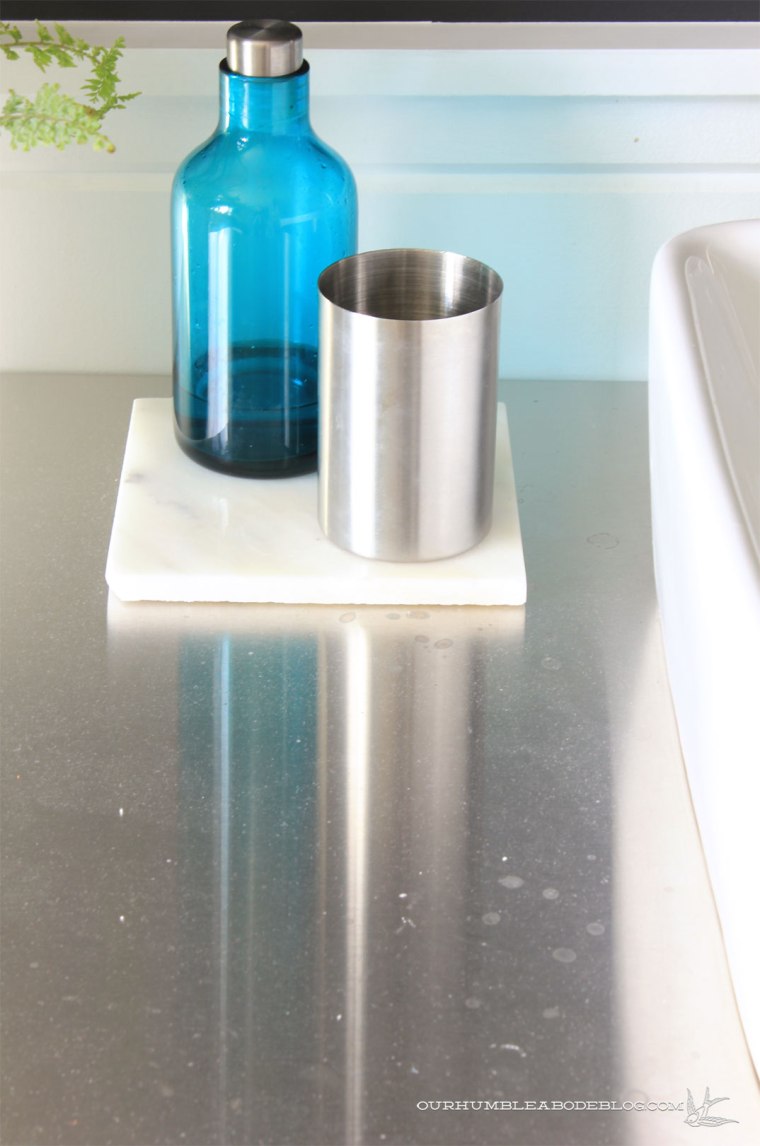
Despite showing everything, cleaning is extremely easy with an E-Cloth or Norwex set.

stainless-steel-counters-cleaning-cloths

I use one to clean, then follow-up with a polishing cloth for a streak free shine.  For really stubborn areas, I sprinkle a bit of Bon Ami or Bar Keeper’s Friend on and gently scrub with a damp sponge before wiping away the residue.

stainless-steel-counters-clean-in-bathroom

That’s all easy, but everyone asks about scratches.  Yes, stainless will scratch, but with normal wear and tear, the scratches are simply on the surface and cannot be felt.  If you have a stainless kitchen sink, take a close look at it.  You’ll see scratches and scuffs, but those don’t negatively affect the function.  Since our master bath isn’t a high traffic space, most of the counter looks new, unlike a hard-working kitchen sink.

stainless-steel-counter-scratches

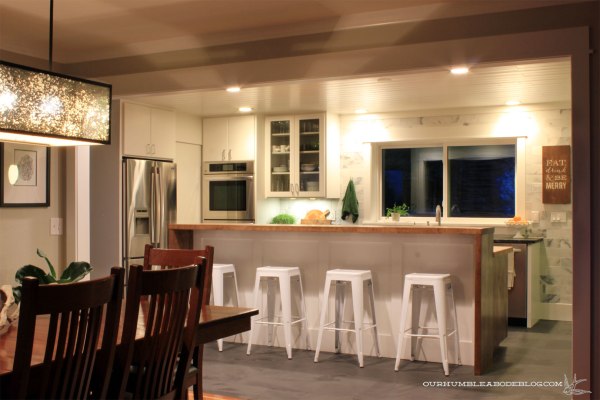
After living with and loving our master bath, we decided to use stainless again in our laundry room.  Again, the durability and affordability won.

stainless-steel-counters-at-laundry-room-sink

Not to mention, they look fantastic and provide a great work space that is hard to beat up.

stainless-steel-counters-in-laundry-room

In this higher traffic room, the newer counters already have more scratches than the bathroom.

stainless-steel-counters-scratches-on-laundry-2

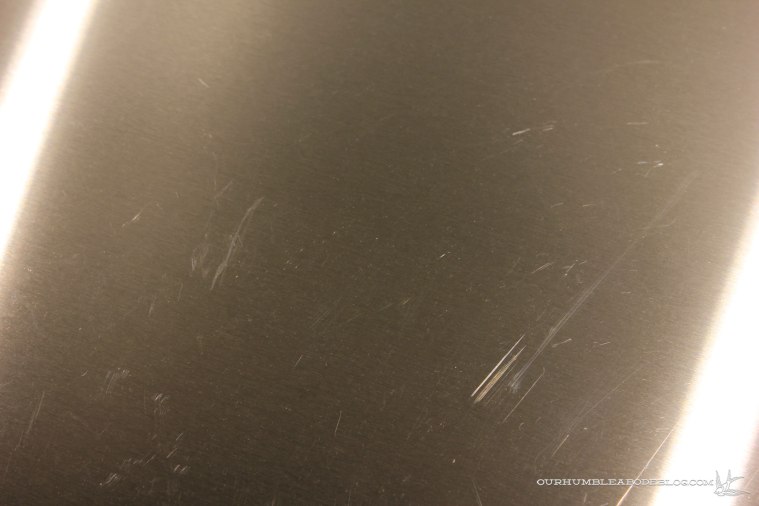
I fold laundry here, so maybe the buttons, zippers, and rivets on clothes leave scratches behind.  We also store paint supplies and other tools which get pushed around on here.

stainless-steel-counters-scratches-on-laundry

Scratches and all, we love our stainless and can’t recommend them highly enough.  We’re actually considering more stainless counters for another upcoming remodel.  What can I say, we’re addicts now.

Our Home at Night

We all love seeing photos of beautifully designed, sun drenched homes, right?  I know I’m drawn to those bright, airy spaces that are so often featured in magazines, advertisements, and blogs.

For a few months now, I’ve wanted to share a different approach, featuring night shots to show how cozy a dark home can look.  Honestly, many rooms in our south-facing home do receive a generous dose of sunlight.  But what happens when the sun sinks?  Life still goes on, of course, but rooms don’t lose their beauty without sunlight.

Granted, taking true to life photos that capture the warmth and details is one hundred times more difficult.  Our family room, on the darker north (back) side of the house always feels a bit cozier.

family-room-at-night

I think it’s a combo of the indirect light, privacy/courtyard feel of the back deck, fireplace, and the surrounding rooms.  Being adjacent to the kitchen certainly feels less formal and more inviting.

family-room-toward-kitchen-at-night

Due to the floating furniture arrangement with main walkways around, table or floor lamp cords would pose a tripping hazard.  Instead, we have three different sources of lights; directional can lights above the fireplace, another set angled toward the right wall, and a pair of sconces flanking the door.

family-room-fireplace-at-night

A little nook for firewood and family photos is laid back and casual.  How cute would a little lamp look tucked in there?  I may have to make that happen, if I can find a perfect fit.

family-room-shelves-at-night

In the kitchen, a small table and four chairs create a breakfast nook with a vintage globe light above.

kitchen-toward-dining-room-at-night

In that same area, a built-in hutch cabinet stores pretty dishes and serving pieces, as well as a stocked bar for entertaining.  After I took this photo, I added a set of ceramic house candle holders for a soft, flickering option.

kitchen-bar-at-night

In the main kitchen area, simple recessed can lights shine down on the walnut island centerpiece.

kitchen-sink-at-night

Glass front cabinets are one of my favorite features because the addition of dishes and accessories add character to a utilitarian space.

kitchen-ovens-at-night

Our dining room is right off the kitchen, which is where we eat family meals, entertain guests, play games, and do homework.

kitchen-at-night

Finding a light fixture that offered a warm glow was crucial for us, as we wanted a diffused, candle light feel.  In my opinion, bright or downcast lights in a dining room don’t give the ‘come, sit, stay a while’ feel.

dining-at-night

As you can see, I need to add another shell over the other picture frame, but I hope you’ve enjoyed this alterative view of our home.

A Sweet Side Table

Last week, while walking the boys to school, we walked past a garage sale where a little metal side table caught my attention.  After dropping them at school, I walked back past the sale and stopped in to get a closer look.

metal-side-table-underside-rust

I was smitten with the size, shape, and interesting tray like top.  It was covered in a thick, bubbling layer of rust, but for only two dollars, it was worth the risk.

metal-side-table-rusted-leg

When I got it home, I got to work scraping off the layer with a sturdy metal spatula.  A few corners had rusted more than the rest.

metal-side-table-rusted-corner

Still, it was clean and the top was as smooth as it was going to get and ready for paint.

metal-side-table-top-cleaned

Since I loved the character and age, I didn’t want it to look too perfect and new, but it did need a coat.  Black spray paint would have been easy, but I thought it’d be too stark.  Instead, I pulled out the leftover paint from our bathroom, Benjamin Moore’s Wrought Iron.  What better color to paint a metal table than Wrought Iron?!

metal-side-table-finished

I brushed on two coats, starting with the table upside down, then flipping for the second coat.

metal-side-table-leg-detail

metal-side-table-detail

Once the second coat had dried, I sprayed it down with a few coats of clear matte spray for a more wipeable, durable finish.

metal-side-table-top-edge

Adding a hit of dark makes me happy, but also makes everything on it pop.

metal-side-table-top-detail

Without overhead lighting, I wanted to add another lamp to the room, and this table is a perfect perch.

metal-side-table-by-leather-sofa

The lighter table frame balances out the visually heavy sofa.

metal-side-table-from-dining-room

Across the room, a stump and the floor lamp flank the wood and linen sofa.

brass-floor-lamp-by-wood-sofa

Yet another small change toward a finished living room.

living-room-with-new-table-and-lamps

But, then I decided to try a different lamp to try to better balance the height of the floor lamp.

metal-side-table-with-tan-lamp

Despite loving the white lamp, I think I’m liking the other better.  For now anyway.

living-room-with-new-side-table

It’s a pretty wonderful almost ugly, handmade, signed lamp that gets the attention it deserves out here.

living-room-with-new-side-table-tan-lamp

Maybe I’ll tuck a basket of blankets below to really cozy this room up for the fall weather we’re starting to have.

DIY Pillow Shams

I’m not usually a big fan of the traditional fall colors on the color wheel.  An occasional mustard is about as comfortable as I am with the warm spectrum, but I do want to shake things up for fall.  Darker, gloomier colors are some of my favorites, and also play quite nicely with this cooler season.  Of course, one little way to make a change is pillows, for living areas and the bedroom.  After looking at oodles of beautiful shams, I couldn’t find exactly what I was after, so I sewed my own.

blue-pillow-shams-on-bed

If you’re not big on sewing, don’t worry, the process is very easy.  Using a cotton quilting fabric, cut one piece for the front.  Mine standard pillow measured 22 by 29, including an extra inch for my seam allowance.  Next, cut two more pieces, 22 inches square for the back panels.  Sew the insides of the smaller pieces, folding over once, then again for a finished edge.

blue-pillow-shams-sewing-step-1

Next, pin the pieces, right sides together, overlapping the back panels to create the envelope closure.

blue-pillow-shams-sewing-back

Sew along the outer most edge, leaving a 1/2 inch seam, then turn the fabric right side out.  Before sewing the flange of the sham, press the edges with an iron for a professional look.  Now, to create the flange, simply sew two inches in from the outer edge.

blue-pillow-sham-right-side

To make measuring easier, tape off two inches on the machine edge to follow against, and use a ruler to measure at the corner.  Once at the corner, keep the needle down and pivot 90 degrees to make a seamless corner before carrying on with the edge.

blue-pillow-shams-top-detail

That’s it, a super quick flange sham that can be customized to any size.  Go ahead and make a Euro, throw, or lumbar pillow with a sweet edge detail.

blue-pillow-sham-edge-detail

I love the tiny gold birds on this fabric for a subtle detail from across the room.

blue-pillow-shams-in-bedroom

For about 15 dollars in fabric and an hour of sewing, our bedroom is rocking another layer and feeling a bit cozier.  Maybe a different, warmer toned accent pillow would round out the room and really bring in that fall feeling.  If you’re in the market for navy pillow shams, here were my top contenders:

navy-pillow-shams

  1. Deil Global Sham
  2. Flannel Stripe Sham
  3. Shabori Dot Sham
  4. Ticking Stripe Sham
  5. Organic Stamped Dots
  6. Tassel Sham
  7. Ladder Stripe Sham
  8. Vintage Washed Solid Quilted Sham

Beam Coffee Table

Have you ever made a single change to a room and noticed how much it changes your feelings about it?  Rather than finish a room in one quick, buy-it-all purchase, I love to let things slowly and naturally take shape, based on things I stumble upon, search for, and build.  By doing so, each addition or change gets me one step closer to my final vision, but the room feels personal and collected, not like a catalog.

For us, remodeling and decorating is a long road with twists and turns, all depending on what thrift stores and Craigslist bring to me.  After giving up my search for a streamlined leather sofa, I built a large, faux leather topped coffee table.

Horizontal-Railing-and-Living-Room

It has served us very well for the last two years, providing ample Lego building surface.  Then, a year ago, fate stepped in and brought me the perfect camel leather, straight-lined sofa for an amazing price, and the colors have clashed since.  The ostrich-like vinyl was similar in color, but a touch lighter and more yellow, but far too close to be put together in the same room.

Parallel-Couch-Window-Seat-Arrangement-Toward-Dining

Three years back, Ben spotted a giant stack of beams from a demolished building, asked what their fate was (landfill), and we built a deck using most of them.  A few remained, taking up an unused section of our driveway, waiting for a use.  Flash back a few weeks, when we decided it was time to put the remaining 34 inch wide by 9.5 inch thick beam to use, as a coffee table.

Ben cut the beam, squaring up the edges, and followed up with an angle grinder to quickly sand off the previous lavender-ish finish.  Since the boards are pine, I opted for stain to avoid the overly yellow tone and finished with a coat of water based polyurethane. To get the 9 1/2 inch material up to my preferred coffee table height around 16 inches, I set out on a caster hunt.

House-Tour-Four-Years-In-Family-Room-Toward-Fireplace

Casters were a great fix for the stump I turned into a coffee table, adding height, but also the ability to easily move such a heavy slab.  This scenario wasn’t much different, but the stump was already 12 inches, so smaller casters worked perfectly.  Unfortunately, those casters were the largest size I could find locally, at least without a rubber wheel around.  After plenty of online digging, I found a great Etsy shop, MMCaster, with affordable, big steel casters and ordered up a set of four.  As soon as those arrived in the mail, Ben and I screwed each one in place, leaving three inches from each side.

Beam-Coffee-Table-in-Living-Room-Toward-Leather-Sofa

We dragged it inside, literally dragged on a towel because I can’t lift it, and have been loving it for the last week.

Beam-Coffee-Table-in-Living-Room
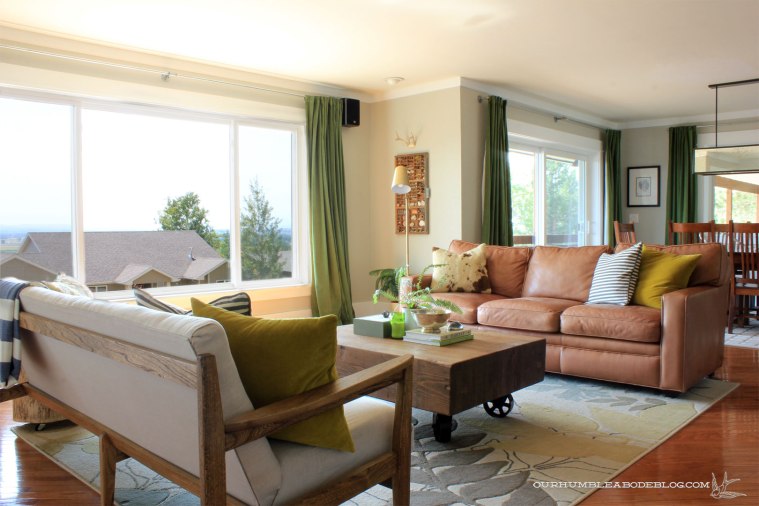
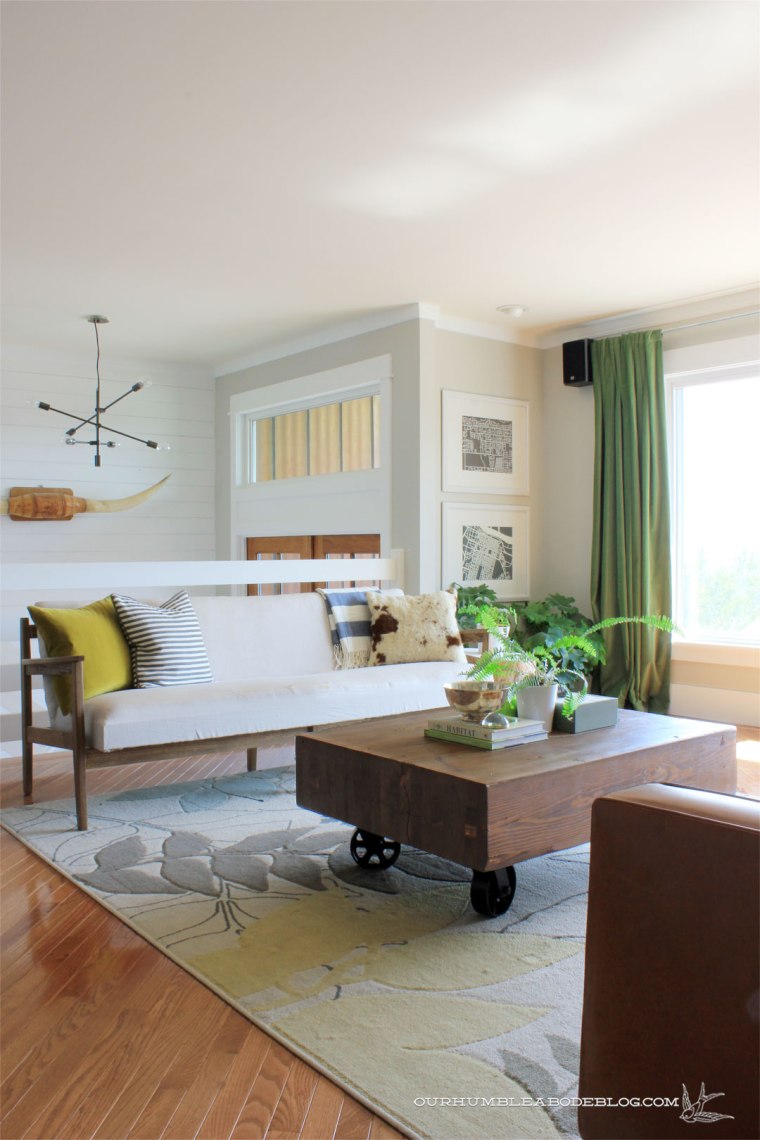
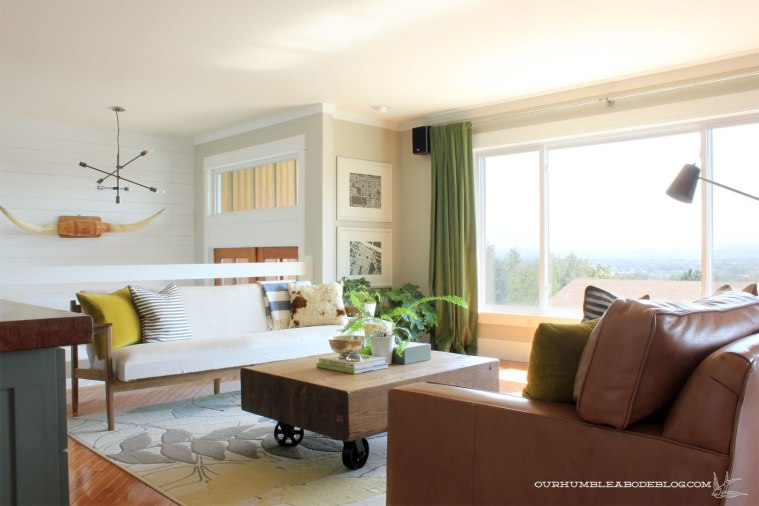
Those six-inch casters brought the slab up to a great height, but give it an industrial edge.  Kind of like a rail cart, a coffee table that Ben has always dreamed of.  The top has character, like a crack and some shallow dents with a touch of the original finish.

Beam-Coffee-Table-Top-Detail

With a smaller surface area than the previous table, I nixed the tray, but kept our marble topped remote control box, a fern, candle, coffee table books, and a footed silver bowl of nature finds.Beam-Coffee-Table-Detail A few other changes have happened recently, too.  Nothing extremely noteworthy, but differences that make me happy, like a pretty brass floor lamp for easier reading less eye strain.

Beam-Coffee-Table-by-Leather-Sofa

Across the room, a wide white and blue stripe throw adds a splash of color on the linen sofa.

Beam-Coffee-Table-Toward-Entry

I really love the pairing of the blue and faux hide pillows.Beam-Coffee-Table-Details

All simple, affordable changes, but I’ve realized that even the smallest details get my attention when changed up.

Beam-Coffee-Table-by-Linen-Sofa

If only I could find the perfect, super soft wool rug that Ben and I can agree on.  I’ve come across many I like the look of, but they’re thin.

Beam-Coffee-Table-in-Living-Room

If/when there’s a lull between big projects, I’d also love to rework the entertainment center.

Beam-Coffee-Table-in-Living-Room-by-Stairs

Don’t get me wrong, it has functioned wonderfully over the last four years, storing books, toys, games, and electronics.  But, it has remained unfinished and certainly looks it, missing cabinet doors and all.

That covers all the recent additions to our living room, so tell me, are you planning/executing any living area changes of your own?