Gold & Herringbone-What Could Be Better?

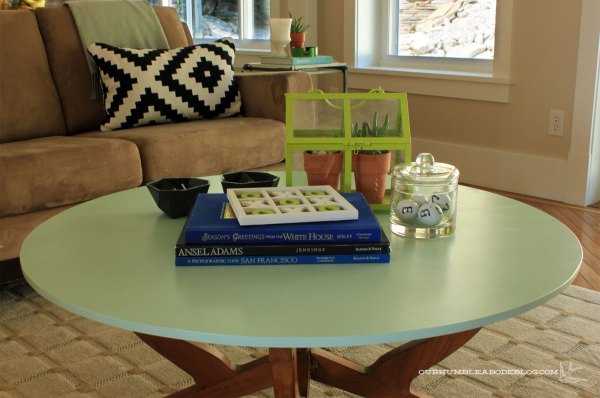
Here’s another tale about tables in the family room.  Apparently I can’t get enough tables.  But this change was prompted by Ben.  Whenever he wore cargo pants, the pocket caught on this little table.  Thus resulting in knocking over my succulent at least three times.  Until the gold pot shattered.  Time for a change.

Gold-Succulent-Pot-in-Family-Room

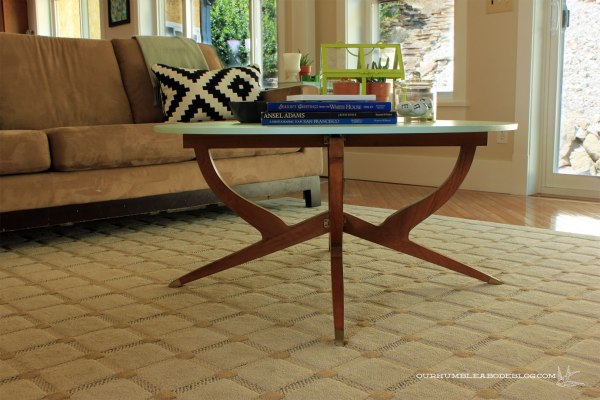
My small table buying habit came in handy this time.  An old, boring black Target table sat in the entry.  A round table with heavy base should be okay, right?  But it was ho-hum.  So what’s a girl to do?  Pull out the gold spray paint and go to town, that’s what.

Black-Side-Table-Before-Gold

Why stop at gold when herringbone would make it even better?  So I got thin poplar strips and cut into 1 by 4 1/2 inch strips.

Gold-and-Herringbone-Side-Table-Strips

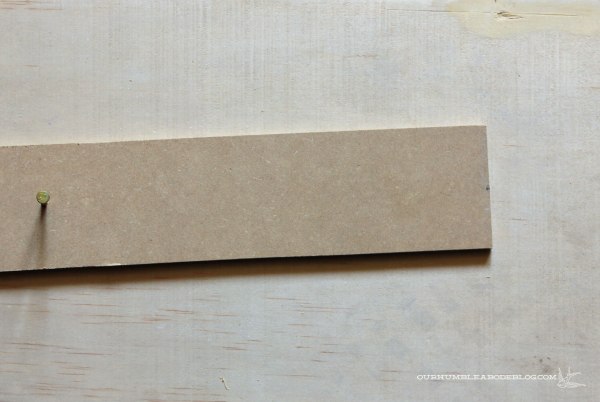
You can find poplar at Home Depot or balsa and basswood at Michael’s and Hobby Lobby, if you’re interested.  To start on the herringbone pattern, I used a tray with a square corner to guide my starter strips.

Gold-and-Herringbone-Side-Table-Step-1

I started with wood glue over the old top and let these two pieces dry.

Gold-and-Herringbone-Side-Table-Step-2

With the starter strips dry, I easily lined up the rest of the rows.

Gold-and-Herringbone-Side-Table-Step-3

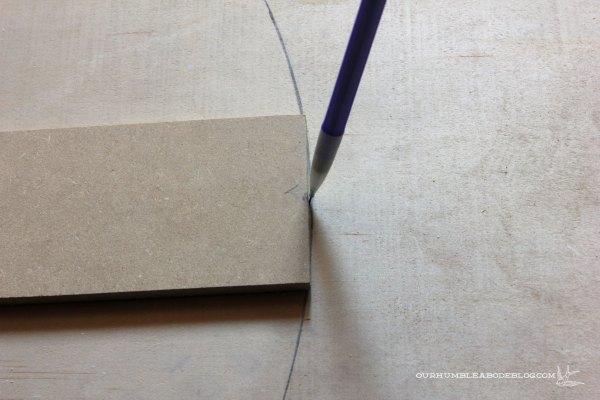
With the entire top covered (I used Liquid Nails for the edge pieces), I taped around the outer line to reduce wood splitting and chips.  After testing a hack saw, I used a sharp utility knife to cut follow the round top.

Gold-and-Herringbone-Side-Table-Step-4

For a clean edge, I glued on birch wood veneer.  Two quick coats of Polycrylic and here she is today:

Gold-and-Herringbone-Side-Table-in-Family-Room

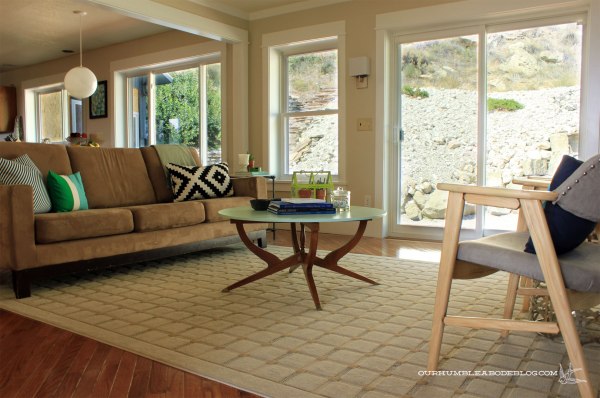
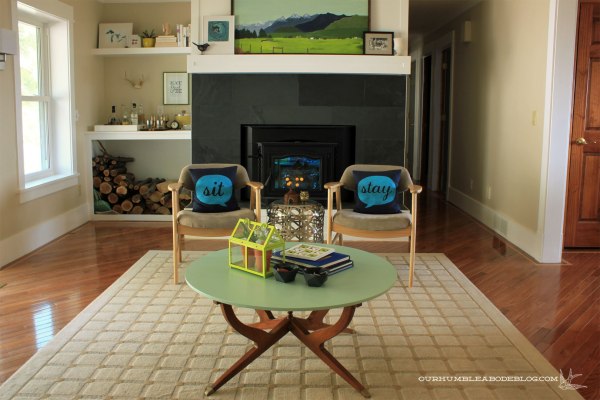
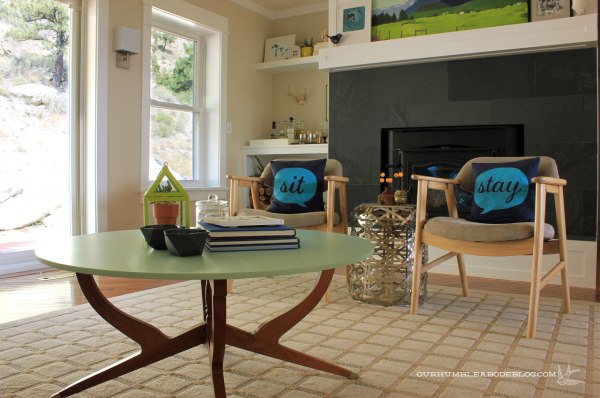
A mix of shiny metal and warm wood to liven up this little corner.

Gold-and-Herringbone-Side-Table-from-Above

It’s not perfect, but it makes me smile.

Gold-and-Herringbone-Side-TableDetail

And ties in perfectly with our fall color scheme and decor.

Gold-and-Herringbone-Side-Table-to-Fireplace

But it can work in year round.  If I change my mind, I can give it a quick coat of spray paint, too.  What do you think of this quick and cheap makeover?

DIY Outdoor Gas Fire Pit

Time to show our weekend project.  A galvanized tank turned outdoor gas fire pit.

Outdoor-Fire-Pit-and-Waterfall

From the get go, we knew we wanted a gas fire pit (no flying embers starting a fire, please).  After searching Houzz for inspiration, we decided we liked a longer, linear style.

Figuring out the housing was tricky.  Ben didn’t want a heavy concrete piece and wood wouldn’t work.  Finding a huge metal bin around here isn’t easy, unless you want a water/stock tank.  So a six by two by one foot deep galvanized stock tank solved our problems.  To get started, Ben ran a flexible gas line through a rigid pipe.  Luckily, our furnace and water heater are on the back side of the house, so punching through wasn’t terribly difficult.  Then he drilled a hole in the side of the tank for the gas to come in and a few more in the bottom for water drainage.

Outdoor-Fire-Pit-Tank-with-Holes

H burner kits, like this one, are available online, ready for install.

After talking to a guy at a local fireplace store, he suggested Ben make his own using black pipe.  Turns out, this way cost under 50 bucks and is completely customizable.  With the end caps still off, Ben drilled holes.

Outdoor-Fire-Pit-Drilling-Holes-in-H

Ours are all about 2 inches apart, the whole length.

Outdoor-Fire-Pit-H-and-Rock-from-Top

Outdoor-Fire-Pit-H-Holes-Detail

And here it is, before adding decorative top rocks.  There’s an exposed valve on one end, but a main shut off valve in the garage.  That way little hands can’t turn on the gas outside.  That Tarter sticker is gone now, too.  Not that I didn’t love the look.  Haha.

Outdoor-Fire-Pit-with-H

Having this valve makes the flame height adjustable.  Super low for ambiance or high for warmth.

Outdoor-Fire-Pit-Low-High-Flames

Until we decide on the top layer, we put a layer of limestone on.

Outdoor-Fire-Pit-with-Limestone

Because we have so much limestone, I want something with contrast.  The Houzz inspiration used large and small river rock, so that’s an affordable option.  Maybe black river rock?  Or steel spheres like these:

Of course, we’re still cleaning up and fixing the damage from the storm, so things aren’t looking finised…yet.

Backyard-with-Outdoor-Fire-Pit-and-To-Do-Points

The waterfall is clean and functional again and there’s a drainage trench along the hill to hopefully channel water down.  Muddy footprints cover the deck and we’re waiting for another truckload of limestone to cover the dirt and mud.  But we’re happy with any and all progress.  Especially when it’s fun and s’mores are involved.  Oh yes, we put the new fire pit to the test the day we finished it.  So, what do you think?  Do you have an outdoor fire pit?  Or top rock suggestions?

P.S.  We didn’t win at Apartment Therapy, but really, really appreciate your support and favorites.  Sherry, you’re the lucky winner of a custom Sit and Stay pillow set.

Stump on Wheels

Because we’re now up to our eyeballs in mud and more landscaping, here’s a little outdoor project.  I found a big stump in our wood pile and kindly asked Handy Sammy to carry it up for me.  Luckily, he’s a super nice, strong guy and happily helped.  Then I picked at the bark, most of which came off easily.  Because this guy is hefty and will live on the deck, I bought casters for the bottom.

Stump-Table-with-Painted-Top-and-Casters-Supplies

Instructions suggested installing 3/8 inch from the outside.

Stump-Table-Caster-Detail

Four work nicely and moving around is a breeze now.  And we don’t scratch the deck in the process.

Stump-Table-with-Casters

Whether an extra seat or side table, this guy is handy.

Stump-Table-with-Painted-Top-and-Casters

For a quick jolt of color I painted the top Japanese Kimono by Behr.

Stump-Table-with-Painted-Top

I also really want to make a hairpin leg table similar to this one.

How fantastic are those blue legs?  Maybe with a chunk of birch with pretty white bark?  Also, if you like our colorful guest room, could you please take a minute to vote for it at Apartment Therapy?  Pretty, pretty please?

Thank you in advance for your help.  Hope you have a wonderful Wednesday!

Blue Sage

For longer than I liked, the walls of our room have been royal (borderline neon) blue.  Very patchy and poorly painted to boot.

Master-Bedroom-from-Door-One-Year-Later

We thought we’d have time to replace all the house windows last summer, but that didn’t happen.  This isn’t the year either.  Knowing next year would be the earliest, I couldn’t stand looking at these walls any longer.  While V was in school, Ev and I picked up two gallons of Restoration Hardware’s Blue Sage, color matched to Glidden Duo.  I started painting right away.  Seriously, I was on a mission to eradicate the bold blue.  And her we are two coats later.

Master-Bedroom-Painted-Blue-Sage-from-Door

Ahh, that’s better.  Though the color is more green than I expected.  Or maybe that’s just in comparison to the blue before.

Master-Bedroom-One-Year-Later

At any rate, I can handle this color.  At least until we replace the windows.

Master-Bedroom-Painted-Blue-Sage-from-Bathroom

Because then we’re probably going to pull off all the drywall to replace it.  Heavy orange peel texture and two painted over wallpaper walls and terrible patches and too few outlets and different sized windows seems like that’s the best way to go.

Master-Bedroom-Texture-and-Patches

Until then, our room is dark and soothing.

Master-Bedroom-Painted-Blue-Sage-from-Bench

Maybe when we deal with the rest of this room I’ll choose a slightly more blue-green color.

Master-Bedroom-Painted-Blue-Sage-from-Bed

What do you think of it?

Master-Bedroom-Painted-Blue-Sage-Gallery-Wall

Much better than this, no?

Gold-Nail-String-Plus-in-Bedroom-Gallery-from-Front

Oh paint, how I love thee.  Such healing powers you’ve got.  What have you painted recently?

Cutting Corners

How ’bout a round of applause for our new spider base coffee table top:

New-Coffee-Table-in-Family-Room

While marble or glass would be beautiful, I think marble is too heavy for the base.  And I know glass would be completely covered in fingerprints, taunting me daily.  So I had Ben help me (okay, he did all the cutting) make a paintable top.  He cut a sheet of 1/2 inch MDF to 36 1/4 inches square, then made a pivot point to make a perfect circle.  A scrap of MDF nailed to the center of the square, like this:

Making-Round-Table-Top-Pivot

Which gives a rigid edge to spin, following with a pencil.

Making-Round-Table-Top-Drawing

Using a jigsaw, Ben cut close, but just outside the line.  With the corners cut, I got out the orbital sander with 80 grit paper and sanded until I met the pencil line.  For a smoother edge, I followed up with 150 grit paper, primed, painted, and sealed both sides with Polycrylic.  I set the top on and for the first time in my home ownership, I’ve got a coffee table.

New-Coffee-Table-in-Family-Room-Toward-Fireplace

I had a sample jar of Valspar’s Sweet Mint, which I think pairs nicely with the wood base.  Fun and colorful, without being bright and crazy.

New-Coffee-Table-In-Family-Room-by-Fireplace

Sweet Mint is also a near perfect match for the sky in my MT Photo Journal Heavenly print and landscape painting on the mantel.

New-Coffee-Table-in-Family-Room-with-Heavenly-Print

If I get sick of it, I can quickly sand it down to repaint with minimal money and effort.

New-Coffee-Table-in-Family-Room-Toward-Back

We’ve got a few games on top including tic tac toe and the checker book.  The terrarium, pulled from the boys’ room, adds greenery and a glass jar with our initials rounds out the set.

New-Coffee-Table-in-Family-Room-Top-Detail

Which do you prefer, coffee tables or ottomans?  It feels less like a dorm room, so adult, to have one.  And really fun to accessorize.  Now to convince Ben to replace the ottoman in the living room with a coffee table.