What’s Next in the Pool House

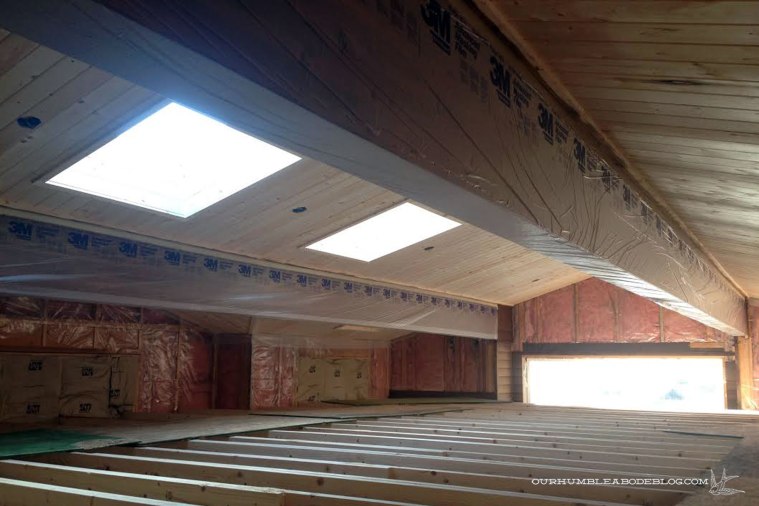
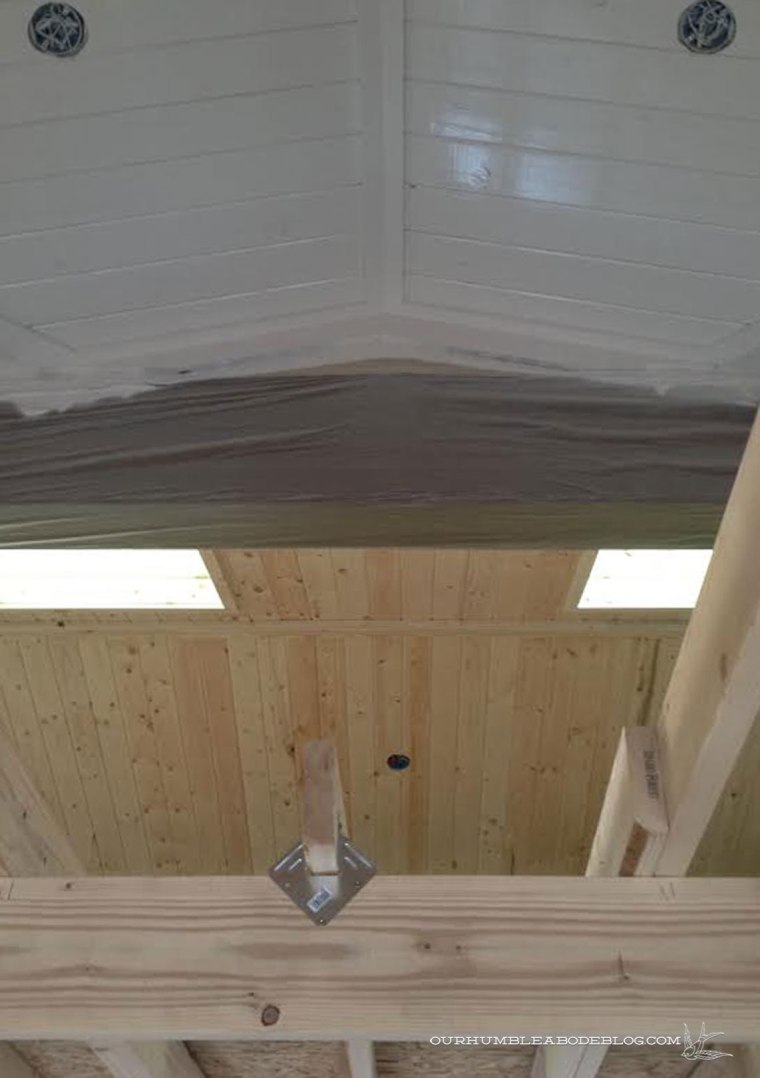
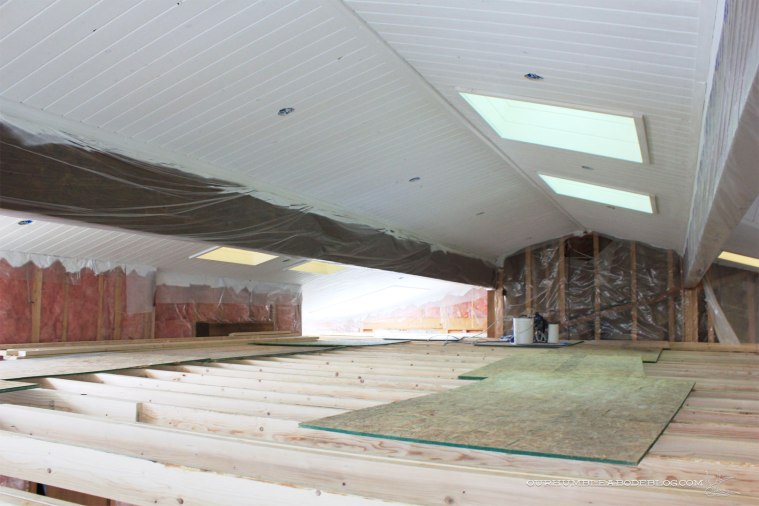
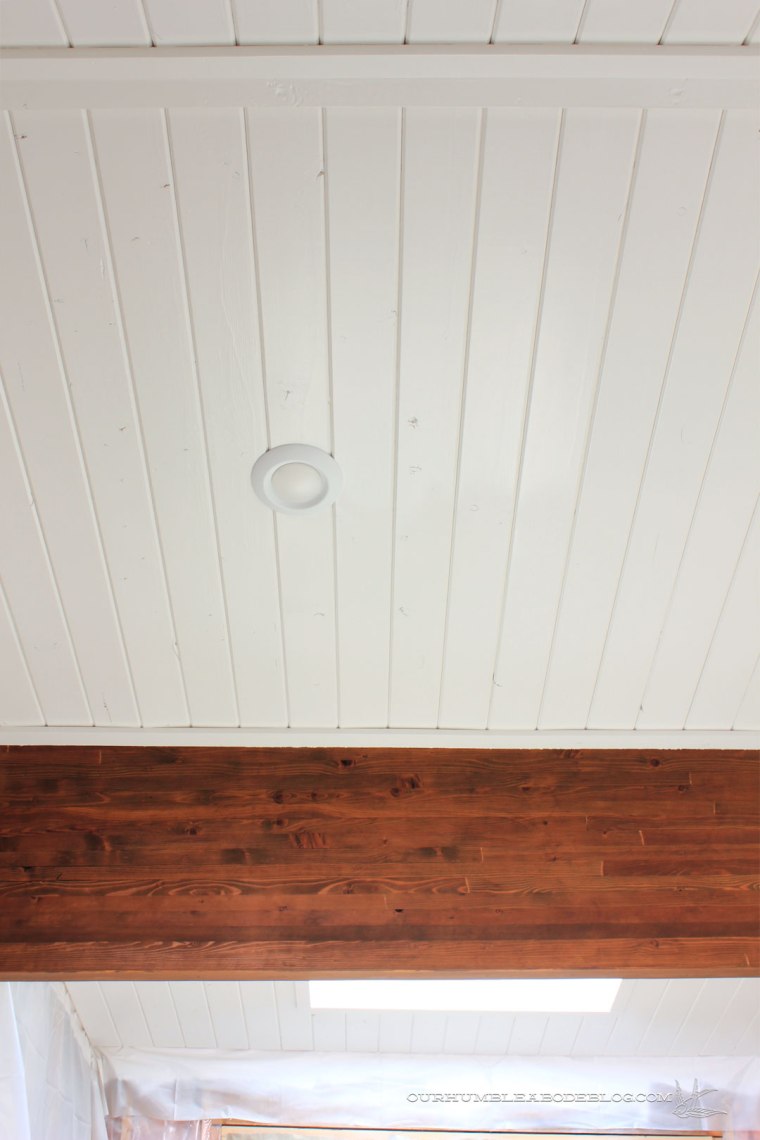
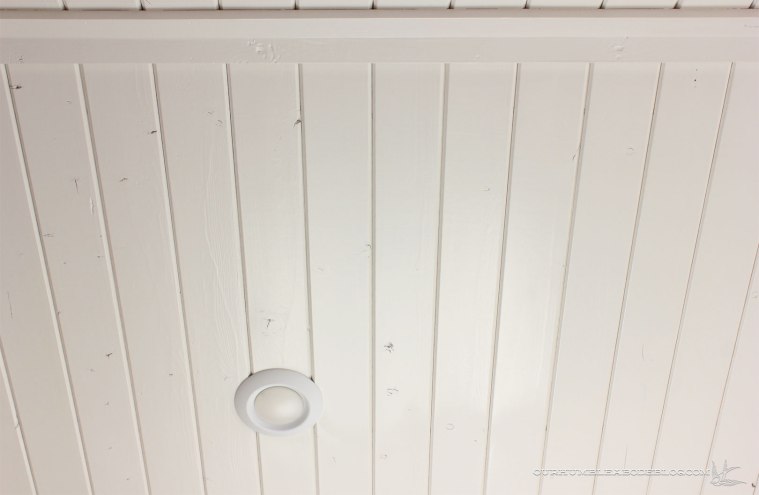
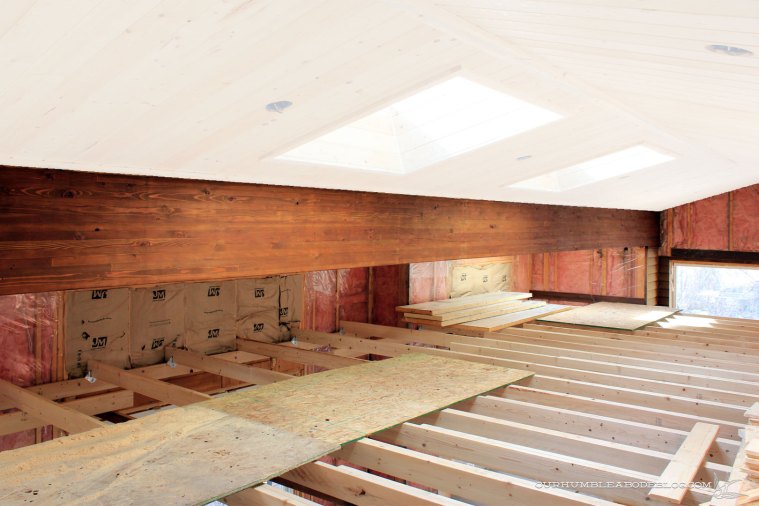
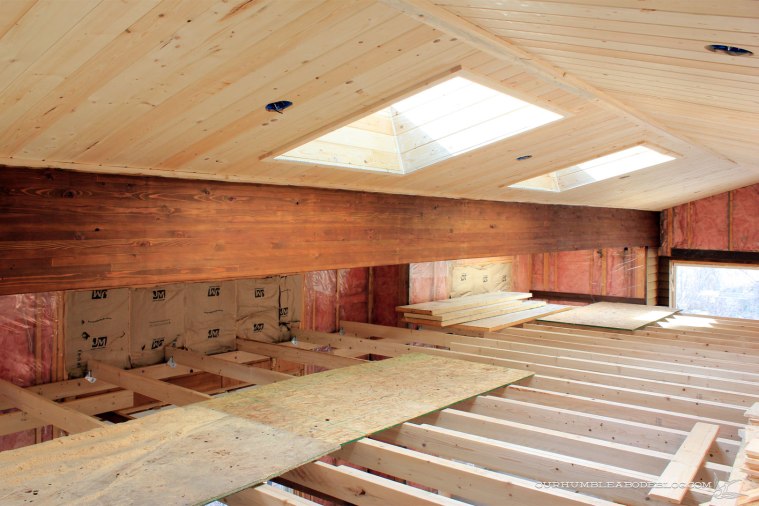
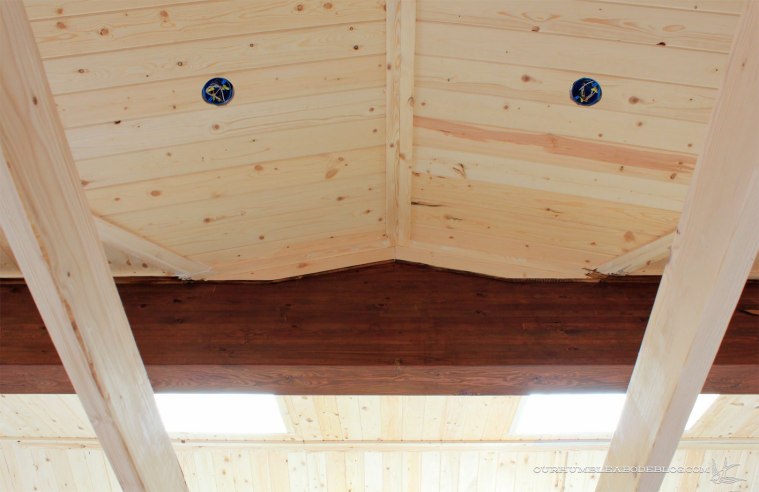
Back in December, we constructed a temporary scaffolding structure to access the pool house ceiling.  It wasn’t pretty, but it did allow us to reach the 15 foot peak to install the tongue and groove ceiling.

pool-house-ceiling-scaffolding-from-below

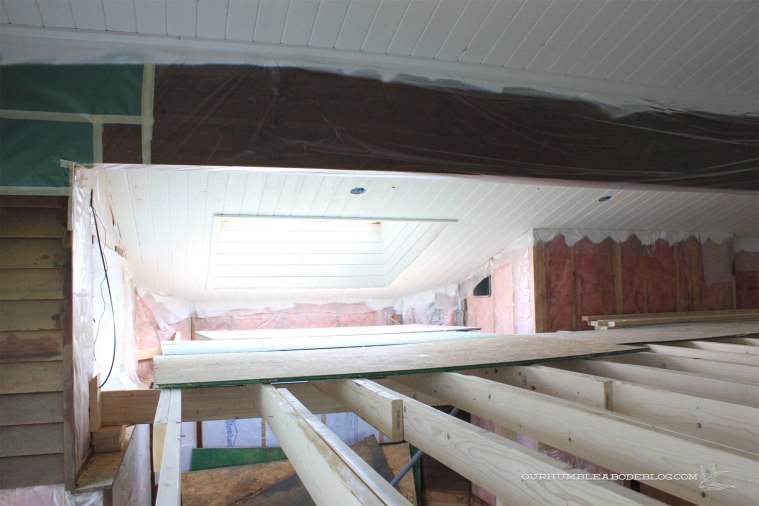
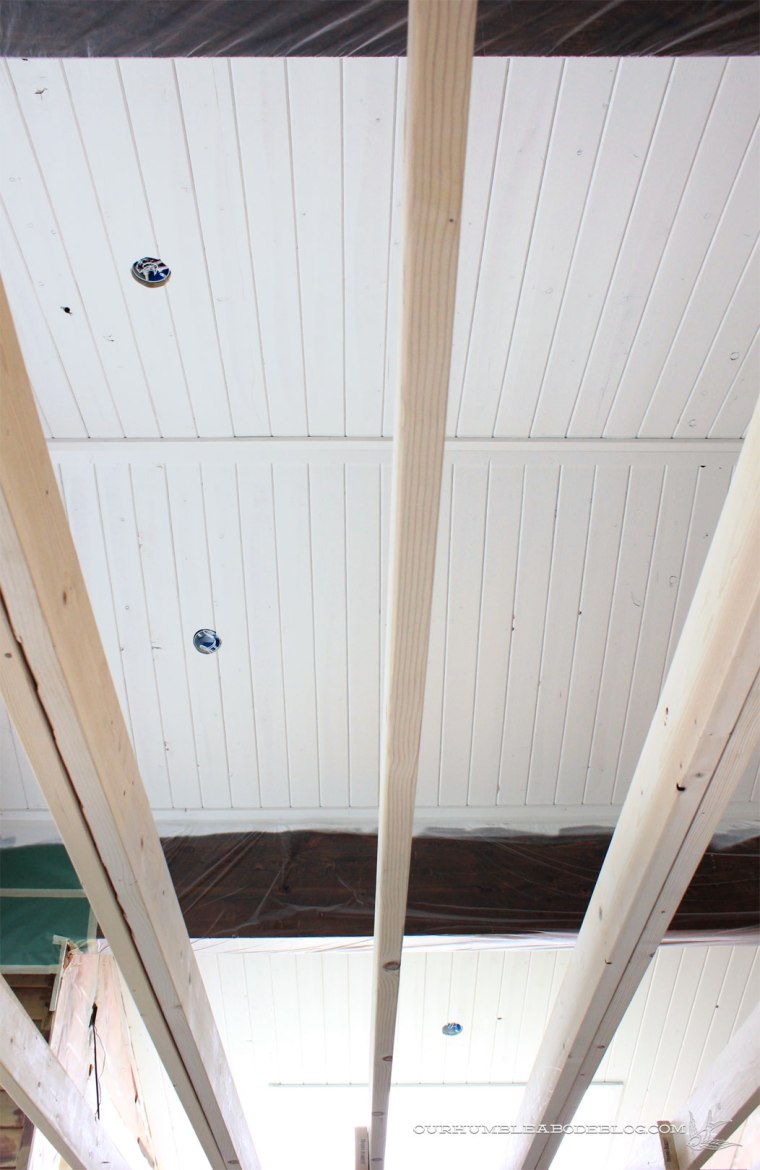
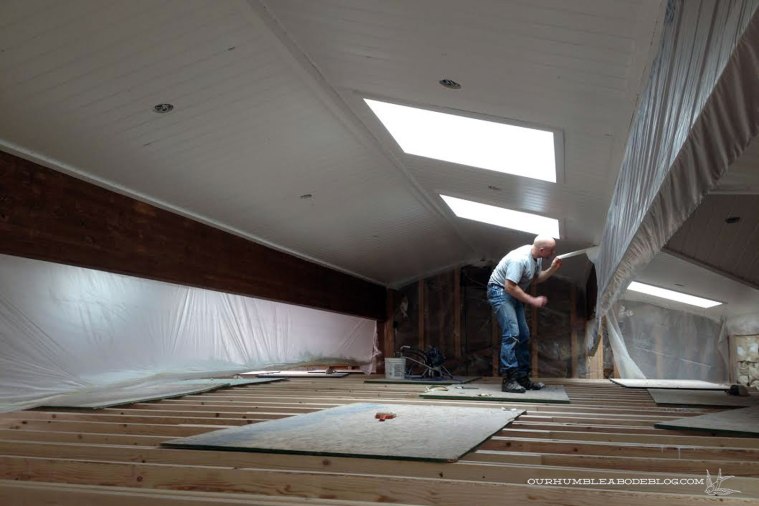
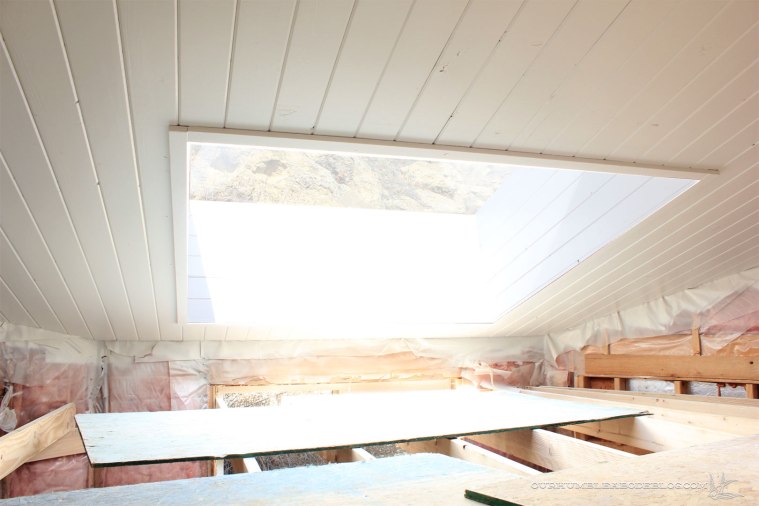
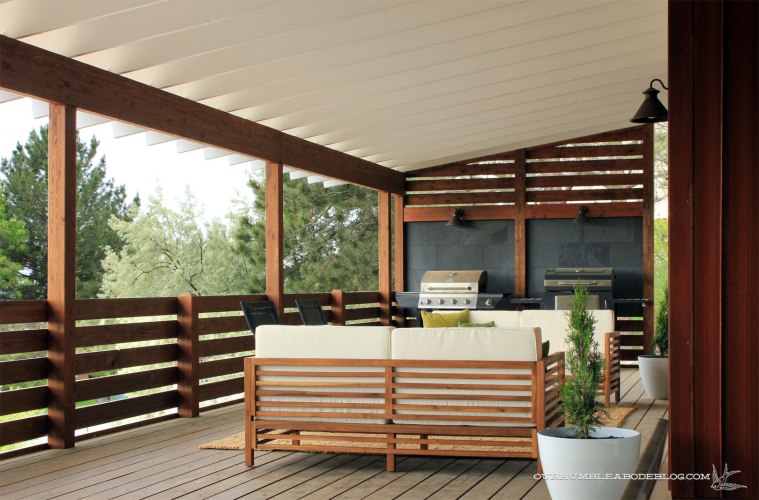
For months, the bottom of the scaffolding was the main thing we saw, with snippets of the ceiling progress through the joists.  After priming and painting the ceiling, we were able to tear that all down over the weekend and get the full view.

Pool-House-Ceiling-Overall-2

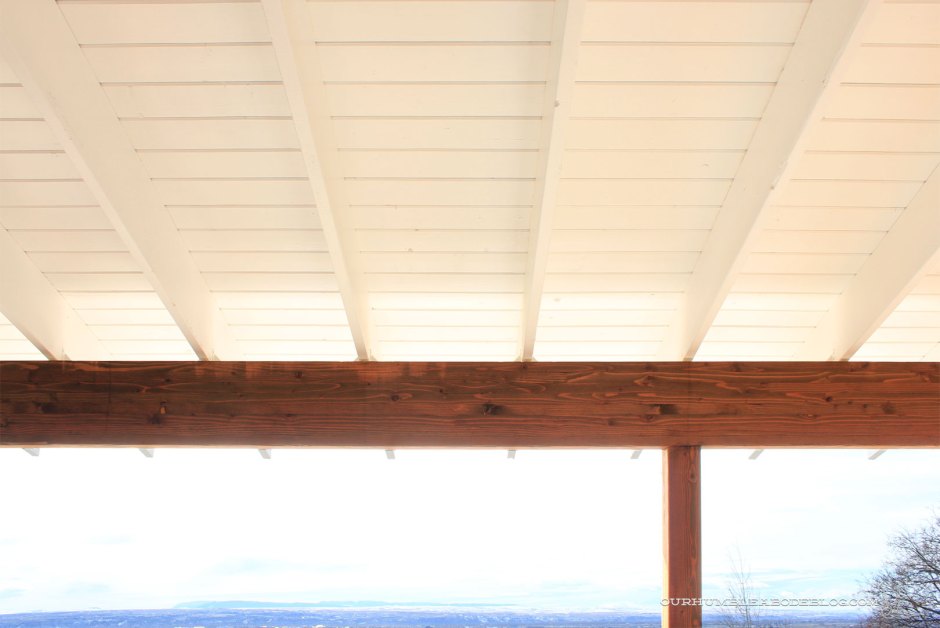
It.Was.Glorious!  It’s funny because we had gotten so used to the vaulted ceiling height that the eight foot scaffolding height felt so low, even though our house ceilings are 8 feet.  Living with that lower height for months, it became our new normal.  So much so, that when the scaffold was down, the ceilings now feel 30 feet high.

Pool-House-Ceiling-without-Scaffolding

If you can ignore the unfinished walls, the difference between the finished ceiling and the original fiberglass sheet clad one makes all the dust, crawling on hands and knees, and hard work well worth it.

New-House-Pool-Room April 13 2012

With a few working hours left on the day, we tidied up the rest of the pool deck to prep for tile removal.

Pool-House-Scaffolding-Down

Time to take out the old outdoor grade blue and gray carpet.

Pool-House-Scaffolding-Down-Corner

Beneath the carpet is the original early 80’s tile, covered my a lovely layer of industrial glue.

Pool-House-Carpet-Removed-Left-Side

Yeesh, it looks so disgusting.

Pool-House-Carpet-Removed

In some areas, the tile had cracked badly, so before installing the carpet, the bad areas had been filled.

Pool-House-Tile-Before

Bright and early on Sunday, Ben got started using a roto hammer with a chisel bit to pry up the old tiles while I filled bucket after bucket to haul away.

Pool-House-Tile-Removal-Difference

We’re just about half way done and so far, 44 five gallon buckets have been filled and dumped.  My arms are stronger and the sides of my legs covered with bruises, but it feels great to make this progress.

Pool-House-Tile-Removal--Right-Side

Not knowing what is beneath the tile is always an interesting gamble.  The concrete pad was poured with wooden strips used as spacers.  Over time, the wood pieces have rotted away, leaving large gaps below the tile, which is a very strong possibility for the severe cracking.

Pool-House-Tile-Mastic-Removal

Before new tile can be installed, we first have to remove all the remaining mastic for a smooth surface and fill the wide gaps.

Pool-House-Mastic-Removal-Difference

With much of the back and far walls buried under ground, there wasn’t much in the form of insulation.  Ben is a nut about energy efficiency and insulating, and we want to heat this space as effectively as possible.  To do so, we’re going to build another interior wall to add extra insulation, just as we did in our basement remodel as well as the exterior of the house.

Pool-House-Ceiling-Overall

The plan is to put a huge dent in that insulation filled pool, keep the heating bill to a minimum, and maintain a comfortable swimming temperature.  All in good time, of course, but all progress is exciting right now, even with only ugly photos to show for it at this stage.

A Spring Spruce

Though we’ve technically hit spring, in Montana, we’re still in the warm up phase.  In late fall, we moved the back deck furniture onto the covered front deck for safe storage.

Front-Deck-Overall

As such, things are a bit lack luster out there, but I’m gearing up for a change.

Front-Deck-Toward-Grills

Nothing major, as we recently rebuilt the deck and finished siding, so the bones are great.  Early last summer, I bought two outdoor sofas and quickly put together an outdoor lounge area.

Front-Deck-Toward-House

Those sofas are still a favorite and will certainly stay, as will the coffee table, and green garden stool.  Once we move the black dining set out to the back deck, the chairs will go with it.

Front-Deck-Toward-Road

Even in an outdoor space, I like having a rug to define the space and help keep the furniture in place.  We received this jute rug from neighbors who were throwing it away because it shed so badly.

Front-Deck-Sofa-and-Coffee-Table-Detail

With it outside, the shedding isn’t such an issue, but I don’t like how flat and monotone the colors are.  The sofa base, beam coffee table, and rug are so similar in tone, I’m itching for contrast.

Front-Deck-Toward-House-Detail

Perhaps something more like this:

Deck-Mood-Board

Rug     .     Sofa     .     Club Chairs     .     Floral Pillow     .     Stripe Pillow     .     Green Pillows     .     Kilim Pillow     .     Concrete Planter     .     Green Garden Stool

Just a bit more color, contrast, pattern, and life, mostly in the form of textiles.  I love having classic, long-lasting big pieces, but shaking things up with accessories.

Front-Deck-Dining-Door-Walkway

Near the dining door, I placed a trio of planters in the ‘dead end area’ at the end of the walkway.  It’s an easy way to brighten up the area, seeing it from the deck, but also inside the house.  As soon as garden centers put out plants, I’m going to stock up.  Strangely, the dying/dead evergreens just don’t do it for me.

Painted Ceiling

Last Thursday and Friday, to prep for priming and painting the pool house ceiling, I carefully masked off the two beams and the six skylights my short T-Rex arms could reach.  I took my time on the beams, first getting masking tape tightly along the edge, then following up with a plastic wrapping.

Pool-House-Beams-Masked

The thought/possibility of getting paint on the beams had me biting my nails with concern, because it would mean sanding and trying to feather in the stain.  Or even completely resanding and staining.  As a side note, we realized not all plastic masking films are created equal.  Unlike cheaper film, paint doesn’t flake off of this one, even after a few coats, making clean up a breeze.

71b2k6se80l-_sl1500_

With the beams and skylights covered, we threw drop cloths over tools and stapled more plastic sheeting over the windows to protect from overspray.  Saturday after lunch, we started spray priming the ceiling.  Watching is like instant gratification because the process goes so quickly.  Like an hour to prime everything quickly.

Pool-House-Ceiling-Priming

This isn’t our first time painting fresh wood, so we’ve learned a good primer is a crucial element.  Though it is far stinkier, we used a good oil based primer from Sherwin Williams.  Having used it in the past, we know it blocks stains and the tannins in the wood, preventing the annoying bleed through.

Pool-House-Big-Skylight-Primed

We got lucky with a gorgeous 70 degree day, so we opened windows and doors to speed up the drying process and help air out.

Pool-House-Ceiling-Primed-from-Below

After cleaning up the sprayer, Ben looked at the 15 gallons of paint.  That’s when he noticed a slight problem.  He had ordered satin, but was given gloss.  Generally speaking, I’m just not a fan of gloss paints, especially in this instance.  A call to the store, followed by a trip in with the big buckets, and the helpful folks exchanged the paint for the correct sheen.  Which allowed us to get painting Sunday.

Pool-House-Ceiling-Primed-Overall

Ben sprayed while I followed behind, touching up and drips or thick spots.  Unfortunately, it rained off and on, so the drying process took a lot longer.  After finishing touch ups, Ben carefully peeled off the plastic wrapping the beams.

Pool-House-Ceiling-Peeling-Plastic

Whew, not a single drop, splash, or drip on them.

Pool-House-Ceiling-Painted-with-Beam-Detail

And the ceiling looks amazing.  It’s exactly as I pictured in my head and really lightens up the entire room.

Pool-House-Ceiling-Painted-with-Light

Going from an unfinished Photoshopped image:

pool-house-beam-stained-with-white-ceiling

To reality:

Pool-House-Ceiling-Painted-Overall

Ben still has some lights to install, but then we should be able to remove the scaffolding.  Eek, it will be so great/strange to see the entire ceiling from below.

Pool-House-Ceiling-Painted-Below-Beam

Pool-House-Ceiling-Big-Skylight-Detail

If you split the space into four parts, the ceiling, floor, walls, and pool, we’re a quarter of the way finished.  Next up, removing the tile, which should be great fun.

My Six Pack

No, I’m not talking about those pesky ab muscles that I severely lack, though I’m working on building those.  Instead, here’s a much more fun six-pack build that takes just a few hours.

Six-Pack-Caddy-Loaded-Up

This little build came about thanks to an upcoming school fundraiser.  Each teacher comes up with a basket theme, then parents are asked to donate things that fit this category.  Movie night is the theme we’re working with, so I wanted to add something that is a little outside the box, while still fitting in.  Thus, the six-pack caddy filled with old style sodas, candy, and popcorn seasoning.

Of course, this can be used in many different ways, so let’s go over the building process.  First, here’s the material/cut list:

Six-Pack-Caddy-Build-Plans

We used 5/8 inch thick plywood for the bottom and side pieces and 1/4 inch thick wood strips for the side rails/dividers.  After cutting all the pieces, we did a quick dry fit to make sure it worked.

Building-Caddy

*I forgot to add the notch spacing to the above drawing.  If you’re using 5/8 thick sides and 1/4 inch thick divider material, the bottle spacing is 2 3/4 inches each.

To assemble, apply a thin bead of glue on one side of the bottom piece and set the side on top, lining the edges up.  Nail in place to secure while working and repeat on the other side.  As long as the dividing grooves are tight, the six part section won’t need glue, just set it in place and carefully nail through the side into the 1/4 inch strip.

Building-Caddy-Almost-Finished

Now, attach the side rails, line on up on the bottom, making the divider and rail flush at the top.  We used a scrap strip to determine the spacing and nailed the top rail in place.

Sand everything smooth, paying extra attention to the plywood edges, slightly rounding to soften the sharp corners.  If you want, go ahead and stain and seal the entire piece now, I’ll wait.

Stained-Caddy

Place the galvanized pipe, home improvement stores usually cut and thread when you buy the pipe, through the two drilled holes and secure the ends with pipe caps.

Six-Pack-Caddy

Add a bottle opener to the side, this one is only two dollars from Hobby Lobby, and fill with favorite drinks.

Six-Pack-Caddy-Side

I think these might be my new go to for parties/fundraisers/gifts.  Even without the drinks, how cute would this look with old bottles filled with flowers?!  Or even a cutlery/condiment caddy for outdoor get-together.  Heck, leave it out on the counter as a dual purpose utensil holder; the possibilities are endless.

Beam-ing with Joy

When we last left off with the pool  house ceiling install, it looked like this:

pool-house-ceiling-center-finished

Since then, we’ve installed the rest of the tongue and groove on the ceiling, with three skylights left to trim out.  It’s thrilling to be at this stage, because it means we’re that much closer to taking the scaffolding down.  After discussing the merits of painting versus staining, we’ve decided to paint the ceiling white, while staining the beams.

New-House-Pool-Room April 13 2012

Those two beams are an architectural element that we love and want to emphasize, and the stain will stand out best against the white backdrop.  With the decision to paint solidified, we knew we could go darker and more dramatic on the beam color without weighing down the entire room.

pool-house-beam-detail

When possible, we like to use the same or similar elements throughout our home for a cohesive look and feel.  Along the entire pool house front is our recently rebuilt large covered deck:

Front-Deck-from-Road

Like the pool house, we used tongue and groove boards to add subtle texture to the ceiling.

deck-painted-ceiling-detail

Painting that ceiling white was such an easy choice, because it visually heightens the ceiling, preventing the space from feeling claustrophobic.

Front-Deck-Lounge-Area-Overall

Similar to the pool house, the front of the deck also features a stained beam.  Ben and I both love the look of the dark beam against the white ceiling, so we’ve decided to carry that same look inside.

deck-beam-with-painted-ceiling

Using the same deck colors will allow a seamless flow from inside to out, but it also made my stain selection painless.  As an added bonus, we had leftover stain so this weekend we knocked out the process in about three hours.

pool-house-beams-stained

Finally, those beams have gotten the attention they’ve always deserved.

pool-house-beam-stained-with-skylights

Once the ceiling goes white, the majority of the room will be light and bright, punctuated by contrasting pieces.

pool-house-beam-stained-with-white-ceiling

Another benefit of painting the ceiling is that the recessed lights will further recede, rather than the white ring standing out against a stained ceiling.

pool-house-beam-stained-from-below

Unfortunately, we’re still looking at the ceiling through scaffolding bits, so it’s not a complete picture just yet.