DIY Pillow Shams

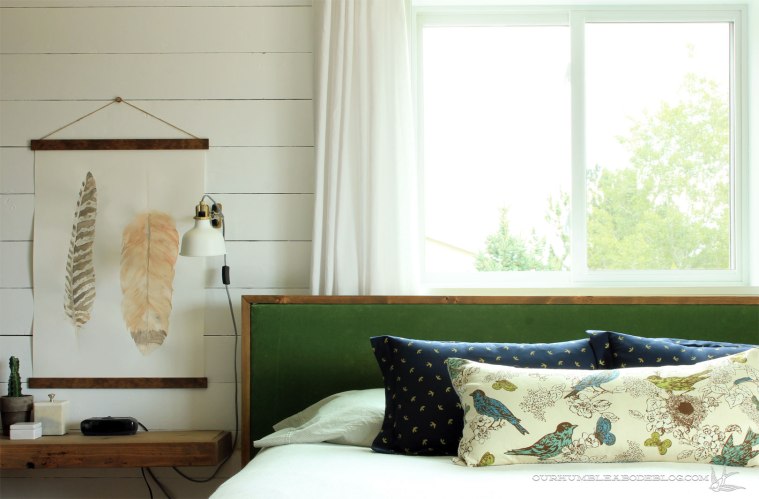
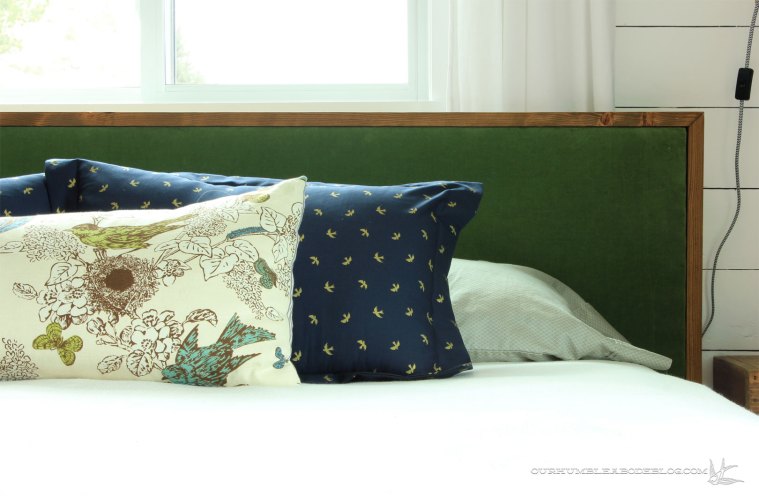
I’m not usually a big fan of the traditional fall colors on the color wheel.  An occasional mustard is about as comfortable as I am with the warm spectrum, but I do want to shake things up for fall.  Darker, gloomier colors are some of my favorites, and also play quite nicely with this cooler season.  Of course, one little way to make a change is pillows, for living areas and the bedroom.  After looking at oodles of beautiful shams, I couldn’t find exactly what I was after, so I sewed my own.

blue-pillow-shams-on-bed

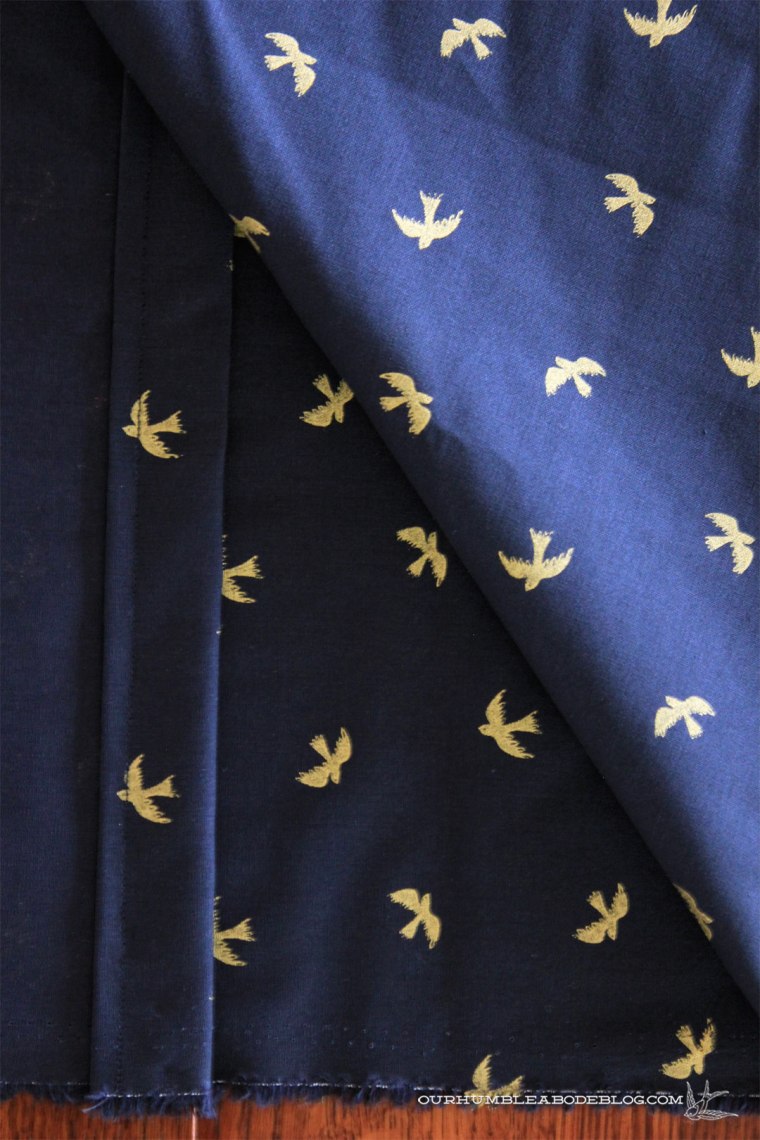
If you’re not big on sewing, don’t worry, the process is very easy.  Using a cotton quilting fabric, cut one piece for the front.  Mine standard pillow measured 22 by 29, including an extra inch for my seam allowance.  Next, cut two more pieces, 22 inches square for the back panels.  Sew the insides of the smaller pieces, folding over once, then again for a finished edge.

blue-pillow-shams-sewing-step-1

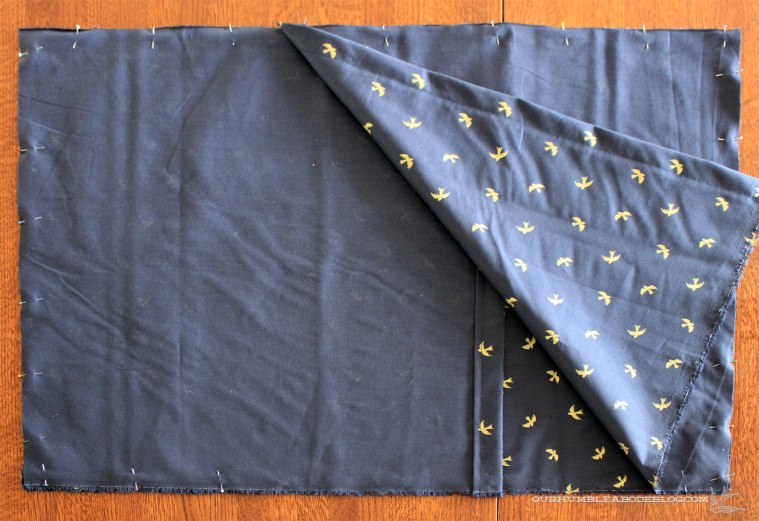
Next, pin the pieces, right sides together, overlapping the back panels to create the envelope closure.

blue-pillow-shams-sewing-back

Sew along the outer most edge, leaving a 1/2 inch seam, then turn the fabric right side out.  Before sewing the flange of the sham, press the edges with an iron for a professional look.  Now, to create the flange, simply sew two inches in from the outer edge.

blue-pillow-sham-right-side

To make measuring easier, tape off two inches on the machine edge to follow against, and use a ruler to measure at the corner.  Once at the corner, keep the needle down and pivot 90 degrees to make a seamless corner before carrying on with the edge.

blue-pillow-shams-top-detail

That’s it, a super quick flange sham that can be customized to any size.  Go ahead and make a Euro, throw, or lumbar pillow with a sweet edge detail.

blue-pillow-sham-edge-detail

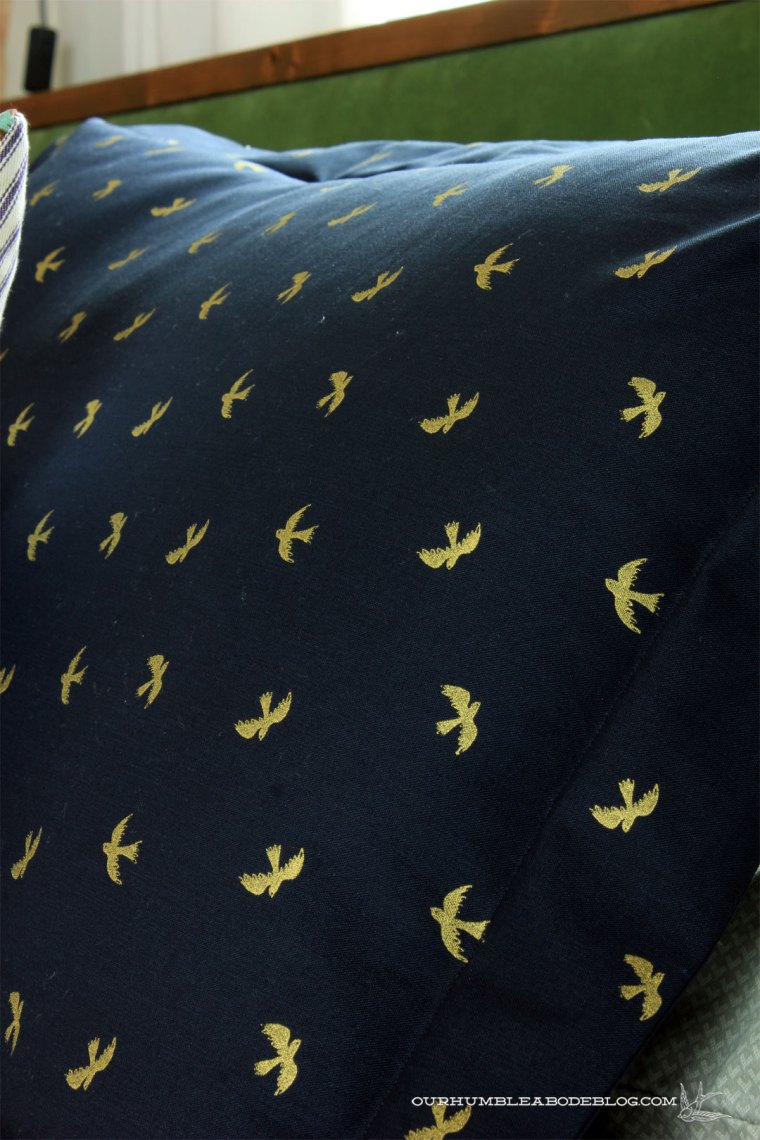
I love the tiny gold birds on this fabric for a subtle detail from across the room.

blue-pillow-shams-in-bedroom

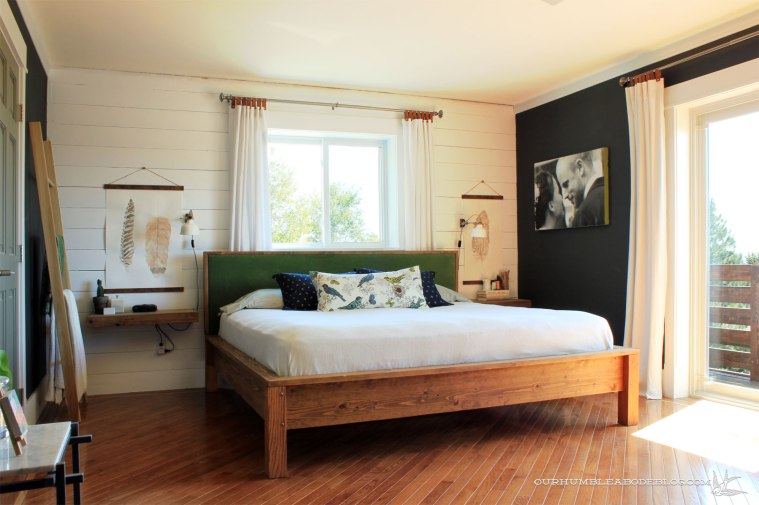
For about 15 dollars in fabric and an hour of sewing, our bedroom is rocking another layer and feeling a bit cozier.  Maybe a different, warmer toned accent pillow would round out the room and really bring in that fall feeling.  If you’re in the market for navy pillow shams, here were my top contenders:

navy-pillow-shams

  1. Deil Global Sham
  2. Flannel Stripe Sham
  3. Shabori Dot Sham
  4. Ticking Stripe Sham
  5. Organic Stamped Dots
  6. Tassel Sham
  7. Ladder Stripe Sham
  8. Vintage Washed Solid Quilted Sham

Beam Coffee Table

Have you ever made a single change to a room and noticed how much it changes your feelings about it?  Rather than finish a room in one quick, buy-it-all purchase, I love to let things slowly and naturally take shape, based on things I stumble upon, search for, and build.  By doing so, each addition or change gets me one step closer to my final vision, but the room feels personal and collected, not like a catalog.

For us, remodeling and decorating is a long road with twists and turns, all depending on what thrift stores and Craigslist bring to me.  After giving up my search for a streamlined leather sofa, I built a large, faux leather topped coffee table.

Horizontal-Railing-and-Living-Room

It has served us very well for the last two years, providing ample Lego building surface.  Then, a year ago, fate stepped in and brought me the perfect camel leather, straight-lined sofa for an amazing price, and the colors have clashed since.  The ostrich-like vinyl was similar in color, but a touch lighter and more yellow, but far too close to be put together in the same room.

Parallel-Couch-Window-Seat-Arrangement-Toward-Dining

Three years back, Ben spotted a giant stack of beams from a demolished building, asked what their fate was (landfill), and we built a deck using most of them.  A few remained, taking up an unused section of our driveway, waiting for a use.  Flash back a few weeks, when we decided it was time to put the remaining 34 inch wide by 9.5 inch thick beam to use, as a coffee table.

Ben cut the beam, squaring up the edges, and followed up with an angle grinder to quickly sand off the previous lavender-ish finish.  Since the boards are pine, I opted for stain to avoid the overly yellow tone and finished with a coat of water based polyurethane. To get the 9 1/2 inch material up to my preferred coffee table height around 16 inches, I set out on a caster hunt.

House-Tour-Four-Years-In-Family-Room-Toward-Fireplace

Casters were a great fix for the stump I turned into a coffee table, adding height, but also the ability to easily move such a heavy slab.  This scenario wasn’t much different, but the stump was already 12 inches, so smaller casters worked perfectly.  Unfortunately, those casters were the largest size I could find locally, at least without a rubber wheel around.  After plenty of online digging, I found a great Etsy shop, MMCaster, with affordable, big steel casters and ordered up a set of four.  As soon as those arrived in the mail, Ben and I screwed each one in place, leaving three inches from each side.

Beam-Coffee-Table-in-Living-Room-Toward-Leather-Sofa

We dragged it inside, literally dragged on a towel because I can’t lift it, and have been loving it for the last week.

Beam-Coffee-Table-in-Living-Room
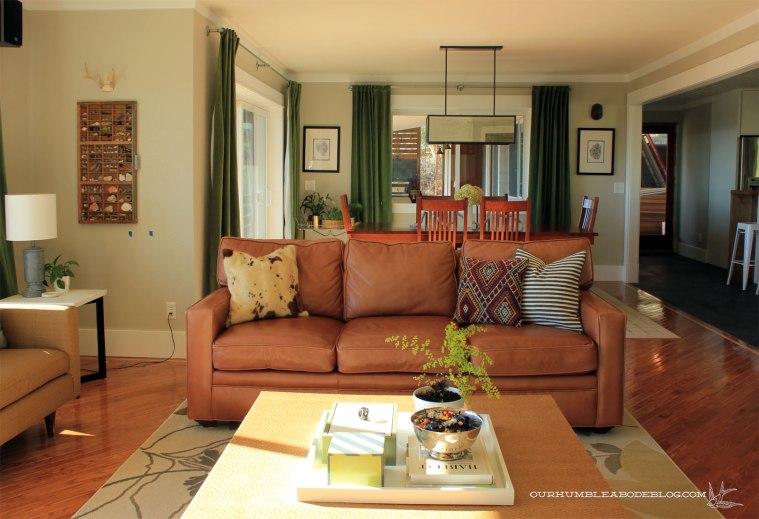
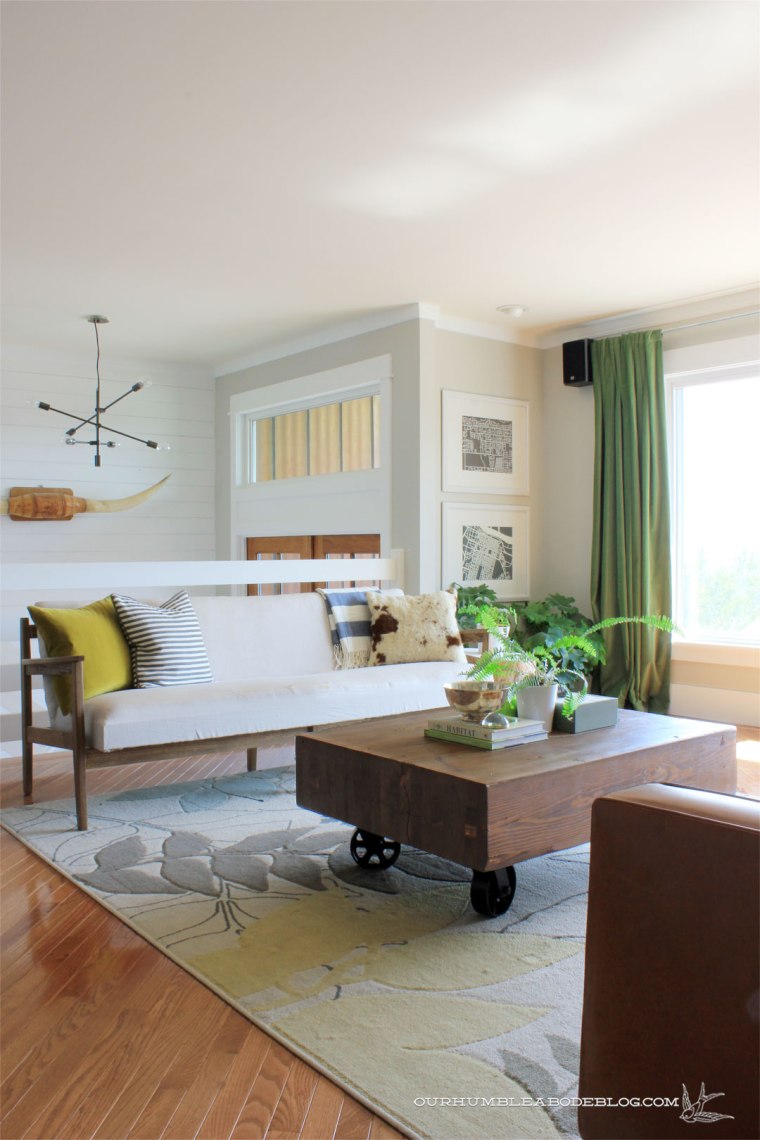
Those six-inch casters brought the slab up to a great height, but give it an industrial edge.  Kind of like a rail cart, a coffee table that Ben has always dreamed of.  The top has character, like a crack and some shallow dents with a touch of the original finish.

Beam-Coffee-Table-Top-Detail

With a smaller surface area than the previous table, I nixed the tray, but kept our marble topped remote control box, a fern, candle, coffee table books, and a footed silver bowl of nature finds.Beam-Coffee-Table-Detail 
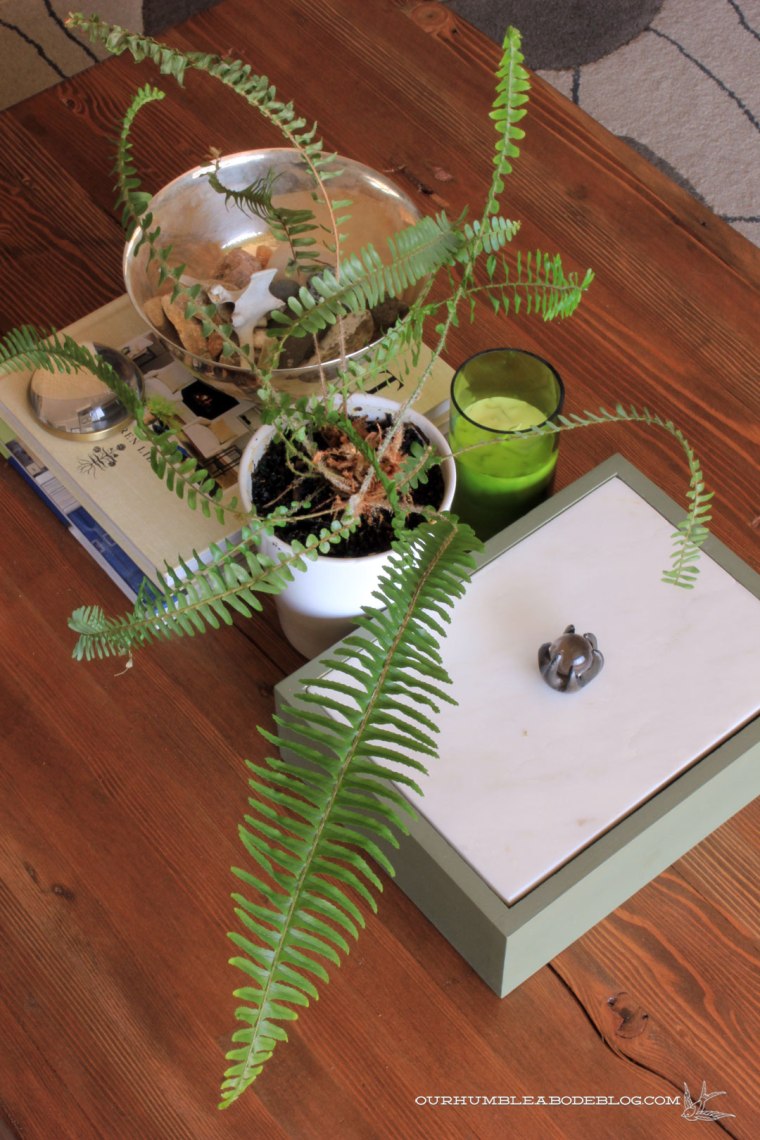
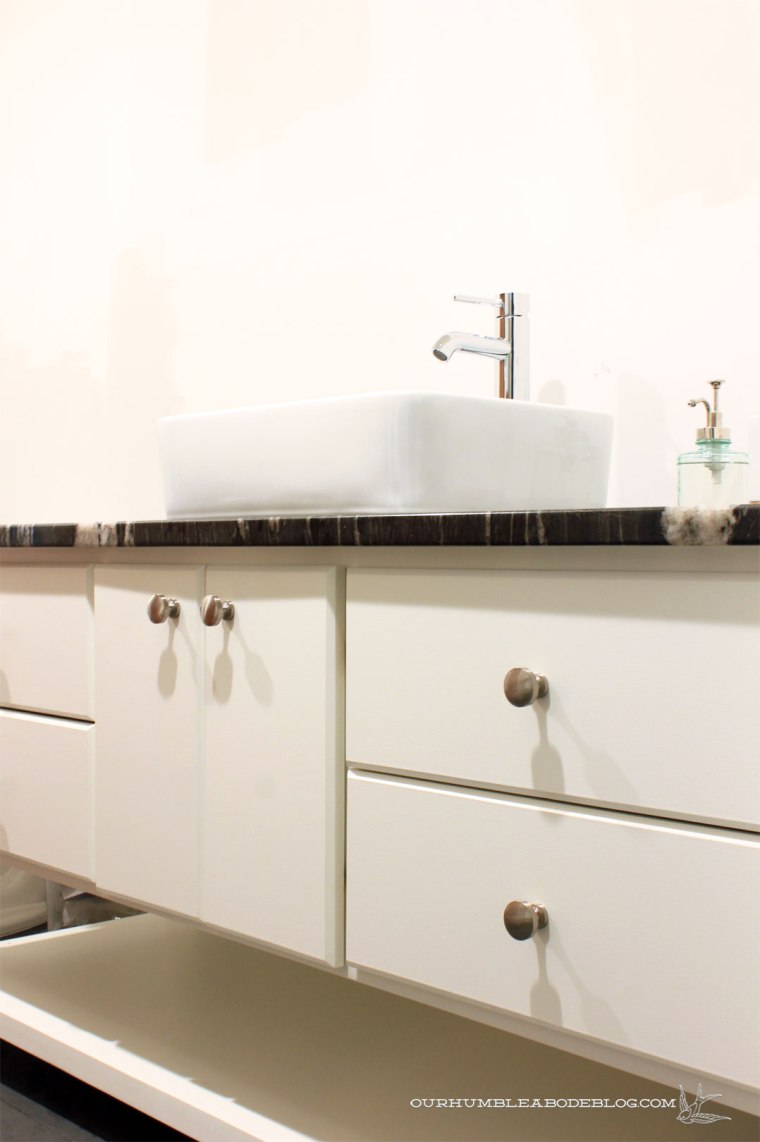
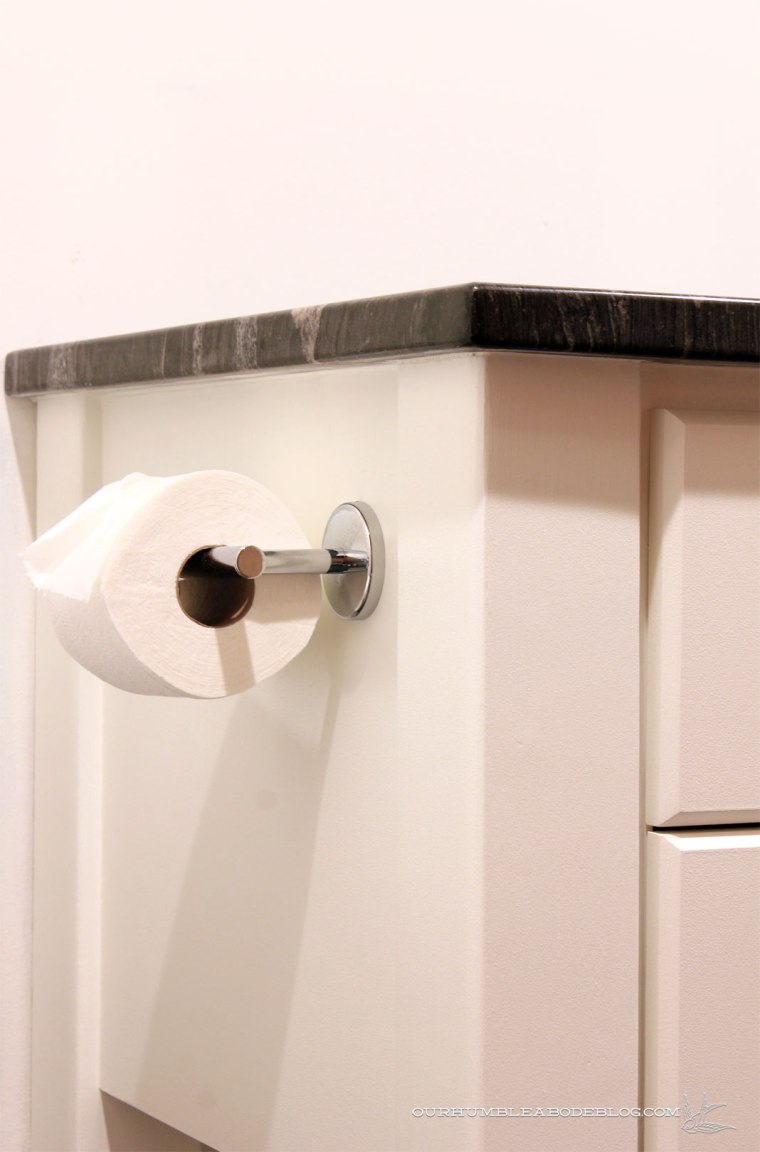
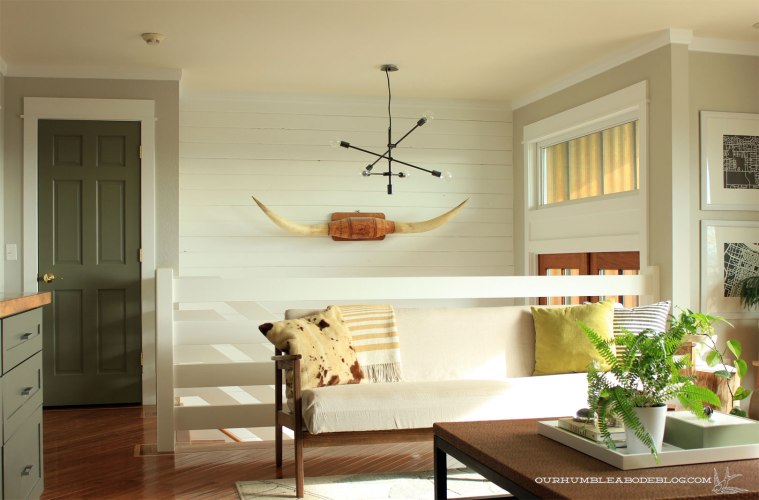
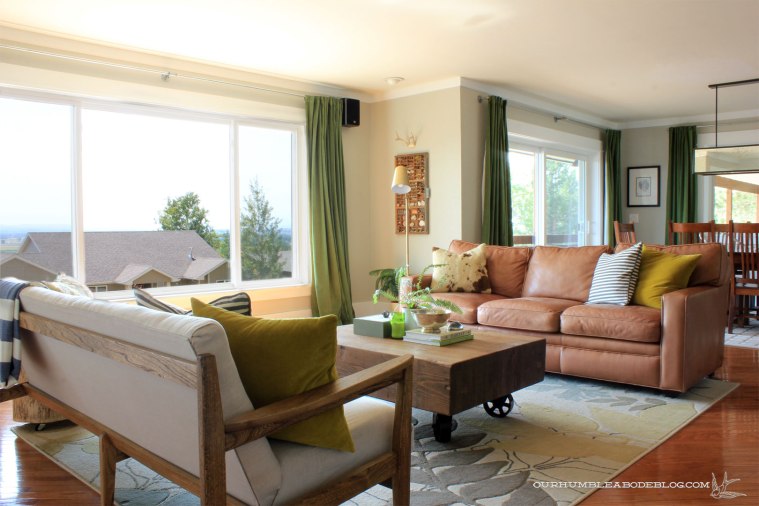
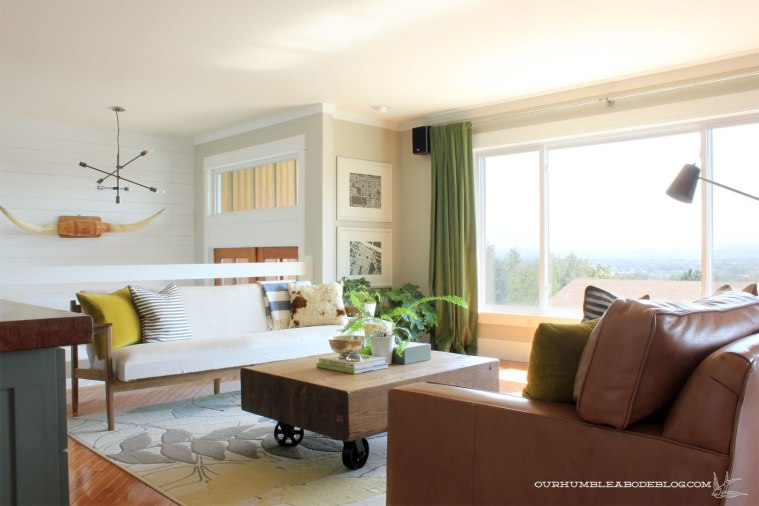
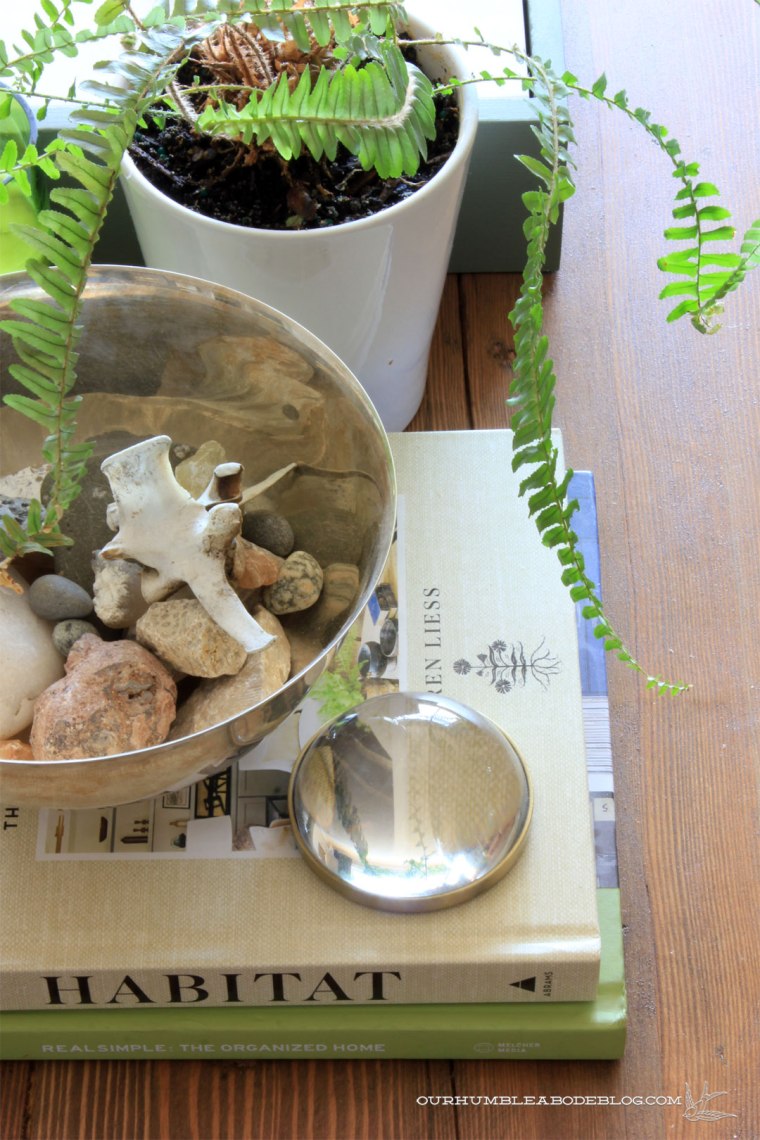
A few other changes have happened recently, too.  Nothing extremely noteworthy, but differences that make me happy, like a pretty brass floor lamp for easier reading less eye strain.

Beam-Coffee-Table-by-Leather-Sofa

Across the room, a wide white and blue stripe throw adds a splash of color on the linen sofa.

Beam-Coffee-Table-Toward-Entry

I really love the pairing of the blue and faux hide pillows.Beam-Coffee-Table-Details

All simple, affordable changes, but I’ve realized that even the smallest details get my attention when changed up.

Beam-Coffee-Table-by-Linen-Sofa

If only I could find the perfect, super soft wool rug that Ben and I can agree on.  I’ve come across many I like the look of, but they’re thin.

Beam-Coffee-Table-in-Living-Room

If/when there’s a lull between big projects, I’d also love to rework the entertainment center.

Beam-Coffee-Table-in-Living-Room-by-Stairs

Don’t get me wrong, it has functioned wonderfully over the last four years, storing books, toys, games, and electronics.  But, it has remained unfinished and certainly looks it, missing cabinet doors and all.

That covers all the recent additions to our living room, so tell me, are you planning/executing any living area changes of your own?

Flags as Art

For a long time, I’ve admired the look of a big flag hung in a room to serve as art.  Doesn’t matter how simple or detailed the flag, I’m a sucker for the look.  Emily Henderson has two that show how great this large-scale art can be.  A vintage Red Cross flag above a sofa fills that large expanse without feeling overbearing.

In her current house, she has a simple blue and white stripe flag above a credenza.  Both designs are simple, two color styles that make a bold statement, without needing a frame.

Or, when framed, the flag becomes a piece big enough to anchor a bed, serving as a headboard.

Division Street

So I know flags as art isn’t a new thing, but I’ve recently added one to our home, with a twist.

Flagology-Flag-in-Laundry-Room-2

The lovely ladies behind Flagology recently asked me if I’d want to try a custom house flag, either outside or indoors.  A million options ran through my mind, designs, colors, even where I could hang it.

Flagology-Flag-in-Laundry-Room

With such a neutral laundry room, I thought it’d be fun to add large scale, colorful art in the mix.  At 28 inches wide by 40 inches tall, the size fills the end wall perfectly.  While I loved everything about it, I realized the light weight piece would work even better in the basement hall.

Flagology-Flag-in-Hall-by-Laundry-Room

Why does the weight matter so much on this wall?  Well, this wall is mostly a pocket door and essentially only drywall to hang anything on.

Flagology-Flag-in-Hall-with-Laundry-Sink

So I found a section of wooden dowel, ran it through the top pocket, and added twine to hang the flag from.

Flagology-Flag-Dowel-Detail

A thumb tack easily holds the flag in place, and doesn’t need heavy-duty hangers.

Flagology-Flag-Hanging

Thanks to the thick, outdoor quality fabric, I don’t have to worry about mess hands, shoulder bumps (not to be confused with shoulder pads), or anything else damaging the flag.  That’s not something I can say about traditional frames with glass or even canvas paintings.

Flagology-Flag-Fabric-Detail

Creating a custom flag was as simple as uploading a .jpeg file, clicking the mouse a few times, and done.  Knowing I wanted this to look a bit more like art than a traditional flag, I created a design based on a paint by number scene.  The Flagtastic fabric kept the greens of the mountains and trees vibrant to really liven up this dark little hallway.

Flagology-Flag-in-Basement-Hall

Now to get some more art on these walls!  I’ve had a special print waiting in the wings for that wall at the end of the hall.  Getting to the accessory stage is so much fun because that’s where the personality and life come into play.

If you like this idea, you’ll love that Flagology is giving one custom house flag or doormat to a lucky reader!  Just for our readers, Flagology is offering 20% off all custom flags and doormats (does not include Create4Me or accessories)-just enter the code OHA20 to redeem your deal.

This post was sponsored by Flagology, but all ideas, opinions, and photos are my own.  

A Simple Headboard

Sometimes it feels like we’re treading water on big projects-you know, doing a lot of work but easily goes unnoticed.  Wow, what an encouraging, uplifting way to start, huh?  You know what is uplifting?  Small, quick, straight forward projects to break up the longer, meatier ones we have going on.  With most of the basement wrapping up, we’re getting to the fun, really obvious changes stage of the game.  One of those changes was getting the Sleep Number mattress up and off the floor with a custom bed frame.

Basement-Bedroom

Basic dimensional lumber, stain, and poly can come together to create a sleek, modern frame.  To create the base, we followed almost the exact same steps as our bed frame.

King-Bed-Frame-Finished-Left-Side

It has held up well, costs about $100 in materials, and can be assembled in less than a day.  One noticeable difference is the headboard.  I love the splash of green in our bedroom, but wanted something warmer to contrast against the blue-gray in the basement.


Basement-Bedroom-Headboard-Overall

After debating a variety of wood designs, I went with the KISS method and kept it simple, stupid.

Basement-Bed-and-Nightstand

Ben used 2 by 4 boards for a completely solid design.  I’m usually 100 percent opposed to the rounded edges of dimensional lumber, so we ran each board through the table saw before assembling.

Basement-Bed-HeadboardDetail

With boards prepped, we cut to length, lined each up on the garage floor, and screwed boards to the back, connecting the pieces together.  For a finished edge, we used more 2 by 4 material to create a frame to wrap the edges.

Basement-Bed-Headboard-Corner-Detail

These boards hide the edges as well as the vertical connecting pieces, leaving a 3/4 inch reveal.

Basement-Bedroom-Headboard-Corner-Detail

We now have a neutral base to layer anything and everything on and around.

Basement-Bed-Pillow-Detail

Pinstripe sheets, small plus sign pillow cases and a kilim throw pillow add a boost of pattern and playfulness to the room.

Basement-Bed-Pattern-Mix

Next step, new night stands to replace the single petite dresser that is standing in.

A Combo Bathroom Vanity

At the end of January, but the beginning of our full gut basement remodel, I shared a few vanity options to go in the bathroom.  After living with a variety of styles, I was quickly able to narrow it down to a combo of open and closed storage.  Open to keep what could be a big, bulky piece light, but closed for maximum storage for items big and small.  Here’s what we came up with:

Plan a unique vanity: https://ourhumbleabodeblog.com/2016/01/27/designing-a-bathroom-vanity/

From drawing to reality, here’s the completed vanity:

Basement-Bathroom-Vanity

Obviously the rest of the room isn’t finished, but we’re getting close.  Tiling the shower is next, followed up with linen shelving behind the door, then paint and finishing touches.  As for the vanity, four by four pine posts create the legs, a shelf rests on hidden supports, and a custom-made cabinet box houses the drawers and cabinet.

After walking around the stone yard, Ben and I both fell for this black with white swirling vein remnant slab.  The same sleek white vessel sink we used in our bathroom is a modern addition.  Photographing this space is tricky thanks to the unpainted walls and artificial lighting, so sorry some areas are really blown out.

Basement-Bathroom-Vanity-Top-Detail

Slab fronts with angled edges allow the rest of the details to shine through.

Basement-Bathroom-Vanity-Left-Side

I usually lean toward handles, but opted for satin nickel knobs for minimal interruptions of the cabinetry.

Basement-Bathroom-Vanity-Knob-Detail

Over the years, I’ve come to enjoy the benefits of keeping some things out in the open.  A single open shelf is handy for storing extra towels and toilet paper, making them accessible for guests without having to search.  Because it’s always awkward if/when you have to search at someone else’s house, right?  Easy way to eliminate that annoyance.

Basement-Bathroom-Vanity-Sink

Speaking of toilet paper accessibility, going with an open ended holder makes life so much easier for everyone.  If possible, I prefer to mount the holder out of sight from the door to keep a clean sight line.

Basement-Bathroom-Vanity-Toilet-Paper-Side

Despite being unfinished, this bathroom is already a far cry from the starting point of  glue floors, yellow fixtures, and orange counter tops.

New-House-Basement-Bathroom-April-13-2012

I’m so excited for the shower to take shape next-we’re using a method and material that we’ve never done so it will be interesting.  What project do you currently have in the works?  Anything with new to you products?