Wrapped Planter

Last week, while at the hardware store, I spotted a shelf of mums, ornamental kale, and cabbage.  The colors of the kale were pretty, but the giant leaves on the cabbage reminded me of a fiddle leaf fig.

Based on other reports of the difficulty of caring for fiddle leaf figs, I know I shouldn’t even try it.  Though I’ve been tempted, I’m sure it’d die within a month.  Instead, this three buck cabbage will add some greenery without bruising my ego if it dies.  Problem was, all my cute planters were too small to hold it.  Then I remembered a stack of orange plastic pots we found in the attic.  Perfect size with a built-in saucer, but perfectly ugly.  Using a sharp utility knife, I cut the rounded plastic top off and warmed up my glue gun.

Wood-Veneer-Wrapped-Planter-Supplies

A roll of wood veneer (left over from this pendant) worked perfectly to hide the plastic planter.  I wrapped the roll around the planter to determine the length needed, cut with scissors, then hot glued the ends in place.  As I neared the slightly wider top, I added more glue in the middle.

Wood-Veneer-Wrapped-Planter

It’s a fun and quick cover up for a plastic pot.

Wood-Veneer-Wrapped-Planter-on-Bar

While I had the veneer out, I also made a few small decorative spheres.

Wood-Veneer-Spheres

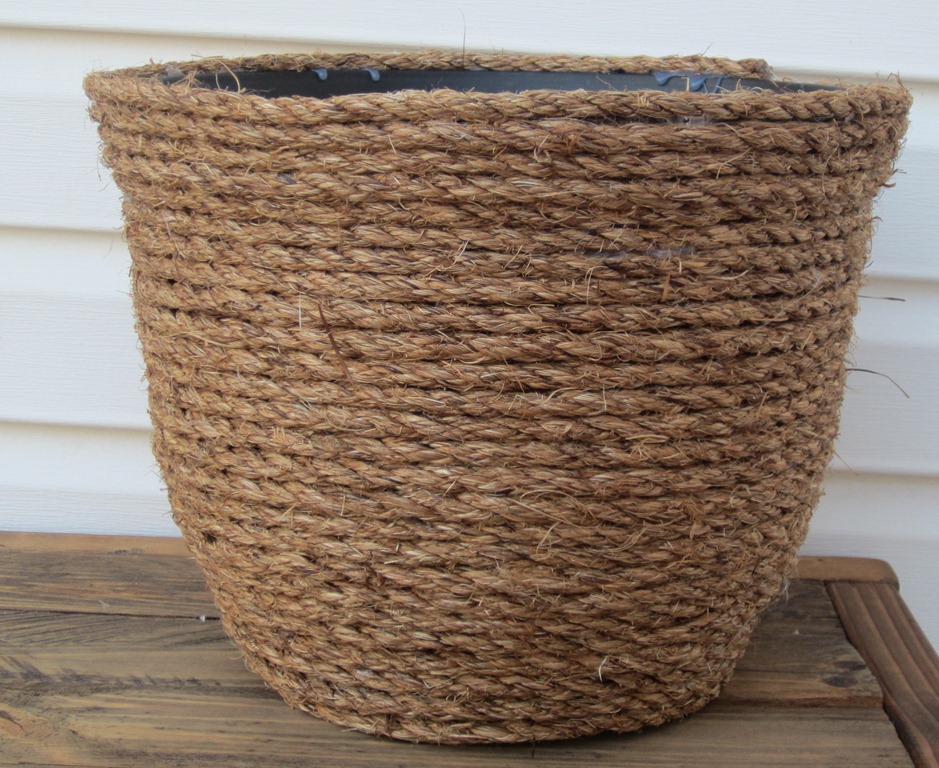
I wish I had a stash of chunky rope, because these sisal planters and this rope pot are equally good-looking and simple.

Speaking of adorable planters, how sweet are these tiny cork succulent holders?

Do you have a cute planter idea?  Or a house plant even a black thumb gardener like me can’t kill?  Have you kept a cabbage indoors?

P.S.  We’d really, really appreciate your vote over at Apartment Therapy.  If you haven’t already, could you please take a minute to sign in or create an account to favorite our guest room?  Big thanks to those who already have, too!!

Worse for Wear: Living Room Edition

Hey everyone!  How was your weekend?  We had a blast relaxing with out-of-town family passing through.  When visitors come, it’s clear our current living room furniture isn’t the best.

Sectional-Cushion-Worse-for-Wear

Our sectional is big, but the corner is kind of dead space, the chaise end isn’t really a seat, and we can’t reconfigure the arrangement.  Even though we’ve only had the couch four years, it’s looking a little older.  We’ve already fixed a cracked support.  The spring cushions (similar to a mattress) have gotten lumpy and uncomfortable.  Unless you’re sitting in the crack.  Unlike our other older sofa with removable cushions and covers, we can’t flip these for even wear.

Sectional-Cushion-Springs

This tufted sofa from Home Decorators Collection has been on my mind.  Clean lines, high arms, tufting detail, removable cushions, and all positive reviews.  I wish I could see, touch, and sit on it before committing.  Because I haven’t had the best luck when ordering.  And a couch is a big-ticket item, so I want to be completely sure of it.

In other living room news, Ev leaned his chubby little butt on one of the drawers too many times.  And bent the glide.

Bent-Drawer-Glide

So our entertainment center has a hole, among other things we need to finish.  Simple things like a toe kick, base board around it, and doors to hide the ugly speakers/receiver/dvd player.

Entertainment-Center-Worse-for-Wear-Broken-Drawer

Basically, all things that are only for design purposes, not function.  Which always seem to take the bottom slot on our priority list.  Have you ordered a sofa online, without seeing it before?  Any affordable, sleek couch recommendations for me?

Initial Impression

Ben ran out of gin, so I took that opportunity to add labels to the most frequently used alcohol.  Insipired by this tutorial, I bought a pack of stickers for $1.50 to get started.  A silver oil based Sharpie I had worked perfectly for this.

Bar-Bottles-with-Inital-Labels-Supplies

To get a general idea of the shape, I made dots on the outer edges, then filled in with close dots around the letter.

Bar-Bottles-with-Inital-Labels-Dots

Super simple, and now three of our bottles have labels.  G for gin, b for brandy, and v for vodka.

Bar-Bottles-with-Inital-Labels-Three

Bar-Bottles-with-Inital-Labels-Detail

These labels coördinate perfectly with the other sprayed silver ombre bottles.

Bar-Bottles-with-Inital-Labels-and-Silver-Ombre

I’m happy with a super simple label that isn’t an ugly brand sticker.  I’ve heard plain Sharpies on ceramic don’t hold up well, so I’ll let you know how these do after some use.

Bar-with-Initial-Bottle-Labels-2

Am I crazy enough to make some for the tonic water, too?

Bar-with-Initial-Bottle-Labels

While we’re talking labels, I found this adorable Threshold Nuts bowl in the Target clearance section.  For two dollars, I couldn’t leave it behind.

Bar-with-Nuts-Bowl-and-Squirrel

Have you tried Sharpies on glass or ceramic?  Am I the only one not liking the jumbled look of brand labels?

Stump on Wheels

Because we’re now up to our eyeballs in mud and more landscaping, here’s a little outdoor project.  I found a big stump in our wood pile and kindly asked Handy Sammy to carry it up for me.  Luckily, he’s a super nice, strong guy and happily helped.  Then I picked at the bark, most of which came off easily.  Because this guy is hefty and will live on the deck, I bought casters for the bottom.

Stump-Table-with-Painted-Top-and-Casters-Supplies

Instructions suggested installing 3/8 inch from the outside.

Stump-Table-Caster-Detail

Four work nicely and moving around is a breeze now.  And we don’t scratch the deck in the process.

Stump-Table-with-Casters

Whether an extra seat or side table, this guy is handy.

Stump-Table-with-Painted-Top-and-Casters

For a quick jolt of color I painted the top Japanese Kimono by Behr.

Stump-Table-with-Painted-Top

I also really want to make a hairpin leg table similar to this one.

How fantastic are those blue legs?  Maybe with a chunk of birch with pretty white bark?  Also, if you like our colorful guest room, could you please take a minute to vote for it at Apartment Therapy?  Pretty, pretty please?

Thank you in advance for your help.  Hope you have a wonderful Wednesday!

When it Rains, It Pours

I wish I had a finished or fun project to share today.  Due to weekend storms, I have a damage report.  If you follow on Instagram, you’ve already seen a few pictures.  Friday afternoon we had a 10 minute down pour.  At the time, we thought it was a lot of rain.  The waterfall looked like it was on.

Friday-Rain-Storm-Waterfall

More water gushing out of the bottom.

Friday-Rain-Storm-Bottom-Waterfall

Rock stairs over flowing.  Suprisingly, my new plants survived both storms.

Friday-Rain-Storm-Back-Stairs

And a mini river on our road.

Friday-Rain-Storm-in-Street

I wasn’t able to get pictures of Saturday night’s storm because it was so bad and dark, so trust me when I say it looked at least 10 times worse.  Piles of dime sized hail, near constant lightning, and rain like I’ve never seen before.  Two inches of rain in twenty minutes rushing down hill never looks good.  And our back yard really shows that.  What looked like this on Saturday afternoon:

Stained-Back-Deck-from-Pool-House

Looked like this yesterday morning:

Saturday-Rain-Storm-Back-Yard-Overall-from-Pool

About a foot of mud slid down the hill, over the waterfall, and piled below.

Saturday-Rain-Storm-Back-Yard-Overall

Mainly from this natural crevice turned raging waterfall.

Saturday-Rain-Storm-Crevice-Above-Waterfall

Ben and I ran from end to end of the house during the storm, monitoring damage, completely helpless.  So we fully expected to wake up to this:

Saturday-Rain-Storm-Waterfall-Damage

Not this:

Back-Deck-with-Rocks-and-Waterfall

Water didn’t make it in the house, and I’m positive it is because Ben installed a drainage system under the rock.  Though during the peak of water, it was nearly level with the top of the deck.

Saturday-Rain-Storm-Mud-and-Deck-from-Above

There’s so much mud and debris in the waterfall and rock that we’re pretty sure we’ll have to pull it out, sort the rock, and toss it up.  Again.

Saturday-Rain-Storm-Top-Waterfall-Damage

On a positive note, seemingly no structural damage was done.  The beam stairs are still standing.

Saturday-Rain-Storm-Beam-Stairs

Even with a gaping hole cut around one of the support posts.

Saturday-Rain-Storm-Beam-Stairs-Top

Most of the front is unharmed.  But a major drainage trench runs along the side, which dumped tons of water and mud, moving all rock away.

Saturday-Rain-Storm-From-Drainage

Mud in the bocce court.

Saturday-Rain-Storm-Bocce-Court-from-Deck

Rocks piled everywhere.

Saturday-Rain-Storm-Bocce-Court-from-End

A giant delta in the road.

Saturday-Rain-Storm-Mud-and-Rock-in-Road

Our fountain has two inches of rain, but obviously was higher.

Saturday-Rain-Storm-Rain-in-Fountain

Of course, just as we neared the end of our landscaping, we have to start over.  Not all is lost, but we’ve got a lot of work ahead of us.  We’ve talked to many of our neighbors and most fared better.  A few with a little water in unfinished basements.  Most with debris to clean up.  Right now we’re thankful everyone is safe and we don’t have house damage and giant rocks stayed put.  But it was scary.  So now we’re in clean up mode, getting ready to fix this.  The bathroom remodel will have to wait again.