Before & After: The Pool House Bathroom

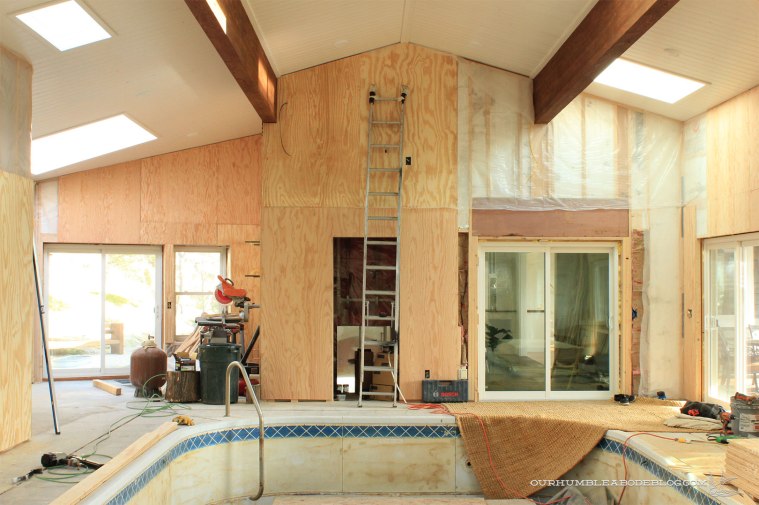
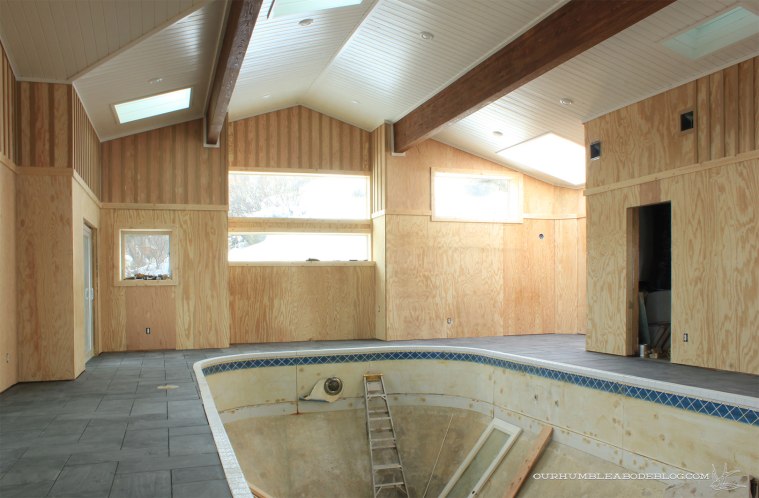
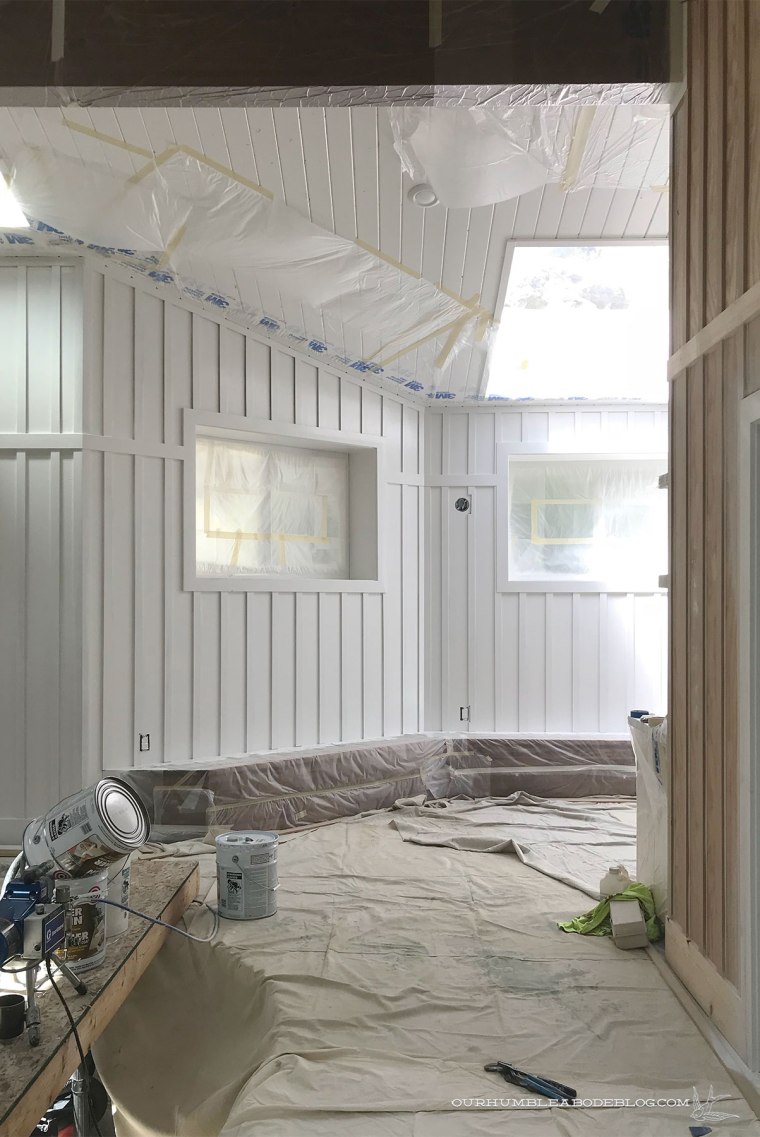
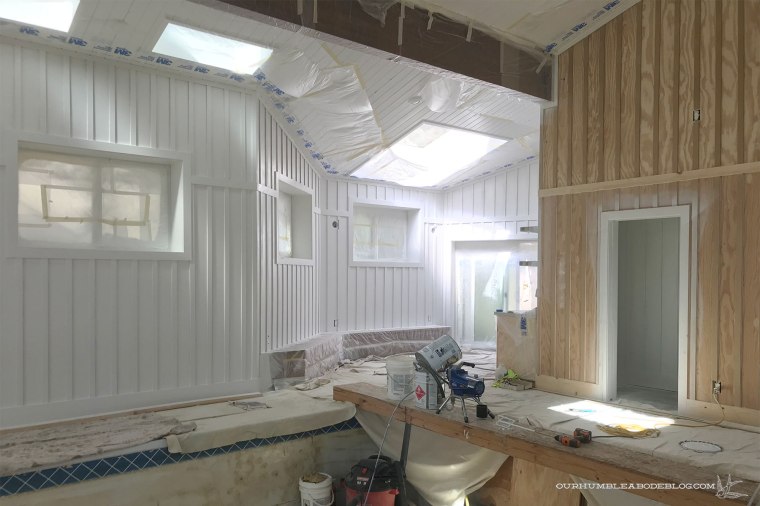
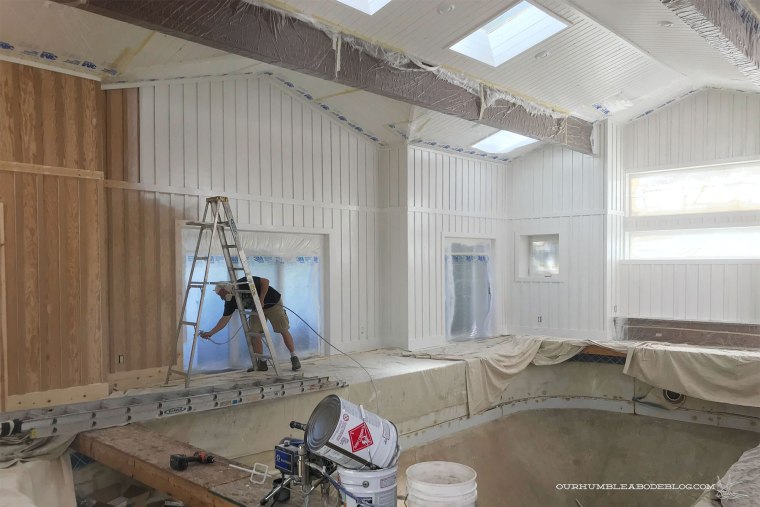
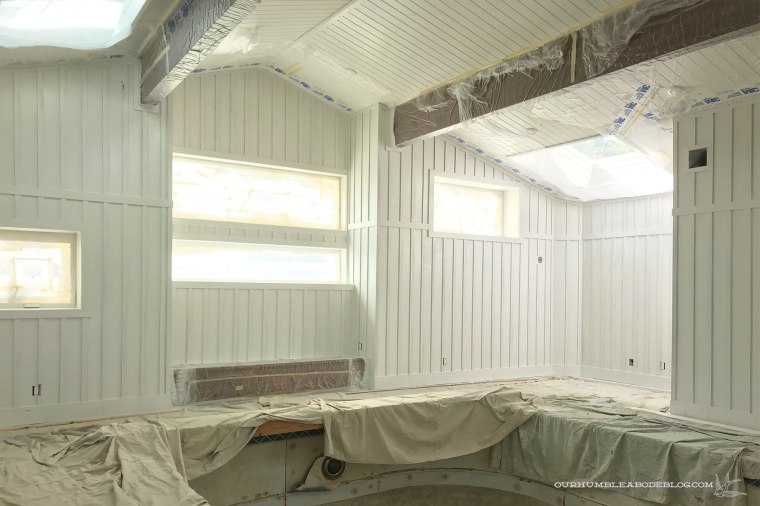
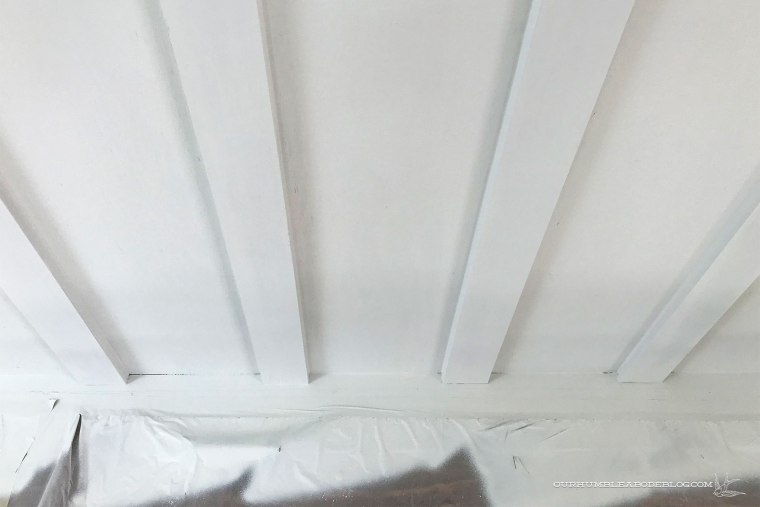
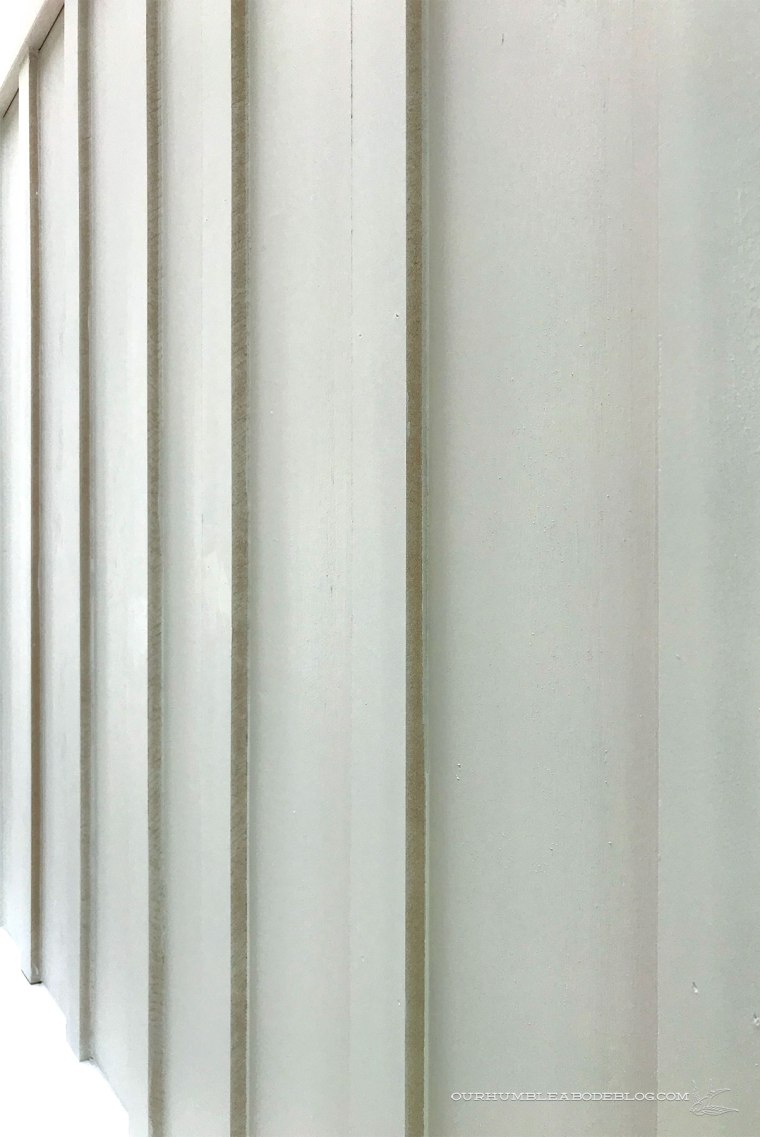
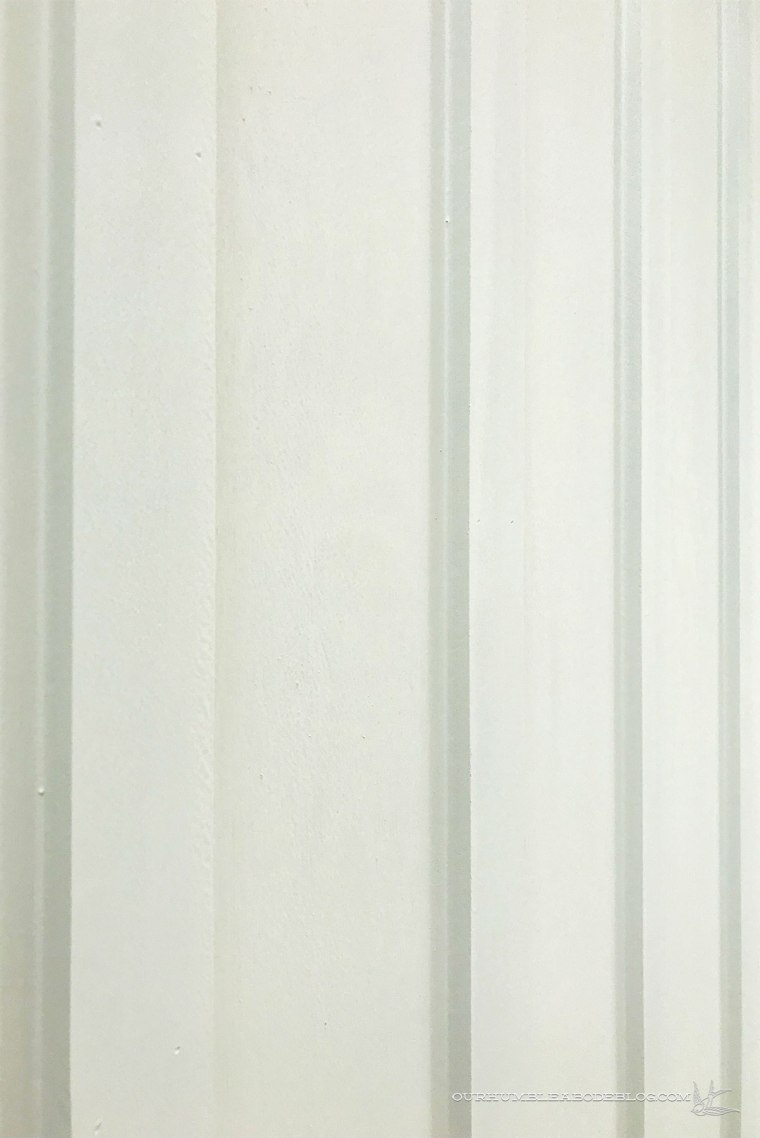
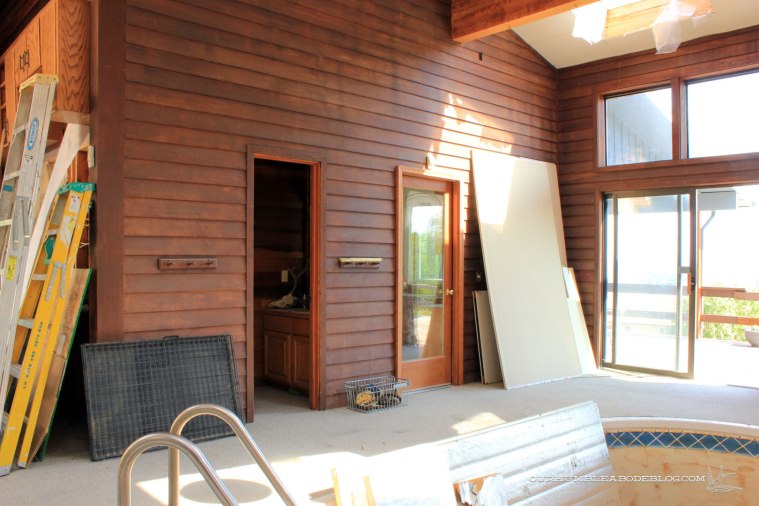
Exciting things have been happening in the pool house recently.  We primed and painted the walls white, which makes much of the room look finished.  Certainly a far cry from our starting point of dark stained (in color and in a literal uneven way) walls, fiberglass sheeting on the ceiling, and outdoor grade carpet covering the floor.

New-House-Pool-to-House-April-13-2012

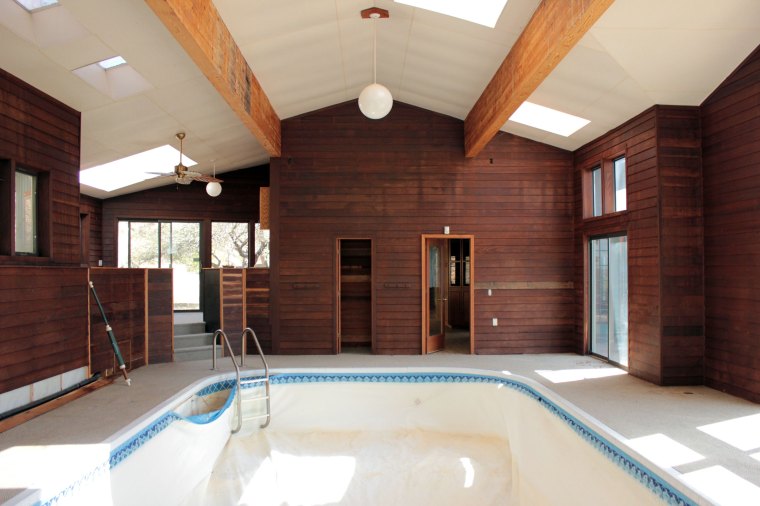
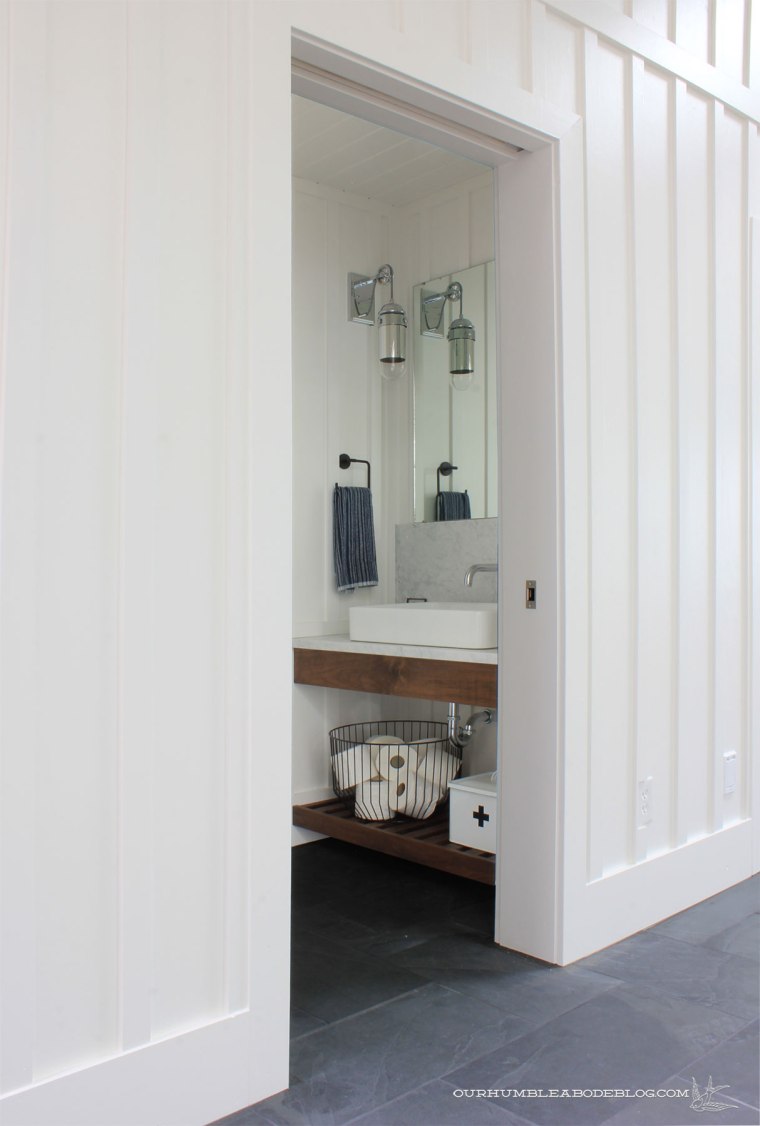
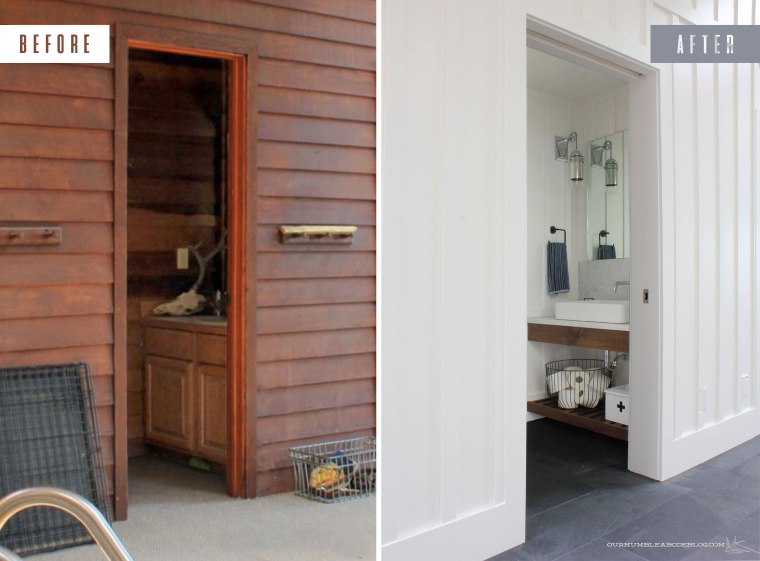
In the photo above, there’s a half bathroom squished in behind a swinging door.  It was so small and dark, I never got photos of the room before, but you can see the vanity peeking out in a progress pic.

Pool-House-Bath-and-House-Aug-2014

Starting with the digital design…

Pool-House-Bathroom-Vanity

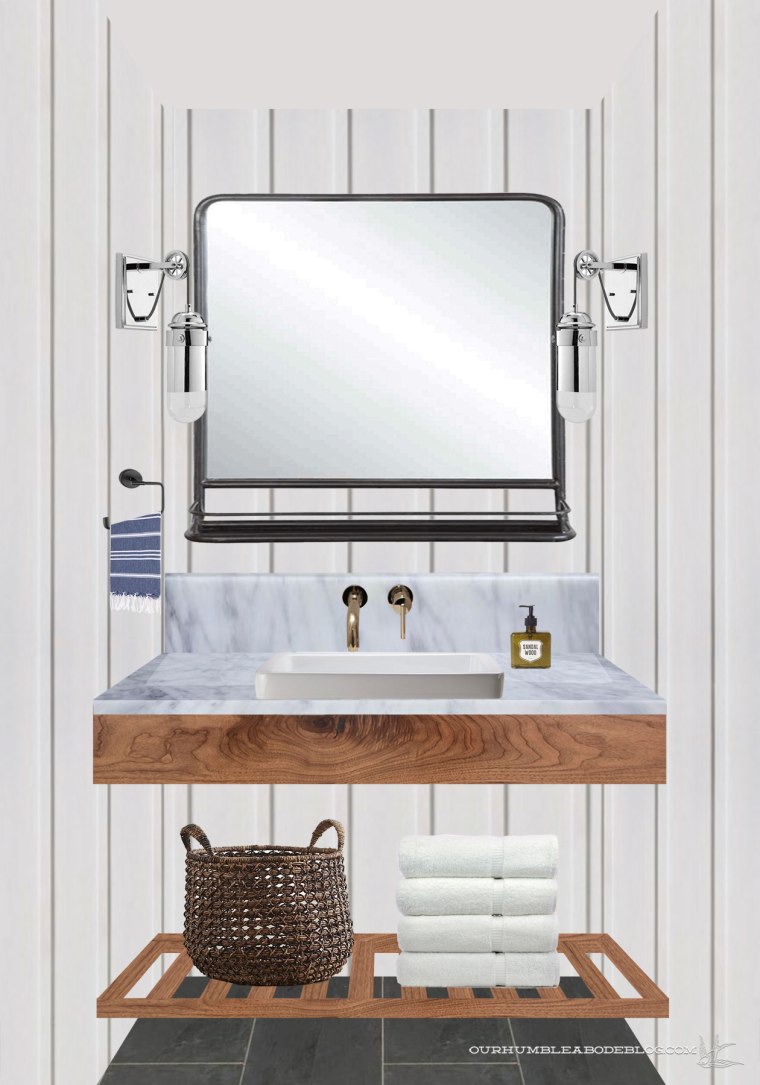
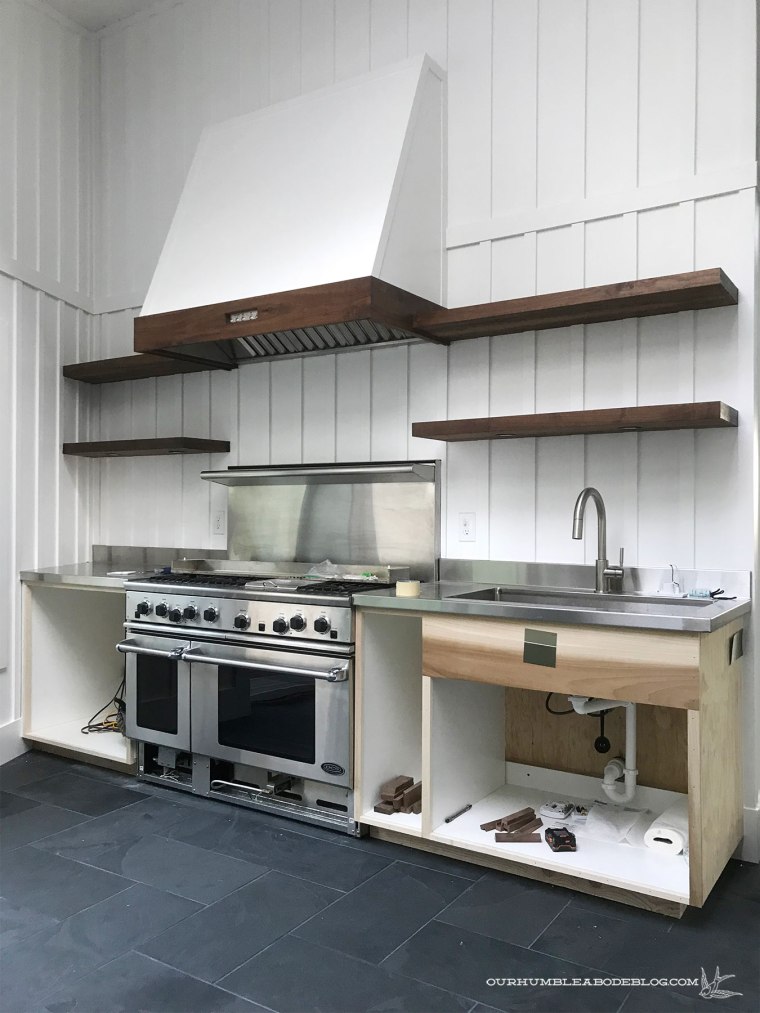
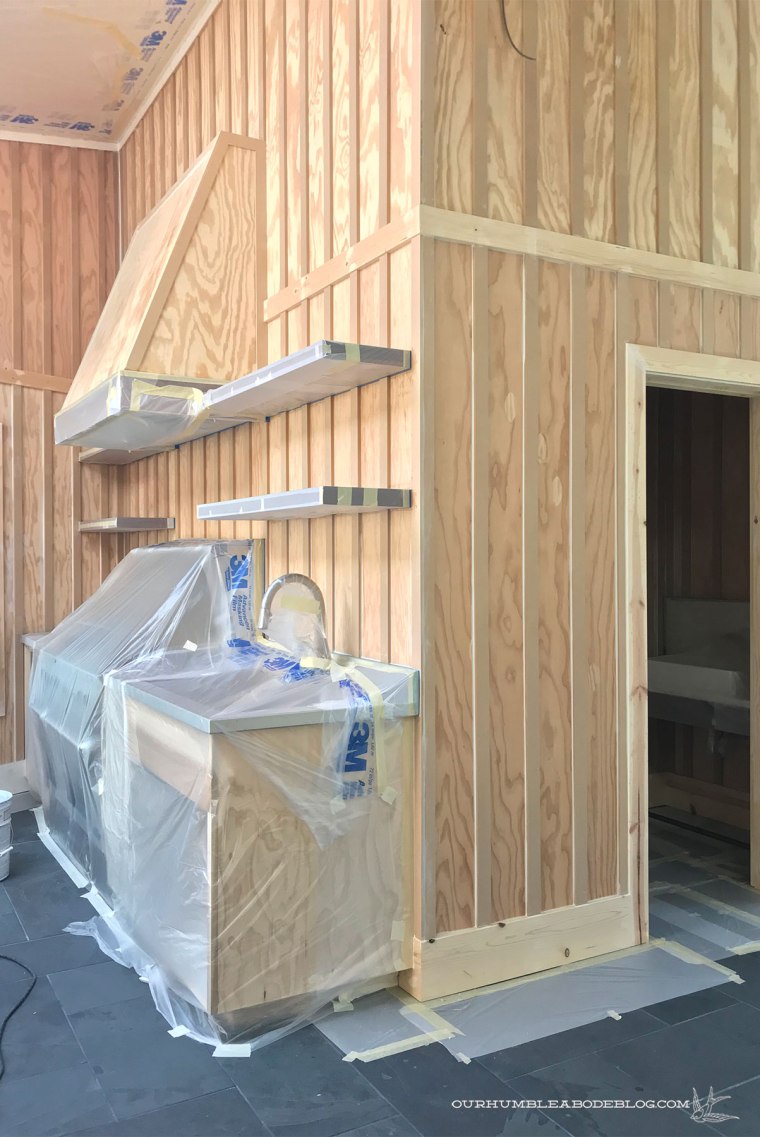
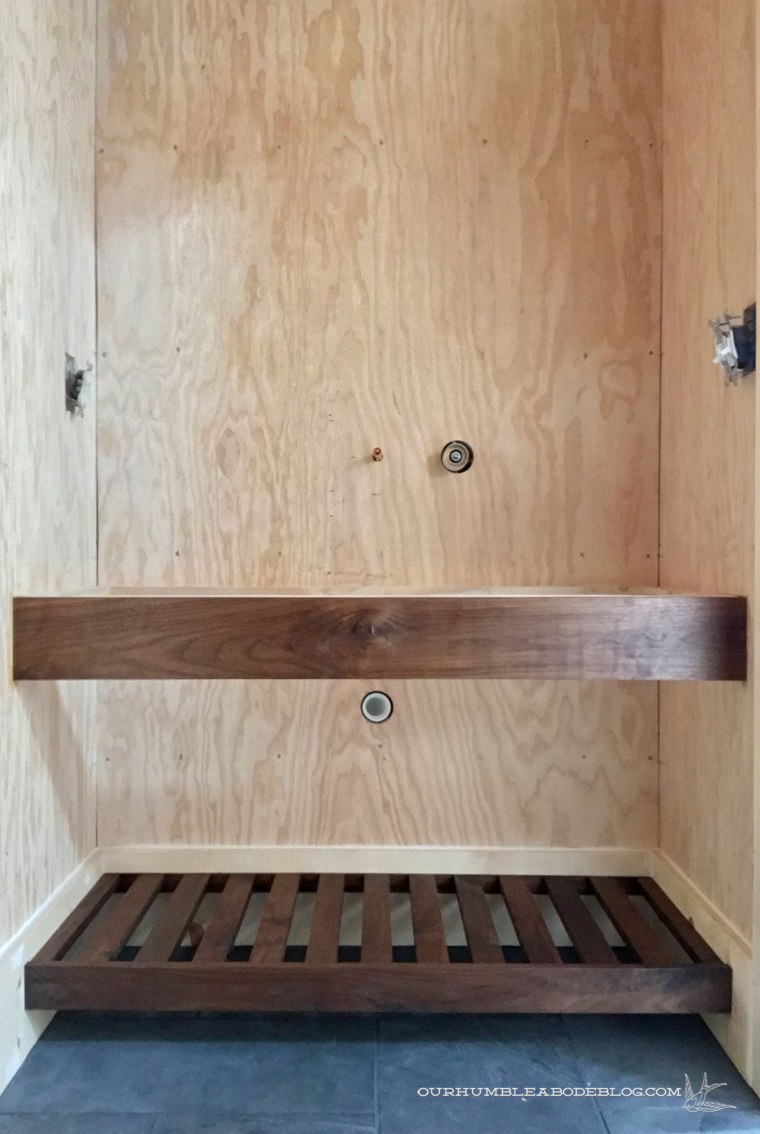
Onto cladding the walls in plywood sheeting, starting on the walnut vanity…

Pool-House-Bath-Vanity-Oiled

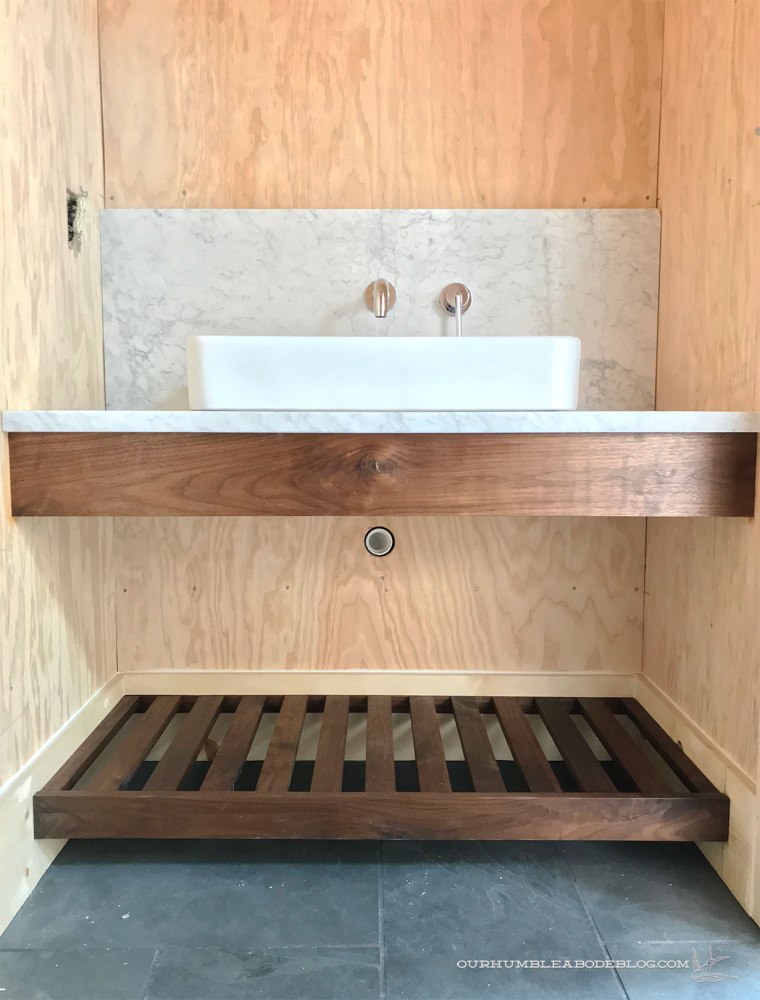
To marble counters and tall back splash…

Pool-House-Bath-Marble-Backsplash-and-Sink-Installed

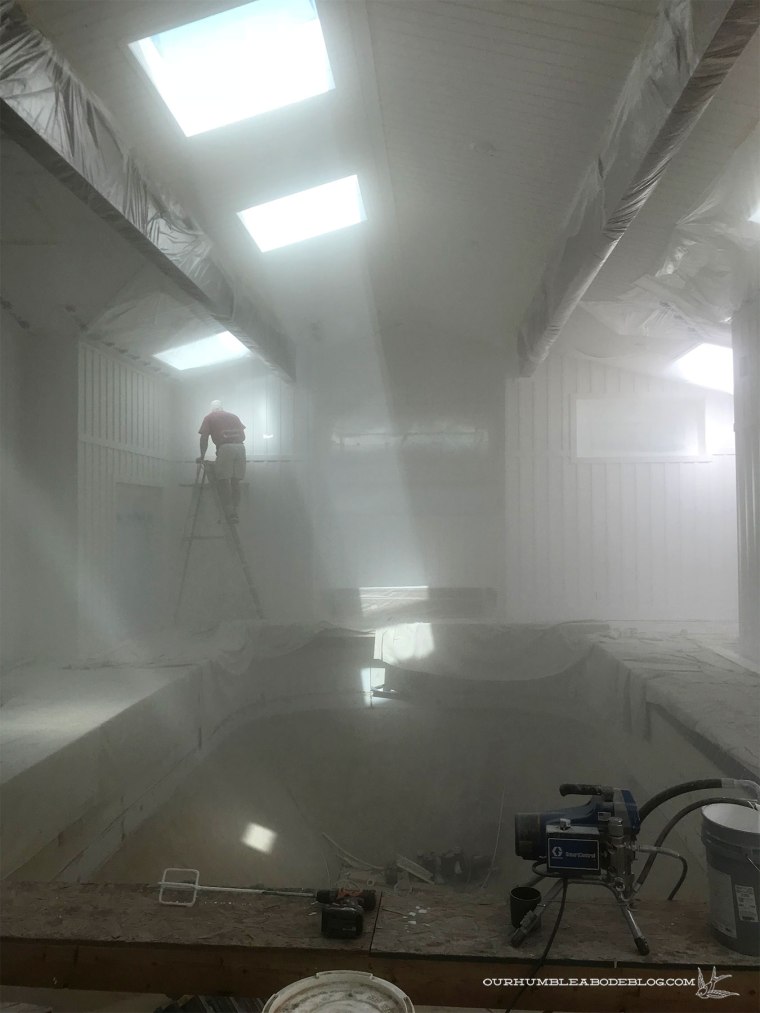
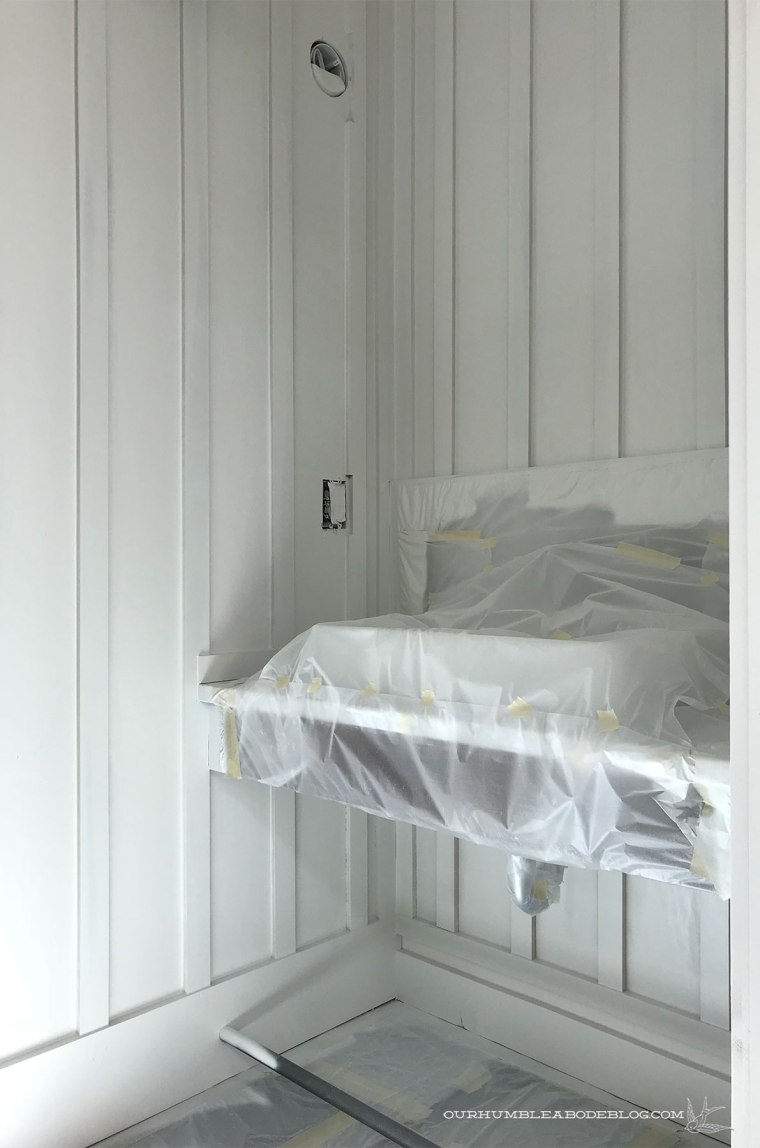
Getting primer and paint on the walls…

Priming-Pool-House-Walls-Bathroom-Sink

This space, at long last, is looking cute.  A locking frosted glass pocket door separates the bath from the main pool area, but still allows natural light to flood in.

Pool-House-Finished-Bathroom-Overall-Pocket-Door

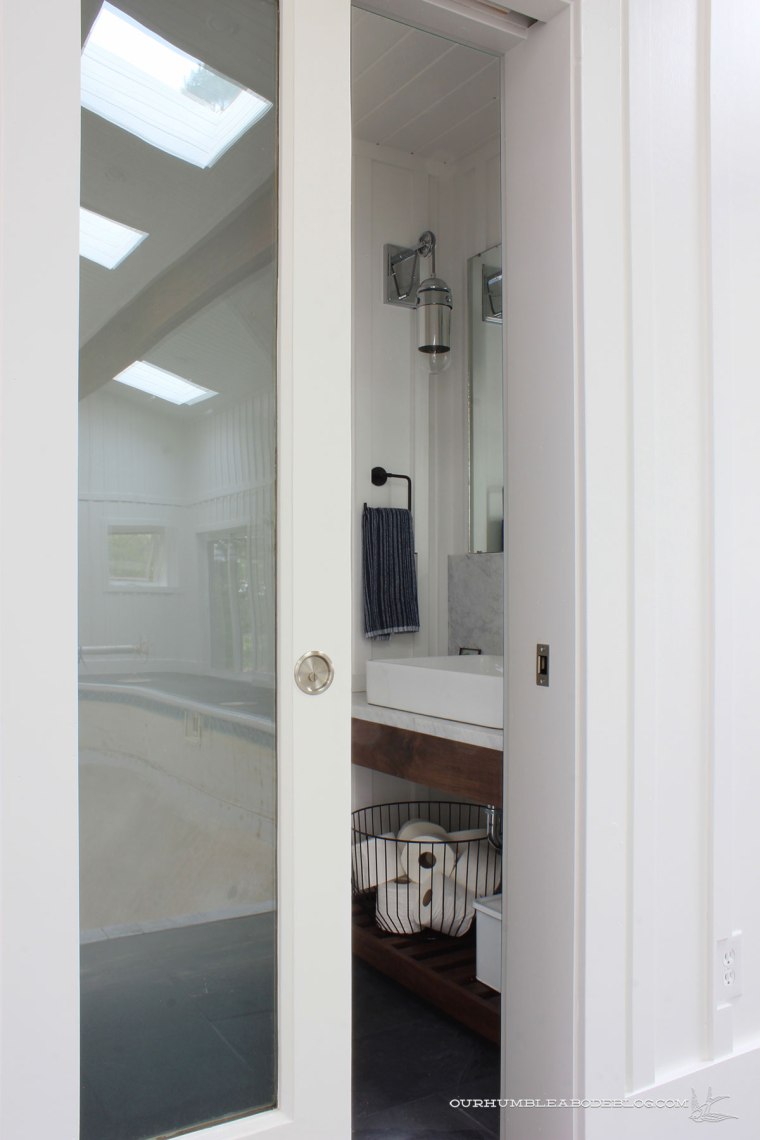
Unlike the bathroom before, the pocket door allows the room to feel open, not cramped.  Walking in is easy, and doesn’t require snugging against the vanity to close the door.

Pool-House-Finished-Bathroom-Overall

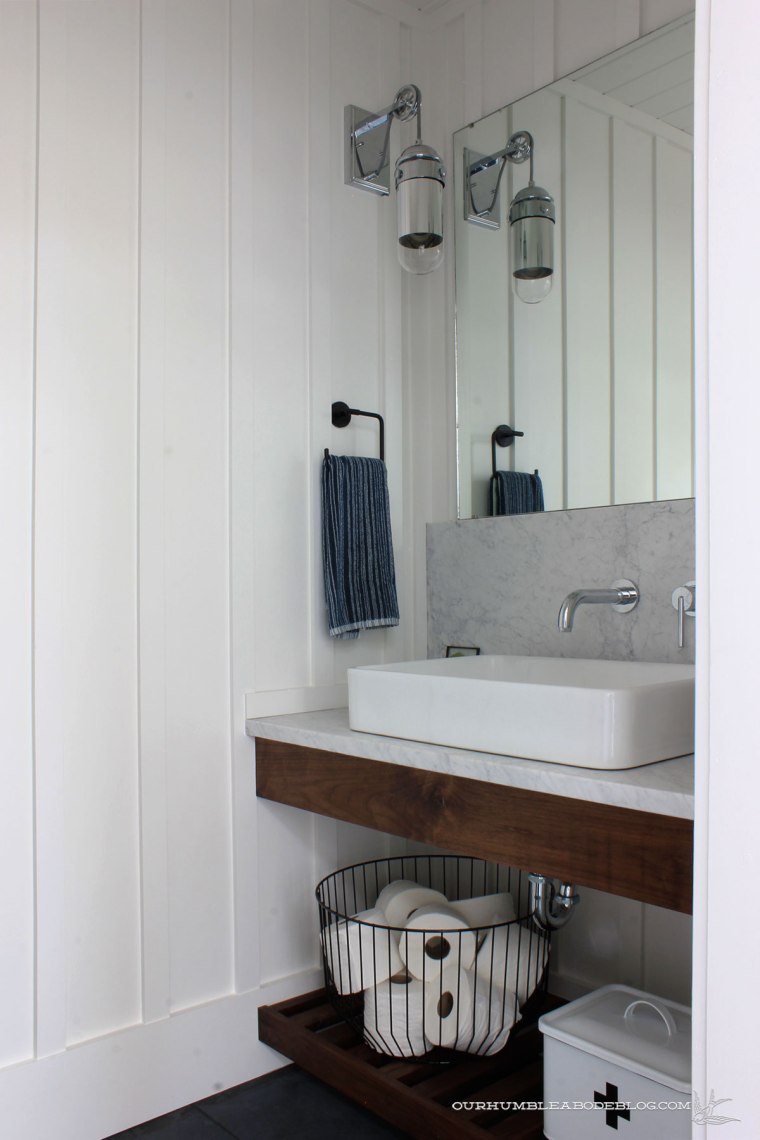
When planning this space, I wanted to keep storage to a minimum.  I know, the exact opposite of the usual desire for as much storage as possible.  Unlike a full bathroom, we don’t need to store extra products, just the basics.  A basket of toilet paper and a cute metal bin stocked with first aid supplies sit on the slatted shelf.

Pool-House-Finished-Bathroom-Overall-Closer

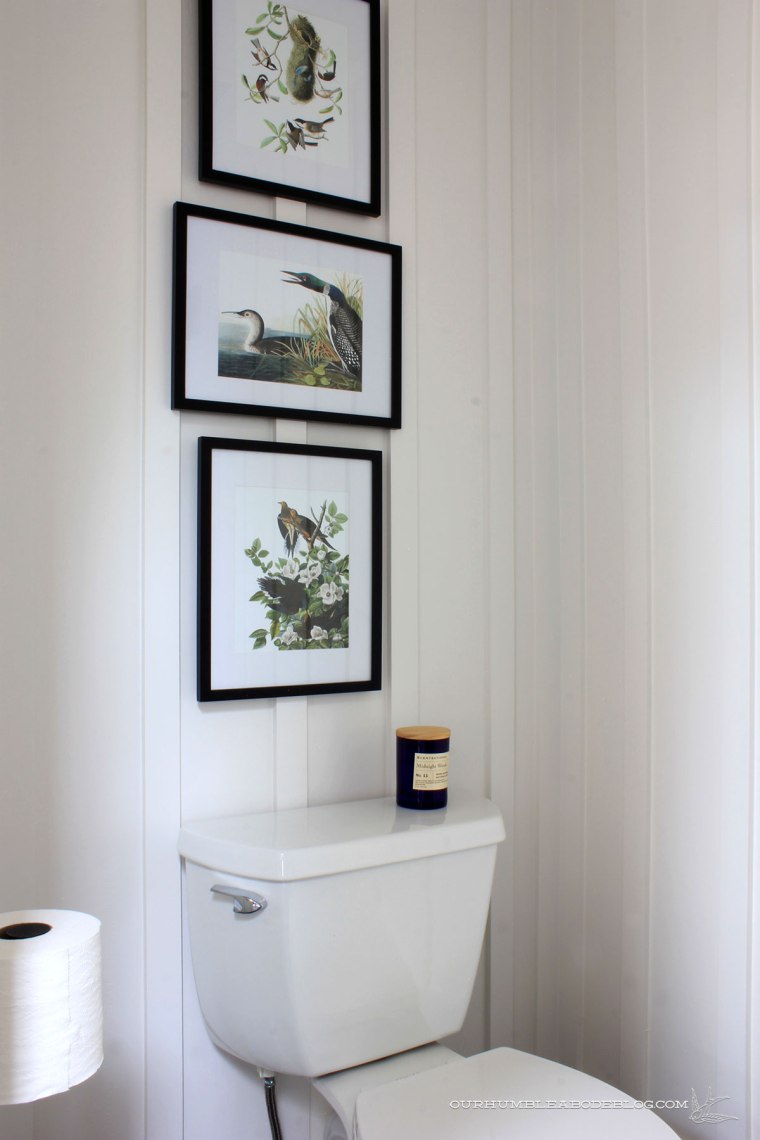
Simple, free to download bird prints add color to the otherwise bare toilet side.

Pool-House-Finished-Bathroom-Overall-Toilet-Side

Other than the change of art, the only deviation from the original plan is the frameless mirror.  This one was in the original bathroom, and I had planned to build a wooden frame around it, painting it black for a metal look.

Pool-House-Finished-Bathroom-Vanity-Lights-Off

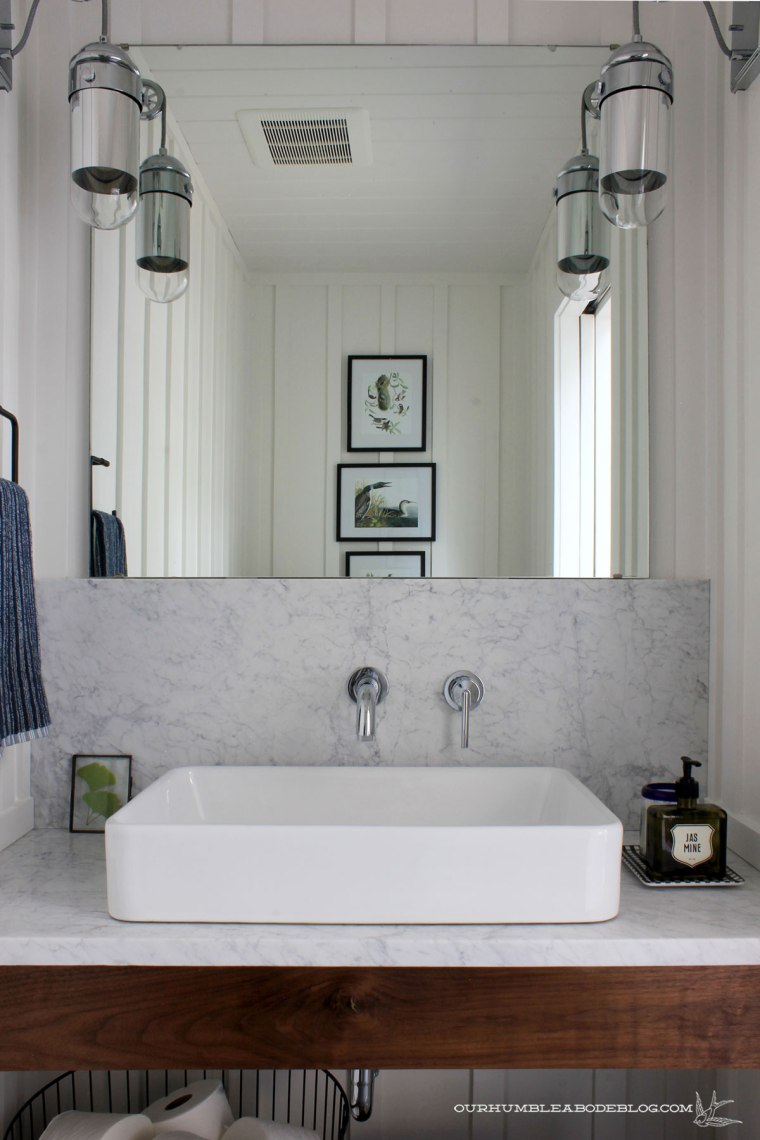
After resting it on the top of the marble back splash, I liked the streamlined look more than a framed mirror.   With the decision to forgo a frame, Ben hung the mirror using four sleek metal mirror clips that are barely noticeable.

Pool-House-Finished-Bathroom-Mirror-Clip-Detail

Without a frame, the interesting Beaker sconces from Progress command more attention.

Pool-House-Finished-Bathroom-Sconce

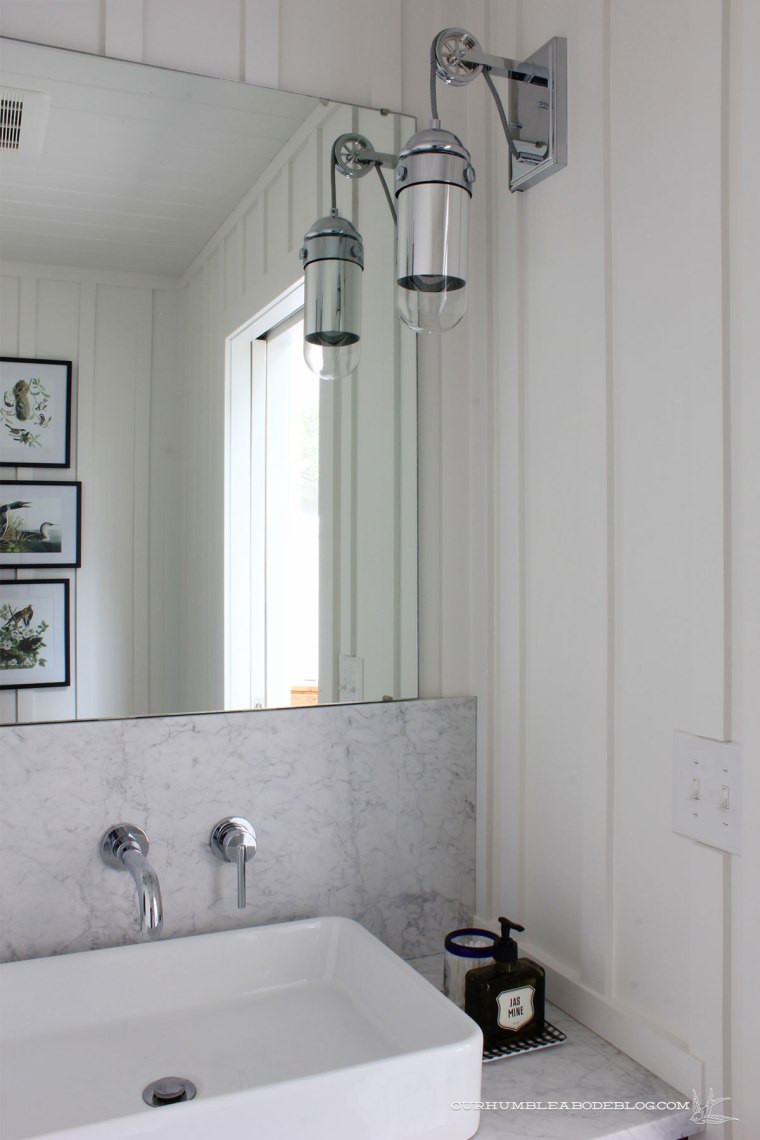
Measuring 17 inches tall, they’re on the large side for a small bathroom (as is the over sized  marble slab back splash), but both height, making the room feel bigger.

Pool-House-Finished-Bathroom-Sconce-Detail

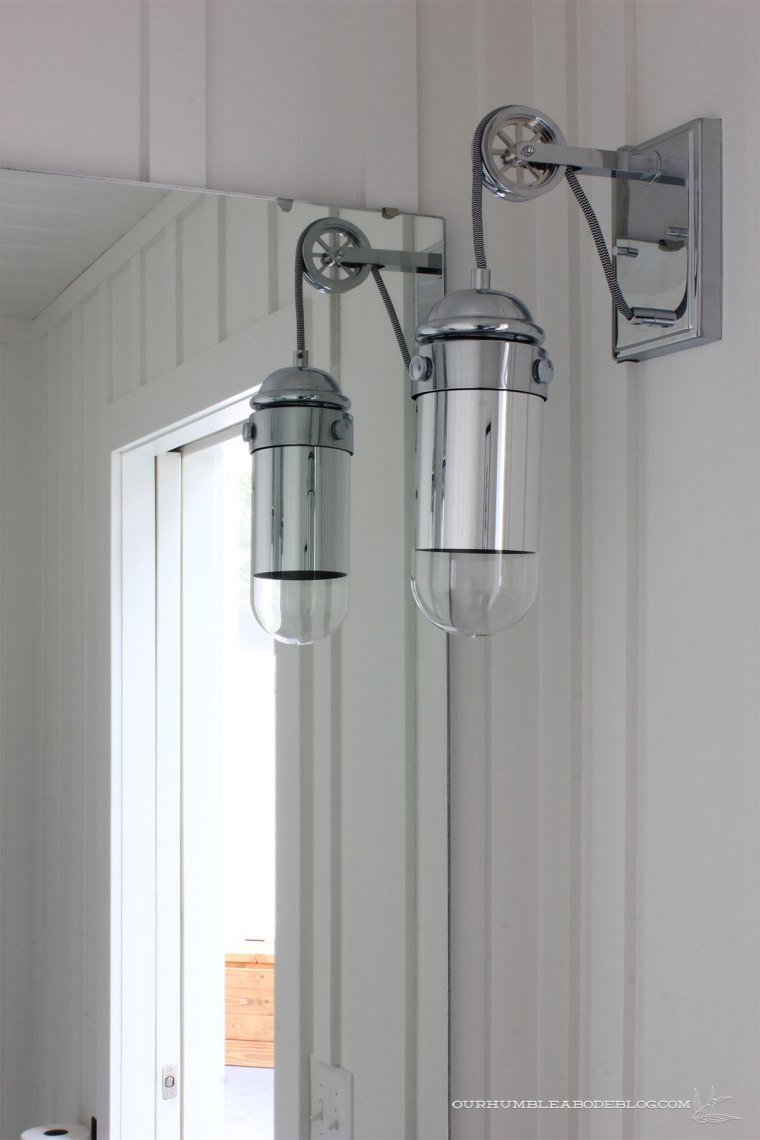
The mirrored glass shades provide a beautiful, soft glow that creates the slightest pattern on the walls.  The faux pulley and cute cloth cord offer a lot of style, while the glass shade keeps visually light.

Pool-House-Finished-Bathroom-Vanity-Lights-On

A wall mount faucet has been on my wish list for years, and I was finally able to get Ben on board with it in here.  Mostly due to the marble backing, preventing unnecessary wall splashing.  However, it didn’t come without challenges and an excessive amount of measuring.  And re-measuring, followed by second guessing.  Followed up with several four letter words when cutting the holes in the marble to accommodate it.

Pool-House-Finished-Bathroom-Marble-Detail

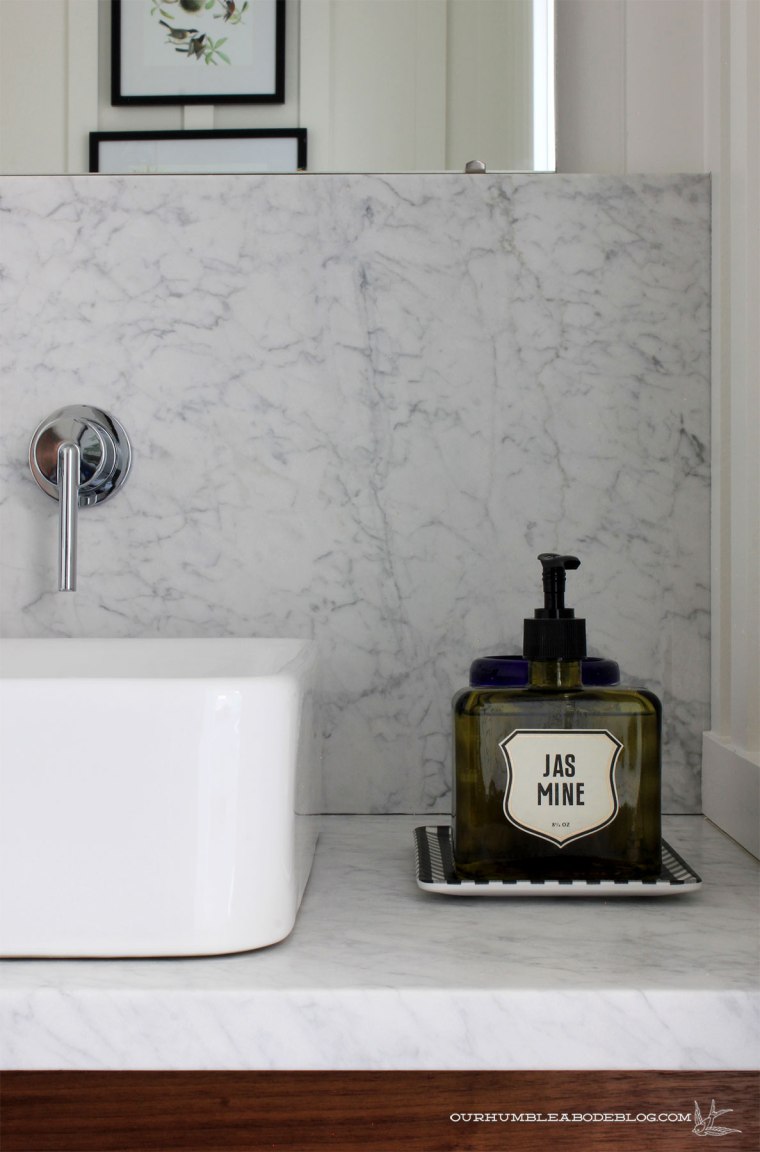
I worried it’d be too ‘splashy’, so we placed the bottom of the spout 2 inches from the top of the vessel sink.  It forces people to keep their hands in the bowl, but doesn’t feel crammed in our wide sink.

Pool-House-Finished-Bathroom-Sink-Detail

At 44 inches wide, with a large part taken up by the sink, there’s enough counter space for a small tray of cotton swabs (useful when the pool is functional) and a cute soap pump.  Basically, all of the little elements I’ve been compiling over the months and finally get to use.

Pool-House-Finished-Bathroom-Soap-Detail

It’s been a long road to get to this point, but I’m basking in the bright, open, fresh space we have now.

Pool-House-Bath-Before-and-After

If you spy something you might want to get for yourself, here’s the list of everything shown.

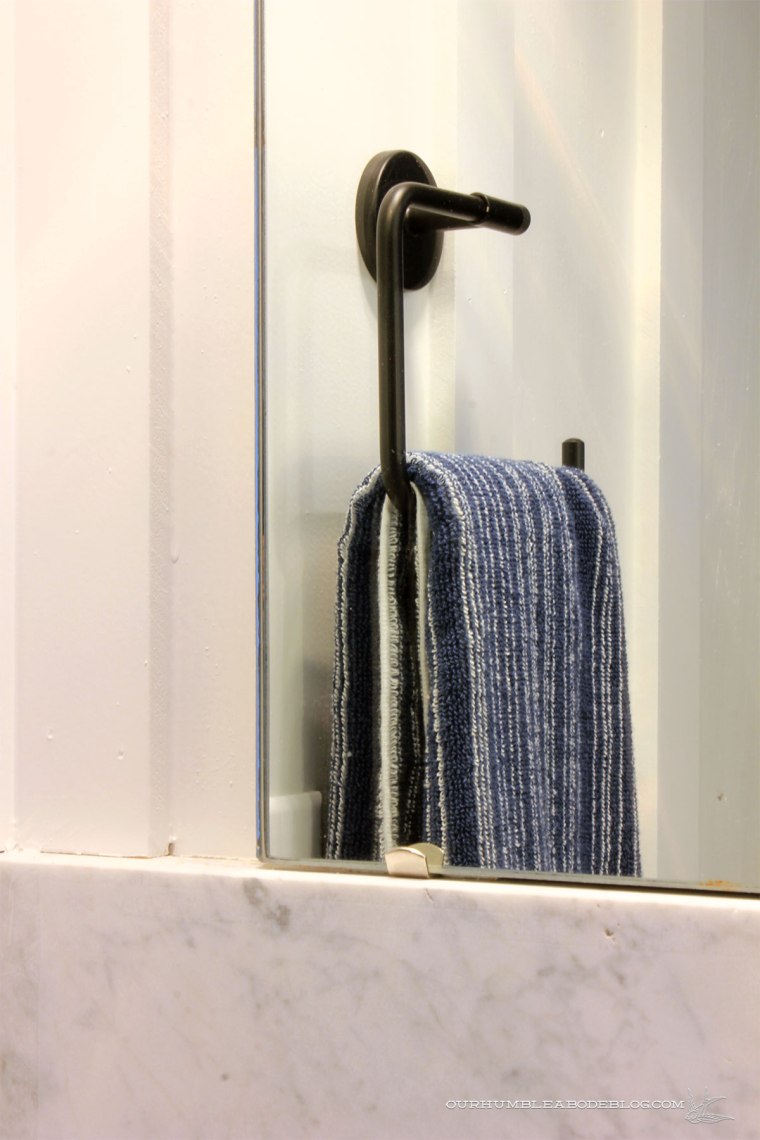
Montauk Black Slate Tile     .     Frosted Pocket Door     .     Pocket Door Hardware     .     Progress Beaker Sconces     .     Delta Trinsic Faucet     .     Vessel Sink     .    Delta Trinsic Black Towel Ring     .     Towel (similar)     .     Mirror Clips     .     Blue Rimmed Cup     .     Izola Soap     .     Black Gingham Tray     .     Round Wire Basket     .     First Aid Box     .     Kohler Highline Toilet     .     Paper Holder (similar)     .     Picture Frames     .     Audubon Art

How To Hang a Straight Row of Hooks (or Anything)

When planning the pool house, I didn’t picture art on the walls.  Instead, I wanted the accessories to serve as art.  Which means every item has to be extra special to serve the functional purpose and add a design element.  Obviously with a pool, towels are necessary.  I found beautiful 100% cotton striped Turkish towels from The Longest Thread and I bought ten.

Pool-House-Hanging-Hooks-Wall-Before

Our pool will have only one ladder, in the shallow end, close to the window in the photo above.  For convenience, I wanted to hang seven of the towels on hooks below the window, placing the remaining three near the future hot tub area.  To hang the seven hooks in a straight row, I held the towel on the hook up to determine my height, marking it with a piece of blue tape.  Next, I eyeballed down the line, placing tape on each batten strip.  With the tape up, I held a level, marking the line on each strip.

Pool-House-Hanging-Hooks-Level-Detail

Next, I held up a hook, making sure the level line ran through each screw hole and marked each.

Pool-House-Hanging-Hooks-Detail

Pool-House-Hanging-Hooks

With the tape still in place, start driving the hook and screw in.  Before tightening too far, pull the tape off and continue attaching.

Pool-House-Hooks-Hung-in-Row-Detail

Voila, easy, perfectly straight row without a bunch of measuring.  If you have to measure the spacing between each hook, stretch a full piece of tape or paper across.  It’s easier to mark it up and change than the wall.

Pool-House-Hooks-Hung-in-Row

Over by the future hot tub, three more hooks and towels are hung higher below that window.

Pool-House-Hooks-Hung-in-Row-with-Hot-Tub

I love the pattern and softness the towels add, just like functional art.

Pool-House-Hooks-Hung-in-Row-with-Hot-Tub-Towels

I realize I’m jumping the gun adding towels before we even have the pool liner, but I’m excited to unpack the accessory hoard I’ve had for over half a year.  Speaking of my accessory stash, I pulled out all of the bathroom goodies and got it all in place.  Stay tuned for that next week!

The Painted Pool House

Bright and early on Saturday, Ben and I put on our best painting clothes, head socks, respirators, and got to work spraying paint.  We used Pro Industrial in Snowbound from Sherwin Williams, and it was okay.  It’s a very thin paint and paired with the detailed board and batten, Ben had to be careful with application.  It dripped in a few areas, but as the day warmed, it dried quicker, which helped a lot.  Unlike oil based paint, water based paints create quite the haze.

Pool-House-Painting-Particles

Once Ben painted around each door, we cut small slits in the plastic, opened the doors, and popped a fan in the mechanical room window.  We waited several hours for the paint to dry to the touch before pulling the masking off.

Ben started with the ceiling/beam masking while I worked on the doors, windows, and benches.  That first glimpse of the stained wood against the white walls made me stupidly giddy.  Pulling the masking off is far more satisfying than putting it all down, of course.

Pool-House-Painted-Bench-Masking-Detail

When the drop cloths were down, it washed out the entire space.  Folding each sheet up to reveal the slate floors grounded the room.

Pool-House-After-Painting-Toward-End-Bench

With the walls and ceiling all the same white, the beams, benches, floors, and accessories all stand out.

Pool-House-After-Painting-Toward-House

I was most nervous to pull the tape off the wood, but relieved to see crisp lines.

Pool-House-After-Painting-Bench

Pool-House-After-Painting-Bench-Detail

Ignore the layer of dust and chipped paint bits.

Pool-House-After-Painting-End-Bench-Hot-Tub

We spent Sunday, our anniversary, installing sconces, outlet/switch/vent covers, and cleaning up the messes.

Pool-House-After-Painting-Hot-Tub

The floating walnut shelves and vent hood look exactly as I imagined.  Deep, rich walnut always looks good, but especially against a clean, fresh white.

Pool-House-After-Painting-Kitchen

Pool-House-After-Painting-Kitchen-Detail

In the half bath, the battens terminate into the marble back splash, creating a textured backdrop for the accessories.

Pool-House-After-Painting-Vanity

I’ve started to unload my hoard of towels, pillows, and other goodies even though we don’t yet have a pool liner.  That’s next on the list, along with finishing up the kitchen cabinets.

Seeing White

Our previously decrepit indoor pool house has been our single biggest, longest, and most expensive room makeover to date.  Though we had demolished the raised wet bar in 2012, replaced windows and doors in 2015, we really got to work in November 2016, working from the ceiling down.

While the ceiling was a lot of work, mostly due to the awkward working space, the walls win the most tedious award.

Pool-House-Plywood-Hanging-Progress

Although I only have myself to blame for that, because I was set on a floor to ceiling board and batten wall treatment.  First, hanging sheets of plywood backing, followed with hundreds of batten strips.

Pool-House-Tile-Install-Finished

The single most time-consuming, finger killing part was the miles of caulking.  I trudged through because I knew the result would be 100 percent worth it all.  This weekend, we made it one giant leap closer to the final, completed room.  Before we could get to the satisfying part, spraying primer, we had to mask off everything we didn’t want to get paint on.

Priming-Pool-House-Walls-Masking-Room

Floors, ceiling, cabinets, shelves, benches, doors, and windows.  Probably most fun, the two huge support beams that span the entire room.

Priming-Pool-House-Walls-Masked-Kitchen

When masking, I prefer to start with a good quality painter’s tape, closely following the edges.  Then I come back with my sheet of plastic to quickly mask the remaining open areas.  When in doubt, tape every single seam.  It’ll prevent over spray coming through as well as the plastic flapping up from the sprayer air.

Priming-Pool-House-Walls-Masked-Door

With the plastic applied, we laid drop cloths on the floor to completely cover it.

Priming-Pool-House-Walls-Masked-Room

With the prep work out of the way, we cracked open the oil based primer and got to spraying.  Ben started in the kitchen, working around the walnut shelves and vent hood.  My heart was beating so fast, a mixture of excitement of how great it looked already and worry that I hadn’t masked well enough.  I felt the same way about the ceiling beams and those turned out perfectly, so I have my fingers crossed.

Priming-Pool-House-Walls-Kitchen-Bench-Detail

This step is the single most satisfying part of a job.  In a matter of seconds, the walls went from unfinished plywood to crisp white.

Priming-Pool-House-Walls-Kitchen-Benches

Ben rocked the priming, knocking out the entire room in about 2 hours.  Despite being unfinished, the primer gives us an idea of the finished look and feel.

Priming-Pool-House-Walls-Center-Bump-out

Even with the windows covered, it’s so bright and fresh (looking, because the smell was terrible).

Priming-Pool-House-Walls-Hot-Tub-Area

Priming-Pool-House-Walls-Bathroom-Sink

It’s taking everything in me not to peel back the tape on the benches to see how it looks, but we still have to paint.

Priming-Pool-House-Walls-Masked-Bench-Detail

One minor annoyance is that the rough edges of each batten strip absorbed most of the paint.

Priming-Pool-House-Walls-Batten-Strip-Side-Detail

We hoped to paint on Sunday, but instead took the day to brush each edge with a second coat of primer.

Priming-Pool-House-Walls-Touched-Up-Edged

Not ideal, but necessary for the best possible paint finish.  We’ll spray the walls white, Snowbound from Sherwin Williams, this weekend and that’ll be the last whole room project.  After that, it’s all minor tasks to complete.  We’ll install sconces, finish the kitchen cabinets, and add the pool liner.  Then, it’s party time.