Big Ass Benches

We’ve got scrap piles for days.  Seemingly of anything and everything.  Including a few beams we didn’t use for our deck, walkways, or stairs.  To use a few up, Ben built what we’ve dubbed ‘Big Ass Benches.’

Big-Ass-Benches-by-Waterfall

They’re huge at 8 feet long and weigh at least 150 pounds each.  Two fill in the space by the waterfall, around the fire pit.

Big-Ass-Bench-by-Waterfall

To build these behemoths, Ben cut an 8 foot piece for the seat and two 3 foot tall sections for arms.  Scraps of 2 by 4 work as cleats and 2 by 6 boards for the backs.

Big-Ass-Bench-End-Detail

Long screws go through the sides and into the seat.

Big-Ass-Bench-Screw-Detail

Back boards connect to a small chunk of wood.

Big-Ass-Bench-Back-Attachment-Detail

Along with the two in the back, we’ve got another on the front landing.

Big-Ass-Bench-on-Front-Landing

It functions as a bench (duh!) and a railing, keeping people away from the far edge and steep drop to the driveway.

Box it Like it’s Hot

This project is a shameless West Elm knock off.  The Contrast boxes are fun and useful in nearly any room.

But, only the tray is available right now.  Hence the knock off.  I found the perfect wood while picking up some other supplies at Home Depot.  In the aisle with pre-cut sheets (varying thickness MDF, peg board, and plywood), I saw these 1/2 inch thick solid oak boards.  Only $2.50 per 1/2 inch by 5.5 inch by 2 foot board.

Two-Tone-Wooden-Box-Oak

I grabbed three and started building when I got back home.  Using the width of the plank as my top and base, I cut two rectangles at 8 inches.  To create the sides, I cut mitered corners to fit around the base.  Not on top, as I did with my recent tray project.  So the inside of my long pieces were 8 inches, short sides at 5.5 inches.

Two-Tone-Wooden-Box-Assembly

This is where a pin nailer comes in very handy.  For each side, I’d brush wood glue on each corner or joint, hold it in place until square, and then shoot four or five 3/4 inch long nails in.

Two-Tone-Wooden-Box-Glued-and-Nailed

It leaves teeny holes, but holds everything together until the glue sets.  For my triangle lamps, I used this same method of nails and glue and they’ve held up perfectly.  Now, to deal with the recessed top.

West Elm’s version has a routered top, but I decided it would be quicker and just as effective to add little ‘posts’ to each corner.  After measuring the inside of the box, I subtracted a half-inch and glued them in.

Two-Tone-Wooden-Box-Unfinished-Inside

My top is a 5.5 by 8 inch rectangle, allowing it to rest inside the frame, on atop the corner posts.  To accommodate the leather strap handle, I measured my leather.  At 3/16 thick, I cut a slightly larger slot by drilling holes in each end and connecting the pieces with a funky vibrating saw.

Two-Tone-Wooden-Box-Unfinished-Top

Before finishing, I sanded everything with fine paper.  Using stain and paint I already had, I finished the outside with stain, and the inside and top edge with paint.  Four coats of Polycrylic to protect everything and give a little shine.  For under eight dollars, I have a cute box to stash our junk on the coffee table.

Two-Tone-Wooden-Box-on-Living-Room

It’s a nice wooden accent, but I’m worried it looks too tall.  Almost like a Kleenex box cover.  I might make a shorter one…

Two-Tone-Wooden-Box-Finished-Outside

At any rate, it holds lotions, chapstick, nail clippers, and the boys’ toothbrushes.

Two-Tone-Wooden-Box-Finished-Inside

The leather handle is a lot easier for the boys to open than the metal bin we had used.

Square-Tray-On-Coffee-Table

Two-Tone-Wooden-Box-Leather-Handle

I couldn’t think of a better way to attach the strap, so I stapled it to the underside of the cover.  I’m guessing West Elm attached their handle differently.  Haha.

Two-Tone-Wooden-Box-Leather-Handle-Underside

A lower, longer box would be great to hold our remotes, too.  I could also use one in the bathroom for first aid supplies.

Scrap Pile Creations

When I get the urge to create something, usually my first step is to raid my supplies.  Be it fabric, paint, or in today’s case, our scrap lumber bin.  It starts with a specific need, but finding ways to use left over materials is a slight way to push myself creatively.  Much like my cedar tub shelf.  And both pieces I made add function to spaces.  For our living room, I built a large square tray to corral everything on the coffee table.

Square-Tray-On-Coffee-Table-Room

I started with a piece of 1/2 inch MDF that was 22 by 30 inches and an 8 foot strip of 1 1/2 inch wide 1/2 inch MDF.  I cut the 1/2 inch piece to 22 inches square and then four strips for the sides.  All trays are assembled the same way.  Thin base material with side material attached on top.  I used 1 inch staples in our air stapler to secure everything; undersides first, then corners.

Square-Tray-Edge-Detail

Due to the nature of MDF, it bulged out and cracked along the edges.  I wasn’t concerned because I knew I’d fill it with putty and caulk.  After filling the cracks and staple holes with wood filler, I caulked the inside corners.

Square-Tray-Assembly-Detail


Sanding everything smooth was quick and evened out the bumps.

Square-Tray-Top-Detail

For durability, I used some white exterior paint.  After three coats, I took it outside to spray with clear gloss.  Two light coats in I noticed how the gloss had yellowed the finish.  Great.  I lightly sanded it again and did two more coats of white paint and called it a day.  Good enough, I can always repaint down the road.  To spare the table from damage, I added small rectangles of felt to the underside.  Clearly I didn’t care about the staples or paint drips on the bottom.

Square-Tray-Assembly-Detail-Underside

And now I’ve got a simple tray to keep magazines, remotes, and other crap (like the boys’ mini foods) organized.

Square-Tray-On-Coffee-Table-Corner

Because their minis are so adorable, I used a wooden drawer organizer (it was actually a tiny shelf) to display the collection.

Square-Tray-On-Coffee-Table

In other scrap pile happenings, I used a small chunk of left over cedar to make a shelf for our shower cubby.

Cedar-Shower-Shelf-Overall

Before assembly, I sanded all sides with 220 grit paper and drilled two pilot holes in each end of the top board.  Obviously this shelf is exposed to water, so I used stainless steel screws so it wouldn’t rust.  Once assembled, I coated it with teak oil for a protective layer.

Cedar-Shower-Shelf

The shelf holds a razor and bar soap, leaving more room on the bottom for bottles.  There, two quick and easy scrap projects that don’t cost a dime.

Caddy Shack

Time for an intervention, folks.  I’m addicted to using old cedar planks.  It started innocently.  First, I used a few to create a slim entry shelf.  More recently, we planked one wall in our bedroom.  And now, our bathroom is rocking a new cedar tub shelf/caddy thingy.  What am I going to do when I run out?  Ahhh!

Cedar-Tub-Shelf-Detail

The process couldn’t have been easier, either.  I measured from outside edge to outside edge of the tub (29 inches) and added two more inches for overhang.  Then I measured the inside of the tub (24 inches).  I cut an extra piece of cedar down to 31 inches and made two 1 1/2 inch wide strips.  On the back side of my wood, I marked 3 1/2 inches (the difference between my outside and inside measurements) from either side to attach my small strips.

Cedar-Tub-Shelf-Cleats

Setting a flat board would certainly work, but I wanted the cleats to keep the shelf in place if it got bumped.  It can only move about 1/2 inch before it hits the other side of the tub so it can’t crash down.  To attach the strips, I used two screws in each and flipped it back over.  With a fine grit sand paper, I smoothed out the rough edges.

Cedar-Tub-Shelf-Edge-Detail

After sanding, I applied a light coat of teak oil to seal everything.  Took maybe 20 minutes to make.  And I’ve got a place to set a book or whatever while relaxing.

Cedar-Tub-Shelf

I considered making a walnut board, but I thought the darker color would draw more attention.  This way, light color blends in and allows other elements to shine.

Cedar-Tub-Shelf-in-Bathroom

Cedar is also more naturally water-resistant, so it should handle splashes better.  Crazy simple and totally functional.  Feels a little fancy-pants, too.

Master Mood

As I shared Monday, we’ve gotten started revamping our ugly bedroom.

Cedar-Planked-Wall-Finished-Overall

Until now, our room has seen minimal attention in the form of white curtain panels and a coat of grayed green paint.  I didn’t love the color while painting and it still hasn’t grown on me.  Don’t get me wrong, it’s okay as a color.  For the room?  It doesn’t add anything, but it was better than the electric blue.

New-House-Master-Bedroom-Front-April-13-2012

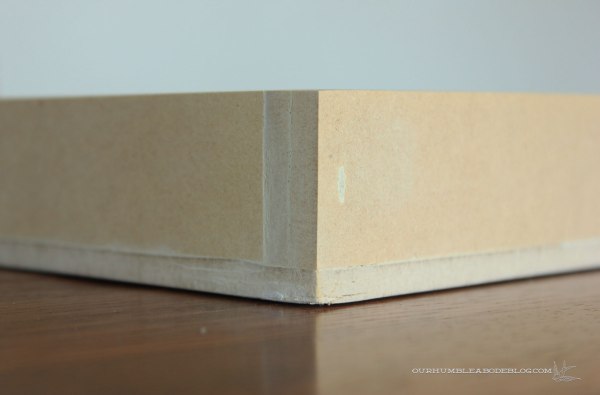
Before we can get to the fun, big impact stuff, I have some tedious work ahead of me.  The two inside walls have orange peel texture, but the previous owner did a bang up job with some patches:

Master-Bedroom-Texture-and-Patches

So I’ll have to address those areas as well as the popcorn ceiling.  We’ll have guests here this weekend, so I won’t be able to get started as soon as I’d like.  Once the guest room is free, we can move our stuff out of the room and I can get going.  I’m aiming for a mix of sleek and modern with warm and rustic to play off each other.  Here’s what I have in mind:

Master-Bedroom-Mood-Board-2


1.  Cedar Planks, we might plank the other window wall, too.  Only after replacing the window with a sliding door.  Then I’ll put on a matte clear coat to seal everything that could be potentially hazardous to have indoors.

2.  Benjamin Moore Wrought Iron in flat finish on the remaining two walls, to tie into the master bathroom.

3.  We want to build a new bed, somewhat similar to CB2’s Dondra Bed.  The basic, open platform base is the part I love.  A light gray painted frame and simple upholstered headboard would off set all the wood going on in the room.  Wood wall + hardwood floors + wood bed frame might be too much for one area.

4.  While discussing replacement night stands, I mentioned floating shelves.  Something like our entry console, but deeper with a drawer.  This Slice Grey Wall Mounted Storage Shelf is close to our idea, though the dimensions would be different.  Also, we’ll use cedar to build the boxes.  That way, we can leave them natural to blend in with the wall.  Or I might paint them to add more contrast.  It depends on how it feels once installed.

5.  Back when I made our curtains, my goal was to create something to close for privacy.  Foolishly, I didn’t sew the panels long enough to raise when we changed the windows and trim.  So, these panels will go in the basement and I’ll sew two new sets.  The linen panels I made for the master bathroom have worked so well, I’m going to sew another set.  This time in white, similar to these White Linen Curtain Panels.

6.  To up the cozy factor, we need a rug.  This Allen + Roth Rectangular Cream Solid Wool Rug looks so plush and soft, and it’s a great price for 100% wool.  Unlike other rooms, our bedroom doesn’t get heavy foot traffic or dirt, so we can get away with a lighter rug.

7.  There are two large mirrors in this house, both in awkward places.  One in the laundry room and another at the end of the hall in the basement.  I’ve wanted to frame one out to lean ever since.  Creating a cedar frame similar to this Salvaged Wood Leaning Mirror is the perfect solution.  It would bring the cedar to another area and add function.

8.  Along either side of our bed, a Faux Sheepskin is nice and soft.

9.  DIY Isosceles Lamps  on the night stands.  ‘Nuff said.

10.  To add in some color, I want a few green accents.  Nothing crazy, but this green wool blanket, the edges of our engineer prints, and a pillow or two.

Across from the bed, we’d like to add a small tv to create a little seating area in the currently unused, open space.  Using the mid-century bench as a small sofa, maybe a chair, and a slim console.  Those elements are still up in the air.  Regardless, I’m excited to get started!