The Jewel of Fall

Generally speaking, I’m not a lover of traditional fall colors.  Red rarely appears in our house, though orange is growing on me.  So this year, I paired orange with some of my year round favorite colors.  Teal, pink, purple, and gray.  Deeper tones really set a warm, cozy feel that’s perfect for fall.

Jewel-Tone-Fall-Decor-Fireplace

Our mantel art felt too summery, so I made a few new pieces with items I already had around the house and natural pieces.

Jewel-Tone-Fall-Mantel-Vignette

Feathers and antlers found on my father-in-law’s ranch add a rustic element.

Jewel-Tone-Fall-Mantel-Antlers-and-Feathers

A cut out deer silhouette was simple.  Look for more info on these art pieces next week.

Jewel-Tone-Fall-Mantel-Deer-Art

For the main item, I painted a feather using Liquid Leaf and a large sheet of gray paper.

Jewel-Tone-Fall-Mantel-Feather-Art

For a little height, I pulled out two glass candle sticks.  Having only cream tapers on hand, I dug in my embroidery floss bin and found eggplant, magenta, and burnt orange to wrap around.

Jewel-Tone-Fall-Mantel-Wrapped-Candles

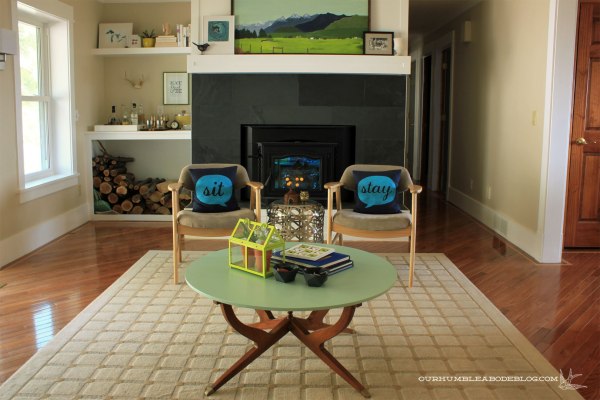
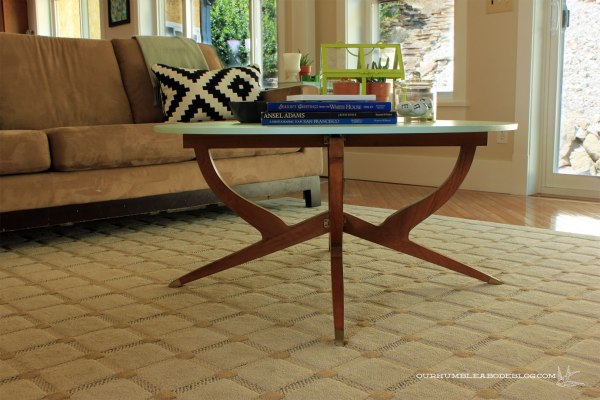
Of course the opposite side of the room has a few seasonal changes, too.

Jewel-Tone-Fall-Family-Room

A color blocked pillow I sewed along with a burnt orange suede pillow from Sears on one end.  I’m waiting on this silk and mirror pillow for the other end.  I saved a couple of bucks using Coupons.com codes, too.

Jewel-Tone-Fall-Orange-and-Purple-Pillows

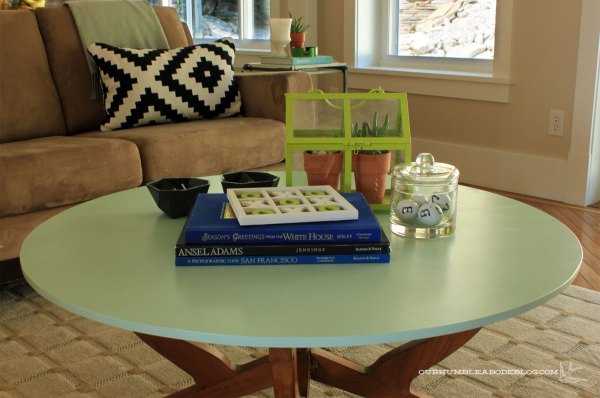
Accessorizing the coffee table was simple.  A piece of driftwood, white faux pumpkin, the gold wishbone, and a simple pumpkin patch-inspired by Kirsten’s.

Jewel-Tone-Fall-Coffee-Table-Decor

While making Ev more mini foods, I molded a few pumpkins, poked wire in the bases, baked and painted them up.

Fall-Pumpkin-and-Squirrel-Terrarium

This post and the following giveaway are sponsored by Coupons.com.  For more fall inspiration, stop by these participating blogs: Brave New Home, Embrace My Space, Fancy Free Me, Inside-Out Design, The Thinking Closet, Two Live Colorfully, Charming Zebra, What’s Ur Home Story, Dogs Don’t Eat Pizza, and Angie’s Roost

The Goods: One $200 Sears e-gift card provided by Coupons.com

To Enter:  Follow this link to the Rafflecopter giveaway: a Rafflecopter giveaway

Contest Closes: 11:59 EST, Friday, October 4th, 2013.

Number of Winners: One winner will be selected from the pool of contestants across the eleven participating blogs.

Ships: US residents only.

Cutting Corners

How ’bout a round of applause for our new spider base coffee table top:

New-Coffee-Table-in-Family-Room

While marble or glass would be beautiful, I think marble is too heavy for the base.  And I know glass would be completely covered in fingerprints, taunting me daily.  So I had Ben help me (okay, he did all the cutting) make a paintable top.  He cut a sheet of 1/2 inch MDF to 36 1/4 inches square, then made a pivot point to make a perfect circle.  A scrap of MDF nailed to the center of the square, like this:

Making-Round-Table-Top-Pivot

Which gives a rigid edge to spin, following with a pencil.

Making-Round-Table-Top-Drawing

Using a jigsaw, Ben cut close, but just outside the line.  With the corners cut, I got out the orbital sander with 80 grit paper and sanded until I met the pencil line.  For a smoother edge, I followed up with 150 grit paper, primed, painted, and sealed both sides with Polycrylic.  I set the top on and for the first time in my home ownership, I’ve got a coffee table.

New-Coffee-Table-in-Family-Room-Toward-Fireplace

I had a sample jar of Valspar’s Sweet Mint, which I think pairs nicely with the wood base.  Fun and colorful, without being bright and crazy.

New-Coffee-Table-In-Family-Room-by-Fireplace

Sweet Mint is also a near perfect match for the sky in my MT Photo Journal Heavenly print and landscape painting on the mantel.

New-Coffee-Table-in-Family-Room-with-Heavenly-Print

If I get sick of it, I can quickly sand it down to repaint with minimal money and effort.

New-Coffee-Table-in-Family-Room-Toward-Back

We’ve got a few games on top including tic tac toe and the checker book.  The terrarium, pulled from the boys’ room, adds greenery and a glass jar with our initials rounds out the set.

New-Coffee-Table-in-Family-Room-Top-Detail

Which do you prefer, coffee tables or ottomans?  It feels less like a dorm room, so adult, to have one.  And really fun to accessorize.  Now to convince Ben to replace the ottoman in the living room with a coffee table.

Build-A-Bed

How ’bout we talk beds.  Specifically the beds Ben and I built for our boys.  You already saw them in action and we’re so happy with them.  At the beginning of the room make over, I threw out the idea of getting Ikea beds.  Sadly, Montana doesn’t have an Ikea.  So we had three options.  One, wait until our next trip to Minnesota.  Two, buy the beds and pay shipping to get them here.  Three, build something.  After crunching the numbers we realized building would be almost the same price as the Ikea bed and slat system.

To make two extra long twin beds we needed:

Three 4 by 4 by eight foot pine posts (we ordered four because we worried about the look.  Good thing we did because one corner was completely gone on one)

Six 2 by 8 by eight foot pine boards

Two 4 by 8 foot OSB sheets

Six 2 by 4 boards

6 inch long screws

Boys-Bed-Building-Materials

We cut four posts at 20 inches long for the footboard and four more at 40 inches to make the headboard.  Then cut four 2 by 8’s to 39 inches to connect the posts together.

Boys-Bed-Head-and-Foot-Board-Assembled

Two more 2 by 8 rails at 81 inches make up the sides.

Boys-Bed-Frame-Assembled

Ben drilled staggered pilot holes in the posts.  The screws go completely through the post and in a few inches of each 2 by 8.

Boys-Bed-Foot-Board-Post-Screws

Each rail connects to the inside of each corner post.

Boys-Bed-Foot-Board-Post-Detail

To support the matterss Ben cut 2 by 4 boards in half length wise and nailed them into the rails.

Boys-Bed-Frame-Rails-and-2-by-4-Supports

Four more 39 inch 2 by 4 pieces go across, resting on the rail supports.

Boys-Bed-2-by-4-Cross-Supports

Which holds the OSB in place before putting the matterss on.

Boys-Beds-OSB-Bottom

Oh, I should mention I sanded all the pieces with 120 grit paper before giving it two coats of Minwax Polycrylic.  Between coats I sanded with 400 grit paper, just to smooth the raised grain.

Boys-Bedroom-Almost-Finished-Beds

Now for the headboards.  Unfortunately I don’t have pictures of this because we both had to stretch the upholstery fabric.  Ben cut a sheet of 3/4 inch plywood to 19 by 39 inches, then nailed more cut 2 by 4 strips to all outside edges.  Two by 2 pine would also work.  Then we wrapped a foam matterss pad (cheaper than foam by the yard!) over the front, top and bottom, leaving the sides clear.  Then we stretched the fabric over, stapling to the back under sides of the frame.

Boys-Bedroom-Upholstered-Headboard

Three inch screws from the back into the posts hold the headboards in place.

All the lumber cost $120, another $12 for the fabric, and we already had the screws, foam, and clear coat.  So, basically the same price as the Ikea beds, without hauling or shipping, but these beds are twice as beefy.  They’re extra long twin instead of a normal twin, too.  And took only two days to make.  Can’t say that about some Ikea items.  Ha!

Walnut Saves the Day

I really love my kids, I do, but sometimes they do things that I don’t understand.  Sometimes cute, like having conversations only they understand.  Others, not so cute.  Like coloring on the couch.  Or using a nail file to scratch the backs of our dining chairs.  Exhibit A:

Scratched-Dining-Chairs-Before

Seriously, what the heck?!  Of course I was irritated, but I remembered a trick I’d heard, but never tried.  Use a raw walnut to cover the scratches.  Luckily, I had a bag of trail mix with a few walnuts left, so I used those.  Here’s the same chair after rubbing the nut over the scratches on the right:

Scratched-Dining-Chairs-Half-Done

And after covering all offending scratches:

Scratched-Dining-Chairs-After

Sure, the scratches are still kind of visible, but not from across the room.

Scratched-Dining-Chair-After-Detail

The walnut colors the scratches nicely, but obviously can’t fill in the gouges.  I’m just happy for a cheap, quick fix.

Have you tried the walnut trick?  Care to share the strangest damage your child(ren) has/have done?  Do you have other quick tips for fixing furniture?

If you’ll excuse me, I’ve got a room full of trim to paint.  Weehee!

Three Things

Three things to share today.  First order of business, the winner of a Sanus Full Motion TV Mount is Erica.  Congrats!

Sanus-TV-Mount

Second on the agenda, sharing a super cheap and über easy way to frame out a canvas.  Wanting to finish off the painted canvas I made for Ben, I stopped in Home Depot to pick up 2 eight foot pieces of 1 by 2 pine.

Canvas-Frame-1-by-2-Wood

To fit these in my car, I cut each into two pieces, five feet and three feet so I had a little wiggle room when cutting at home.  Before making my mitered cuts, I sanded the rough wood using 150 grit paper.

Canvas-Frame-Wood-Before-Sanding-Detail

Rather than relying on precise measurements, I brought my canvas out to my work table.  Yes, I measure the girly (maybe lazy is more appropriate) way.  But, it made it so easy.  I just marked the edges of the canvas on the inside of my frame, then used a square to mark the top as well.  These lines became the inside of my angled cuts, just lined the edge of the saw blade at the corner and cut.

Canvas-Frame-Corner-Detail

Before attaching my frame to the canvas, I first applied a coat of Dark Walnut stain and two coats of Minwax Polycrylic (both already in my stash).  I debated the attachment method.

First I though I’d nail from behind the canvas, shooting into the canvas frame and then into the pine.  But Ben said poplar can have weird knots and it might angle and shoot through  my canvas.  Um, not the look I’m going for.

Instead I used an 18 gauge nailer to go through the pine and into the canvas frame.  Worked like a charm, although I did angle my first shot too severely (fearing a blowout on my canvas) and it went into my work table.  Lesson learned.  While the nail holes are on the outside of the frame, they’re barely visible.  You know, until I take a close up shot.

Canvas-Frame-Nail-Detail

Now the canvas looks finished, with a slim, modern wood frame.

Canvas-Framed-in-Family-Room

Oh, and I worked up the courage to deal with the ceiling.  Not done yet (this is dragging on!), but looking a little better.  Especially when the can lights aren’t hanging down like Halloween zombie eyeballs.

Canvas-Framed-on-Mantel

One of my favorite things about this frame is the price.  Two 8 foot sections of 1 by 2 pine set me back $2.50.  I mean, how can you beat three bucks for a huge frame?!

Canvas-Frame-Left-Side-Detail

My second favorite thing about this frame is the depth.  It sits flush with the canvas back, but has another 3/4 inch depth beyond.  I think it’s a nice touch.

Canvas-Frame-Right-Side-Detail

Of course I love how quick and easy it was, too.  Took between and hour and two of active time to make.  Because this frame was so easy, I want to make two more to finish off these embroidered constellations.

Item number three; last but certainly not least.  We’re celebrating yesterday’s summer solstice with a big sale.  Now through Friday, July 5, use the code STARTSUMMER to save 50% on everything in our shop!

Summer-Sale-Banner

Oh, how about a number four?  Have a wonderful weekend!