Boy Bedroom Makeover

So, I’m trying something different with this one.  Rather than a play by play of makeover progress, I’m switching it up and starting with the before and after pictures.  This is what the boys’ bedroom looked like before I started:

Boys-Bedroom-Before

Sure, we had done some work in there, adding striped curtains, install a new window (the other still has to change), and paint swatches on the walls.  But it was still such a blank slate.

Boys-Bedroom-Before-E-Side

Then I stumbled on the perfect dresser and gave it a makeover and swapped out the flush mount light fixture.

ReStore-Pendant-in-Boys-Room

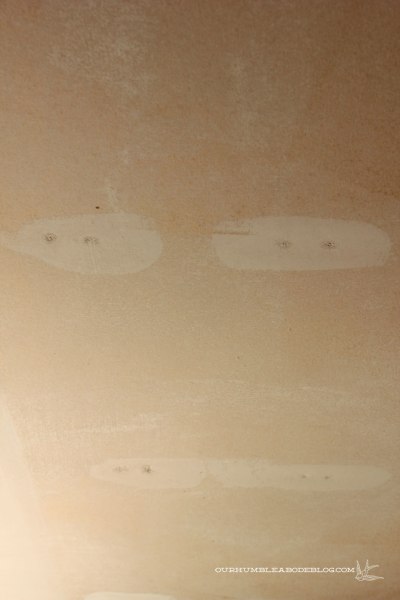
But that’s where progress stopped.  This room makeover really kicked off  by scraping the popcorn texture off and smoothing the ceiling.  While the furniture was out of the room we decided to change the trim (to match the other rooms) and paint.  I stayed close to the mood board, too.

Boys-Bedroom-Mood-Board

Check out their (nearly) finished room today:

Boys-Bedroom-Makeover-Overall

V requested yellow walls and Ev wanted green.  This bold yellowy-green (Anjou Pear by Ben Moore color matched to Glidden) is a great compromise and is still really youthful and fun.  Some original items are in there: the dresser, curtains, and some art, but most everything is new.  A ReStore light fixture for $6.40 (the barn light focused too  much light downward).

Boys-Bedroom-New-Light

Matching custom built pine and upholstered beds replaced the vintage bed and Ev’s crib.

Boys-Bedroom-V's-Side

Gray, ivory, and navy bedding helps balance the bright walls.

Vs-Bed

A new art arrangement fills out the off centered window space.

Vs-Bedroom-Art

Boys-Bedroom-Ev's-Side

The boys chose their favorite and I made new movie posters, too.

Boys-Bedroom-Ev's-Headboard

Fun pillows for a little pattern and color.

Evs-Bed

Across the room are the constellation canvases with added frames and bookshelf below.

Boys-Bedroom-Bookshelf

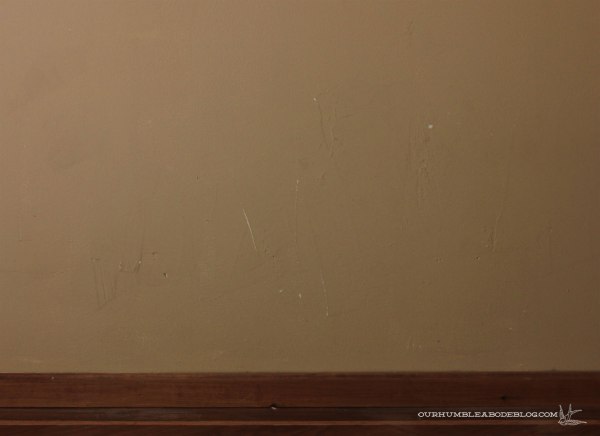
But I’ve got two things I still want to do.  Find or make a large piece of art for this wall:

Boys-Bedroom-Blank-Wall

And get a 4 by 6 or 5 by 7 rug to go between the beds.

What do you think of the changes?  Any suggestions for art?  What are you up to this weekend?

Busted Bathroom

Let’s talk about our master bathroom, shall we?  What to say about this space.  Well, it’s dated.  The 70’s called, it wants our bathroom back.  Orangey oak cabinets aren’t the worst offenders, but they’re not doing anything to help, either.  And because of the sink placement, only one top drawer opens.

Master-Bath-Vanity-and-Toilet

But the cabinets aren’t the real problem.  Oh no, the tile is.  Not only in the looks department, but the shape they’re in.  At the base of the shower, the tiles are separating from the wall.

Master-Bath-Shower-Tile-Detail

Which means…water leakage.  We all know that’s a bad situation.  Of course we could fix just the problem areas, but where’s the fun in that?  I mean, the whole bathroom needs an update.  Super hot weather means we’re better off working indoors.  So, tackling the master bathroom has been bumped up our to do list.  Shower, get ready for a makeover.

Master-Bath-Inside-SHower-Tile

Walls, prepare for a facelift.

Master-Bath-End-Wall

And vanity mirror, you’ve gotta go.  And finally we’ll get some paint around the light fixture.

Master-Bath-Vanity

Most exciting to me is adding the old clawfoot tub from the main bathroom below the window.

Master-Bath-Window-and-Vanity

To accommodate the tub, we’ll shorten the vanity to one sink (two is unnecessary for us).  And convert the swinging door to a pocket door.

Master-Bath-Door

We’re still in the early planning stages, but we’re discussing changing the layout of the shower.  In my ideal world, we’d make this a full glass wall:

Master-Bath-Shower-End

But it’s not realistic; where would we put our switches?  And I’ve heard full glass showers are a pain in the arse to clean.  Not to mention, spendy.  We’re excitedly discussing plans and looking for materials.

What prompts you to start a remodel?  Damage that needs fixing?  Just sick of using/looking at a space?  If you could choose one feature for your bathroom, what would it be?  I’m most excited for a separate tub and shower.  Especially because that tub is a clawfoot.

And to all US residents, Happy Independence Day!  Hope you enjoy your long weekend!

Three Things

Three things to share today.  First order of business, the winner of a Sanus Full Motion TV Mount is Erica.  Congrats!

Sanus-TV-Mount

Second on the agenda, sharing a super cheap and über easy way to frame out a canvas.  Wanting to finish off the painted canvas I made for Ben, I stopped in Home Depot to pick up 2 eight foot pieces of 1 by 2 pine.

Canvas-Frame-1-by-2-Wood

To fit these in my car, I cut each into two pieces, five feet and three feet so I had a little wiggle room when cutting at home.  Before making my mitered cuts, I sanded the rough wood using 150 grit paper.

Canvas-Frame-Wood-Before-Sanding-Detail

Rather than relying on precise measurements, I brought my canvas out to my work table.  Yes, I measure the girly (maybe lazy is more appropriate) way.  But, it made it so easy.  I just marked the edges of the canvas on the inside of my frame, then used a square to mark the top as well.  These lines became the inside of my angled cuts, just lined the edge of the saw blade at the corner and cut.

Canvas-Frame-Corner-Detail

Before attaching my frame to the canvas, I first applied a coat of Dark Walnut stain and two coats of Minwax Polycrylic (both already in my stash).  I debated the attachment method.

First I though I’d nail from behind the canvas, shooting into the canvas frame and then into the pine.  But Ben said poplar can have weird knots and it might angle and shoot through  my canvas.  Um, not the look I’m going for.

Instead I used an 18 gauge nailer to go through the pine and into the canvas frame.  Worked like a charm, although I did angle my first shot too severely (fearing a blowout on my canvas) and it went into my work table.  Lesson learned.  While the nail holes are on the outside of the frame, they’re barely visible.  You know, until I take a close up shot.

Canvas-Frame-Nail-Detail

Now the canvas looks finished, with a slim, modern wood frame.

Canvas-Framed-in-Family-Room

Oh, and I worked up the courage to deal with the ceiling.  Not done yet (this is dragging on!), but looking a little better.  Especially when the can lights aren’t hanging down like Halloween zombie eyeballs.

Canvas-Framed-on-Mantel

One of my favorite things about this frame is the price.  Two 8 foot sections of 1 by 2 pine set me back $2.50.  I mean, how can you beat three bucks for a huge frame?!

Canvas-Frame-Left-Side-Detail

My second favorite thing about this frame is the depth.  It sits flush with the canvas back, but has another 3/4 inch depth beyond.  I think it’s a nice touch.

Canvas-Frame-Right-Side-Detail

Of course I love how quick and easy it was, too.  Took between and hour and two of active time to make.  Because this frame was so easy, I want to make two more to finish off these embroidered constellations.

Item number three; last but certainly not least.  We’re celebrating yesterday’s summer solstice with a big sale.  Now through Friday, July 5, use the code STARTSUMMER to save 50% on everything in our shop!

Summer-Sale-Banner

Oh, how about a number four?  Have a wonderful weekend!

Getting Preppy

Finally having the ugly popcorn off the boys ceiling feels great, but that was the easy part.  The texture came off rather smoothly and easily, but that doesn’t mean the ceiling is primer or paint worthy.  Because we’ve had a few ‘what to do after scraping’ questions, I’m back to share my steps.  Our sheet rock is held in place with nails (the quick way to hang it) and every nail hole needed filling.

Nail-Holes-in-Boys-Ceiling-to-Fill

A few areas had scrapes from my spatula and some minor popcorn residue was still on the ceiling.  Before I could break out the primer, I first filled every nail hole (twice), filled in any scratches, then sanded the whole ceiling smooth.  I started with a drywall pole sander (like this one) but quickly got frusterated with it.

Lacking serious upper arm strength, I couldn’t keep the sander head flat on the ceiling with enough pressure to do much.  Instead, it kept flipping over, causing more damage.  So I ditched it, filled in the scratches from it, and used a sanding sponge to get ‘er done.  Oh, and I taped off the door to contain the dusty mess.  Also, wear glasses and a mask because the dust is everywhere.

Ceiling-in-Boys-Room-Ready-to-Prime

Use a fine grit paper and sand until smooth to the touch.  Carefully, sanding through the tape can be a serious pain in the butt.  Drywall mud should sand easily off, as will the popcorn residue.

Sanding drywall, it’s a dirty job (said as Mike Rowe).

It was annoying to use a small sanding block, moving a chair all around the room, but it’s done.  Even primed and painted.  Looking gloriously smooth.

Painted-Ceiling-in-Boys-Room

Unfortunately for me, the ceiling wasn’t the only wall needing attention, sanding, and spackling.  I’m 99% sure the two outside walls had wall paper.  Wall paper was all over this house: the kitchen, previously in the family room and guest room (found pieces behind outlet covers), and some painted over in our master bedroom (which will make it super easy to remove, I’m sure).  Either this paper really stuck on or someone was especially careless when removing, leaving big triangular gouges behind.  That’s bound to happen.  Then the chunks were filled, but apparently not sanded before painting over.  Behind Everett’s crib was the worst spot.

Wall-to-Fix-in-Boys-Room

So I’m currently tending to the walls before we can prime and paint.  First I used a metal putty knife to scrape off the uneven areas, filled, sanded, even primed the problem areas.  But the moisture of the primer made the surrounding paint bubble.  I scraped again, making the area larger, sanding smooth, and filling again with mud.  Annoyingly, the wet mud made more paint bubble.  You guessed it, more scraping, sanding, and filling.  Now I’ve got this to work with:

Patching-Wall-in-Boys-room

Hopefully (key word here!) I’ve gotten the flaky paint off and I can carry on with my plans.  Which should include new door trim, crown, and base boards before a few coats of Anjou Pear paint.

Door-in-Boys-Room-Waiting-for-Trim

It’s exciting to take another virtually untouched since we’ve moved in room and make it ‘us’.  Kind of getting sick of feeling like I’m living in someone else’s house, you know what I mean?  So tell me, what’s the strangest thing a previous home owner has done to your house?  Something that has you wondering, “why in the world did that happen?!”

Pop Off Popcorn

Disclaimer: Before I get to the details, it’s super important to know if your ceiling has asbestos.  You can buy a test kit to do yourself, or call a professional to check.  If your ceiling tests positive for asbestos, leave this job to the pros.  If your ceiling doesn’t have asbestos, read on.

As I mentioned last week, scraping the popcorn off our ceiling was easier than I expected.  Lucky for us, these ceilings hadn’t been painted over, allowing the texture to absorb more water.  If you’ve got a ceiling you want to smooth, get a weed sprayer, wide metal spatula, hot water, and white vinegar.  You’ll also want safety glasses or goggles, a mask, and probably a hat.

Popcorn-Scraping-Supplies

If your floors are finished (or just for easy clean up), tape plastic over floors and finished walls.  Fill the weed sprayer with the hottest water you can get from your faucet.  No need to boil or anything, just hot.  Add in vinegar.  I poured about 1 to 1 1/2 cups in the sprayer.  Start spraying the ceiling and don’t be stingy!  Note, I’m not sure if the vinegar really helped because I didn’t do a side by side test, but vinegar did help with wall paper removal…

Popcorn-Scraping-Boys-Room-Plastic

Spray a large area (the wet areas should be noticeably different from the dry ceiling – see along the back wall?), then test scrape.  If it comes off easily, keep on going.  Be careful to have your spatula at an angle so you don’t gouge the sheet rock below.

If it doesn’t come off, spray again, let it soak a few minutes then try.  If your ceilings are painted, scraping the outermost layer off to expose fresh texture, then spraying again could really help.

Popcorn-Scraping-Mid

Also, when you come up to a taped seam, scrape along it, not against it.  This way you won’t tear the tape leaving a cracked ceiling behind.  I worked toward the center, leaving my light up.  When I got close, I pulled down the canopy, covered the electrical box with plastic, carefully sprayed around the box, and scraped off the rest.

Popcorn-Scraping-Around-Light

Clean up was pretty easy thanks to the protective plastic layer, but the water did loosen the tape in some spots.  After rolling up the sheeting, I hauled the shop vac in to get the rest off the floors.

Popcorn-Scraping-After

The actual scraping took only an hour, which is about 23 shorter than I expected.  Ha!  Now I’ve got to fill a few holes to get ready for paint, which is always the tedius part.