Stair Master

I’ve called Ben the Stair Master all weekend because he built this:

Back-Beam-Steps

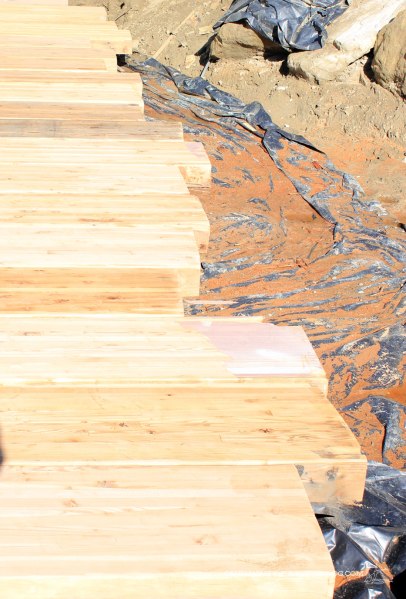
Yes folks, you are looking at a very beefy set of stairs made from more reclaimed beams.  These steps connect the driveway to the back of the house, covering about six feet of elevation change.  Also remarkably easier and cleaner to climb than the dirt hill.  Obviously we’ve still got landscaping to finish, but let’s celebrate the individual victories.

Back-Beam-Steps-to-Walkway

And while he was at it, he made a beam walkway, connecting the new stairs to the deck.

Back-Beam-Walkway-Top-Steps

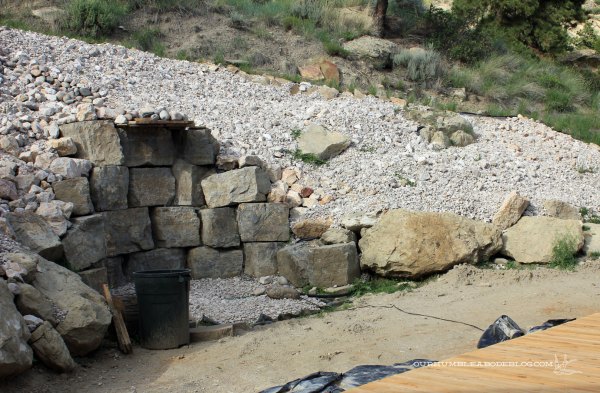
Ben moved and sanded four more of the biggest guys.  The stack is finally dwindling and we’re slowly gaining our driveway back.

Ben-Sanding-Walkway-Beam

These beams just rest on a level bed of crushed rock, butting up to the deck.

Back-Beam-Walkway-Start

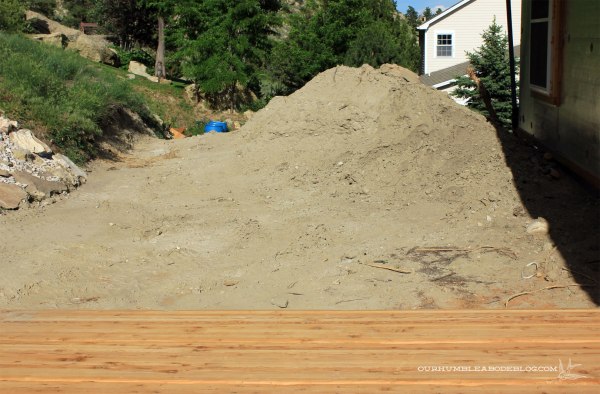
Soon we’ll fill in the rest of the back with crushed limestone and we’ll be able to add plants come spring!  Hootie hoo!!

Back-Beam-Walkway-to-Deck

Once the rock covers over the dirt, we can stain these pieces, too.

Back-Beam-Walkway

What we’re actually waiting on is the rest of the front walk.  If you follow on Instagram, you know we had a trench dug over the weekend.

Driveway-Trench-Instagram

Within four hours, Ben had the pipes in place and filled back in, like it was never there.  But we had, okay, wanted, to do this before placing the rest of the front beams.  Eventually, we’d like to build a shop with living quarters above at the back corner of the driveway.  We can either get everything in place for it now or wait until we’re ready to build.  Problem with waiting is we’ll have to dig up anything we’ve already finished.  Now we can get the walkway done and perhaps pour a concrete pad in front of the garage.

It’s So Sick

Hello everyone and happy Monday!  Weather finally cooperated with us this weekend and we gave the back deck a finish coat.  Per Ben’s research and paint store recommendations, we used Sikkens SRD in a Teak finish.

Ben had a one day only 20% off all paints and stains coupon at Home Depot, so we bought six gallons.  And used just under five to get it covered in one thick, even coat.

Stained-Back-Deck-Overall

The color samples at Home Depot and the can showed a medium toned finish, but it actually is much darker.

Stained-Back-Deck-and-Rocks

Not that we don’t like it, but it just wasn’t what we expected.

Stained-Back-Deck-from-Pool-House

However, the dark wood is high contrast against the limestone, so happy accident.

Stained-Back-Deck-Edges

It takes 48 to 72 hours to fully cure, and a few areas still are shiny.  But soon we’ll be able to walk on it and (gasp!) use it.

Stained-Back-Deck-Wet-Spots

Once the back deck dries, we’ll coat the new front walkway and steps.

Beam-Front-Steps-from-Walkway

More beams make three steps and a small platform.

Beam-Front-Steps-from-Side

Because the house originally had concrete steps (that still tie into the house foundation) we had to build the steps over the broken concrete.

Beam-Front-Steps-Edges

An outdoor bench and cable rail system are still on our to do list, but we’re slowly finishing up this year’s landscape work.  Which means we’re getting closer to a pretty exterior and a master bathroom remodel.

What do you think of the darker finish?  Did you cross somthing off your to do list this weekend, too?

Court Rules

This landscaping bit is no joke.  We’ve been working our way around the yard since early April.  Leveling low spots, transplanting plants, and spreading rock to keep our yard as low maintenance and weed free as possible.  Here’s part of our front yard before:
Front-Yard-by-Deck-Before

Lots of dirt, weeds, a few dead or dying plants and that’s about it.  After weeks of work, here’s where we are today:

Bocce-Ball-Court-2

When discussing and planning the front yard, we knew we didn’t want to water, mow, and keep up a small patch of grass here.  What to do instead?  Houzz.com gave us the perfect (for us) solution.  A bocce ball court. 

Once spring rolls around, we’ll stock up on plants to green up the rock.  But, that hasn’t stopped us from playing a few games already.

Bocce-Ball-Court-1

To edge the court, Ben used steel (it came with the wood deck beams) for a clean edge.

Bocce-Ball-Court-Corners

We also pulled the giant concrete fountain out of the pool house and put it in the front yard.

New-House-Pool-Room April 13 2012

It’s centered on the pool house door, but off-center of the bocce court.

Bocce-Court-Fountain

And this little area is quickly becoming a favorite of mine.  Home Depot had 1 gallon hydrangeas for 9 bucks each, so I grabbed two.  At first, I didn’t know where I’d put them.  Then realized the part shade end of the deck would be perfect.

Hydrangeas-By-Deck

Now I’ve got to get a hammock to hang between those trees.  They’re practically begging for it, right?!  And I just might have to get a few (or several) more hydrangea plants.  One can never have too many beautiful flowers.

Deck Dynasty

Hey everyone!  Welcome to Monday.  Did you have a nice holiday weekend?  Let me just say, four-day weekends are awesome.  We got some work done and still had time to relax.  Much of our weekend work took place outside.  Landscaping.  Adding more rock in preparation for next spring’s plants.  Before finishing up the back landscape work, we had to cut the uneven ends off the back deck.  Because this is a safety issue.

Back-Deck-Uneven-Ends

Ben borrowed a neat beam cutting blade from a contractor friend to get through the thick wood.  We snapped a chalk line and set up our cut guide.  Straight two by fours raised the blade from the ground and Ben cruised along, cutting the excess off while I used the shop vac to blow away the dust.

Back-Deck-Cutting-Beams

Now we’ve got clean ends.

Back-Deck-End-Cuts

And a safe, straight-edged deck.

Back-Deck-Cut-ENds

Hopefully weather will coöperate (not too hot and no rain) with us to finish it completely.  A finish sanding, pressure wash, dry time, and protective coat are all necessary before we can start using this space.

Back-Deck-Cut

Because the back yard is a dirty dust bowl, we need to cover the dirt before our finish coat on the deck.  Dirt settling in our new deck coat is not the goal here.  So, yesterday, we added limestone chips.

Ben-Spreading-Rock-in-Back

Before spreading the chips, Ben dug a small trench for a future gas line for the fire pit to be.  Hence the bucket covering the tubes.  We’re so excited for this space.  A little more rock to spread, fire pit to install, deck to seal, and plants and we’ll be done.

Back-Deck-with-Rocks-and-Waterfall

I’m thinking flowers along the large rocks.  Maybe salvia?  It grows really well here and the purple would look so nice against the rock.

Back-Deck-and-Rock-Around

Here’s the slight cantilever detail, too.  The deck is about eight inches above the rock, which is a perfect step height.

Back-Deck-Overhang-with-Rock-Below

There’s one disappointing deviation from plans.  This is the only pergola you’ll see back here.

Back-Deck-with-Pergola-Drawing

After a lot of measuring, we’ve nixed the idea.  Wop, wop.  Everything will block the view of our back yard, one of our favorite features of this house.  But all is not lost.  We’re discussing a front deck pergola to give much-needed shade.

What did you do this weekend?  In addition to landscape work, we had a relaxing Friday lunch, watched fireworks from our back yard, and had a barbeque.

Grow Inspired

I’ve mentioned before we’re working on landscaping our yard.  Right now, that includes tons and tons and tons (quite literally) of rock.  Rock is perfect for us because so much of our property is steep, hard-to-mow hill and sun-baked southern exposure.  Oh, and we’re way too cheap to pay hundreds of dollars a month just to keep grass green.  Hooray for saving water and money!  While the rock has many benefits for us, it still isn’t green.  And let’s face it, green = life.

Back-Yard-Hill-Needing-Plants

Although, I did transplant a few creeping evergreens up on our back hillside.  A touch of green, but we’ve got a long way to go.

Back-Yard-Hillside-Needing-Plants

The plan is to add plants after spreading all the rock (so we don’t crush our plants in the process).  Sadly, that may have to wait until next spring when a greater variety of plants is available.  Until then, I’m using Sprout It to help plan our attack.  Sprout It is a new, free iTunes app that helps find the best plants to use based on space, lifestyle, weather conditions, and growing difficulty.  Basically, it takes the guess-work out of choosing plants.

Even more exciting, Sprout It is giving fans a chance to win a backyard revamp!  Everyone has a space in their yard that needs some help.  I’ve really got my eye on this spot:

Back-Yard-Shade-Garden-Spot

Big ole pile of dirt, just waiting to get plowed over, rocked, and planted.  I’m thinking a variety of shade plants like hostas, bleeding hearts, ferns, and lily of the valley.  But really, our whole yard could count.  Do you have a needs help spot, too?   Well, the Sprout It Backyard Takeover contest is a super fun way for you to get involved.

Sprout It Grow Inspired

Anytime between now and July 2, upload a picture to Instagram or Twitter with the hashtag #GrowInspired, then visit the Sprout It page to claim your photo and officially enter the contest.  One grand prize winner, to be announced on July 10, will receive a free backyard design from Chris Loves Julia and a $1,000 Lowe’s or Home Depot gift card to make it happen.  Sign me up!

Obviously this yard can use a plan and plants.  Because this is the greenest place in the yard:

Back-Yard-Steps-and-Plants

Something needs to change, stat.

I know this seems like a sponsored post, but I’m  not being paid to share this info.  Just think it’s a fun contest and want to spread the word.  What are you waiting for?  Hop on Instagram to add your photo and get in on the action.