DIY Walnut Picture Frame

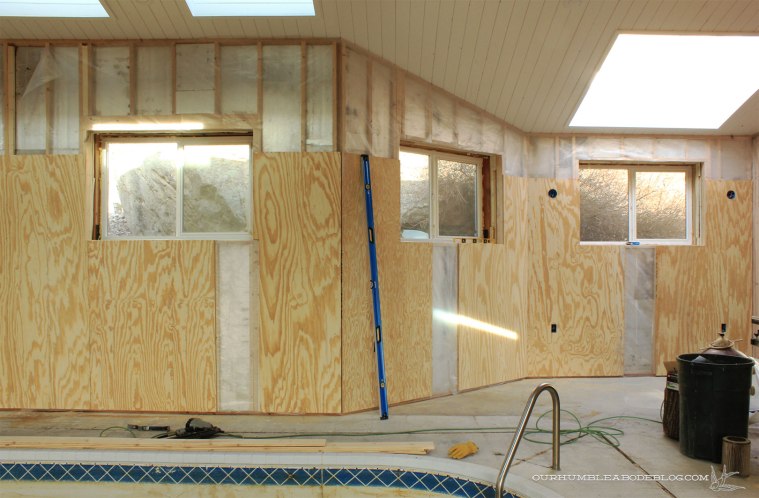
Happy New Year, everyone!  I hope you all had happy holidays.  We had several visitors, a mountain of snow (which meant Ben spent most of his time off working), and plenty of time relaxing at home.  Our original plan included knocking out a good chunk of work in the pool house, but snow changed those plans.  Instead, we had little project time, but in that time, we finally built a frame for the Tom Selleck Replace Face print I’ve had for a year.

tom-selleck-replaceface-prints

It’s a non standard size, measuring 28 by 32 inches, so store-bought options don’t work.  Instead, it sat in a cabinet until now, when we built a walnut frame.  Using a leftover walnut plank, we started by cutting four 1.75 inch strips to create the thickness of the frame.  With the strips cut, we ran each piece through the table saw twice to notch out the sides for the plexiglass, print, and backing to rest inside.

Walnut-Frame-Inside-Corner

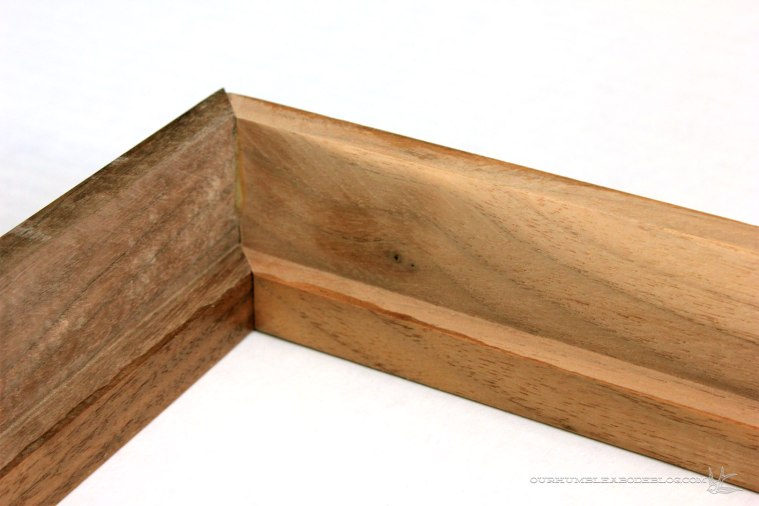
To attach the pieces together, we glued each corner, then shot 1 inch long pin nails from each direction.  They’re tiny and only noticeable up close.

Walnut-Frame-Corner-Detail

In lieu of real glass, we used a 30 inch by 36 inch sheet of plexiglass.  Slowly feeding the sheet through the table saw cut like butter, without shattering, as I had pictured in my head.  A sheet of 1/4 inch MDF serves as the backing, sandwiching the print between, keeping it in place.

Walnut-Framed-Tom-Selleck-Print-in-Theater-Room

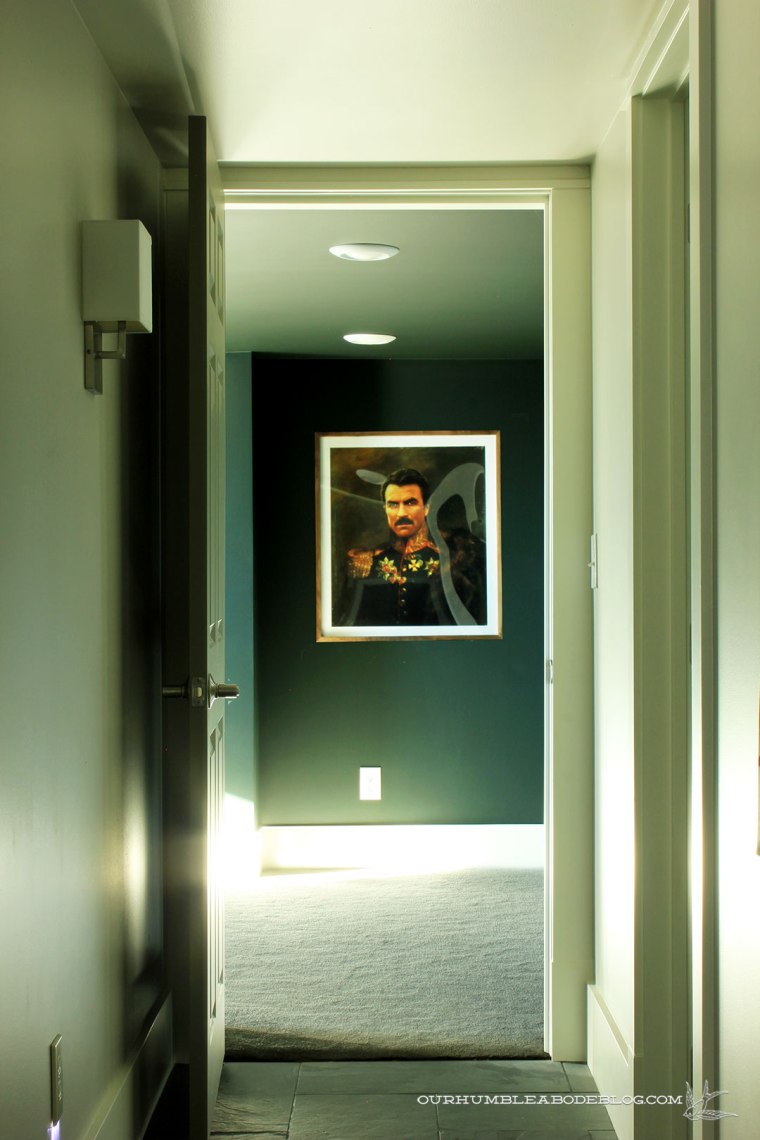
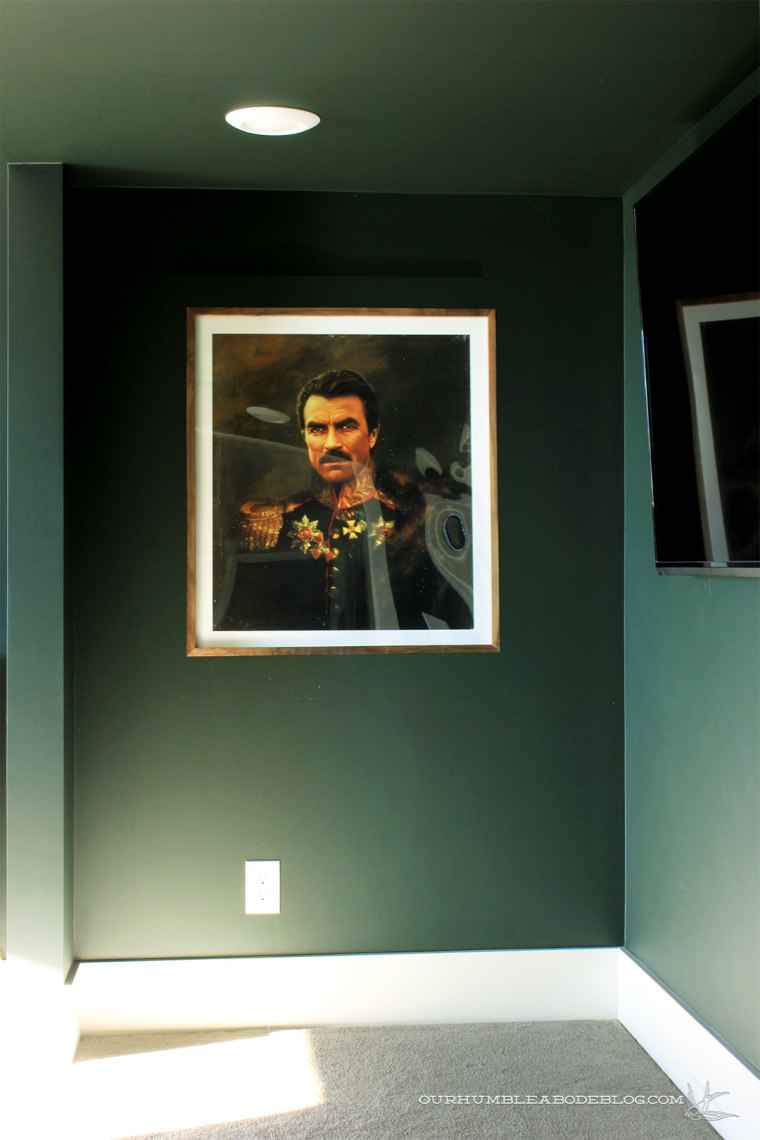
The print hangs in the theater room, directly in front of the room entrance.  I adore the combination of deep greens and walnut.

Walnut-Framed-Tom-Selleck-Print

Tom Selleck is a favorite in our house, and I like that it’s kind of movie themed without being too serious.

Walnut-Framed-Tom-Selleck-in-Theater-Room-Overall

The colors work really well with the room, and play well with the over sized engineer print.  What is your favorite way to frame/hang art?  While I love store bought frames, sometimes, they just won’t work.

Pool Liners and Water Colors

Though premature, I’ve begun researching pool liners as the liner we select will have a dramatic impact on our finished space.

New-House-Pool-Room April 13 2012

When we bought this house, the pool had an old, sagging, faded liner with a lovely border detail.  We were told the pool hadn’t been operational in several years, and as such, have never seen water in here.

New-House-Pool-to-House-April-13-2012

Not clean water, anyway.  Just stagnant green water that had dripped in through the then leaking roof, with a few dead mice, for good measure.

New-House-Pool-Tearing-Liner

Surely this pool was a vital selling point to most people.

Due to the way the pool was constructed, it requires a vinyl liner which I’m realizing are surprisingly difficult to shop for.  Maaaaybe even more difficult than rug shopping, because the commitment is even greater.  Once finished, the walls and ceiling of this space will be a crisp white, with a black slate floor.

Pool-House-Plywood-Hanging-Progress

If you’ve never shopped for pool liners, you are probably in the same mindset I was a few months ago.  It’ll be easy, like picking a paint color.  Boy is that wrong.  The liner color and pattern determine the water color and mood of the pool.

Fantastic Inground Pool Liners Design with Unique Shaped Decoration

Dark, saturated patterns will create a deep abyss looking pool, which we kind of already have considering ours is about 9 feet at the deepest point.  Deep colors also show color fading much quicker, whereas light colors absorb sun less and don’t fade as quickly.  For our space, I’ve always imagined a light water, similar to a full bath.  After a lot of online searching, I’ve found our winner:

AQUARIUMLINER

It’s fun, whimsical, and I love the idea of swimming along a coral reef without leaving my home.  Haha, actually, I want something a bit more simple than that, which is why I’ve settled on this:

Royal Dolphins

What can I say, dolphins just really do it for me?!   That’s a big fat lie, too.  It just seems the majority of pool liners are similar to mid 90’s decorating.  Bright, patterned, and theme-y, like the Tuscan vineyard kitchens or beach themed bathrooms complete with wall paper border.

Here are my liner requirements:

Light

Borderless

Small pattern

Not kitschy looking

This pebble look is okay:


Royal Pebble

Water/waves, not so much!

White Diffusion

Clearly fake mosaic border, nope!

White Santiago

A speckled terrazzo look however, checks all of the boxes, with a pattern that fades into the background.

White Terrazzo

It’s classic, yet modern and shouldn’t look too fake, even for a vinyl liner.  After lots of internet digging, I found a photo with the simulated water color on a similar liner design.

crystal-quartz-water-colour-liner-detail

Doesn’t this pool look spa-like tranquil, but still inviting?

fe9ddb81e0db6529cbb53bf67c729350

Now to turn my internet shopping into actual local shopping to make sure we can get the same thing (or something similar) and have it installed.

Installing a Vent Hood

Sometimes, when doing the same thing over and over again, you have to switch gears.  Though we don’t have much sheeting left to hang, over the weekend, Ben decided to hang install the kitchen vent hood.

Pool-House-Plywood-Hung-in-Kitchen

We bought this one over three years ago for our main kitchen, but after opening up the kitchen wall, I didn’t want anything blocking the new open feel.  Plus, we have a big whole house fan about ten feet away, so it seemed redundant.  Having purchased a 48″ wide DCS range off Craigslist for the pool house, we knew it would eventually be put to good use.

To install the vent hood, Ben first secured a 3/4 inch thick strip of wood at the vent hood back height.  There’s a little lip for the housing to rest on, making it a bit easier to screw into the wall.  While Ben held it in place, I screwed into the predrilled holes to keep it in place.  With the frame up, Ben installed the fan and duct work to get it all in working order.

Vent-Hood-Under-Side

The venting angles into the dead space between the main house and pool house roof lines before angling up and out the roof.

Pool-House-Kitchen-Vent-Hood-Overall

Next, we’ll build a frame around the hood and duct work, sheet over it, and paint it when we get to the walls.

Pool-House-Kitchen-Vent-Hood-Vertical

Everything is great, except the buttons on the front, which I had completely forgotten about as the fan had been in storage all this time.

Pool-House-Kitchen-Vent-Hood-Button-Detail

While not detrimental, the button placement does play into the walnut accent I want at the bottom of the hood.

Pool-House-Kitchen-Two-Shelves-Without-Backsplash

Ben and I discussed various options such as forgoing the walnut strip and leaving the front edge steel.  Or building the frame out around the hood, leaving a 1 to 2 inch gap to reach in a press the buttons.

Pool-House-Kitchen-Vent-Hood-Plan

Each option wasn’t perfect and had issues, so we’re planning the simplest: notching out the walnut strip around the buttons.  It’s not ideal, but a solution we can both agree on.  I know we have much more to complete, but I can’t help getting excited over the details that will finish off this space.

DIY Touches of Christmas

Tis the season of hope and the busiest time of year.  Between holiday traveling, gift buying/wrapping, holiday parties, school events, cold weather, and the usual daily chores, there’s a lot going on.  What should be the most wonderful time of the year can, in reality, become the most stressful time of the year.  Keeping our holiday decor simple and focused is a way I help eliminate some stress.

Christmas-Trees-Sign-Above-Mantel

Limiting the decorations to our living and family rooms, we have the holiday cheer, without an excess of clutter or decor to store the remaining eleven months of the year.

Christmas-Trees-Sign-with-Stockings-Detail

Following the same process as last year, I designed and hand painted a holiday sign to lean on our mantel.

a-thrill-of-hope-sign-from-side

In place of a festive quote, I came up with a Christmas Tree sale sign.  If you like the design, download this .pdf to print your own to display or use as a template to make your own sign.

Christmas-Trees-Sign

Simple trees fill in around the sides of the sign with our railroad spikes turned stocking holders.

Stocking-on-Mantel-Detail

Clearly I have a love for green throughout the year, so I took the opportunity to upgrade to new stockings.   Bringing the plaid down, I covered the chair pillow forms in left over fabric from the boys’ bedroom revamp.

Christmas-Trees-Sign-Overall

The green plaid tree garland from last year fits in perfectly.

Christmas-Trees-Sign-Side-Detail

Christmas-Trees-Sign-from-Living-Room

As for the living room, our tree proudly stands in the center window, in full street view.

Christmas-Tree-in-Living-Room-Window

In addition to the yearly silhouette ornament of the boys, our tree is decked out with home-made ornaments based on our summer travels.  Montana, of course.

Montana-Ornament

Minnesota:

Minnesota-Made-Ornament

Our neighboring state to the east that we make many drives through, North Dakota:

North-Dakota-Ornament

Wyoming:

Wyoming-Ornament

Jackson, tied with a ribbon from our tram wristbands:

Jackson-Wyoming-Ornament

South Dakota, though George Washington looks a little Hitler-esque with the nose shadow:

South-Dakota-Mt-Rushmore-Ornament

What is your holiday decorating approach?  Do you stick with a theme?

DIY Board and Batten, Step 1

In the last pool house update, I shared all of the details on the guts inside our walls: insulation, electrical, and a little bit of plumbing.

Pool-House-Insulation-Above-House-Door

With all of that important, but generally unseen business taken care of, we are able to start hanging our vapor barrier and sheeting.

Pool-House-Plywood-Hanging-Progress

To create the board and batten look, we’re using exterior grade A/C (one side is good A grade, the other a lesser quality, C) plywood as our base.  After, thin (1 1/2 to 2 inches wide) strips will cover the seams and nails.

Pool-House-Board-and-Batten-Design

Before installing, Ben meticulously measures all obstructions, then transfers the measurements to the sheet before cutting the sheet to fit.  Once cut, I hold the cut sheet in place, about an inch off the floor to prevent the plywood from wicking up water that will be on the floor.  A quick nail into a visible stud helps hold the board in place while we mark the stud placement across the panel.  Obviously, nailing into the stud is necessary to securely hang the sheet on the wall.  But it also ensures the nails will be hidden beneath our spaced batten strips.  Marking is made quick with an eight foot level and pencil.

Pool-House-Plywood-Marking-Studs

More nails along the pencil lines keep the panel firmly in place.

Pool-House-Plywood-Hanging-Detail

Installing the sheets isn’t difficult, just time-consuming thanks to the many necessary cuts around outlets, windows, and doors.  Particularly the kitchen wall, which had as many as seven cuts around objects in a single panel.  Careful measuring and marking of the sheet before hanging is crucial to keep the sheets as seamless as possible.

Pool-House-Plywood-Around-Kitchen-Shelf-brackets

Knocking out the most intricate pieces first makes the rest of the sheets feel easy by comparison.

Pool-House-Plywood-Hung-in-Kitchen

We’re continuing, working our way around.  In an effort to prevent as much waste as possible, we’re cutting pieces in strips to avoid big, unusable chunks taken from the windows.  The gaps below will get filled in with left over pieces cut from other areas like doors.

Pool-House-Plywood-Hanging

Essentially, we’re putting together a big puzzle, looking at each piece and how to best use it.  It might not look like much yet, but this is similar to the drywall phase of a project.  It’s the turning of the corner from “unfinished construction” toward “beautiful, finished room.”  Because the batten strips will terminate into the baseboard, we’ll have to tile the floors after hanging all of the sheeting.  Big, exciting things coming up!