A Makeover Under $75

In 2013, we took a few days to show the boys’ bedroom a little love.  We started with a blank beige box.

New-House-Boys-Bedroom-April-13-2012

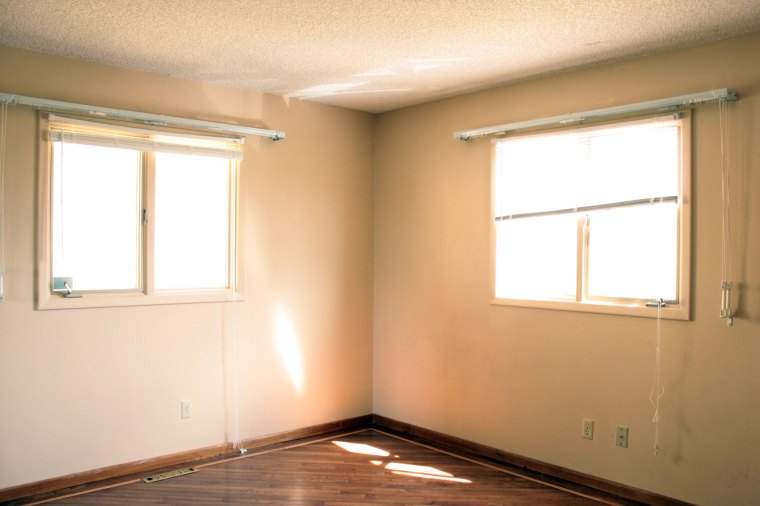
While installing new windows throughout the home, it changed ever so slightly, and I was in the planning process.

Boys-Bedroom-Before

When the time came to get serious, I scraped popcorn off the ceiling and smoothed the ceiling out, Ben installed new trim.  Together, we built a pair of beds and painted the walls a fun yellowy green color the boys picked.

Boys-Bedroom-with-Large-Rug-from-Door-Wide

For four years, it was a fun, happy room that we all liked.  More recently, it has felt a tad too young for our growing boys, but the main elements were all still a good fit.  Fresh paint, new art, and pillowcases made for a quick refresh that didn’t break the bank.

Boys-Bedroom-Painted-Vintage-Vogue-Overall

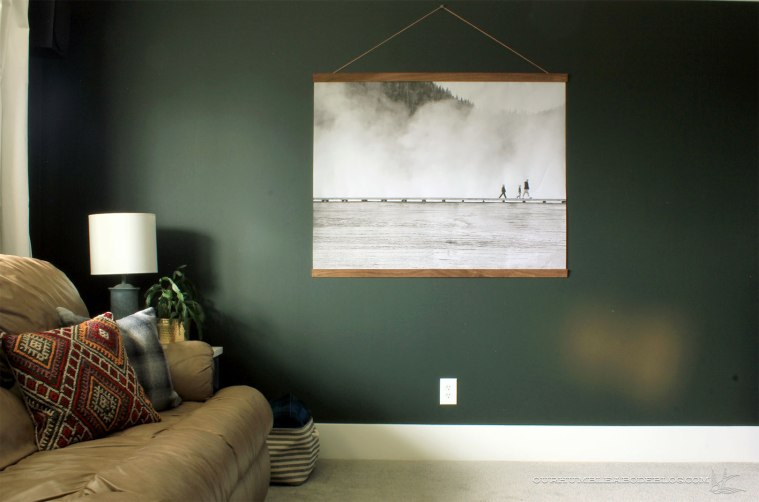
One look at our house and it’s obvious I love green, so it shouldn’t come as a surprise that I chose Vintage Vogue from Benjamin Moore to splash on the walls.Boys-Bedroom-Painted-Vintage-Vogue-Right-Side-Vertical

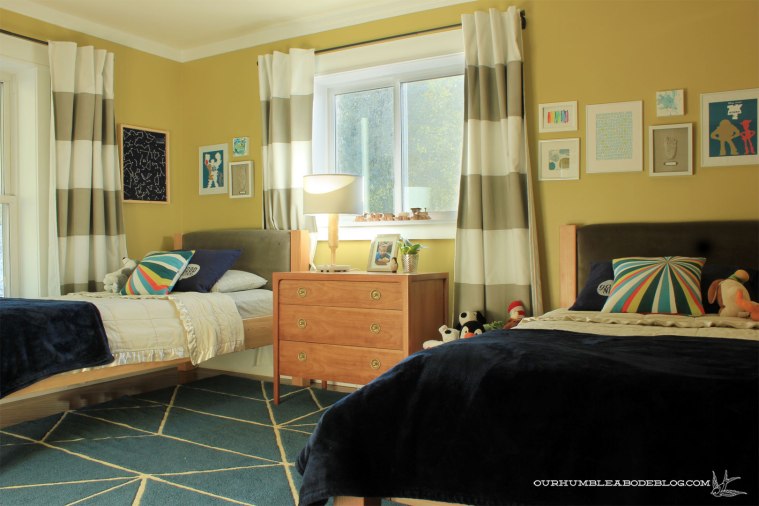
It’s a deep green with a slight blue tone that plays well with the blue rug and blankets; wood tones pop against it.

Boys-Bedroom-Painted-Vintage-Vogue-Bookshelf

After the paint was dry to the touch, we moved the furniture, snugging the right bed closer to the dresser to match the left.  Now that our boys are older and we don’t have the worry they’ll roll out of bed, it seemed best to center the beds on the off-center window.  I called the boys in and showed them the updated room and they were thrilled with the color and new bed placement.  At least until bed time, when they asked for it to be moved back against the wall.  So, we’re back at the only layout that works for this room.

Boys-Bedroom-Painted-Vintage-Vogue-Overall-Side

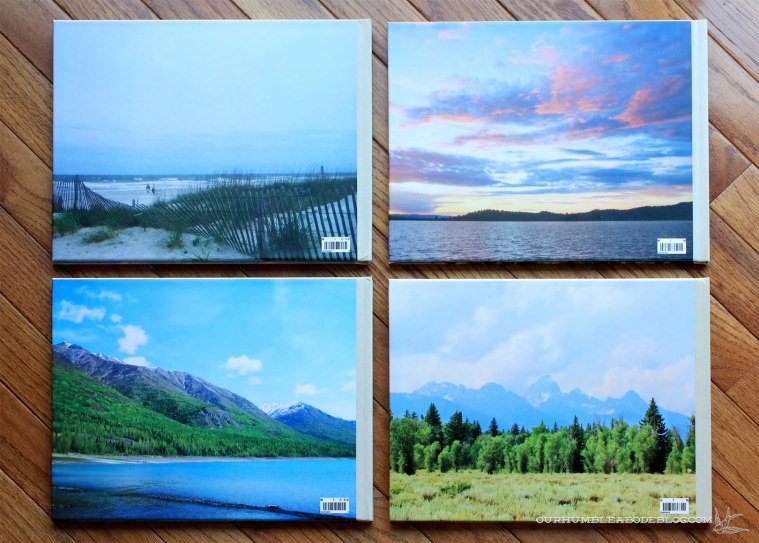
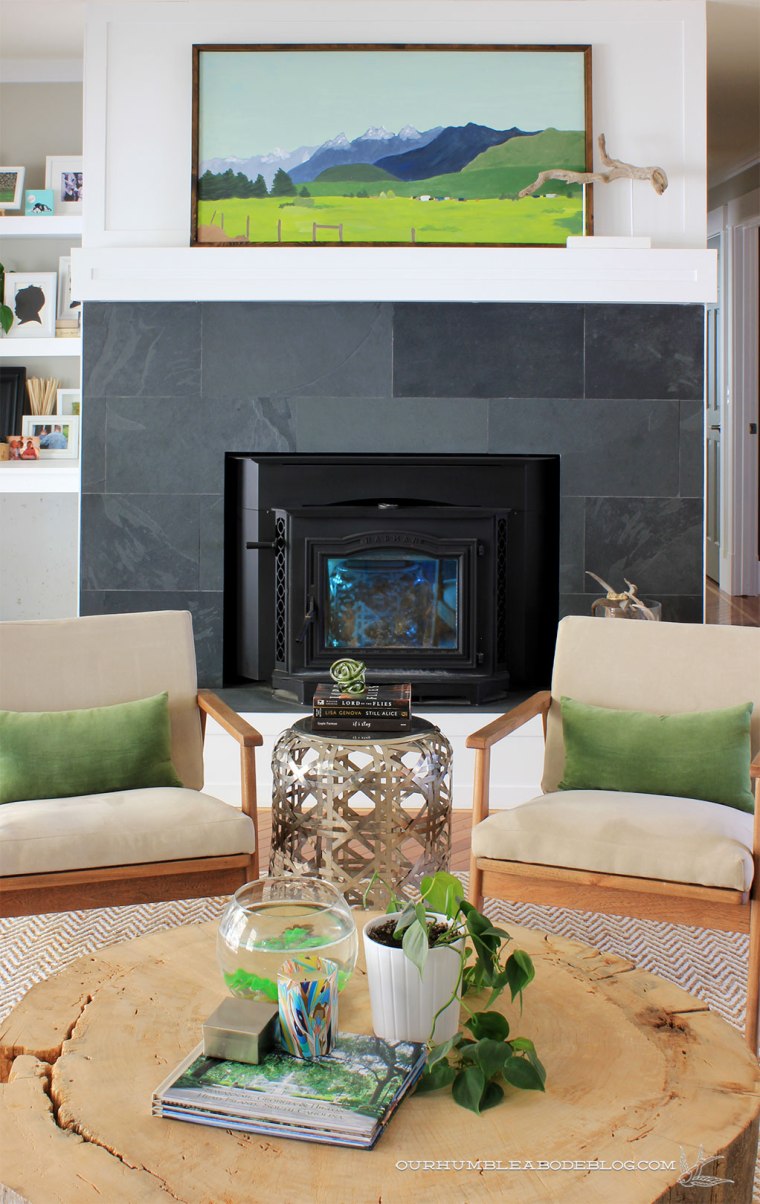
Due to the bed placement, same sized art isn’t an option.  Instead, I took inspiration from the theater room art and made two engineer prints, one with each boy nestled amongst beautiful scenery.

Boys-Bedroom-Painted-Vintage-Vogue-Bed-Detail

Boys-Bedroom-Wide-Side

To give their beds a fresh look without buying all new bedding, I pulled out two king pillows to fill the width of the bed.  Two striped pillowcases that came with the basement sheets make up the base layer.

Boys-Bedroom-Painted-Vintage-Vogue-RIght-Side-Detail

I couldn’t find pillowcases in stores or online that I liked, so I stopped into Joann fabric and found a green, black, and white plaid that feels both boyish and updated.  Buffalo check fabric from Hobby Lobby now covers the accent pillow, because it’s just hard to go wrong with buffalo.

Boys-Bedroom-Painted-Vintage-Vogue-Bedding-Detail

Across the room, between the bedroom entrance and the closet, we filled a thrifted printer style tray with Lego minifigs.  The tray is still within their reach, but holds their favorite characters.

Boys-Bedroom-Painted-Vintage-Vogue-Lego-Shelf-Detail

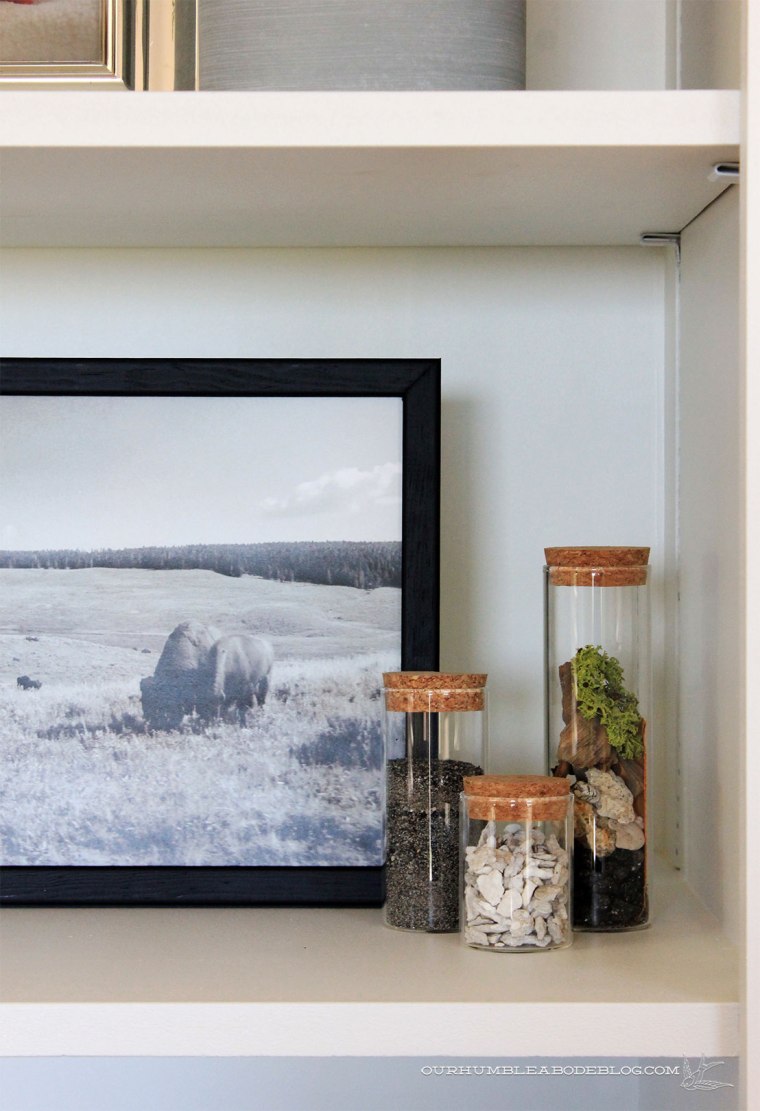
First initial letters, a sign picked out at Yellowstone, and a race ribbon are all items that have personal significance to them.  With only $30 and a day spent to clear the room, fill nail holes, tape, edge, and roll, paint always give the most bang for your buck.  Fabric for the pillow cases and accent pillows cost $20 total.  The hanging engineer prints cost about $15 to make both, bringing the total for this room to a whopping $65.

Importance of Insulation

Bit by bit, progress is happening in the pool house and we’re this close to being able to close up all of the walls.  If you’re feeling like we’ve been working on this forever, you’re not alone.  Officially, we started late last year on the ceiling, which was a task and a half.  Though the rest of this room is relatively accessible, the peaks via ladder, we still have dozens of steps to tackle.  And that’s just the walls and the stuff inside.

Creating beautiful rooms is only half the battle.  Creating functional and efficient spaces is the other half.  The far less glamorous, ugly, tedious, and often underappreciated half.  Right now, we’re still in the ugly phase, but hope to create something beautiful soon.

In the five and a half years we’ve lived in this house, the pool never functioned.  Which is a big reason we were able to scoop this house up for the price we did.  Because the pool doesn’t work, we shut off  all the water, hoarded building materials, and never have heated this space.  It’s large, about 1,600 square feet with 14 foot vaulted ceilings.  The majority of the north and west walls (straight ahead and right in the photo below) are concrete foundation due to the steep slope of our lot.

New-House-Pool-Room April 13 2012

When our house was built in the 70’s, it was typical to build a wood framed wall atop the foundation and fir out the foundation with 2 by 2 inch wood strips.  Essentially, there’s a thin sheet of insulation and that’s it.  Actually, you can see a little bit at the bottom of the left wall in the photo below:

New-House-Pool-to-House-April-13-2012

I guess what I’m trying to say is, this room as it was before, was about as efficient as a cardboard box.  And what’s the point of having an indoor pool if it’s impossible to heat the space to a comfortable swimming temperature in the cold months?!

To achieve that, we’ve framed in new 2 by 4 inch walls, tucking insulation between the old and new.  Above the foundation, there’s space for another sheet because we’ve eliminated the half wall step.

Pool-House-Insulation-by-Window

Our new electrical  runs behind the new studs, then Ben adds another sheet of insulation inside each stud bay.

Pool-House-Insulation-Inside-Studs

Each 2 inch thick Polyisocyanurate foam sheet has an R value of 13.  (R value is the resistance of heat flow through a given thickness of a material.)  By doubling, or in some areas, tripling the insulation, we have a total R value between 26 and 39.  Fiberglass batts have an R value ranging from 2.9 to 3.8 per square inch.

Pool-House-Insulation-Above-House-Door

Back in 2014, before we installed our new siding, we took similar steps to insulate the exterior of our home.  Then, when we remodeled our basement two years ago, we followed the same steps I described above.  Immediately, we noticed the house maintained temperature much easier, keeping cool in the summer and warm in the winter.

In the pool space, we (let’s be honest, it’s all Ben), have one more section of wall to insulate. We had already completed the front wall, so we took a break from the tedium of insulation to start hanging the 4 by 8 foot sheets of exterior grade plywood.

Pool-House-Insulation-and-Sheeting

To complete the board and batten wall treatment, we need a durable backing that can perform in this wet environment.  Hanging the sheets requires marking the 8 inch spacing of the future batten strips, nailing in place where the strips will hide the nails.

Pool-House-Sheeting-2

Each sheet hangs 1.5 inches above the floor, to prevent the sheets from wicking up any water near the wall.  Baseboards will cover the gap and thin boards will follow the edge of the ceiling.

Pool-House-Sheeting

Another horizontal band will line the room at the 8 foot mark, covering the joint of the sheets.  Something along the lines of this, but you know, real:

Pool-House-Board-and-Batten-Design

As usual, there are many steps we need to take before we can get to that point, so we’ll keep working and I’ll keep you posted.

DIY Halloween Costume Ideas

Each Halloween, our boys tell us what they want to dress up as, and we’ve had adorably kooky ideas throughout the years.  And each year, I do my best to turn their ideas into reality, and this year was by far my most time-consuming adventure.  This year one wanted to be a bag of Skittles, then the other asked to be his favorite candy, a Milky Way.

Skittles Bag

Naively, or stupidly, I thought they’d be quick to make.  I wouldn’t say difficult, but I would say time-consuming.  Drawing the lettering, cutting the felt, then hand stitching on the small details before using a sewing machine for the bigger details all took a decent chunk of time.

Skittles-Costume-Making.jpg

And the entire dining table while getting everything ready.

Halloween-Costume-Making

After multiple days of intermittent work, both costumes are completely done, and we have two happy boys.

Skittles-Costume

The goal:

Milky Way Bar

And the reality:

Milky-Way-Costume

Our Milky Way has a hard time not talking while getting a picture taken, hence the not-quite-a-smile smile.  Ben thought I was certifiable for adding the lettering shadows and the registration mark, but I’ve always cared about the tiny details.

If your Halloween costumes are still up in the air, there’s still time!  Here are our past years of costumes, all DIY, to get the creative juices flowing.  We have a Minecraft Zombie and Steve:

Minecraft-Zombie-and-Steve-Costumes

A Lego brick and light switch:

Lego-Block-and-Light-Switch-Costumes

A 9 volt Duracell battery and rain cloud with rainbow:

Battery-and-Rain-Cloud-Costumes

A Rubik’s cube:

Rubiks-Cube-Costume

And a yellow Angry Bird:

Angry-Bird-Costume

A stop light (and Thor but he was too blurry):

Stop-Light-Costume.jpg

A credit card:

Credit Card Costume

And finally, baby Hulk Hogan:

Hulk Hogan Costume

Wishing everyone a fun and safe Halloween.  May your kids get plenty of your favorite candy that you can sneak while they sleep.

Planning for Electrical

You may have noticed that we’ve been plugging away on the pool house projects.  It’s far from speedy progress, but so far we’ve covered the ceiling in tongue and groove planks and painted it white. We followed that up by widening the door connecting the main house and pool, tore up the old outdoor carpet, and broke up the original tile.  Other than planning for the pretty finishes for the main space, as well as the bathroom and kitchen areas, we’re still in the ugly, dirty stage of remodel.  Each finished task feels like a victory right now, so wrapping up the additional framing and electrical allows us to move forward to insulating.

Bathroom electrical included installing a new bath fan, venting it to the exterior (and not just the attic space).  Two sconces flank either side of the (future) bathroom mirror.  A horizontal 2 by 4 wall allows us to hide the plumbing in the wall, which was hidden in the cabinet before.

Pool-House-Electrical-Bathroom

Hidden plumbing is necessary for our open vanity plan:

Pool-House-Bathroom-Vanity

On the other side of the bathroom wall, the working part of the kitchen has outlets and wiring for under shelf lighting.

Pool-House-Electrical-Kitchen-Side

The guts are all in place to create this set up:

Pool-House-Kitchen-Two-Shelves-Without-Backsplash

Directly across from the range wall will be a kitchen seating area, complete with sconce boxes for accent lighting.

Pool-House-Electrical-Kitchen-Bench-Side


Due to the six-foot square skylight above, an overhead light isn’t possible, but we didn’t want to rely strictly on the recessed ceiling lighting.

Pool-House-Electrical-Below-Skylight

A 17″ tall bench will line the left and back walls, so our outlets are placed just above, if someone wanted to plug-in a phone or computer in this area.

Pool-House-Electrical-Bench-Side

At the far back corner was an in ground hot tub, but it hadn’t worked in at least 15 years.

New-House-Hot-Tub-April-13-2012

Knowing how plumbing can fail, we opted to remove the old tub and instead will replace it with a standalone unit.  A pair of outlets designated for the future hot tub plug-in are at the bottom of the back wall.


Pool-House-Electrical-Hot-Tub-Area

Another pair of sconces will softly light this area.  Determining placement was interesting because of the height of the window in this area.

Pool-House-Electrical-Hot-Tub-Side

Everything that goes on inside the walls is incredibly important for the function of the room, but are easily taken for granted once closed off.  I’m hoping we can cruise through the insulation installation and start closing up the walls with our exterior grade A/C plywood.  From that point on, progress will be much prettier and far more noticeable.

Coffee Table Photo Books

Obviously, based on the content of this blog, it’s clear Ben and I devote a large amount of time (and money) to fixing up our home.  We’ve made it our financial priority to fix up and pay off our home as quickly as possible.  To do so, we do sacrifice expensive family vacations, with the hope that as our kids get older, traveling will be easier, more enjoyable, and they’ll actually remember the trip.  On our previous travels, I have purchased a coffee table photo book of the area we’ve visited.

With that said, in August, we took a family trip to Yellowstone and Grand Teton National Parks.  It was a week of camping, sight-seeing, and about 1,000 photos taken.  Yes, I have an addiction, but it’s easier to take more and delete later.   Upon returning home, I loaded the photos on my computer and picked out my favorites.

Shutterfly-Travel-Book-Photos

I enlarged one and turned it into art for our basement theater space.

Theater-Room-Engineer-Print-Overall

Another sits in a DIY frame on our entertainment center shelf.

DIY-Light-Weight-Frame-Finished-Detail

Two down, only 998 left to get out of my computer and into regular view.  I didn’t buy a photo book while on vacation, as I planned to create our own, using our photos and memories.  After some research, with a coupon in hand, I ordered a photo book through ShutterflyNo, this is not a sponsored post; I purchased the books with my own money and simply love this product.

Shutterfly-Travel-Book-on-Entertainment-Center

After loading my edited photos into my project, I set about creating a design with few words and as many photos as possible.  To create as professional looking book as possible, I picked one picture to fill the front and back covers.

Shutterfly-Travel-Book-Design-Advanced-Editing

Using Photoshop on a near daily basis, I didn’t like how limiting the standard editing mode was, so I switched to Advanced Editing.  From there, I stretched the photo to cover the entire front.

Shutterfly-Travel-Book-Design-Front-and-Back-Covers-Sizing

A simple title in a coordinating color overlays the pale sky of the photo.

Shutterfly-Travel-Book-Design-Front-and-Back-Covers

Shutterfly offers a wide variety of page layout options, but again, I found some to be limiting to photo orientation.  I found it easiest and quickest to load the photos chronologically onto each page, grouping based on the site location.

Shutterfly-Travel-Book-Design-Load-Photos.jpg

Before arranging the images, I first filled all 20 pages with pictures so I knew they’d all fit in my book.

Shutterfly-Travel-Book-Design-Photos-Sizing

I found it so easy to arrange photos, as the software keeps the photos in the proper proportions.  In some cases, I stretched a vertical photo to fit my layout or zoom in on an interesting area.

Shutterfly-Travel-Book-Design-Photos-Adjustment

Once arranged, I selected a hard cover upgrade and submitted my order.  Having never ordered a photo book before, I waited until this one arrived to assess the quality and my feeling about it.  When it arrived, I tore open the box and flipped through the book.  I loved it, but wished I upgraded to a matte cover.

Shutterfly-Travel-Book-Gloss-Cover

Ben loved it, the boys loved it, so I went through photos from previous vacations and ordered three more, this time springing for the matte covers.

Shutterfly-Travel-Book-Matte-Cover

It’s a subtle change, but does feel much higher in quality.

Shutterfly-Travel-Books-Front-Photos

For a cohesive collection, I chose the same spine, fonts, and filled the covers with a single large photo.  The backs are single images as well.

Shutterfly-Travel-Books-Back-Photos

This stack lives on our stump coffee table in the family room, readily available to flip through.

Shutterfly-Travel-Book-Stack-on-Coffee-Table-2

Shutterfly-Travel-Book-Stack-on-Coffee-Table

As the saying goes, “a picture is worth 1,000 words” so I kept the text brief with only a location and date.

Shutterfly-Travel-Book-Photo-Layouts-Detail

At first, I worried the 8 by 11 book size would make the images too small, but I’m thrilled with the size.  By enlarging favorite photos and keeping the supporting photos smaller, it’s a great balance.

How do you deal with the photos you take?  It’s sad, but so many great photos sit on our computers, forgotten about for who knows how long.