Tips for Cutting Marble and Placement of a Wall Faucet

Between several projects this weekend, Ben made time to cut the marble remnant we picked up in January.  At roughly three feet wide by 50 inches tall, the size was perfect for our half bathroom counter and a slab back splash.  It wasn’t in perfect condition, with blue tape and a red circle noting scratches or tiny surface chips.

Pool-House-Bath-Marble-Slab

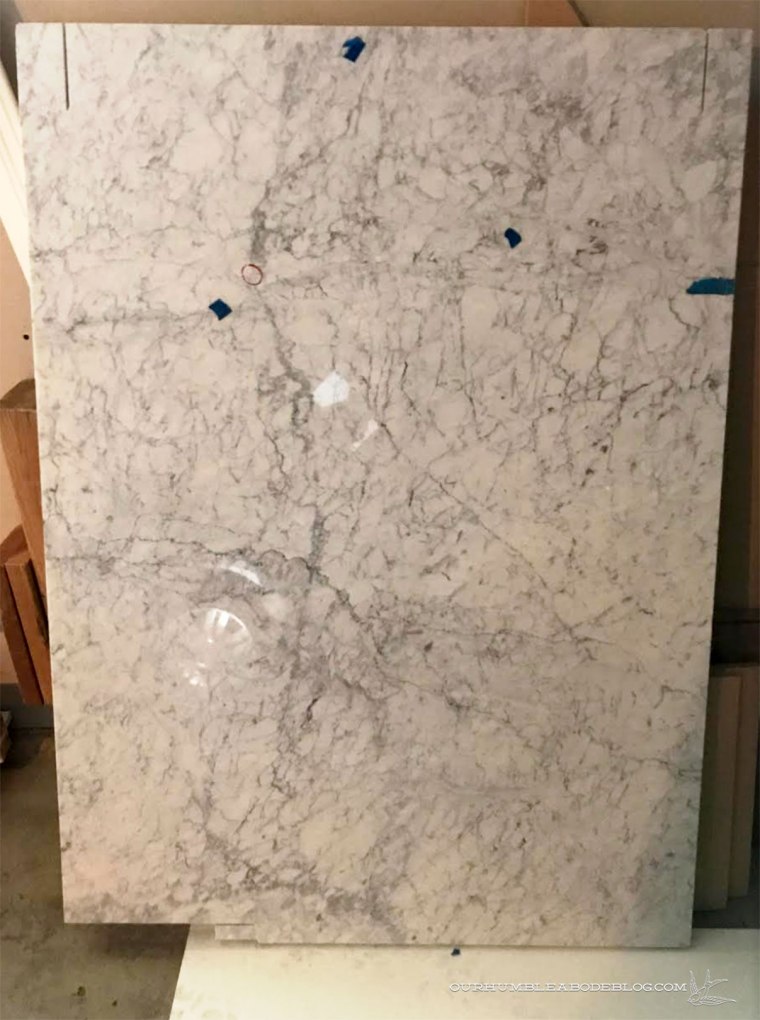
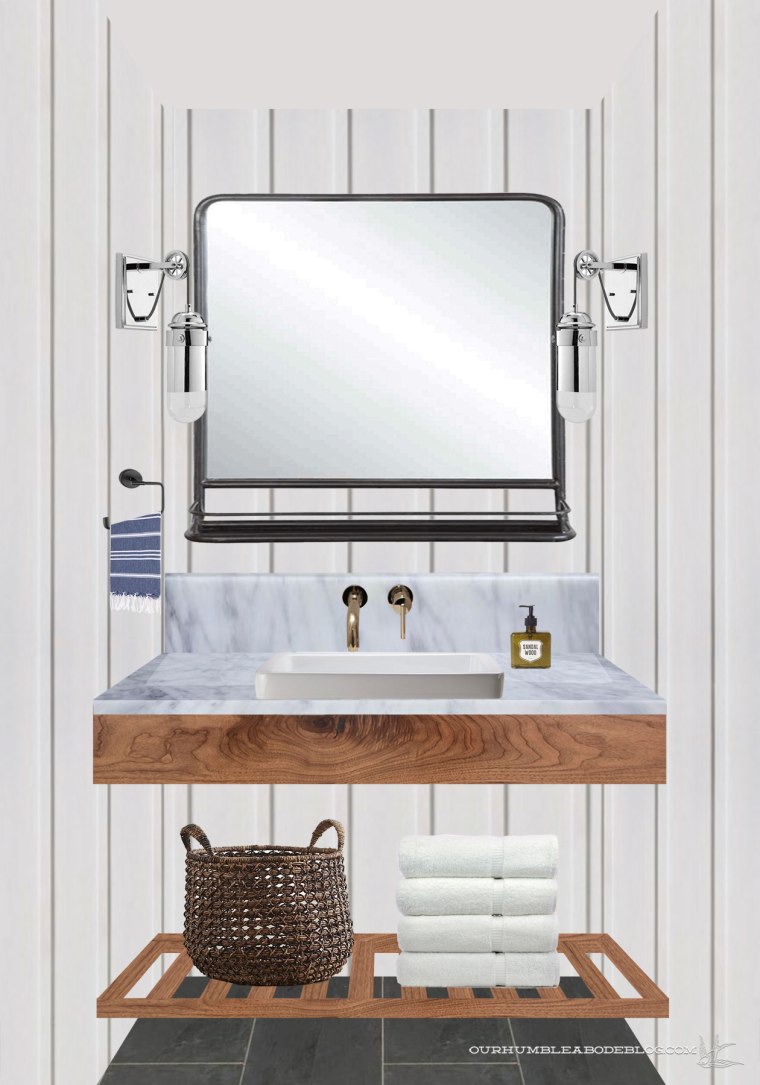
Even so, we knew we could make it work.  Before we could even get to the install point, I did a lot of measuring and number crunching to determine the faucet placement.  This is the first wall mount faucet we’ve installed, and it’s an entirely different process.  With a traditional deck mount faucet, you only need to know how many holes (1 to 3) and whether it’s mounted to the counter or the sink.

Our Humble Abode Blog Master Bathroom Vanity

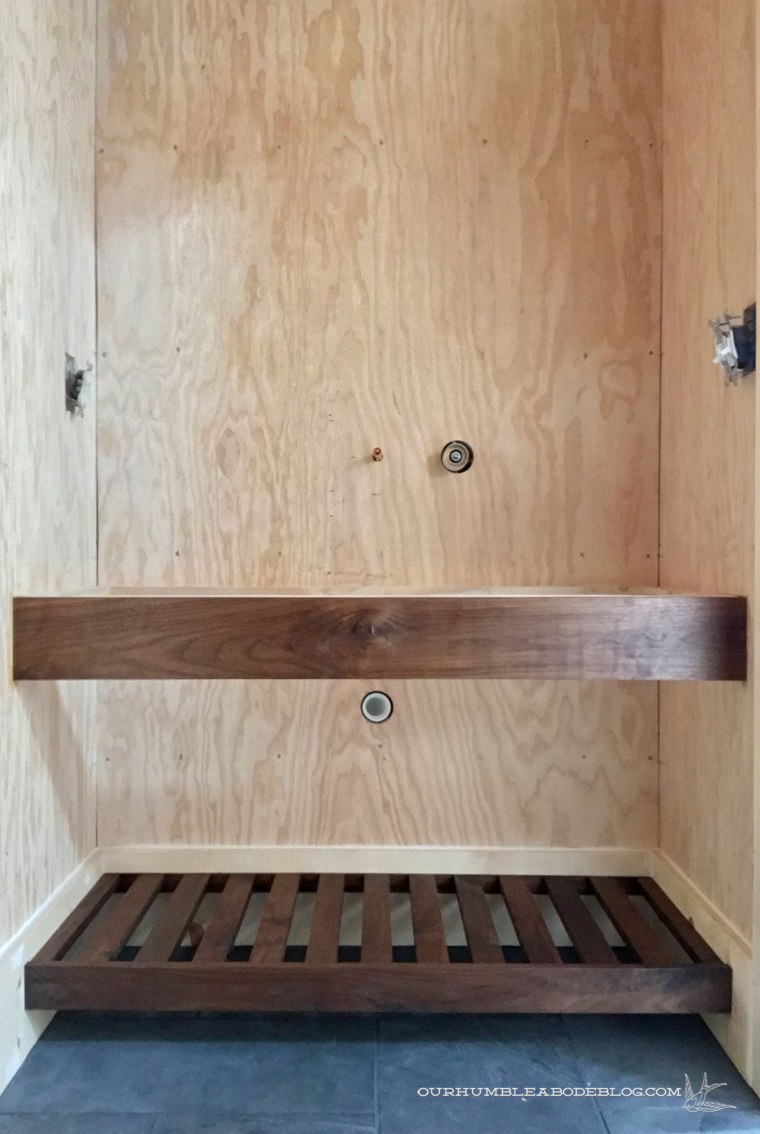
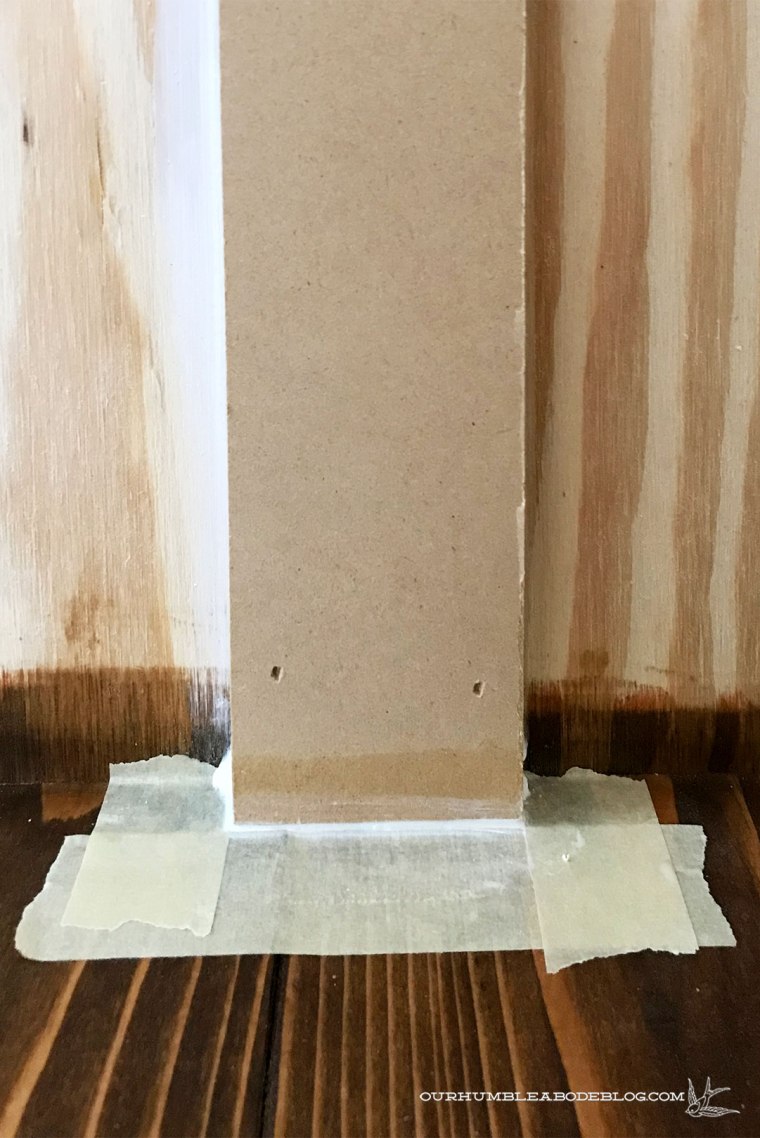
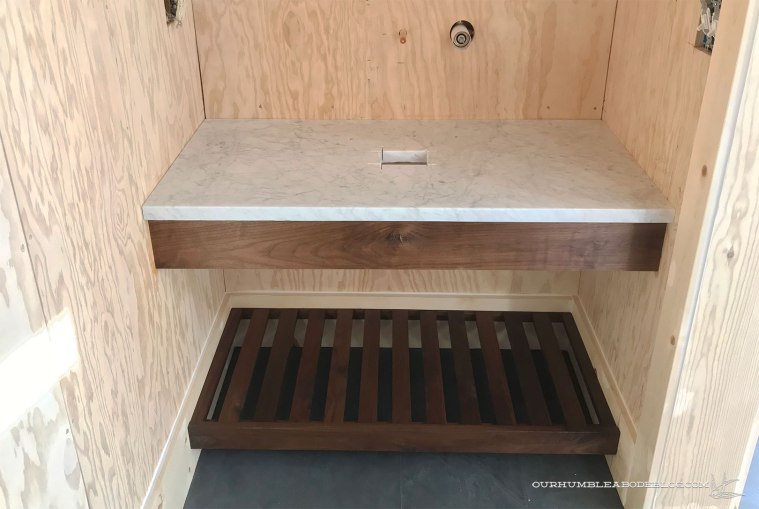
A wall mount faucet is more like a shower control, hidden in the wall, so the height of every element determines the faucet height.  To place our faucet, we had to determine: the gap between the floor and shelf+the space between the shelf and walnut band+the height of the wooden walnut+the counter thickness+the sink height+the space between the top of the sink and bottom of the faucet spout.

Pool-House-Bath-Determining-Wall-Faucet-Height

It was a lot of marking on walls, mock hand washing, and heaps of second guessing.  Once closed up, that’s it.  No changes from there on out, so no pressure.

With the vanity frame built, we got started on the marble.  Using a masonry blade in a circular saw, Ben cut the marble pieces to size as well as a rough square for the sink drain.  The sink hides it, so it didn’t have to look good.

Pool-House-Bath-Marble-Counter-Installed

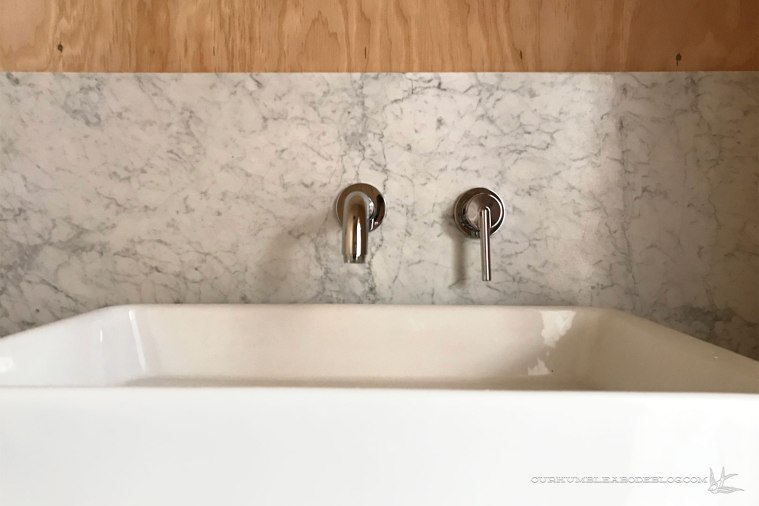
The back splash was a bit trickier, as we had two holes to cut and very little wiggle room.  And no material for a re-do if it was wrong.  Ideally we would have used a diamond tip hole saw, but didn’t have one in the two sizes we needed.  We made do with a standard hole saw, which worked fine, but took a little longer.  After a test fit, it wasn’t quite perfect, so Ben made slightly wider holes.

Pool-House-Bath-Marble-Backsplash-and-Sink-Installed

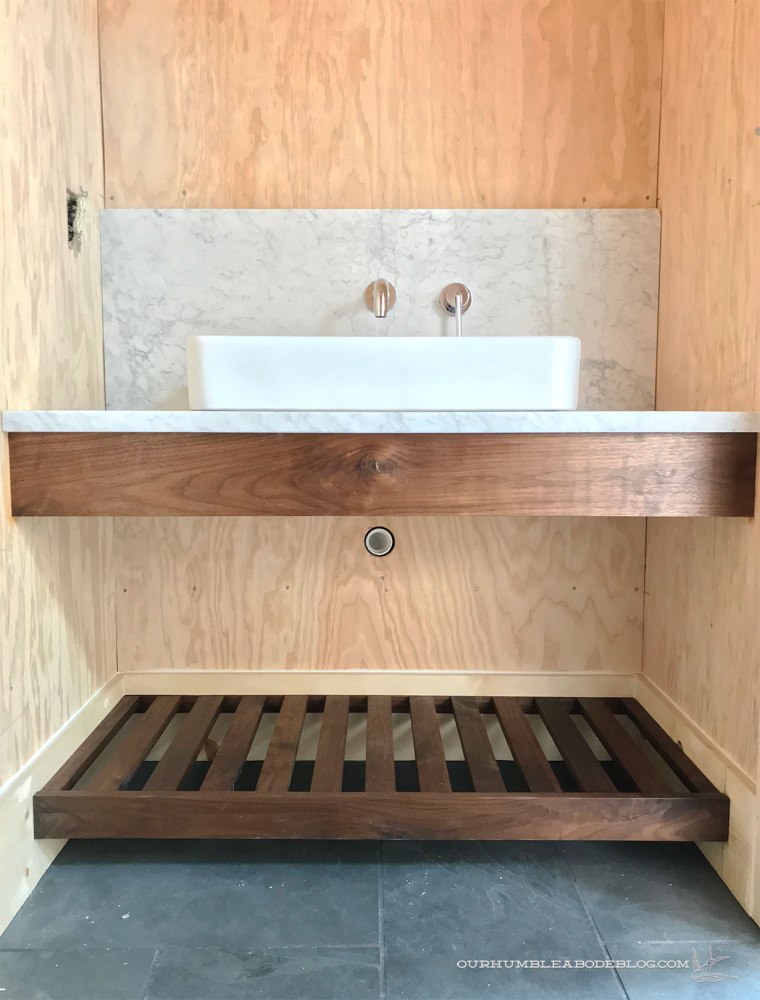
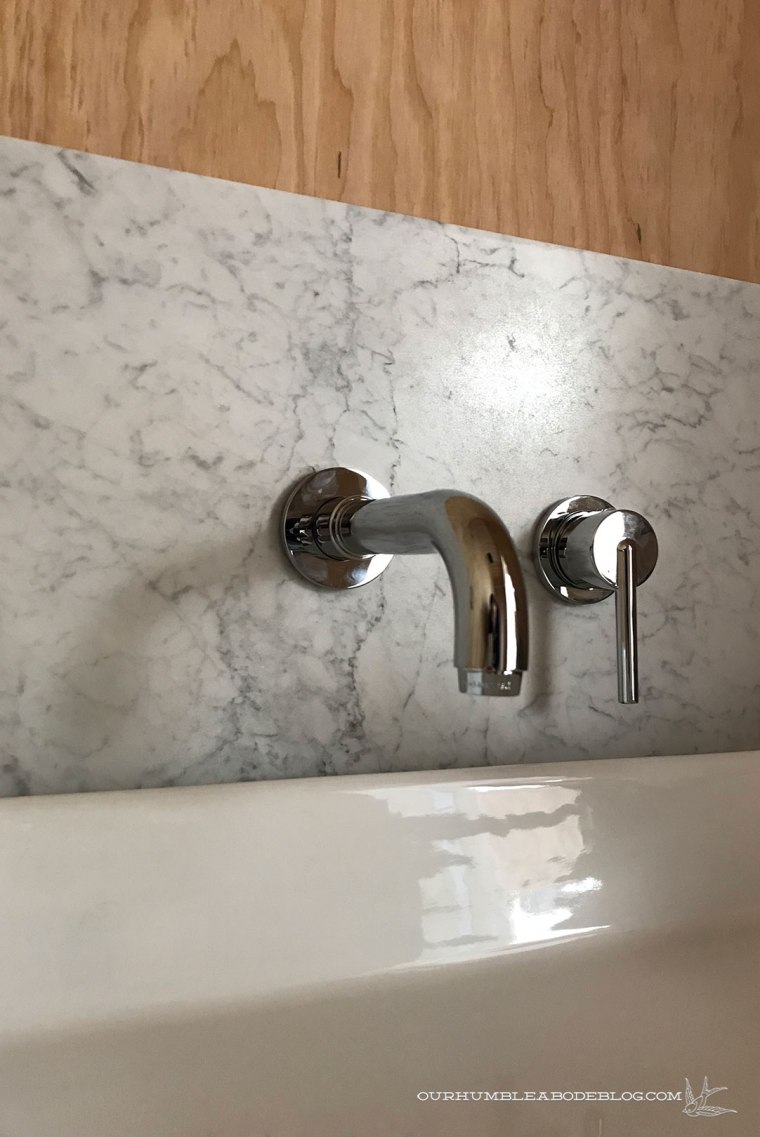
Second time was the charm and he installed the spout and handle to finish it off.

Pool-House-Bath-Marble-Backsplash-Installed

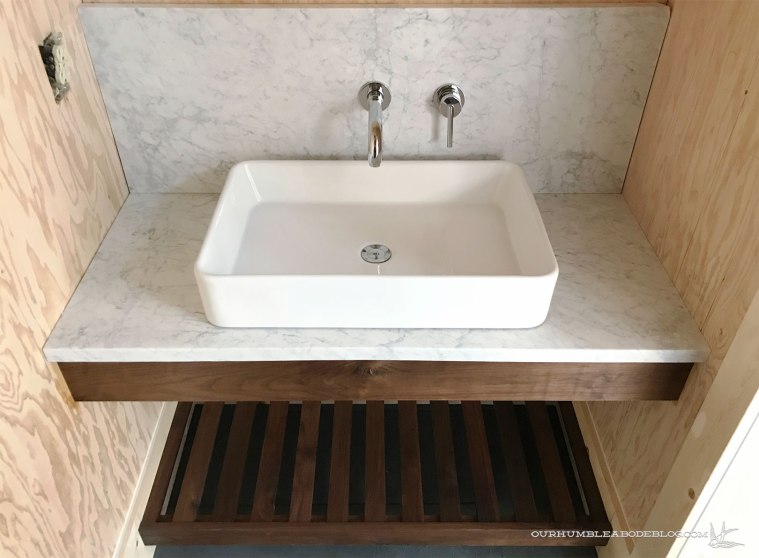
With the counter top cut, we had just over 16 inches of marble left.  We decided to use the rest to create an over-sized, statement making back splash.

Pool-House-Bath-Marble-Backsplash-Sink-Detail

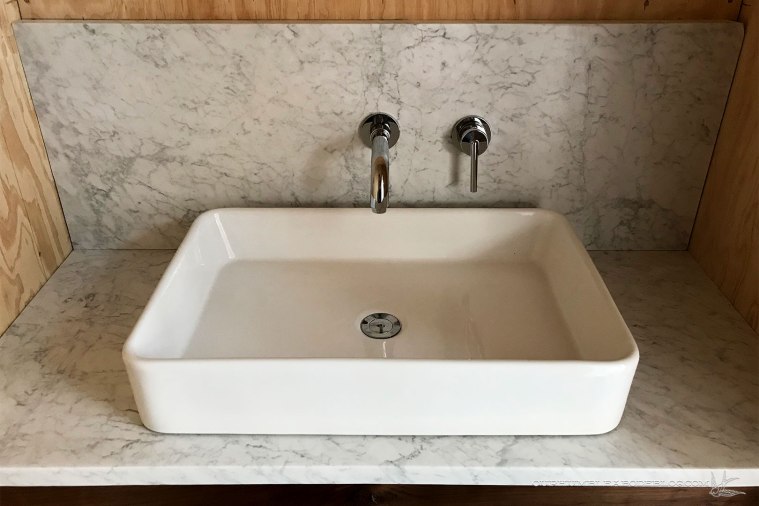
Between the sleek faucet and the extra tall slab, this should be a breeze to keep clean.

Pool-House-Bath-Marble-Backsplash-Faucet-Detail

That’s all great, but how did we hide the scratches?  I’m glad you asked!  I love the look of honed marble, so we sanded the entire surface, first with 60 grit, followed up with 120 grit paper.  It takes off the sheen and makes any imperfections nonexistent or noticeable only if pointed out.

Pool-House-Bath-Marble-Backsplash-Sheen-Detail

I can’t help wandering in and sneaking a peek.  It’s just as beautiful and luxurious as I’d hoped it would be.

A Glass Bathroom Door & Walnut Vanity

We started off our pool house remodel with a half bath between the house entrance and the bar space.  It had a narrow swinging door that forced snugging against the vanity just to close it.  The bathroom itself was dark, in part because of dark wood clad walls, but also from a lack of natural light.

New-House-Pool-to-House-April-13-2012

Our remodel plans included adding wider doors to the bathroom as well as the house.

Pool-House-April-Progress-Bathroom-Door

A six-foot wide sliding glass door now connects the house and this space.  When I proposed using the previous swinging glass door for the bathroom, Ben gave me a funny look.  I continued with my rationalization that I’d like a way to get natural light into the small space, and the glass door, with the addition of frosted film, was perfect.  This gave us a wider opening, and with a pocket door, a more user-friendly function.

Pool-House-Kitchen-Shelves-and-Pocket-Door

Adding a pocket door in a 2 by 6 framed wall is easier, and sturdier, than in a 2 by 4 wall.  Placing 2 by 4 boards flat on either side of the pocket area, with the track installed, makes a rigid wall.

Pool-House-April-Progress-Kitchen-and-Doors

Ben installed trim around the door frame to finish it off, with little brackets at the bottom to keep the door in line.

Pool-House-Bathroom-Pocket-Door-Base

I ordered a round locking pocket door handle to fill the hole from the previous knob.

Pool-House-Bathroom-Pocket-Door-Handle

Obviously, a clear glass door doesn’t give privacy for a bathroom.  We called a local glass company and asked for pricing on frosting a tempered glass door.  I don’t remember the price, but it was really reasonable.  However, they said there’s a 50/50 chance the process of frosting the tempered glass would shatter it.  We decided to play it safe and chose a frosted window film instead, applying it to the bathroom side of the door.

Pool-House-Bathroom-Pocket-Door-Frosting-Film

It obscures really well, unless someone is standing within inches from the door, but still lets light flood in.  With the door in place, we turned our attention to building the vanity.  My plan included a floating slatted shelf with a wooden band across the top.

Pool-House-Bathroom-Vanity

When building something, Ben always plans for MWS: most weight scenario.  To support the front of the shelf enough for a kid, or grown man, to stand on, Ben ran a steel pipe across the front of the shelf, drilling through the baseboard and wall for it to rest on the wood.  A cut piece of baseboard serves as a rest/support along the back.

Pool-House-Bath-Vanity-Bottom-Shelf-Spacing

Constructing the shelf was a pretty simple process.  A 2 1/2 inch thick face, a 1 inch wide strip (to cover the top of the pipe), 2 inch wide slats, and a 3/4 inch thick strips for the back.  We started at the center and used a 1 1/2 inch spacer to keep the width even.

Pool-House-Bath-Vanity-Building-Shelf

A dry fit run to make sure it fits before adding the final two strips along the sides.

Pool-House-Bath-Vanity-Bottom-Shelf-Set

Another cut piece of baseboard follows the top of the shelf, creating a nook for the shelf to rest in.  It also keeps the shelf removable for painting.  To support the vanity top, a wooden frame lines the walls, with a four-inch board along the front.

Pool-House-Bath-Vanity-Frames

With the walnut sanded, attached, and oiled, it’s a thing of beauty.

Pool-House-Bath-Vanity-Oiled

Keeping this space clear of unnecessary junk is important, and cabinets tend to become a catch-all for lotions and potions.  A single shelf allows room for a basket of toilet paper and a first aid bin.  Clearly, it didn’t take me long to test things out.

Pool-House-Bath-Vanity-Bottom-Shelf-With-Basket

Seeing the vanity peeking out has me excited to get the marble top in place and install the rest of the batten strips.

Pool-House-Bath-Vanity-Shelf-Installed

I’m still caulking away my spare time, but adding these finished elements is really making the end of this gigantic process seem within reach now.  There is light at the end of the tunnel.

Floating Walnut Shelves

Exactly six years ago, also on a Friday the 13th, we officially became owners of this place we call home.  Throughout that entire time, we’ve updated the house, room by room, step by step.  Six years in, we’re nearing the end of our single biggest and last(!?!) space, the pool house.  After slowly rebuilding the bones, we’re getting to the point where fun finishing elements are going in.  One area that saw action this weekend is the kitchen, that started off life as a closed off three step raised wet bar.

New-House-Wet-Bar-April-13-2012

We removed the platform to keep an open flow, both inside and out onto the deck.  For maximum entertaining, we’ve opted to add a range with floating shelves on either side.  Something like this:

Pool-House-Kitchen-Vent-Hood-Plan

When Ben builds something, he builds it to withstand the weight of a large quadruped.  These shelves are no different, with a frame work of welded steel brackets, secured into the studs.

Pool-House-Plywood-Around-Kitchen-Shelf-brackets

A 48 inch wide vent hood provides ample ventilation.

Pool-House-Kitchen-Vent-Hood-Overall

With a custom cover, it’s large and in charge, anchoring the wall.

Pool-House-Slate-Tile-at-Stove-Side-of-Kitchen

Over the weekend, we built the walnut shelves and all of a sudden, things are taking shape.  Between the steel bracket, Ben added 3/4 inch thick strips of wood to serve as a spacer.

Pool-House-Kitchen-Walnut-Shelves-Install

Then a piece of walnut plywood covers the top and the bottom, with recessed lights tucked in the bottom panels.

Pool-House-Kitchen-Walnut-Shelves-Installing-Three

Pool-House-Kitchen-Walnut-Shelves-Installing-Four

Solid walnut strips cut to 2 inches wide finish out the front and side faces.

Pool-House-Kitchen-Walnut-Shelves-with-Range

A thin strip will cover the bottom of the vent hood cover, then I’ll fill, sand, and seal it all before we add the remaining batten strips.  It’ll be a happy break from caulking for my fingers.

Pool-House-Kitchen-Walnut-Shelves-Lights-2

The shelves follow the angle of the outside wall, tucking in so perfectly.

Pool-House-Kitchen-Walnut-Shelves-Lights

I spent a couple of hours scrubbing and cleaning the 48 inch DCS range we found on Craigslist for only $1500.  The toe kick cover is waiting off to the side until I clean it up.

Pool-House-Kitchen-Walnut-Shelves-with-Range-from-Door

Under shelf lights are a special touch that glow at night.

Pool-House-Kitchen-Shelf-Lights-On

If you want to fully appreciate the progress, take a look back at these highlights.  It’s what I do when I feel like this process is dragging on.

Installing the ceiling  .   Staining the beams   .   Painting the ceiling   .   Running electrical   .   Adding insulation   .   Board and batten steps one and two   .   Finishing tile floors


Caulking Tips and Tricks

Nearly six years ago, when we purchased this house, the pool house was rocking a lot of dated finishes, including dark stained and streaked wooden lap siding.

New-House-Pool-Room April 13 2012

To achieve the light, airy feel we’re after, our plan includes painting the walls white.  While we could have used lap siding and painted it white, I feel it would have looked too much like an exterior in an interior space.  After many discussions to make my board and batten dreams come true, Ben agreed to the wall treatment.  Before installing the tile floors, we started installing the upper portions.

Built-in-Bench-at-End-of-Pool

Now, with the floors and baseboard installed, we’re working our way around the room installing the remaining batten strips.  Attaching the strips is the quick, easy part.  Caulking is the very necessary, but far more tedious part of the equation.

Caulking-Tips-Batten-Strips-Overall

Applying and smoothing the caulk takes a toll on the fingers, literally making the tips bleed after a while.

Caulking-Tips-Scratched-Fingers

In an attempt to avoid bloody fingers, I picked up a Caulk Buddy for three bucks from Ace Hardware.

Caulking-Tips-Caulk-Buddy

I had high hopes for it, but when put to use, the rigid yellow plastic doesn’t allow the flexible white end to flex into the joint enough.

Caulking-Tips-Caulk-Buddy

Back to bloody fingers for me.  But I accidentally realized the bandage on my finger provided just enough of a barrier between my finger and the wall.

Caulking-Tips-Bandaid

Unlike some of the tools available, I can easily control the pressure applied and the amount removed.

Along the three benches, the batten strips terminate directly into the bench.  To fill the small gap between the strip and bench top, without making a mess of the stained wood, I tape off around each batten.

Caulking-Tips-Taped-Bench

Apply and smooth the caulk as usual:

Caulking-Tips-Taped-Bench-Caulked

Then remove the tape immediately after, before the caulk dries and peels away.

Caulking-Tips-Taped-Bench-Caulk-Finished

Now, if you’ll excuse me, I’m heading back out to continue on my miles long quest to caulk the batten seams.  Enjoy your weekend!

Selecting and Applying Stain

Last week, I shared our process of building the tree storage benches in the pool house, with one last lid to build.

Built-in-Bench-Angled-Bench

Bright and early Saturday morning, Ben built the last top.  He followed up by using a router to cut the recessed ‘handles’ in the top front board.  To do so, he screwed a pair of boards along the top, giving a straight edge for the router to run along.  It takes multiple passes to get a smooth finish, leaving piles of shavings and dust behind.

Built-in-Bench-Cutting-Handles

The handles are a subtle detail, allowing us to open the lids without protruding hardware.

Built-in-Bench-Staining-Process

I followed up by spending several hours sanding everything smooth with 220 grit sandpaper.  Wanting a deep, rich, walnut like finish for the pine, I knew I’d need to stain the benches.  Although technically an indoor space, the potential splashes and humidity from the pool mean these benches need a durable finish.  Either with an indoor stain and oil/poly top coat, or an exterior stain/waterproofing combo.

Exterior stains come in a variety of colors and transparencies: clear, transparent/toner, semitransparent, semi solid, and solid coverage.

Stain-Finishes

For this application, I wanted to see plenty of the wood grain, but deepen the color.  When we stained our decks, I did oodles of searching for the Goldilocks in the stain world.  Deep brown without a red or orange undertone, transparent, under $60 per gallon, and water-resistant.  After hours of online and in store searching, I found the perfect solution: Olympic Maximum Stain and Sealant in Canyon Brown.

715195750516

We used the same stain on the large structural beams running the length of the pool house, so I knew exactly how it would look.

Pool-House-Tile-Install-Finished

Before staining, I vacuumed the benches, wiped off any dust left, then masked off the inside and the floor.

Built-in-Bench-Stained-End-Bench

With gloved donned, I started with the underside of the lids, applying the stain with a brush to get in the deep details.

Built-in-Bench-Stained-Kitchen-Area

For the smoother outside faces, I applied the stain with a brush for the grooves, and an old t-shirt scrap for the board faces.

Built-in-Bench-Stained-Corner-Meeting

Built-in-Bench-Stained-End-of-Bench-by-Door

We’ll paint the entire interior of the benches to keep it all looking nice and clean.

Built-in-Bench-Stained-Angled-End-Bench

The darker hinges aren’t nearly as noticeable against the dark wood, exactly as I hoped.

Built-in-Bench-Stained-Angled-End-Bench-by-Wall

Now that the baseboard and benches are in place, we can attach the lower portion of batten strips.  I’ll follow that up with miles of caulking and then we can paint it all white.  Eeeek, I’m so excited to for the day we’re done painting.