Quick Paints

Between finishing up the bathroom remodel and plotting our next project, I haven’t had much energy for little projects.  So what I have made recently is quick and no frills.  I’m talking about you, plant stand and copper vase.  My two most recent home additions aren’t any more difficult.  Quite opposite, actually requiring only paint and a gold paint pen.  Last summer, we found several cheapo plastic planters in the attic.  I wrapped one for my cabbage plant.

Wood-Veneer-Wrapped-Planter-Supplies

Around Christmas, I bought a little Norfolk Pine from Home Depot.  I’m happy to report it’s still going strong and needed a larger pot.  So I cut off the rolled rim, spray painted it flat white, and made a loose herringbone pattern with a gold oil Sharpie.

Herringbone-Plant-Pot

With dreary winter, I’m so happy to have live green plants in the house.  This one lives at the top of the stairs.

Herringbone-Plant-Pot-with-Norfolk-Pine

Right next to my newly thrifted chrome and black vinyl sling chair.  I wasn’t going to get it, but it was only $7 and 25% off.  The entry closet is only a few steps away, so this is a natural place to sit to put on or take off shoes.  And the lightweight frame and slim size is perfect for the area.

Herringbone-Plant-Pot-and-Thrifted-Chair-Overall

Ben has enough black or cream leather to give this a makeover.  Cream looks to light, and the black won’t look different.  Perhaps black woven strips?  What would you do?  The vinyl is in great shape, so it doesn’t need anything…

Herringbone-Plant-Pot-and-Thrifted-Chair

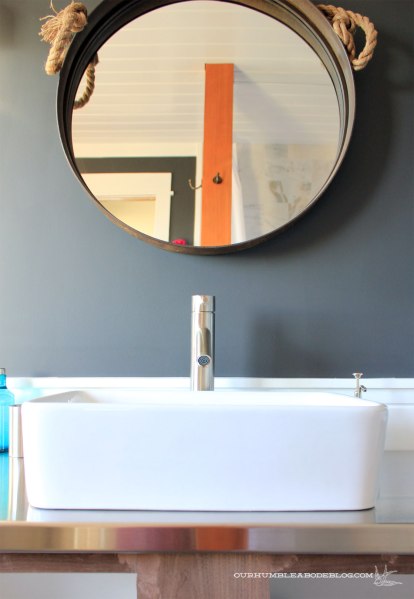
Ignore the baseboard-less, patchy walls, and unfinished toe kick.  That will happen, eventually.

While cooped up in the house, the boys and I have painted.  Our entry is unfinished and boring, remember this?  After discussing hooks, we decided they’d just add clutter to this small entry.  But a painting is simple:

Arrow-and-Initial-Entry-Canvas-Detail

Something to fill some wall space, but it’s an awkward wall to work with.

Arrow-and-Initial-Entry-Canvas-with-Door

The stairs angle up, making a small sliver at the top.   In the not too distant future, the entry will probably get a makeover (new front door, tile, wall treatment, and new paint).

Arrow-and-Initial-Entry-Canvas-with-Stairs

Another case of, “I’ll live with it until we get around to a full makeover.”

Plumbing Aisle Inspiration

While getting copper supplies for the bud vase, I wanted to make something with basic hardware store supplies.

Copper-Bud-Vase-Hanging-Side

What do you get when you pair 8 feet of 5/8 inch wooden dowel, 6 1/2 inch copper T connectors, 1 90 copper elbow, a two gallon bucket, glue, and spray paint?

Wood-and-Copper-Plant-Stand-Supplies

A cute (in my opinion, anyway) planter and stand.

Wood-and-Copper-Plant-Stand-by-Back-Door

That aloe plant is my oldest plant.  I’ve had it for three or four years (the only plant I’ve kept alive over a year) now and it desperately needed a larger pot.  It was looking like a male orca in captivity; confined and droopy.  While priming the bathroom drawers with Kilz primer, I noticed the small 2 gallon bucket would be the perfect size.  Which spurred, the hardware store plant stand.  If you want to know how I made my, read on.

Here’s my cut list:

Two at 1 5/8 inch long, for the base.

Four dowels cut at 2 3/4 inches, also base pieces.

Four at 3 inches, top pieces to hold the bucket in place.

and four more at 10 inches for legs, all cut with a chop saw.

I started with two 4 foot lengths of 5/8 inch dowel and 1/2 inch copper fittings.  The two short pieces (1 5/8) fit inside each side of the elbow.  Attach a T to each end like this:

Wood-and-Copper-Plant-Stand-Base-Start

The four 2 3/4 inch sticks go in each hole of the T connectors to make the base.

Wood-and-Copper-Plant-Stand-Base-Assembly

Add the four remaining Ts to the ends for the leg attachments.

Wood-and-Copper-Plant-Stand-Base-on-Bucket

After dry fitting everything, I rolled each dowel end in Liquid Nails to secure the pieces.

Wood-and-Copper-Plant-Stand-Base-and-Legs

And let if dry on a flat surface, with the three-inch pieces down.

Wood-and-Copper-Plant-Stand-Drying-on-Table

While the glue dried, I asked Ben to cut the top off the bucket.  I didn’t want the handle or ridges.  This bucket was thin enough he was able to cut through with a sharp utility knife.  To make the bucket look, well, less bucket-y, I gave it two coats of flat white spray paint.

Wood-and-Copper-Plant-Stand-in-Family-Room

Now, sir Aloe has a larger pot with room to grow.  And I really like the mix of shiny copper and wood.

Wood-and-Copper-Plant-Stand-Finished-Detail

A new Philodendron is keeping it company by our back patio door.

Wood-and-Copper-Plant-Stand-1

This could easily be modified by staining or painting the wooden legs, or making it entirely from copper.  Buy copper tubing and 8 copper caps for the legs and you’ve got a shiny, custom stand.  All from humble plumbing parts and hardware store basics.

Let’s Get Functional, Functional

This post approved by Olivia Newton John.  Not really, because we’re getting functional, not physical.  No 80’s gym gear necessary.  Over the weekend, our master bathroom became fully functional in the plumbing department.  That’s right, we’ve got a working shower, clawfoot tub, toilet, and now sink.

Master-Bathroom-Sink-Faucet-and-Counter-Detail

Ebay came through with a sink, faucet, and drain combo.  Because we went from two sinks to one, we wanted something a little wider to make it more functional for two people.

Master-Bathroom-Sink-Faucet-and-Counter-with-Mirror

After much debate and pricing of materials, we landed on a custom-made stainless steel counter to match the shower.  Carrara marble would have cost nearly $800.  While it would have been beautiful, we couldn’t justify that price.  Stone or man-made remnants in this size are nearly impossible to find.  Wood was a contender, until we decided to make a walnut vanity.  Stainless was not only the most affordable option, but also a solid, easy to clean surface.

Master-Bathroom-Sink-Faucet-and-Counter-Overall

It’s so nice not to wash hands in the bathtub.

Master-Bathroom-Sink-Faucet-and-Counter-Above

I’m torn about the mirror.  I like the look, but it’s on the smaller side at 25 inches in diameter.  Ideally, we’d have a 36 inch round mirror.  At $40, it’ll stay.

Master-Bathroom-Sink-Faucet-and-Mirror-Straight-On

I still have to cut the rope shorter and find something to ‘hang’ it from.

Master-Bathroom-Vanity-with-Round-Mirror

See what I mean about it being a little small?  Do you know of any 36 inch round mirrors under $100?

Master-Bathroom-Vanity-Mirror-Overall

We made progress on the vanity yesterday, but I’m waiting to share until it’s 100% finished.  But, the walnut is amazing already.  Happy Martin Luther King, Jr. day, too.  Enjoy the day off, if you get it.

Thrifty Hits

Thrifting recently has been very hit or miss, mostly miss.  But, I have found a few decent items.  This rug was originally from Target, I think around $15.  Unsold clearance goes to Goodwill, so I snagged this cotton rug for two dollars.  The teal is a near perfect match for the curtains and art, so score.

Thrifted-Bath-Rug

In other bathroom news, here’s a peek at the beginnings of the American Walnut vanity.  Only the ends have wood right now, but it’s exciting to see.  And oh so handsome!

Master-Bathroom-Vanity-Side-Peek

Back to thrifting, here’s a Dwell Studio for Target pillow I found for three bucks:

Thrifted-Dwell-Studio-Pillow-Floral

The floral design is okay, but I’m smitten with the black and white striped back with yellow edge.

Thrifted-Dwell-Studio-Pillow-Stripes

This rug was in a consignment shop.

Thrifted-Colorful-Rug

Some fringe is missing, but the colors are so lively.  Thirty five dollars, for a vintage 4 by 6 rug.  My sister asked me to keep an eye out for a colorful, boho-ish rug.  A quick text and she told me to get it.

Thrifted-Colorful-Rug-Detail

It’s thin, but a rug pad can help out a lot.  Hope she likes it as much in person.  While at the same shop, I found tons of heavy metal printing letters.  I got one for each of my boys.

Thrifted-Metal-Printing-Letters

Maybe this American Insects page will go in the boys’ room, too?

Thrifted-Insect-Page

Ev loves the beetles.  Me too, dude.  Only on paper though.  No live bugs for this girl.  He is my go to bug killer, that helpful little guy.  Any favorite finds you’d like to share pictures of?  Feel free to link here or share pics on our Facebook page.

The Copper Tone

Some of my creations are a way to use left over materials.  Whether fabric scraps, left over wood veneer, or in this case, wood ends.

Copper-Bud-Vase-Wood-Scraps

Ben kept these scraps from the Bubinga counters, but had no use.  While cleaning out the garage last weekend, he brought them upstairs and set them in our wood pile.  Knowing I could make something, I saved them from a firey death.  Of course Ben accused me of hoarding, but it’s worth it.  After seeing these beautiful jewelry blocks, I knew what I wanted to do.  I cut a 1 3/4 inch cube (because my pieces were already 1 3/4 inches, which also happened to be the width of the tube strap) and bought a 1/2 inch copper air chamber and copper tube straps, both found in the plumbing aisle.  Add a few screws, a tooth hanger, and we’ve got a chic, industrial, wall mounted bud vase.

Copper-Bud-Vase-Overall

If you want to make your own, start with a wooden cube, dealer’s choice.  Because the Bubinga is super dense, I used a small drill bit to make pilot holes for the screws.  Both front (for the strap) and back (for the hanger).

Copper-Bud-Vase-Wood-Backing

Copper-Bud-Vase-Block-Detail

Short screws hold each in place.  I couldn’t find copper screws, so I used brass instead.  I might get a copper leaf pen to paint the heads.

Copper-Bud-Vase-Side-Comparison

A small nail hangs the vase on the wall, but I didn’t like the slight lean it gave the piece.  A few sticky back felt dots bumped up the bottom to hang parallel to the wall.

Copper-Bud-Vase-with-Shower

If I han’t already hung the astrological cut outs about the toilet, I’d want three or five of these instead.  Loving how the copper popped against the dark bathroom walls, I hung it in the little space between the shower and bathroom door.

Copper-Bud-Vase-by-Shower

A cheap, colorful carnation brightens this dreary winter.

Copper-Bud-Vase-Hanging-Side

Now I have an excuse to keep fresh flowers in the house.  Sometimes, small projects like these are my favorites.  Simple, affordable, and brighten a room.  What do you think of this DIY vase?