Outside Updates, Two Year Check Up

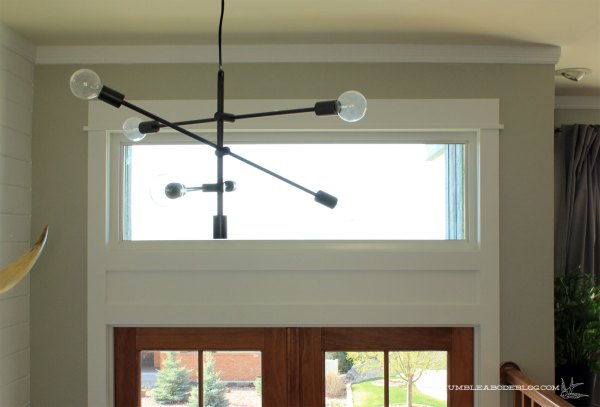
You’ve seen the house progress over the last two years, now check out the outdoor spaces.  Though we’re still far from finished, the outside received a lot of attention last summer.  We started out with an uneven, weed riddled paver patio, large ostentatious lion head fountain, large trees planted too close to the house, a short tall rock wall, and very neglected or non-existent plantings.

New-House-Back-Yard April 13 2012

The rock wall was built to act as a retaining wall, separating the patio and hillside.

Yard-Demo-Backyard-Rocks

While great in theory, the 18 inch high wall wasn’t tall enough to hold back the hill as it had already overgrown it.  When landscaped, the patio was built up too high, covering the bottom of the wooden rim joist atop the concrete house foundation.  This is a huge problem because it could cause rotting (and lead to major structural issues).  It also made it easy for bugs, dirt, and water to get in the basement.  To prevent these issues, we pulled out the fountain, patio, and rock wall.  Then excavated another foot of dirt to sit below the foundation’s top edge.

Back-Yard-After-Some-Excavation

We used large boulders as a taller ‘wall’ to keep the rocks on the hill.  For a fun feature, Ben tucked a waterfall with covered pond into the hillside.

Back-Yard-Hillside-Needing-Plants

For a clean outdoor entertaining area, we built a slightly raised deck from reclaimed beams.

Stained-Back-Deck-Overall

Just as we neared our rock and hardscaping finish line, a huge rainstorm channeled water and dirt from the natural hill above, back down.

Saturday-Rain-Storm-Back-Yard-Overall-from-Pool

Fortunately, the rocks stayed in place, though it filled with dirt in some areas.  Sure, it sucked to clean out and redo, but we were so lucky we had done that landscaping.

Mud still would have slid down the hill and filled the back yard, but our basement would also have been flooded with water.  It could have been so much worse.  All over town, we heard stories of water filled basements, caved concrete block retaining walls, and mud filled pools.  Before that, I’d never fully realized the sheer power and strength of water.  It’s even worse when you add steep hills for it to pick up debris and momentum.

Waterfall-in-Back-Yard

After cleaning the mess, we dug diversion trenches to direct water to safe places, if a large storm happens again.  The we added a fun DIY gas fire pit.  We did keep a few previously landscaped features.  A set of rock stairs with a stacked rock flower bed.

Back-Yard-Stairs-to-No-Where

Stairs-in-Back-Yard-Overall

Back-Yard-Steps-and-Plants

It seems most of my succulents survived the record-breaking cold, snowy winter.

Succulents-by-Stairs-in-Back-Yard

Along the waterfall, there are a few little ‘pockets’ of dirt between rocks.   I’ve started planting small succulents in these areas to green things up.

Succulent-by-Waterfall-in-Back-Yard

Here’s a before shot of the back from up the hillside:

Back-Yard-from-Low-Tier

It’s easy to see how deceptively steep it really is from that angle.  Today, we’ve got the hard parts done, but need to add plants.

Back-Yard-2014-from-Top

Siding will be nice, too.  Ha!

Before, there wasn’t an easy way to get to the back from the driveway.  Ben built matching beam steps to link the spaces together.  Those posts will get cut down soon.

Wooden-Steps-to-Back-YArd

Just as the back had been neglected, the front didn’t look any better.  Overgrown, wild-looking hills scattered with half dead trees and shrubs isn’t what I consider pretty.

Front-Yard-Hill-from-Driveway

Since then, we’ve added a wide beam walking path.  More recently, plants!  Glorious green plants!  A few peonies in a stacked rock planting bed.

Peonies-and-Boxwood-by-Front-Walk

A train of boxwood evergreens.

Boxwood-Row-Along-Front-Walk

Off the deck, there’s a plateau area that looked mostly dead.

Front-Yard-by-Deck-Before

We added tons of rock (literally) and created a little bocce ball court.  Now a few Bird’s Nest Spruce shrubs dot the perimeter.  Eventually we’ll add taller plants in front of the deck, like Burning Bush.  Filler plants, perhaps flowering will liven up the remaining open spaces.

Front-Yard-Clean-Up-2014

Another before of the walkway:

Landscaping-Front-Yard-Deck-Out

You can see why siding is this summer’s priority.  Not that the blue was much better.  And today:

Front-Walk-to-Side

I’ve even got a few potted plants by the front door.

Plants-by-Front-Door

As I said earlier, we’ve got more before we’ll consider this finished.  We’ll be able to add more plants after siding.  Don’t want those in the way of the ladder and scaffolding.  Still, we’re happy to have new, better functioning hardscapes.

Two Year Check Up

This month marks two years of living at this house.  Like last year, I’m taking you on a room by room tour to show you the changes.  Here’s the plain entry the day we closed:

New-House-Entry April 13 2012

Recently, we installed a tongue and groove accent wall, new front door and window, modern light, giant Longhorns and cute art.

Button-Picture-in-Entry-Top-Stairs

We now have a bright, light filled happy space we’re not ashamed of.  Especially because this is the first impression.  We still have to replace the uneven, stained tile and railing, but this space is nearly complete.  The living room had great potential, but it felt too traditional for us.

New-House-Living-and-Dining-April-13-2012

Much of this room is still subject to change, but it’s functional and more ‘us.’  Painted light gray walls modernize it, while still feeling warm.

Living-Room-into-Dining-Two-Years-Later Coffee table plans are in the works, and I want to find a new rug and chairs.  Art, too.

New-House-Dining-into-Living-Room April 13 2012

But the modern twist on a rustic/Western style is coming together.  The newly finished sofa is perfect in here.

Living-into-Entry-Two-Years-Later

Hopefully a leather sofa will replace this one, but it serves the purpose until then.

Living-Room-Sofa-Two-Years-Later

Our dining room has seen some progress, but it’s not looking so hot these days.  Though it really didn’t look to great when we bought this place either.

Dining-Room-After-Move-In-April-30 A window replaced the door, and we’ve got one sheetrock-less wall while we deal with electrical changes.

Dining-Room-Two-Years-Later One of the least changed rooms is the kitchen.  Maybe this winter we’ll have some updates to tackle.

New-House-Kitchen-from-Breakfast-Nook-April-13-2012

Aside from removing wallpaper and painting, no action going on in here.

Kitchen-Two-Years-Later

In the adjacent family room, we’ve refaced the fireplace, added an insert, built shelves for a little nookpainted the walls a soft beige.

New-House-Family-Room-from-Pool-April-13-2012

This room is one of my favorite places to relax and enjoy the back yard views and wildlife.

Family-Room-from-Kitchen-Two-Years-Later

Our first remodel here, the main bathroom, was a full tear out.  Though it was one of the most recently updated spaces, the dark, showerless layout didn’t work for our two young boys or guests.

New-House-Main-Bathroom April 13 2012

Replacing the tub with a tub/shower, it now functions for kids and adults.

Main-Bathroom-Finished-Vanity

Across the hall, the small guest room was very dark.  North facing, small window, and a wall of 70’s oak shelving sucked the light and life out.

New-House-First-Showing-Guest-Room

A new egress window lets in more light while the white shelves and happy yellow walls add cheer.

Guest-Room-Two-Years-Later

A beige box of boring wasn’t really a happy place for two little boys.

New-House-Boys-Bedroom-April-13-2012

After asking for their suggestions, I scraped off the popcorn ceiling, painted the walls a pear green, and filled the room with color and kid friendly decor.

Boys-Bedroom-Two-Years-Later

The master was completely opposite from the boys’ room starting point with obnoxiously bright blue walls.

New-House-Master-Bedroom-Front-April-13-2012

So far, I’ve only painted over the shocking blue.  Soon, we’ll get new windows.

Master-Bedroom-Two-Years-Later


The biggest interior project from the past 365 days is the master bathroom remodel.  It was a dated yellow and red room of yuck.

New-House-Master-Bathroom-Toilet-April-13-2012

Now, its our updated sanctuary complete with a walnut vanity, clawfoot tub, and pretty slate and marble tile.

Master-Bathroom-Two-Years-Later

A few big inside changes, but our landscaping saw the most attention last year.  I’ll get to that in another post.  We’ve been adding plants and greenery!

Sometimes, progress feels like it moves slower than a turtle, even though we’re most often working on something.  It’s nice to look back to see just how much we really have done; to be reminded of our excitement at closing.  And look back at the ugly and plain space we inherited.

Natural Linen and Special Walnut

That ugly, dirty, orange thrifted sofa isn’t so ugly anymore.  Over the past week, I’ve given it a makeover and new life.

Thrifted-Vintage-Orange-Sofa-Front

I started by removing the cushioned section from the wooden frame.  The back middle leg was loose, so I glued the plugs and clamped it overnight.  Then I started pulling away the dated fabric.

Thrifted-Vintage-Sofa-Pieces

When tackling an upholstery project, I like to take pictures of pieces as I go.  If I get stuck or can’t remember how things went together, I have pictures to go by.

Thrifted-Vintage-Orange-Sofa-Arm-Underside

Back sections always go on last, so it’s the first to come off.

Thrifted-Vintage-Orange-Sofa-Back-Removed

Followed up with the arms.

Thrifted-Vintage-Orange-Sofa-Arm-Exposed

See all that nasty stuff that was stuck in the crack?  Eeew.  I also found old gum on the under side of the frame.

Thrifted-Vintage-Orange-Sofa-Arm

When I pulled the fabric off, I saw the arms were barely padded.  Underneath matching solid oak arms.  I opted to leave the arms open because I liked the look better.  A few screws, accessible from the underside hold the arms to the main frame.  I’ll skip the refinishing steps, because I didn’t really follow the rules.  Also, my hands were busy, so I couldn’t take photos.    Basically I sanded the entire frame with 220 grit paper until I was down to bare wood.  To give a rich finish, I applied one coat of Minwax Special Walnut stain, followed up with two layers of Teak Oil.

Thrifted-Vintage-Sofa-Overall-After

As for fabric, I fell for a natural linen.  I’ve never had linen upholstery, so I’m hoping this hold up.  If it doesn’t, I’m only out the cost of fabric and my time.  Because my fabric has a little more stretch than thicker upholstery fabrics, I decided not to sew box cushions for the back and seat.  This way, if the fabric stretches or looks saggy, I can give it a stretch without it looking strange.

Thrifted-Vintage-Sofa-in-Living-Room-After

I also replaced the old worn out seat foam with a 3 inch high density foam for extra padding.

Thrifted-Vintage-Sofa-End-After

Leaving the arms open is my favorite change.  With little padding, the arms weren’t soft and comfortable, so this is just a better looking version.   That’s one of the super Western and manly leather pillows Ben made, too.

Thrifted-Vintage-Sofa-Arm-Side-After


Simple lines on the back are my second favorite thing about this sofa.

Thrifted-Vintage-Sofa-Back-Overall-After

To keep it simple, I stapled a strip along the top for the fabric to fold over.

Thrifted-Vintage-Sofa-Back-Top-After

On the sides, I had to improvise.  I couldn’t find a tack strip to stuff the fabric into.  And nail heads looked too cluttered.  Instead I stapled along the top of the fabric, then made strips to hide the staples.

Thrifted-Vintage-Sofa-Back-Corner-After

Sleek and simple with a slightly rustic look.  The crazy oak grain is fun and the linen compliments it without drawing attention.

Thrifted-Vintage-Sofa-Back-After

Also, I’m not sure what main couch will stay in this room so I want a go with anything neutral.  Ben wants leather and I most like the look of the camel toned Foxtrot from Flexsteel.

Wouldn’t the camel and linen look great together?  Problem is, local stores don’t have this in stock.  We don’t know if it’s comfortable, if we like the look in person, or a price.  Clearly we still have some research to do before we can make a solid decision.

Orange You Glad

I bought an orange sofa?  Seventies sofa, welcome to my 70’s home.

Thrifted-Vintage-Orange-Sofa-Front

When paired with exposed studs and insulation, it makes for a really beautiful, somewhat industrial look.  Ha, couldn’t keep a straight face for that ridiculous claim.  However, the sofa does have good bone structure.  That’s where the good qualities end.  Also similar to our house when we bought it.

Thrifted-Vintage-Orange-Sofa

Both back legs have huge scuffs and scratches.

Thrifted-Vintage-Orange-Sofa-Leg-Damage

While ugly, the orange upholstery is seriously dirty – beyond a deep cleaning.

Thrifted-Vintage-Orange-Sofa-Side

I’m not exactly sure what fabric and color I want.  Just have to see what the fabric gods send me.  I do know I’ll sand the frame to make repairs (tighten up the joints) and stain the wood.

Thrifted-Vintage-Orange-Sofa-Back-2

Oh that open back.  Hopefully it doesn’t turn into a giant headache to recover.  For only $20, I couldn’t leave without this piece.

Thrifted-Vintage-Orange-Sofa-Back

In other sofa news, the mid-century bench is living in our bedroom.  In other, other sofa news, we returned the Rachael.  Despite her good looks, she wasn’t comfortable, especially for six-foot tall Ben.  Turns out what’s comfortable for a few minutes at the store isn’t the same as a few hours at home.

Flexsteel-Rachael-Sofa-in-Living-Room

What good is an uncomfortable couch?  We moved the Dana in and so far, she’s better.  Perhaps a new leather sofa is in the cards.

Make it Bigger

Some recent projects lately haven’t been of the super fun and exciting variety.  Changing out the front door was a huge change that greatly impacts the look and feel of the space.  Trimming it out didn’t take much time, but it’s the icing on the cake.  That finishing touch.

Finished-Front-Door-Entry

Using a 12 inch tall header for stability, it was a funky space to trim.  After discussing our options – decorative door trim with simple casement around the window, one straight trim piece across – we chose to make the window and door look like a set.

Finished-Front-Door-Trim-Top-Detail

Craftsman style trim along the top (to match the other windows and doors) with casement around the door and window, all painted white.  Leaving the gap between sheet rock looks more interesting than a solid, flat trim piece.  Painting the door frame white lets it all flow together.

Finished-Front-Door-Trim-Painted

The warm wood door is in great shape, so we’re leaving it for contrast.

Finished-Front-Door-Trim-Detail

Only window on the front of the house finished.  Ten more to go!

Finished-Front-Door-Trim-Entry

Living and dining gridded windows exempt, the windows were all original to the house.  Most in poor shape so that’s this summer’s big task.  We swapped the office window this weekend.  Fogged between the two pieces of glass, it clearly had seen better days.

Painted-Office-from-Kitchen

Since the new dining window and office nearly meet at the corner, we made the office window 8 inches closer to the floor to match height.

New-Window-in-Dining-Room-Front

First a bigger hole:

Larger-Window-in-Office-Hole

Then the larger window to let in more light.

Larger-Window-in-Office

Projects that make a big difference (hey, we can open the window!) but isn’t exactly nice to look at yet.  Gotta get out my white paint.