Giveaway Winners and Etsy Favs: March

Last Friday of March and first order of business.  Jessica, you’re the winner of the Britt Bass giveaway.

And Beth, you’ll get to design your custom Duffle Coat from S & S Babee.  Congrats, ladies!

Himmeli Diamond Pendant Light from Panselinos

Whiskey Me Away print by Perrodin Supply Company

Wooden Hexagon Trivet at Things Like Diamonds

Small Vintage Ceramic Letters from Shaving Kit Supplies

Metallic Gold Star Pillow at Earth Lab

Decorative Match Boxes by Bello Pop

The Tetons Mountain Range Pillow from Three Bad Seeds

Saving for my Van Gogh print at Alfamarama

Objectify Magazine Rack from Objectify Homeware

Abstract Watercolor Painting at So Very Happy Art

Falling Roses Abstract Art Print by Parima Creative Studio

Misty Oil Painting from Painting Well.

So many pretty paintings, and all profits are donated to cancer research charities!  After reading that, I bought two.  I’m excited to get this beauty in the mail.

Welp, I’m going to get back to my living room painting.  Have a great weekend, all!

The Fix Up

Finding a diamond in the rough at a thrift shop or second-hand store is a thrill.  Rescuing something that others consider trash is kind of fun.  Taking something from ugly to beautiful while giving it a new life is an economical way to add to your house.  By fixing up an old piece, you’re saving it from the landfill.

Which is Crucial Vacuum‘s goal.  Crucial Vacuum supplies replacement parts for vacuüm cleaners and other small appliances.  Too often, a vacuüm cleaner that just needs a little TLC gets thrown away.  Crucial Vacuum wants to see how you are re-using, recycling, and repairing wherever possible.  We’ve joined forces to host a fun little competition.  Show us something you’ve fixed up/reused/recycled/upcycled and in one week Jess at Crucial Vacuum and I will choose one winner.  That lucky winner wins a $100 Amazon Gift Card, courtesy of Crucial Vacuum.

We’re certainly no strangers to rescuing items from shops, Craigslist, or even the trash.  Several years ago, I refinished a beat up bookshelf that originally belonged to my great grandparents.  It happily lives in the boys’ room:

Boys-Bedroom-Bookshelf

More recently, we pulled small marble remnants from a junk pile to top old end tables.

Honed-Marble-End-Table-Top-Detail

A thrifted dresser got a new lease on life after stripping down old layers to reveal a beautiful cherry wood Drexel dresser.

Drexel-Dresser-front

These five dollar chairs I scored didn’t look so hot before refinishing and upholstering.

MCM Chairs by Fireplace from Breakfast Nook

To keep our couch usable, Ben fixed our broken couch support.

Broken-Couch-Fixed

But the biggest saved from the trash project we’ve tackled is our reclaimed wood beam unique deck.

Stained-Back-Deck-from-Pool-House

From that alone, we saved thousands of pounds of wood from the landfill.  Even better, we have a sturdy, schmancy new deck.  Now it’s your turn!  Show us any projects you’ve tackled that have saved something from becoming trash.  Anything goes.  You can share a link in the comments section here OR post a photo on our Facebook page OR use the tag #OHAFixMeUp to share on Instagram.

This is not a sponsored post; we were not paid or compensated to share.    Just love a fun, friendly competition with a $100 Amazon Gift Card winner prize provided by Crucial Vacuum. 

Worse Before Better

We’re making progress in the family room, after leaving it nearly the same since move in.

Honed-Marble-End-Table-Top-Left-Side-of-Living-Room

This is what progress looks like:

Living-Room-with-Crown-Installed

Yes, at first, progress always looks like a big mess.  It has to get worse before it can look better.  We pulled down the old, upside down (?!) crown before installing the new trim.  I forgot to take pictures, but here you can see it in the basement:

Basement-Crown-Upside-Down

We know the previous owner liked to do things his own way, but we’re not fans of the look.  Especially compared to properly installed crown via This Old House:

So, down came the old stuff, leaving small nail holes in the ceiling.  Filling with joint compound isn’t difficult, just another step added to my list.  Two if you count sanding.

Living-Room-Crown-Installed-Ceiling-Touch-ups

Along with caulking seams and filling nail holes in the new trim.  While I had the filler out, I removed all nails and spackled old nail holes (there were many).

Living-Room-Crown-Installed-and-Filled

Trim around the entry hasn’t gotten the full treatment yet, but will once we break the ladders out.  After that, painting the last white coat and walls.

Entry-with-Crown-Installed

We’re crownless in parts of the dining room until we swap the door for a window with a header.  At that point, we’ll run a solid piece across.

Dining-Room-Without-Crown

For now, and hopefully not much longer, we have a lovely patchwork of colors and textures.

Living-Room-Crown-Patched-Areas

I’m carving out time this week to get the trim, ceiling, and walls painted.

Reader Question: Bathroom Fixtures

When we remodeled the master bathroom, we chose a few less often used products that we hoped we’d love.  But we had back up plans if we didn’t.  Luckily it has all worked out well.

Finished-Master-Bathroom-Overall

A stainless steel shower pan and countertop.  Skipping a glass wall and using two curtains in place.  Because they’re kind of unusual, we’ve gotten several questions:  What do we think of the stainless?  Is is slick/slippery?  Hard to clean?  Do the curtains actually keep water in?  Is it cold?  Now that we’ve used the bathroom for a few months, I thought I’d give my review.  Here’s how the stainless shower pan typically looks:

Master-Bathroom-Stainless-Steel-Shower-Pan-Water

It has water spots.  Which would typically bother the crap out of me, but it only half bugs me.  The whole pan gets wet at the same time, so it’s more uniform than little droplets.  We’re testing out stainless steel cleaners to find one we’re happy with.  So far, we haven’t found the one.

Master-Bathroom-Stainless-Steel-Shower-Pan

I’ve used mineral oil on the countertop, and it shines like a new quarter.

Master-Bathroom-Stainless-Countertops

If I didn’t have to worry about the slickness, I’d use it on the shower, too.  I’m afraid it’d make the pan slick and greasy.  Any stainless cleaners you love?  Overall, we’re really happy with the stainless function and wipeability.  But it’d be nice to get rid of the water spots, even on the brushed nickel faucet.

Master-Bathroom-Brushed-Nickel-Faucet

A few scratches are on the counter, but they’re barely noticeable and just give it character.

Master-Bathroom-Stainless-Countertop-Scratches

As for the shower curtains, they work really well to keep the water in.  It’s really not much different from the main bathroom tub/shower combo with a curtain in that regard.  The only difference is that we have to use a suction cup/plastic loop combo to keep the convection current from pushing the curtains in.

Master-Bathroom-Shower-Curtain-Hooks

I think the reason we have this problem is because our curtain is only two inches from the ceiling, the heat can’t escape quickly.  Thus sucking the bottom in.  Unlike the tub, there’s nothing for the curtain to cling to either.  We have a suction cup with a hook at each corner and I sewed plastic rings to each end to keep the curtains taught while in use.  It’s annoying to have the added step, but still better than having to keep a glass wall spot free in my book.  If only the stainless were magnetic, we could drop little magnets in pockets to keep it closed.

As for the cold factor, the curtains do a decent (not great, but good) job keeping the shower heat in.  Once the curtain is open though, even a crack, it’s freezing.  Overall, we’re very happy with the updated bathroom.  Now if we could just get a good stainless cleaner or polish.

Feeling Groovy

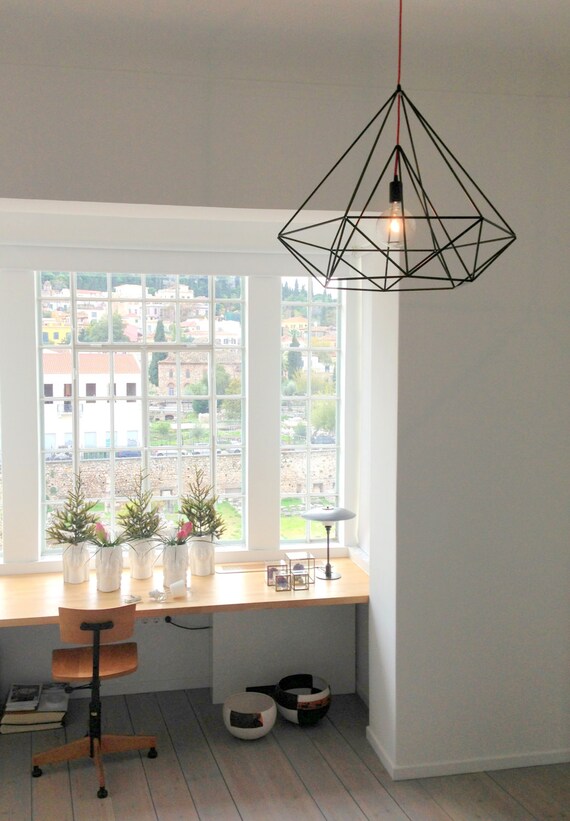
Adding the West Elm Mobile Chandelier and vintage Longhorns added some interest to our blank entry.  But it was (and still is, really) a far cry from what I’d consider finished.  I mean, half torn off, waiting to be replaced crown doesn’t scream finished.  In fact, it looks awful.

West-Elm-Mobile-Light-in-Entry

As do the peach, heavily textured knock down walls throughout the entry, living, and dining rooms.  It looks the worst on the large 12 foot expanse.  But, we did take a big step in the finished direction this weekend.  Luckily, Ben and I are both fans of painted tongue and groove strips; a great cover up option for ugly walls.  We’ve got a blank slate accent wall.

Tongue-and-Groove-Entry-Wall-from-Living-Room

I’ve never had an accent wall.  We started with tongue and groove planks, starting level with the entry floor, then down and up from there.  Nailing into studs to secure the boards in place.

Tongue-and-Groove-Entry-Wall-Bottom-Install

Going down was easy, just a few angled cuts along the stairs.  But going up wasn’t so smooth.  Being 12 feet off the floor on the right side, and 16 off the left made it tricky to get everything to the top.  Fortunately Ben knows his way around a wobbly ladder.  Me?  Not so much.

Tongue-and-Groove-Entry-Wall-Install

I tried priming the wall, starting at the top, but my short T Rex-ish arms couldn’t reach.  Though he thought it hilarious, he instead took over the priming and painting.

Tongue-and-Groove-Entry-Wall-Starting-Paint

This pine has heavy grain and knots, so it has plenty of character and texture.  Even when painted.  But still looks neutral to allow the light and horns to be the real focal points.

Tongue-and-Groove-Entry-Wall-Texture-Detail

Though this railing isn’t my favorite, it looks significantly better against crisp white.

Tongue-and-Groove-Entry-Wall-with-Railing

We still have some trim pieces to add before putting the final coat of paint on.  The angled trim pieces along the stairs are only 1/2 inch thick, so I’d like to add a cap to thicken it up.

Tongue-and-Groove-Entry-Wall-Stair-Trim-to-Thicken

We did this on the planked side, and it adds just enough thickness for the boards to sit against.

Tongue-and-Groove-Entry-Wall-Stair-Trim

Crown can go up around the entry, living, and most of the dining next.  Again, the lone piece isn’t the look we’re going for.

Tongue-and-Groove-Entry-Wall-from-Door

Except the back dining wall, where the 8 foot door goes to the ceiling.  We’ll have to add crown there after we’ve replaced the door with a window and a normal sized header.

Grid-Rug-in-Dining-Room-from-Living-Room

But, I’m willing to paint the room, even if the windows and trim will change soon.  Those peach walls have been here too long.  I’ll paint the dark garage door and new railing white for a seamless look.