Easy Bathroom Accessories

Utilitarian spaces like kitchens, bathrooms, and laundry rooms are always easier to accessorize than living/bedroom areas, simply because you’re aiming for function.  But function doesn’t have to equal ugly.  To finish off bathrooms, I select items that serve a purpose, are still pleasing to the eye, but aren’t always found in the bath section.  If you’re looking to add character, here are my favorite additions.

  • Cute towels and hooks:  Go crazy and pick a fun pattern and/or color because towels are so easy to swap out.  Near the shower, single label hooks hold peppy striped Turkish towels for a dose of fun.
  • basement-bathroom-finished-from-door-straightFramed mirrors:  I always ditch the builder standard plate-glass mirror in favor of a framed one.  Pretty mirrors are everywhere, so don’t settle for boring!  Our main bathroom sports a vintage campaign style mirror that came with a dresser set.

Campaign-Mirror-Hung-in-Bathroom

Our master bath has a unique round metal framed mirror to offset the rigid lines throughout the room.

Master-Bathroom-Vanity-for-BHG

Another vintage wooden mirror, that came with our bedroom dresser, is a welcome warm addition to the cool neutrals of the basement bathroom.

basement-bathroom-finished-vanity-from-door

Also, to get great, flattering lighting, use sconces instead of overhead lights.  Fewer shadows are cast because the sconces light from each side.

  • Add vertical storage shelves:  Short on floor space?  Go up!  In our main bathroom, we removed a wide vanity to add a smaller vanity plus a floor to ceiling shelf stack.  At 16 inches wide, it doesn’t eat up much of our floor plan, but does offer a great deal of storage.

Main Bathroom Shelving

By widening the basement shower, we narrowed the space between it and the door.  Rather than letting that space go to waste, four floating shelves fill the void, putting it to good use.

basement-bathroom-finished-from-door

  • Glass storage:  Especially in bathrooms that guests often use, I like keeping essentials in plain sight.  No one wants to rummage through cabinets to find cotton balls or soap.  Cylindrical jars keep band aids, soap, cotton balls and cotton swabs handy on a shelf in the main bathroom.

Store Toiletries in Sight

A triple stacked glass container on our master bathroom counter is used daily.

Master Bathroom Toilet

Four black lidded canisters fill a basement bathroom shelf, but keep those items out of limited drawer space.

basement-bathroom-finished-shelves

  • Art, preferably without eyes:  Almost anything goes here, but I always feel strange adding art with eyes.  With moisture concerns, I avoid using anything too expensive or precious.  Vintage, almost ugly oil paintings are great.

House-Tour-Four-Years-In-Main-Bath-from-Door

Or you can think outside the box and hang something different, like vintage arrows.

Cedar-Tub-Shelf-in-BathroomSimple Instagram photos add a bit of color, too.

basement-bathroom-finished-toilet-area

Near the toilet, an added outlet (on the same circuit as a GFI outlet, so it’s grounded) is a great spot for a little night light, or perhaps a fancy heated toilet seat.

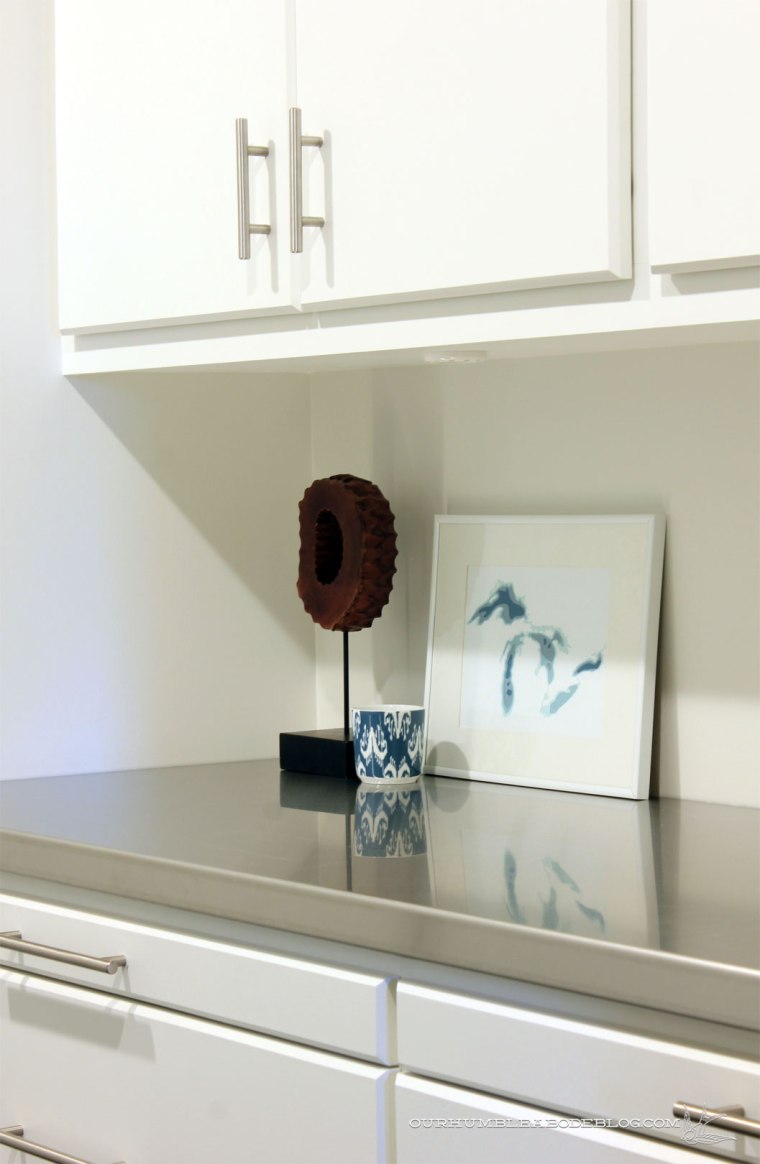
For easy clean up, I prefer relatively clutterless counters.  Even so, I love to add something pretty, like a small plant or picture frame along with a drinking glass and soap.

stainless-steel-counters-in-bathroom

basement-bathroom-finished-vanity

  • Trays:  To keep drawers and cabinets free for toiletries, cleaning supplies, etc., I corral toilet paper in a wooden tray or basket.

House-Tour-Four-Years-In-Main-Bath-VanityAgain, keeping necessities in sight avoids awkward searching or running out.

basement-bathroom-finished-vanity-vertical

  • Upgrade shampoo, conditioner, and soap bottles:  I know my OCD is showing here, but I really love how sleek and fancy real soap pumps make a space feel.

House-Upgrades-Rain-Shower

Also handy when you shop at Costco and don’t want to keep a giant bottle in the shower.

basement-bathroom-finished-shelves-and-shower

  • Extra towels:  Have extra space?  Free up room in the linen closet by keeping towels in the bathroom.  A great accessory, but guests can easily help themselves.

basement-bathroom-shelves-finished

Of course stylish garbage cans and shower curtains never hurt.

The Progression of Our Entry

As with many remodels, some rooms take priority and are finished first and quickly.  Others are a slow but steady progression toward an end goal.  Our entry has certainly fallen into the latter category, with small changes taking place over the last four years.  In such a small space, why can’t progress go quicker?  First, let’s look at the space the day we got the keys.New-House-Entry April 13 2012It was as dark as it looks, heavy on the wood tones, red curtains, and stained beige marble floors.  The Tiffany style light was too ornate as were the corbels supporting an arch dividing the entry and living rooms.  Soon after, we pulled off the curtains, tore out the arch, built a slim entry shelf, and put in a new light fixture.West-Elm-Mobile-Light-in-Entry-from-Family-RoomOy, I don’t know if I’d say the space looked better, but it was going places.  The big blank wall with a heavy knock down texture just loomed, all peach and boring.  Knowing we’d need a giant piece of art to cover it, we decided to add a painted tongue and groove accent wall.  Not only does it add a good kind of texture, but the simple white is a great backdrop for a pair of vintage Longhorns.Tongue-and-Groove-Entry-Wall-from-Living-RoomJust painting over the peach walls with a warm gray made a huge difference, somewhat updating the orange oak railings.  Still, the old front door and too tall window above weren’t cutting it.Finished-T-and-G-Plank-Entry-Wall-with-ConsoleThen, a big game, ehhh, room changer happened when we swapped the front door.  Replacing the standard door and sidelight combo with an 8 foot tall by 6 foot wide full glass door floods the entry and stairs with natural light.  A shorter, transom style window above is better proportioned.Replace a Front DoorMore recently, while we had access to the underside of the posts from the unfinished basement, we built a sleek stair railing.  Ahh, the transformation was nearly complete.Lingering-To-Do-Entry-TileTwo weekends ago, while discussing what tools Ben could clean up and put away, I mentioned the entry tile could be a quick project to tackle.  He said it wasn’t on his priority list and I carried on with painting the basement bathroom.  That was, until I heard an awful lot of hammering and went to check it out.  Turns out, Ben had started tearing out the old tile.  After I finished painting, I grabbed a hammer and gleefully broke up tile with him.  By carefully scraping, we were able to reuse the Hardie board and were left with this:entry-without-tileLast Saturday, Ben laid new slate tile in a staggered brick pattern and grouted on Sunday.  Baseboards are finally in and waiting caulking, filling, and painting to complete the look.entry-slate-tile-from-top-of-stairs

entry-slate-tile-from-top-of-stairs-2Other than painting the baseboards, I’m ready to call the entry complete.entry-slate-tile-toward-plank-wallWith or without the Halloween decorations.  The bats have made another appearance, along with a barbed wire ‘wreath’ wrapped with twinkle lights.entry-halloween-2016That concludes the entry transformation, at least I think it does.  You know, until I change my mind and want to add something.

Laundry Room

Do you hear that?  No, I’m not crazy, the choir of angels is singing because we have one room in the basement without anything on the to do list.  As in, finished.  100% done.  Complete.  Granted it’s one of the smallest rooms, but it does boast nearly as much custom cabinetry as our kitchen, so it wasn’t as simple as throwing down flooring, slapping up trim, and tossing paint at the walls.  While the appliances have been functional nearly the entire duration of the remodel, the room as a whole has caught up.

To really feel accomplished, let’s take a look back four years ago to the beginning.   New-House-Laundry-Room-April-13-2012

I’m sorry for the orange overload seared into your brain, but that’s what we lived with until demo started.  Across the room sat the side by side washer and dryer with a utility sink oddly stuffed behind the door.  Oh yeah, and we had glue covered floors so I tucked a rug in the room to make it feel a little less gross under foot.
Laundry-Room-Washer-and-Dryer

With a few minor tweaks like scooting the door frame over, adding a pocket door, and different cabinets, we’ve got a fully functional laundry room.

Laundry-Room-Right-Side

Bright white cabinets help lighten up the windowless space, while stainless counters provide a durable work surface with a touch of shine.

Laundry-Room-From-Door

A tall cabinet in the corner holds a vacuum and ironing board, with bulky cleaning products above.

We decided to stack the washer and dryer, leaving space for our upright freezer on one side and a sink with a bit of countertop on the other.

Laundry-Room-Sink-Side-from-Door

After precariously balancing things on the edge of the old utility sink, I knew I wanted a little more space to set soaking clothes, soaps, and paint brushes.  Two shelves store the most used laundry and cleaning items, keeping it in reach.

Laundry-Room-Sink-and-Shelves

In place of the plastic wash bin, we used a single bowl stainless steel kitchen sink and pull down faucet for easy spraying or rinse action.  Don’t worry about the standard looking outlet, it’s actually connected to a GFCI in the bathroom, on the other side of the wall.

Laundry-Room-Sink

Since we buy in bulk, I decant laundry staples into containers for easy handling.  Big boxes tuck in the cabinet below for a quick refill.

Laundry-Room-Soap-Detail

Just for fun, and because I wash nearly everything on a cold cycle, I added a sarcastic laundry chart to the room.  If you really want to know what all those crazy symbols mean, here’s a real chart option.

Laundry-Room-Chart-Detail

Back to the other side, custom drying rack drawers tuck neatly away behind slim fronts.  A six-foot long counter space makes folding and sorting a breeze, and the drying racks come in handy as extra surface space to drape hanging shirts and pants on.

Laundry-Room-Drawers-Drying-Rack

On the counter, I added a Great Lakes cut out from Crafterall, along with a wooden sculpture to have something pretty to break up the gray and white.  A little cup holds chang, ear plugs, rocks, and other items I find in pockets.

Laundry-Room-Counters-and-Cabinets

This is the first time in my life having such a functional, fully finished, and if I do say so myself, beautiful and clean laundry room.  I know most people see it as strictly utilitarian, but choosing durable, hard-working elements doesn’t automatically equate to ugly.

A Deck Makeover & Cozy Outdoor Lounge Area

Four years ago, when we bought this house, it came with a large front deck and a paver patio.  Without adjectives, both spaces sound lovely.  I’m sure the paver patio was beautiful, but the lack of maintenance, weeds, and tree roots took a toll.

New-House-Back-Yard-East-April-13-2012

Replacing windows and siding was a priority, but before that could happen, we had to excavate a foot of dirt back here, build a low deck, and only then could we hang siding.  In home remodeling, each project seems to hinge on another aspect being ready.  Though we didn’t want to tackle landscaping first, it did give us a baseline to seamlessly transition siding.

May-Garden-Back-Deck-Potted-Plants

None of that is new, and has been featured several times before.  But, there’s another deck that hasn’t been shared since move in, until today.  Before getting into the afters, here’s a look at the condition the front deck was in when we took ownership:

Original-Front-Deck-from-Road

New-House-Deck-April-13-2012

West-Side-of-Deck

In a word, woof.  The railing that was so far from code/safety requirements, benches along the edge were uncomfortable and took up useful space, rotting/spongy joists, and splintered deck boards didn’t exactly make this space enjoyable.  It certainly had potential, but thanks to other more important projects, we just got around to rebuilding it last summer.  Due to the technical aspects, this isn’t a deck building tutorial.  Rather, it’s the kind of television makeover before and after without the work, sweat, and wait-surprise!!

Front-Deck-Lounge-Area-Overall

Clearly, a lot has changed.  Everything, in fact.

Front-Deck-from-Road

We completely demoed the structure, rebuilding to meet or exceed code standards to ensure longevity.

Update: A reader emailed me, wanting to similarly cover an outdoor space, asking if/how much light the solid roof blocks?  Since others might have the same concerns, here’s my answer and our rationale why covering the deck was worth it.  This entire deck fronts the pool house, not our normal living space.  Since it is a pool house, it has 8 skylights, normal windows, and four sliding glass doors that flood the space with light, so the deck roof hasn’t changed the lighting too much.  Yes, it’s a touch darker, but totally worth the added usable outdoor living area and not becoming the human version of a roasting marshmallow.  That said, I don’t think this is the perfect solution for all outdoor spaces.  Before adding a cover, consider the size and orientation of the windows/doors and the room(s) it will potentially darken.

Front-Deck-Lounge-Area-Overall-Toward-Grills

Redwood deck boards are smooth and splinter free, the railing is not only safe, but offers more privacy, not only to the deck, but the (currently nonfunctional) pool inside.  At 36 inches tall, the railing still doesn’t block the city/mountain views.  Instead, it hides just the street and houses across, even when seated because our house is on a steep hillside.  Thanks to the southern, full sun exposure, we decided to add a full roof, keeping the area as cool as possible.  When we swapped the dining door placement, we created a four-foot wide walkway off the front.

Front-Deck-Lounge-Area-Toward-Pool-House

Over the long weekend, thanks to awesome sales, we picked up two World Market sofas (only $204 each!!) to create a comfortable lounge/seating area.  Until this point, this 900 square foot deck housed two grills, the bench in the background and that’s about it.

Front-Deck-Sofa-Overall

Last year, while we were rebuilding the deck, I started my search for outdoor furniture and came across a pair of linear wood frame chairs:Wood-Frame-Outdoor-Chairs

That screenshot has been on my phone for nearly a year, and for the life of me, I cannot remember the source.  But, I do know that I was instantly smitten, and wanted the same look.  Imagine my surprise when I was wandering around World Market and stumbled upon the Praiano set.  At $400 per sofa, it wasn’t a bad price, but I wasn’t ready to pull the trigger.  Fortunately for me, my patience pair off and I struck when the price dropped to $239.99 plus a 15% off coupon.

Front-Deck-Lounge-Area-Furniture-Detail

After patiently waiting a few months, I became impatient and bought, assembled, and lounged within 24 hours of getting the coupon in my inbox.

Front-Deck-Sofa-Side-DEtail

Those sleek lines have my heart.

Front-Deck-Lounge-Area-Sofa-and-Coffee-Table

And closely resemble the railing.  Haha, I guess I have flock to a distinct style.

Front-Deck-Sofa-Corner-Detail-Toward-Grill

The cushions are firm, but not uncomfortable.  However, the arms need some cush, so I pulled some indoor pillows from the linen closet to soften the hard wood frame.

Front-Deck-Sofa-Corner-Detail

For additional greenery, I added two potted Arborvitae trees in the corner of the center bump out.  The green seems so much more vibrant against the dark gray siding.

Front-Deck-Potted-Tree

I’m still trying to track down chairs to round out the grouping, since these are standing in from our old, seen-better-days patio set.

Front-Deck-Lounge-Area-Toward-House

Then there’s this sad, mostly empty corner.  Again, these pieces are standing in until we have time to build a dining table.

Front-Deck-Future-Dining-Area

Ben and I have differing visions/layouts for the deck.  Mostly because he’d love to build an 18 foot long Last Supper style table to take place of the current lounge area.

Napa Style Residence

While I think that’d be really cool, I think we’re better off putting this corner to use as an extension of the adjacent indoor dining space.  Adding an overhead fixture to this area would also be pretty easy with the attic overhang and access.  Time will tell, but I’m thrilled to have a cozy place to escape the house to enjoy a book.

Oh, and the deck desperately needs a good wash to get rid of the dust and pollen.  In the above photo, the darker area between the furniture is the real color.

Eventually, we want to ‘build in’ the gas and charcoal grills to hide the stands for a polished look.

Laundry Room Progress

In what feels like a never-ending saga, let’s dive into the progress we’ve made in the basement.  Specifically, the laundry room.  For it’s purpose, it’s a decent sized room at nine feet wide and eight and a half feet deep.  We started out with our washer and dryer side by side, below a row of orange oak upper cabinets.  Since we immediately ripped out the pet stained carpet, we tossed a rug below to have a less dirty floor to walk on.

Laundry-Room-Washer-and-Dryer

Just to the left of the appliances was a big, plastic wash tub and open floor space.

Laundry-Room-Behind-Door

Opposite the washer and dryer was a full wall of dark oak upper and lower cabinets, complete with stunning orange countertops.

Laundry-Room-from-Door

Based on the cabinet configuration and the large mirror, we think this room was a designated sewing space for a previous owner.  While the room boasted a lot of cabinetry, it wasn’t laid out in the most functional way for our uses.

Laundry-Room-Door-Side

When we gutted the entire basement, we decided to tweak the door placement to throw more depth to the appliance side.  This minor change centered the door on the open floor space, making each side a better depth for what would go on the walls.

Basement-Moving-Laundry-Door

After five months of working toward an updated basement, we are nearing our finish line.  Let’s take a look behind the pocket door.

Basement-Laundry-Pocket-Door

We still have the sink, washer, and dryer on the left side of the door, but opted to stack the units to accommodate an upright freezer.

Basement-Laundry-Room-Left-Side

For the most finished look, we built a floor to ceiling panel to block the side of the stack.  A 40 inch wide by 24 inch deep cabinet, which will have a sink once we get our countertops, fills in from the side panel to wall.

Basement-Laundry-Room-Left-Side-Toward-Door

Above, we opted to skip an upper cabinet, and built two floating wood shelves instead.  At eight inches deep, we won’t have to worry about crashing heads, but we still have enough room for laundry essentials.  Of course the shelves can also hold a few pretty things to add a bit of personality to even a laundry room.

Basement-Laundry-Room-Sink-Area

Over on the other side of the room is a wall-o-cabinets.  Sleek white cabinets keep this dark, windowless room from feeling dingy and depressing.  At the back of the room is a 5 foot tall by 2 foot wide vacuum/ironing board cabinet.

Basement-Laundry-Room-Vacuum-Cabinet

This leaves us with a 6 1/2 foot long counter space, which will be great for folding, but also getting laundry baskets off the floor.

Basement-Laundry-Room-Right-Side-Storage

A pair of upper cabinets gives us ample space to store, well, I’m not sure yet, but whatever we need.

Basement-Laundry-Room-Right-Side-Toward-Door

Clearly the bottom drawers aren’t finished, but the shallow tops aren’t actually drawers.  Surprise, it’s a pull out drying rack.

Basement-Laundry-Room-Drying-Rack

To be honest, we don’t have much that can’t go in the dryer, but we didn’t have an option before.  Yes, we could have added a pull down wall mount version, but I love that these are discreet when not in use.  More than anything, we built the cabinets, so we easily added the option.

Basement-Laundry-Room-Pull-Out-Drying-Rack

Even when fully extended, there’s a little more than two feet of space to get around.

Basement-Laundry-Room-with-Drying-Rack

Like the kitchen and master bath, all drawers and doors are soft close.  It’s a small feature that is just so nice to have; no more accidentally slamming anything shut.

Basement-Laundry-Room-Upper-Cabinet

Before we can call this room finished, we still have a few things to finish up.  Two more drawers to build, a cabinet will go above the freezer, a panel to cover the top of the dryer, countertops/sink/faucet to install.  Baseboard and crown can go in soon and then it’s fill, caulk, prime, and paint.

Basement-Laundry-Room-Cabinets-to-Build

Even with those lingering tasks, how about a side by side to show just how far we’ve come in five months.

Basement-Laundry-Room-Before-and-Almost-After

Guys, we have floors that don’t feel gross underfoot.  We’ll have counter space by the sink to actually set stuff like soap.  No more mirror to creep everyone out.