Dark and Handsome

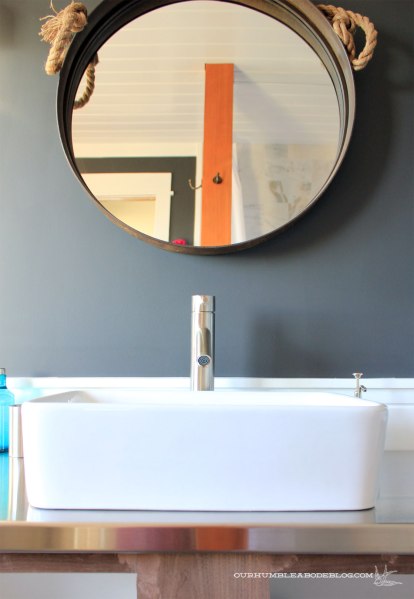
Hey, hey, hey!  Guess what?  Aside from a few small tasks (replacing the broken light switch plate and perhaps getting a runner), our master bathroom remodel is done.  Finishing the vanity was our last job, and it’s ready to rock.

Master-Bathroom-Vanity-Finished-Overall-Toward-Tub

Ben built everything, and in a similar way to our old kitchen cabinets.  (If you have questions, feel free to ask!)  After talking to a custom cabinetry shop, he did make a few tweaks.  The custom shop uses white melamine for the cabinet box and Blum Tandem Plus drawer glides, so that’s what we used.  Because these glides are designed to be ‘hidden’, the drawer bases have a 1/2 inch lip around the sides and front.  No visible glides on the sides:

Master-Bathroom-Vanity-Hidden-Glides

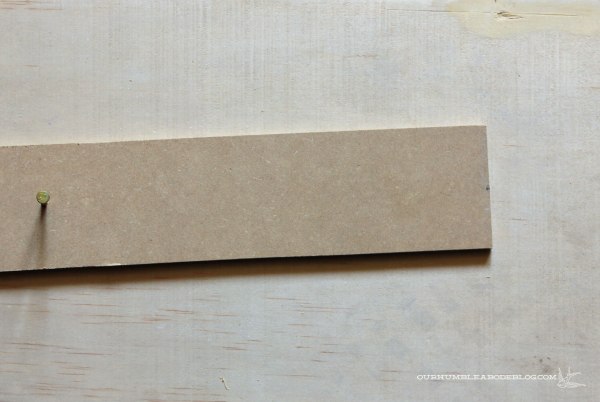
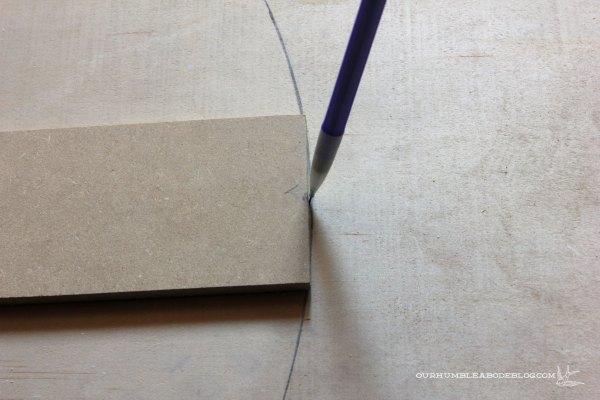
Ben used his table saw to cut a channel for the MDF to fit into.

Master-Bathroom-Vanity-Drawers-Before-Paint

We wanted a wooden vanity to add some much-needed warmth to the room.  American Walnut is a favorite of mine, with its deep, rich color.  After joining the boxes together, we, um, Ben faced the fronts with walnut.  I came by after and filled the small cracks and nail holes.

Master-Bathroom-Vanity-Holes-Filled

One of the reasons we chose a vessel sink was to have usable, full-sized top drawers.  To make this possible, Ben ran all the sink plumbing down the 5 inch center of the vanity.

Master-Bathroom-Vanity-Drawers-Installed

An access hole inside the cabinet is usable with the drawers pulled out, if we ever need to work on the sink.

Master-Bathroom-Vanity-Hidden-Access-Hole

For a simple, modern look, we kept flat panel drawer fronts.  (Sorry for the terrible lighting, I took these at night).

Master-Bathroom-Vanity-Drawer-Fronts-Installed

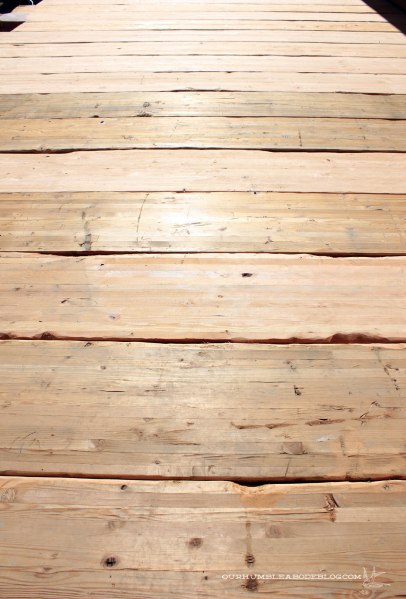
For the finish coat, I decided to experiment with Teak Oil.  I love the ability to recoat without having to completely sand down the wood.  And the oil looks amazing, bringing out all the beautiful grain and color.  See the right stack, without oil?  Ashy and blah.

Master-Bathroom-Vanity-Half-Oiled-Drawers

After a full day of dry time, the vanity was almost ready.

Master-Bathroom-Vanity-with-Drawers

Modern cylinder handles finish it off.  To mark the holes, I put pieces of tape near the center then measured and marked on the tape.  Ben drilled and pulled off the tape.  Worked like a charm.

Master-Bathroom-Vanity-with-Handles

Hey handsome, do you come here often?  Oh, you do?  Wanna come home with me?

Master-Bathroom-Vanity-Finished-Detail

Of course it took me two seconds to start organizing the drawers.  Here’s Ben’s side:

Master-Bathroom-Vanity-Finished-Inisde-Drawers

And my top drawer:

Master-Bathroom-Vanity-Inside-Drawer

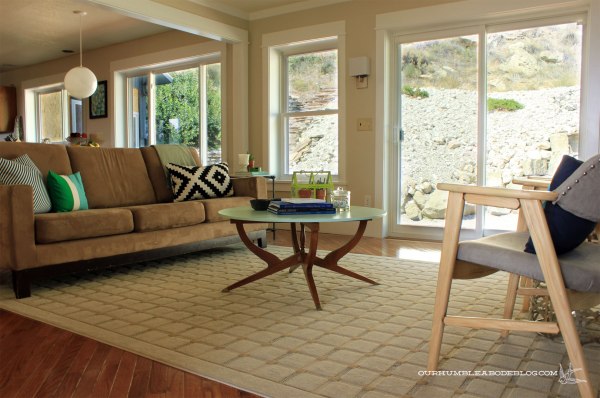
When the sun cooperates, I’ll snap a ton of pictures to show full before and afters.  I’m pretty sure, no, completely sure, this is our fastest full remodel.  We demo’d mid November and I’m calling it done today; only 2 1/2 months.

Let’s Get Functional, Functional

This post approved by Olivia Newton John.  Not really, because we’re getting functional, not physical.  No 80’s gym gear necessary.  Over the weekend, our master bathroom became fully functional in the plumbing department.  That’s right, we’ve got a working shower, clawfoot tub, toilet, and now sink.

Master-Bathroom-Sink-Faucet-and-Counter-Detail

Ebay came through with a sink, faucet, and drain combo.  Because we went from two sinks to one, we wanted something a little wider to make it more functional for two people.

Master-Bathroom-Sink-Faucet-and-Counter-with-Mirror

After much debate and pricing of materials, we landed on a custom-made stainless steel counter to match the shower.  Carrara marble would have cost nearly $800.  While it would have been beautiful, we couldn’t justify that price.  Stone or man-made remnants in this size are nearly impossible to find.  Wood was a contender, until we decided to make a walnut vanity.  Stainless was not only the most affordable option, but also a solid, easy to clean surface.

Master-Bathroom-Sink-Faucet-and-Counter-Overall

It’s so nice not to wash hands in the bathtub.

Master-Bathroom-Sink-Faucet-and-Counter-Above

I’m torn about the mirror.  I like the look, but it’s on the smaller side at 25 inches in diameter.  Ideally, we’d have a 36 inch round mirror.  At $40, it’ll stay.

Master-Bathroom-Sink-Faucet-and-Mirror-Straight-On

I still have to cut the rope shorter and find something to ‘hang’ it from.

Master-Bathroom-Vanity-with-Round-Mirror

See what I mean about it being a little small?  Do you know of any 36 inch round mirrors under $100?

Master-Bathroom-Vanity-Mirror-Overall

We made progress on the vanity yesterday, but I’m waiting to share until it’s 100% finished.  But, the walnut is amazing already.  Happy Martin Luther King, Jr. day, too.  Enjoy the day off, if you get it.

Minor Tweaks, Big Impact

I know there’s been a lot of bathroom talk and updates.  But the good news is, we’re nearing the end.  Ben grouted the shower and floors last weekend and they look fantastic!  He used unsanded grout and matching caulk because the lines are under 1/8 inch wide.

Master-Bathroom-Shower-Grouted

Update: We received a few emails wondering about the corner in the photo above.  This was after grouting, but before we filled the edges with matching caulking.  After allowing the grout to dry, we filled the edges, let it dry, and we’re ready for use.

Master-Bathroom-Shower-After-Caulking

While not a dramatic difference, it makes the shower functional.  And that’s huge.

Master-Bathroom-Shower-Grouted-DEtail

Well, almost usable.  Shower curtains are in order.  I ordered these 96 inch shower curtain liners and got them on Thursday, but I’ll get to those in a second.  Here’s the bare shower after grout with the stainless steel shower pan:

Master-Bathroom-Shower-After-Grout

And the grouted floors.

Master-Bathroom-Slate-Floors-Grouted

And here’s the shower now:

Master-Bathroom-Shower-Finished

For the pretty tile to be the star, I wanted a super simple, low profile curtain hanging system.  One that didn’t use a tension rod or drilling into the marble tile.  I think we accomplished that, and for about 25 bucks!  We started with three heavy-duty eye hooks, screwed into the tongue and groove ceiling, as close to the walls and post as possible.

Master-Bathroom-Shower-Cable-System-Eye-Hooks

Then we strung a galvanized steel wire rope (30 cents per foot at Home Depot) through, along with a curtain clip (I used two sets, but wished I had gotten two more to bunch the curtain tighter).  Clamps hold the wire rope in place.  We decided to keep a clip inside the loop, so the curtain would always stay close to the wall.

Master-Bathroom-Shower-Cable-Hook-Up

More curtain clips and a clamp on the other end.

Master-Bathroom-Shower-Cable-System-Corner

At the corner, we pulled the wire rope tightly through.

Master-Bathroom-Shower-Cable-System

I know I’m not the only one looking for an extra long curtain, so here are my opinions on these.  After reading product reviews, I worried the curtain wouldn’t be completely waterproof, but they are.  Vinyl curtains drive me nuts because they aren’t washable, but this fabric is.  Which is a big plus.  Decent looking material, too.  The description said it has a weighted bottom, but it’s just a rope sewn along the bottom.  Regardless, I had to hem the curtain a few inches to allow it to hang without pooling and bunching.

Shower-Curtain-with-Washer-Weights

After sewing along the bottom, I make a pocket on each end for stainless steel washers to tuck in.  Unfortunately, after using the shower, these weren’t heavy enough to hold the curtain with the convection current the shower created.  But they do make the curtain hang nicely when open.  So, I’m on to plan b, suction cups.  Wish the shower pan was magnetic!

Master-Bathroom-Pulls-Turned-Towel-Hooks

In other small news, I found these wooden drawer pulls at Hobby Lobby.  At $2 each, I thought they would make cute hand towel hooks.  A tight-fitting anchor in the wall worked perfectly to hang these dudes.

Master-Bathroom-Hand-Towel-Hooks

I love how the wood picks up the branch color of the towels.  And adds a slight touch of warmth to the dark walls.

Master-Bathroom-Pulls-Turned-Hand-Towel-Hooks

We’re still missing a vanity, but we’re all so happy with the progress.  Even the boys; they said black and white are their favorite colors.  Such funny opinions.

2013 Favs

Hey, everyone!  Happy New Year!  Our 2014 is off to a rough start with sick kiddos, but we’re so excited for a fresh start.  While Ben and I both love projects, sometimes it’s tough.  Roadblocks hit, things take longer than anticipated, or just an itch to get started on a new project.  It can feel like treading water.  Plenty to keep busy, but you’re not getting anywhere.  A look back on what has been accomplished or finished is an easy way to feel better.  What better time to reminisce than a new year?  So, here are some of my favorite projects from 2013.

In January we: Built wood storage and shelving, organized the main bathroom, crafted tree slice art, and art for our freshly finished fireplace.

Art On Mantel Overall

February included: A little demo, followed up with freshly painted walls (man is that a good feeling!), a thrifted dresser makeover and reveal, hey-o, a finished bathroom, then, of course, a toilet set back.

Mini-Dresser-Front-After

March was our guest room revamp month: Starting with cutting out the existing bookshelves, then styled shelves and a blue headboarda DIY pendant with wrapped cord, finished off with warm yellow walls.  Hey, we finished a room in a month.  That has to be a record for us.

Guest-Bedroom-Painted-Safari-Overall

April we had less focus:  The beginnings of a waterfall and landscape filled summerembroidered constellation artmodern rectangle quilt, and yet another thrifted dresser makeover.

Waterfall-Stream-and-Filling-Pond

May was furniture filled:  I crafted some cute hooks, foundrefinished, upholstered, and revealed $5 thrifted chairs, made and installed a PVC pendant.

MCM Chairs by Fireplace from Breakfast Nook

June was a little slower: Our biggest, most time-consuming project was building a reclaimed beam deck.  Between decking, I scraped off a popcorn ceiling and patched it, made a quick, rough (read, not museum quality…ever) large painting, cheaply and easily built canvas frames, and put a walnut to the test.

Back-Deck-Character

July was filled with landscape work and a fresh boys room: Ben finished the deck, built a bocce ball courtcustom beds while I made text bubble pillow cases, and painted Green Eggs and Ham art.

Boys-Bedroom-Makeover-Overall

August, another month of outdoor work: stained the deckbuilding beam stairs, turn a book into a game boardhow to cut a round top for our thrifted table basenail and string plus art, and surprise, another thrifted chair!

Gold-Nail-String-Plus-Side-Detail

We wrapped up outdoor work and did small crafts in September: Finally painted over the crazy blue in our bedroom, cringed while our landscaping washed away (lesson learned.  If I declare a project finished, something will happen to prove me wrong), created a wheeled stump side tableinitial bottle labelswood wrapped planterknock off clay wishbone, jewel toned fall scheme.

Bar-Bottles-with-Inital-Labels-Three

In October we: herringboned (now a verb) a table top, DIY’d an outdoor gas fire pitfixed the damaged back yardplotted our bathroom remodel, updated our coffee table top with V stripesunder $5 lyric art.

Chevron-Table-Top-in-Family-Room

November was busy with family, but fewer projects: demoed the master bathroom, brought our MCM bench inside and gave it an update, sewed more pillows (shocker!) got crafty with paper mâchébuilt an entry console shelf, set a colorful Thanksgiving table with a painted plus table runner.

MCM-Sofa-in-Living-Room-to-Dining

December had a lot of bathroom work and Christmas crafts: bought a real dining tableeasiest way to sew in a zipper, got in the Christmas spirit with a colorful scheme and felt garlandtiled the heck outta the bathroomplanked the ceiling and wallsdebated colors then painted the bathroom walls dark.  What a way to end the year.

Marble-Herringbone-Shower

Whew, makes me happy and exhausted going through it all again.  Now I’m even more excited to wrap up the bathroom and get started on another project.  What project have you tackled this year that makes you giddy?  Or makes you happy you’re done?

Cutting Corners

How ’bout a round of applause for our new spider base coffee table top:

New-Coffee-Table-in-Family-Room

While marble or glass would be beautiful, I think marble is too heavy for the base.  And I know glass would be completely covered in fingerprints, taunting me daily.  So I had Ben help me (okay, he did all the cutting) make a paintable top.  He cut a sheet of 1/2 inch MDF to 36 1/4 inches square, then made a pivot point to make a perfect circle.  A scrap of MDF nailed to the center of the square, like this:

Making-Round-Table-Top-Pivot

Which gives a rigid edge to spin, following with a pencil.

Making-Round-Table-Top-Drawing

Using a jigsaw, Ben cut close, but just outside the line.  With the corners cut, I got out the orbital sander with 80 grit paper and sanded until I met the pencil line.  For a smoother edge, I followed up with 150 grit paper, primed, painted, and sealed both sides with Polycrylic.  I set the top on and for the first time in my home ownership, I’ve got a coffee table.

New-Coffee-Table-in-Family-Room-Toward-Fireplace

I had a sample jar of Valspar’s Sweet Mint, which I think pairs nicely with the wood base.  Fun and colorful, without being bright and crazy.

New-Coffee-Table-In-Family-Room-by-Fireplace

Sweet Mint is also a near perfect match for the sky in my MT Photo Journal Heavenly print and landscape painting on the mantel.

New-Coffee-Table-in-Family-Room-with-Heavenly-Print

If I get sick of it, I can quickly sand it down to repaint with minimal money and effort.

New-Coffee-Table-in-Family-Room-Toward-Back

We’ve got a few games on top including tic tac toe and the checker book.  The terrarium, pulled from the boys’ room, adds greenery and a glass jar with our initials rounds out the set.

New-Coffee-Table-in-Family-Room-Top-Detail

Which do you prefer, coffee tables or ottomans?  It feels less like a dorm room, so adult, to have one.  And really fun to accessorize.  Now to convince Ben to replace the ottoman in the living room with a coffee table.